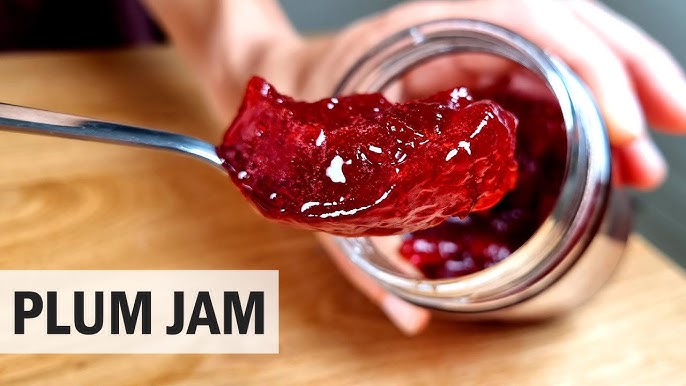
Plum Jelly Recipe: Plum jelly is a smooth, sweet preserve made by extracting the juice from fresh plums and combining it with sugar and pectin to create a clear, spreadable jelly. Unlike jam, which contains chunks of fruit, jelly is known for its clear, glossy appearance and firm set. It’s perfect for spreading on toast, using in pastries, or even pairing with savory dishes like cheese or roasted meats. The balance of tart and sweet in plum jelly makes it a household favorite, especially during late summer when plums are in season.
Why Make Homemade Plum Jelly?
Making your own plum jelly at home is not just satisfying, it’s also practical and healthier. You control the ingredients—no high-fructose corn syrup, artificial preservatives, or colorings. Plus, homemade jelly has a rich, natural flavor that you simply can’t get from store-bought versions. It’s a wonderful way to preserve the seasonal bounty of fresh plums, especially if you have a tree in your backyard or access to a local farmer’s market. Once you try homemade jelly, you’ll never go back!
Ingredients and Tools Needed
Key Ingredients for Plum Jelly
To get started, you’ll need the following ingredients:
- 4 pounds of ripe plums (red or black work best)
- 1/2 cup of water
- 1 package of powdered fruit pectin (usually 1.75 oz)
- 6 to 7 cups of granulated sugar (adjust to taste)
- 2 tablespoons of lemon juice (optional, for added tartness and pH balance)
These simple ingredients, when handled properly, can transform into a luxurious jelly with a deep color and intense flavor.
Tools and Equipment Required
Having the right tools makes the jelly-making process much smoother. Here’s what you’ll need:
- A large heavy-bottomed pot (non-reactive, like stainless steel)
- Potato masher or spoon (for mashing plums)
- Cheesecloth or jelly bag (for straining the juice)
- Large bowl (to collect strained juice)
- Measuring cups and spoons
- Candy or jelly thermometer (optional but useful)
- Sterilized glass jars with lids (half-pint or pint size)
- Jar lifter or tongs
- Ladle and funnel (to fill jars neatly)
Before you start, make sure all tools, especially the jars and lids, are thoroughly cleaned and sterilized to avoid contamination.
Preparing the Plums
Selecting the Best Plums
Choosing ripe, flavorful plums is key to making a delicious jelly. Look for plums that are slightly soft to the touch, deep in color, and free from blemishes or bruises. Overripe plums can result in a mushy texture and may ferment quickly, while underripe ones won’t release enough juice or sweetness.
For a balanced flavor, you can mix different types of plums—such as red and black varieties—to create a richer taste and a more vibrant color. Avoid using overly sour or bitter plums unless you plan to add extra sugar.
Washing and Cutting the Plums
Once you have your plums, give them a thorough rinse under cool water. Remove any stems or leaves and drain them in a colander. Using a sharp knife, cut the plums in half and remove the pits. You don’t need to peel them—the skin adds flavor and color to the jelly.
Cut each half into quarters or smaller chunks to help them break down faster during cooking. At this stage, it’s okay if the pieces are uneven; they’re going to be cooked down and strained later anyway.
Cooking the Plums to Extract Juice
Simmering the Fruit
In a large pot, combine your cut plums with about 1/2 cup of water. Bring the mixture to a gentle boil over medium heat. As the fruit begins to soften, use a spoon or potato masher to crush it slightly and help release the juice. Let the mixture simmer for 20-30 minutes, stirring occasionally, until the plums are soft and swimming in their own juices.
Don’t rush this part—slow simmering helps draw out the full flavor and ensures you get every bit of juicy goodness from the fruit.
Straining the Juice Properly
Now comes the key step: separating the juice from the pulp. Pour the hot plum mixture into a jelly bag or a colander lined with several layers of cheesecloth, placed over a large bowl. Let the juice drip through naturally—don’t squeeze or press the pulp, as that can result in cloudy jelly.
Leave it to strain for a few hours, or overnight in the refrigerator for best results. You should end up with about 4 to 5 cups of clear, ruby-red juice.
Making the Jelly
Mixing Juice with Sugar and Pectin
Once you’ve collected your strained plum juice, it’s time to start making the actual jelly. Measure out the juice—you’ll need about 4 cups for this recipe. Pour it into a large, heavy-bottomed pot. Add the powdered pectin and stir to dissolve it completely.
Place the pot over high heat and bring the mixture to a rolling boil, stirring constantly. Once it hits that vigorous, foamy boil that can’t be stirred down, add in your sugar all at once. This is when things really start to smell amazing—sweet and fruity with that signature plum tang.
Continue to stir constantly as the sugar dissolves and the mixture returns to a boil. Let it boil hard for 1 to 2 minutes (depending on your pectin’s instructions), then remove from heat. If there’s foam on top, skim it off with a spoon—this helps your jelly stay crystal-clear.
Boiling to the Right Consistency
Getting the jelly to the perfect set is an art, but a few tricks can help. The classic method is the “cold spoon test”: place a metal spoon in the freezer before you begin. When the jelly has boiled, drip a bit onto the cold spoon. If it wrinkles slightly when pushed with your finger after cooling for 30 seconds, it’s ready.
Alternatively, you can use a candy thermometer. Jelly is done when it reaches 220°F (104°C) at sea level. Be aware that altitude affects boiling points, so adjust as needed.
Once it’s reached the right consistency, move fast. Jelly sets quickly, and you want it in jars before it cools too much.
Canning and Storing the Jelly
Sterilizing Jars and Lids
Before you even start cooking the jelly, make sure your jars and lids are prepped. Wash them in hot, soapy water, then sterilize them by boiling in water for 10 minutes. Keep them hot until you’re ready to fill them—this helps prevent cracking and keeps the jelly from cooling too fast.
Lids should also be clean and hot but don’t boil the sealing compound. Just let them sit in hot (not boiling) water until ready to use.
Filling and Sealing the Jars
With your hot jelly ready and jars prepared, it’s time to fill them. Use a ladle and funnel to pour the jelly into each jar, leaving about 1/4 inch of headspace at the top. This space helps create a proper vacuum seal.
Wipe the rims with a clean, damp cloth to ensure a tight seal. Place the lid on and screw the band on fingertip-tight—don’t over-tighten.
Process the jars in a boiling water bath for 5 to 10 minutes, depending on your altitude. This step is critical for preserving shelf stability. After processing, let the jars sit undisturbed on a towel for 12-24 hours. As they cool, you should hear the satisfying “pop” of sealing lids.
Tips and Tricks for the Best Jelly
How to Avoid Cloudy Jelly
Want that crystal-clear finish that looks like stained glass? Then don’t rush the straining process. Let gravity do its job and resist the urge to squeeze the bag or cheesecloth. Also, ensure you’ve skimmed any foam before canning. Too much pulp or squeezing can introduce particles and bubbles, making your jelly look cloudy.
Use fresh, firm plums rather than overripe ones, which tend to break down too much and muddy the juice.
Adjusting for Sweetness and Tartness
Plums vary in sweetness. Some are mouth-puckeringly tart, while others are sweet like candy. You can tweak the amount of sugar to suit your taste, but don’t reduce it too much—it affects how the jelly sets. If you’re unsure, start with less and add more as you taste.
A splash of lemon juice not only enhances the flavor but also helps ensure the right pH for preservation. If your jelly tastes flat, lemon juice is often the fix you need.
Common Mistakes to Avoid
- Skipping the pectin: Unless you’re an expert and using high-pectin fruit, pectin is key to getting a good set.
- Adding sugar too early: Always add it after the juice and pectin have boiled together first.
- Using dirty equipment: Even a tiny bit of contamination can ruin a batch.
- Improper sealing: Make sure jars are hot, filled properly, and processed in a boiling water bath.
- Overcooking or undercooking: Too long on the stove and your jelly gets rubbery. Too short and it stays runny.
Making jelly takes attention to detail, but the results are so worth it!
FAQs about Plum Jelly Recipe
1. How long does homemade plum jelly last?
Properly canned plum jelly can last up to 1 year in a cool, dark pantry. Once opened, store in the fridge and use within 3 weeks.
2. Can I make plum jelly without pectin?
Yes, but you’ll need to boil the juice longer and may not get as firm a set. Use naturally high-pectin plums and add lemon juice for best results.
3. What can I do if my jelly doesn’t set?
Try reheating it with a bit more pectin or lemon juice. Follow the same boiling process and test for doneness again.
4. Can I use frozen plums?
Absolutely! Just thaw them first and treat them like fresh plums in the recipe.
5. Can I reduce the sugar?
You can reduce sugar slightly, but the jelly may not set properly unless you use a low-sugar pectin specifically designed for that purpose.
Conclusion
Homemade plum jelly is one of those beautiful, nostalgic kitchen projects that reward you with something truly special—jars of vibrant, jewel-toned sweetness that last all year. Whether you’re slathering it on toast, baking it into thumbprint cookies, or gifting it to friends and family, your plum jelly will be a hit. With the right plums, some patience, and a little love, anyone can master this timeless preserve.