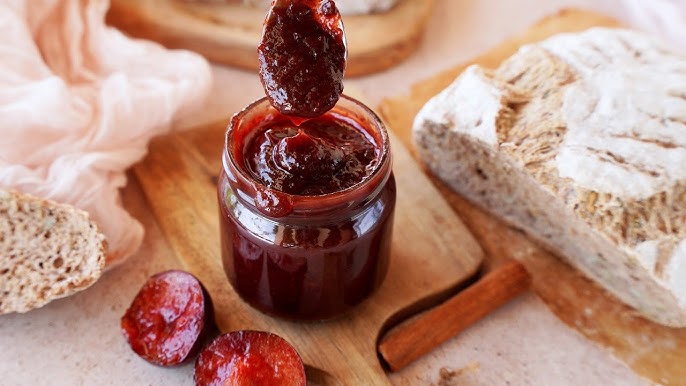
Plum Confiture Recipe: Homemade plum confiture is a classic that brings sweet, tangy, and richly fruity flavors to your pantry. Whether you spread it on toast, swirl it into yogurt, or gift it in jars, this recipe is a keeper. You don’t need fancy ingredients or expert-level cooking skills—just fresh plums, a few simple additions, and a bit of love.
Let’s break it down so you can create this vibrant and luscious spread right from your kitchen. This guide will walk you through everything—what you need, how to prep, and the exact steps to get that perfect confiture consistency.
What Is Plum Confiture?
“Confiture” is just the French word for jam, but it has a slightly different feel to it. It usually refers to whole or chopped fruits preserved with sugar—less about the jelly-like texture and more about keeping the integrity of the fruit. Plum confiture is chunkier than traditional jam and boasts a rich, luxurious flavor with bits of fruit in every bite.
Plum confiture strikes the perfect balance between tart and sweet. Depending on the plums you use, you’ll get variations in flavor, color, and texture. And unlike commercial jam, homemade confiture lets you control sweetness, flavor intensity, and additives.
Why Make Your Own Plum Confiture at Home?
Why go the homemade route when you can grab a jar from the store? Here’s why:
- Flavor Explosion: Store-bought jams are often overly sweet or too bland. When you make it at home, you taste real fruit.
- No Preservatives: Homemade confiture skips all the chemicals and additives.
- Customizable: Add spices, mix fruits, or tweak sugar levels—it’s yours to experiment with.
- Saves Money: When plums are in season, they’re cheap and plentiful.
- Great Gift Idea: A jar of homemade plum confiture? That’s love in a jar.
Health Benefits of Plum Confiture
Plums are more than just sweet—they pack a punch of nutrients:
- Rich in antioxidants like Vitamin C and phenols
- Aid digestion due to natural fiber content
- Support heart health thanks to potassium
- Low in calories (before the sugar is added)
While sugar does add up in confiture, moderate amounts on a balanced diet are perfectly okay. Plus, when you make your own, you can reduce the sugar compared to commercial versions.
Types of Plums You Can Use
Not all plums are created equal! Your choice of plum affects color, texture, and sweetness.
European Plums (Prunus domestica)
- Oval-shaped, deep purple or blue skin
- Dense flesh
- Perfect for confiture with chunks
Japanese Plums (Prunus salicina)
- Rounder, juicier, and often larger
- Red, yellow, or purple varieties
- Make a softer, more syrupy confiture
Wild Plums
- Smaller and more tart
- Great for a tangy spread
- Might require extra sugar
Whichever type you choose, make sure they’re ripe and aromatic—under-ripe or overripe plums don’t cook as well.
List of Ingredients You’ll Need
Here’s your essential list. No fluff—just the good stuff:
- 2 pounds (900g) fresh plums, ripe and firm
- 1 to 1½ cups (200–300g) sugar, depending on sweetness of fruit
- Juice of 1 lemon
- (Optional):
- 1 tsp vanilla extract
- ½ tsp cinnamon
- Pinch of salt
These ingredients are easy to find and form the base of your plum confiture. Want to get fancy? You can later tweak it with star anise, cardamom, or even ginger.
Required Tools and Equipment
Nothing too fancy here—you probably already have most of these:
- Large saucepan or jam pot
- Wooden spoon or silicone spatula
- Cutting board and sharp knife
- Ladle
- Sterilized glass jars with lids
- Kitchen scale or measuring cups
- Candy thermometer (optional but helpful)
Having these tools on hand makes the whole process smoother and more efficient.
How to Prepare the Plums Properly
Before you even think about turning on the stove, prep your plums the right way:
- Wash thoroughly under cold water.
- Cut in half and remove the pits.
- If the skin is thick or bitter, you can peel them—but this is optional. The skin adds texture and color.
- Chop into chunks, depending on your desired consistency. Bigger chunks give you a rustic feel, while smaller ones cook down smoother.
Tip: If you’re short on time, leave the skin on and just slice them in halves or quarters. The texture will soften as it cooks.
Step-by-Step Guide to Making Plum Confiture
Now the fun part. Follow these steps closely and you’ll have your own batch of homemade gold.
Step 1: Wash and Pit the Plums
Start by rinsing your plums well. Pit them by slicing in half and twisting apart. Remove the stone cleanly. If they’re clingstone (stones are hard to remove), just slice around the pit as best as you can.
Step 2: Macerate the Plums with Sugar
In a large bowl, toss your chopped plums with sugar and lemon juice. Let this sit for at least 2 hours, or overnight in the fridge. This process pulls out natural juices and starts the breakdown process.
- Helps dissolve the sugar
- Deepens flavor as the fruit absorbs the sweetness
- Reduces cooking time later
Step 3: Cook the Mixture
Transfer the mixture to a large pot and bring it to a gentle boil over medium heat. Stir regularly to avoid sticking.
- Boil for 15–20 minutes, then lower to a simmer
- Continue cooking for another 30–40 minutes
- Stir constantly as it thickens
- Skim off any foam
Want precision? Use a thermometer—the setting point is around 220°F (104°C).
Step 4: Check for Proper Consistency
Use the cold plate test: Drop a spoonful of confiture on a cold plate and wait a few seconds. If it wrinkles when you push it with your finger, it’s done.
No wrinkles? Keep cooking and test again in 5–10 minutes.
Step 5: Sterilize the Jars
While your confiture simmers, sterilize jars:
- Wash jars and lids in hot soapy water
- Boil them in a large pot for 10 minutes
- Dry upside down on a clean towel
Sterilizing ensures long shelf life and prevents bacteria from ruining your batch.
Step 6: Fill and Seal the Jars
Use a ladle to fill jars, leaving about ¼ inch at the top. Wipe the rims clean, then seal tightly with lids. Turn the jars upside down for 5–10 minutes to vacuum-seal.
Let cool completely before labeling and storing.
Cooking Tips for the Perfect Texture and Flavor
Achieving the ideal consistency and flavor in your plum confiture isn’t just luck—it’s about technique and attention to detail. Here are some key tips that will elevate your confiture from good to gourmet:
- Don’t rush the cook time: Let the mixture simmer gently. Rushing it with high heat can cause burning or a gummy texture.
- Stir frequently: Especially toward the end when it starts to thicken. This prevents sticking and scorching.
- Use a wide, heavy-bottomed pot: It promotes even heat distribution and faster evaporation, helping your confiture reduce and thicken better.
- Taste as you go: Depending on your plums, you may want to add a bit more sugar or lemon juice.
- Add spices sparingly: Vanilla, cinnamon, cardamom, or even a pinch of nutmeg can be delightful—but don’t overdo it. You want the plum flavor to shine.
Pro tip? A splash of balsamic vinegar right before bottling adds depth and complexity, especially if your plums are overly sweet.
Troubleshooting Common Mistakes
Even experienced cooks can run into hiccups. Here’s how to fix the most common plum confiture problems:
- Too runny? You probably didn’t cook it long enough. Put it back on the stove and simmer for another 10–15 minutes, testing consistency along the way.
- Too thick or sticky? You may have overcooked it. Try gently reheating it with a splash of water or fruit juice to loosen it.
- Overly sweet? Add a bit more lemon juice or stir in some unsweetened stewed plums to balance things out.
- Not sealing properly? Make sure jars and lids were fully sterilized and that you filled them while the confiture was hot.
Always label your jars with the date and store in a cool, dark place for maximum shelf life.
Storage Tips and Shelf Life
Proper storage is key to enjoying your plum confiture for months to come. Follow these tips to keep your jars fresh and flavorful:
- Unopened jars: Store in a pantry or cupboard away from heat and direct sunlight. They’ll last up to 12 months.
- Opened jars: Keep in the refrigerator and use within 3–4 weeks.
- Freezing option: Not planning to can them? You can freeze confiture in airtight containers. Just leave some space at the top for expansion.
Always check for signs of spoilage like mold, odd smells, or bubbling. If in doubt, throw it out.
Creative Ways to Use Plum Confiture
Think confiture is just for toast? Think again! Here are some delicious and creative ways to use it:
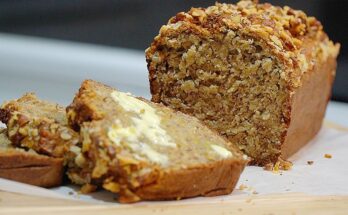
1. On Toast or Bread
The classic. Pair with butter, cream cheese, or even peanut butter for a quick breakfast or snack.
2. As a Glaze for Meat
Plum confiture makes an amazing glaze for pork, chicken, or duck. Just mix with a bit of soy sauce or balsamic vinegar and brush on before roasting.
3. In Baked Goods
Use as a filling for thumbprint cookies, croissants, or layer cakes. It also works well in fruit bars or between sponge layers.
4. As a Yogurt or Ice Cream Topping
A spoonful of confiture over plain yogurt or vanilla ice cream adds a sweet, fruity kick with just the right tartness.
5. Cheese Board Companion
Pair with brie, goat cheese, or aged cheddar on a charcuterie board. It brings out the flavor of both soft and hard cheeses beautifully.
How to Customize Your Confiture
The beauty of homemade confiture? It’s infinitely adaptable. Here are some fun ways to mix things up:
Adding Spices
Try:
- Cinnamon
- Star anise
- Vanilla bean
- Cloves
These create a warm, cozy flavor profile—great for fall and winter vibes.
Mixing Fruits
Plums pair well with:
- Apricots
- Berries
- Apples
- Peaches
Combine fruits in a 50/50 ratio for a unique blend.
Adjusting Sweetness
If you prefer low-sugar or no-added-sugar versions, you can:
- Reduce sugar and add natural sweeteners like honey or maple syrup
- Use pectin to help it gel without needing tons of sugar
- Choose very ripe, naturally sweet plums
Nutritional Information (Approximate per Tablespoon)
| Nutrient | Amount |
|---|---|
| Calories | 45–55 kcal |
| Carbohydrates | 12–14 g |
| Sugars | 11–13 g |
| Fiber | 0.3–0.5 g |
| Vitamin C | 2–3% DV |
| Potassium | 2–3% DV |
Note: Values vary depending on plum variety and exact sugar quantity used. Always check based on your specific ingredients if needed.
FAQs about Plum Confiture Recipe
Can I make plum confiture without sugar?
Yes, but it changes the texture and shelf life. You can use natural sweeteners like honey or use low-sugar pectin. Always refrigerate low-sugar versions and consume them more quickly.
How long does homemade plum confiture last?
If sealed and stored properly, unopened jars last up to a year. Once opened, keep in the fridge and use within 3–4 weeks.
What’s the difference between jam and confiture?
Jam usually has a more uniform texture and is smoother, while confiture often contains visible chunks or whole fruit pieces. Confiture leans more rustic and less processed.
Can I freeze plum confiture?
Absolutely. Let it cool completely, pour into freezer-safe containers, leaving space for expansion, and freeze. Use within 6 months for best flavor.
How can I tell if my confiture is spoiled?
Look for mold, off smells, bubbling, or changes in color. When in doubt, throw it out—safety first.
Conclusion
Making your own plum confiture is a delicious, rewarding process that connects you with the seasons and brings authentic flavor to your kitchen. With just a few ingredients and a bit of time, you can create something that’s better than store-bought in every way. Whether you enjoy it on toast, in a dessert, or as a glaze, this rich, sweet-tart spread will elevate every bite. Plus, the satisfaction of seeing your own jars lined up on the shelf? Priceless.
Once you make it, you might never go back to the store-bought stuff. And your friends and family? They’ll be begging for a jar.