Pita Chip Recipe: Ever opened a bag of pita chips and thought, “These are good, but I bet homemade would be better”? You’re absolutely right. Homemade pita chips not only taste fresher and crispier, but they’re also totally customizable. Whether you’re prepping for a party, looking for a healthier snack, or just love experimenting in the kitchen, making your own pita chips is super simple and satisfying.
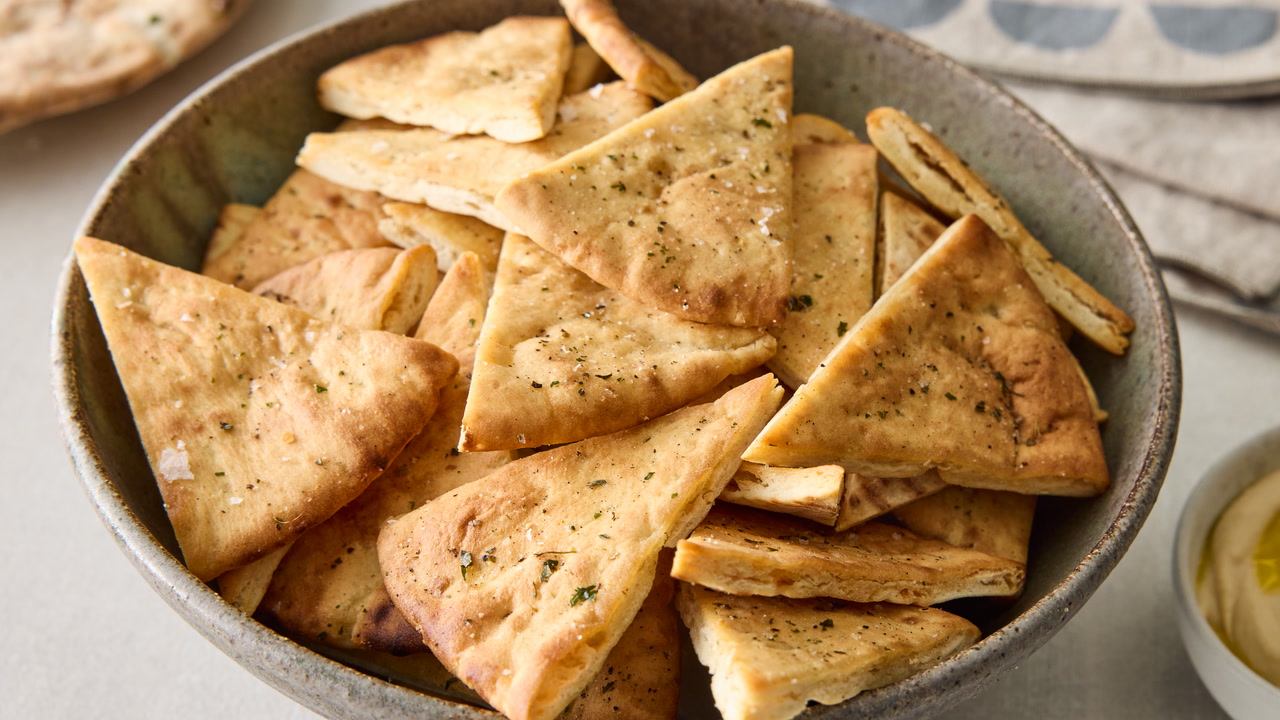
Pita chips are thin, crunchy, and flavorful chips made by baking or air-frying pita bread. They’re ideal for dipping into hummus, tzatziki, salsa, or enjoying all on their own. The beauty of this recipe? It’s budget-friendly, easy, and totally flexible—you can flavor them however you like, from savory to sweet.
Let’s dive into everything you need to know to make perfect pita chips every time!
Ingredients You’ll Need
To keep things simple, here’s your base list of ingredients. These are pantry staples you probably already have.
Basic Ingredients
- Pita Bread: 4–6 rounds of plain pita bread (white or whole wheat)
- Olive Oil: 3–4 tablespoons (or any neutral oil like avocado or canola)
- Salt: 1 teaspoon (adjust to taste)
Optional Flavor Add-ons
- Garlic Powder
- Paprika (Smoked or Sweet)
- Black Pepper
- Parmesan Cheese (Grated)
- Lemon Zest
- Dried Oregano or Thyme
- Cinnamon and Sugar (for sweet chips)
Tips on Choosing Pita Bread
Not all pita is created equal. Go for pita bread with pockets—these are easier to split and yield thinner, crispier chips. If you prefer thick and crunchy chips, you can use pita without pockets. Whole wheat options also offer a nuttier flavor and more fiber.
Make sure your pita bread isn’t too stale—it should be flexible enough to cut cleanly but not overly moist.
Kitchen Tools You’ll Need
You don’t need any fancy tools to make these, but having a few basics on hand helps a lot.
Essential Tools
- Sharp Knife or Pizza Cutter
- Baking Sheet
- Mixing Bowl
- Pastry Brush (or clean hands)
- Oven or Air Fryer
Optional but Helpful
- Cooling Rack: Helps chips cool evenly
- Parchment Paper: For easy cleanup
- Measuring Spoons
Step-by-Step Guide to Making Pita Chips
Let’s get into the nitty-gritty. This is where the magic happens.
Step 1: Preheat the Oven
Set your oven to 375°F (190°C). It’s the sweet spot for crispy, golden pita chips without burning them. While it’s heating, prep your bread.
Step 2: Prepare the Pita Bread
If your pita has a pocket, gently pull it apart to make two thinner layers. This creates lighter, crispier chips. No pocket? No problem. Just proceed with whole rounds, but expect a bit more crunch.
Step 3: Slice Into Chips
Using a knife or pizza cutter, slice each pita round into 8–10 triangles—think pizza slices. Keep sizes even to ensure uniform baking.
Step 4: Season and Oil
In a bowl, toss your pita triangles with olive oil. Use just enough to lightly coat them—not too greasy, not too dry.
Add salt and any other seasonings you love. Mix well to make sure every chip gets some flavor love. You can also brush oil and sprinkle seasoning directly on the baking sheet if you prefer less mess.
Step 5: Bake to Perfection
Arrange pita triangles in a single layer on your baking sheet. Don’t overcrowd—they need breathing room to crisp up.
Bake for 8–10 minutes, flip them over, then bake another 5–7 minutes or until golden brown and crispy. Keep an eye on them—every oven is a little different.
Step 6: Cool and Store
Let them cool on a wire rack (or the baking sheet) before storing. This keeps them crunchy. Store in an airtight container at room temperature for up to a week.
Flavor Variations
Now that you’ve mastered the basic pita chip recipe, why not get creative? One of the best things about homemade pita chips is how easy it is to customize them. Whether you’re craving something cheesy, spicy, or sweet, these flavor ideas will take your chips to the next level.
Garlic Parmesan
This combo is a crowd-pleaser. Right after coating your pita triangles with olive oil, sprinkle a generous amount of garlic powder and freshly grated Parmesan. Bake as usual. The Parmesan crisps up beautifully, giving a salty, savory crunch that’s hard to resist.
Pro tip: Add a tiny bit of dried parsley after baking for extra flavor and color.
Spicy Chili
Want to add a little heat? Toss your chips in olive oil mixed with chili powder, smoked paprika, and a dash of cayenne pepper. You can also sprinkle some crushed red pepper flakes before baking. These are perfect with guacamole or a cool ranch dip to balance the spice.
Lemon Zest & Herb
For a refreshing twist, combine lemon zest, dried oregano, and a pinch of thyme with olive oil. This Mediterranean-inspired version pairs perfectly with hummus or tzatziki.
Cinnamon Sugar (Sweet Option)
Yes, pita chips can go sweet too! Instead of olive oil, brush the pita with melted butter. Mix cinnamon and sugar (about 1 tsp cinnamon to 2 tbsp sugar) and sprinkle generously. Bake until golden and enjoy as a dessert chip or dip into fruit salsa or yogurt.
How to Store Homemade Pita Chips
Homemade pita chips are so delicious, they might not last long—but if you’re making a big batch, here’s how to store them right.
Best Storage Methods
- Airtight Containers: Keep chips in a sealed glass or plastic container.
- Zip-Top Bags: Great for saving space and easy snacking.
- Avoid Fridge Storage: The moisture from the fridge can make them soggy.
They’ll stay fresh for about 5–7 days at room temperature. If you want them super crisp even longer, consider popping them back into the oven for 2–3 minutes before eating.
Pro Tip for Extra Crunch:
Throw a paper towel in the container—it absorbs any extra moisture and keeps the chips crisp!
Serving Suggestions
Pita chips are incredibly versatile. Whether you’re using them as a base for dips or adding them to a charcuterie board, there are endless ways to enjoy them.
Pair with Dips
- Classic Hummus
- Baba Ganoush
- Spinach and Artichoke Dip
- Guacamole
- Tzatziki Sauce
Creative Snack Ideas
- Nacho-Style Pita Chips: Load them with melted cheese, olives, jalapeños, and tomatoes.
- Pita Chip Salad Croutons: Toss them in your favorite salad for a crunchy twist.
- Dipping Platter: Serve alongside cheese, meats, olives, and fruit for a fun grazing board.
Sweet Pairings
If you made the cinnamon sugar version, try dipping them in:
- Vanilla yogurt
- Fruit salsa
- Chocolate sauce
Tips for Perfect Pita Chips Every Time
Making pita chips is easy, but a few smart tips can make the difference between decent and delicious.
1. Cut Evenly
Uniform chip sizes mean even baking. Uneven chips can lead to some burning while others stay soft.
2. Don’t Skimp on Oil
Oil is key for both flavor and crispness. You don’t want the chips drenched, but a light coating ensures they crisp up nicely and hold onto the seasoning.
3. Flip Halfway Through
Flipping ensures both sides get golden and crunchy. Don’t skip this step!
4. Don’t Overcrowd the Pan
Bake in batches if needed. Too many chips on one tray leads to uneven baking and sogginess.
5. Watch Closely Near the End
They go from golden to burnt pretty fast. Trust your eyes more than the timer!
Mistakes to Avoid
Even a simple recipe can go sideways if you’re not careful. Here are the most common pitfalls:
Over-seasoning
Too much spice or salt can overpower the chips—and some seasonings burn easily. Add just enough before baking and taste test when possible.
Underbaking or Overbaking
It’s a fine line. Underdone chips are chewy, not crisp. Overdone ones turn bitter. Start with 10 minutes, check and flip, then go from there.
Using the Wrong Pita
Thin pita with pockets gives light, crispy chips. Thick pita may work, but it results in much heavier chips, and you’ll need to bake longer.
Air Fryer Pita Chips (Alternative Method)
Pressed for time or hate heating the oven? Air fryer to the rescue! It’s fast, efficient, and gives you ultra-crispy chips with less oil.
Steps:
- Preheat your air fryer to 350°F (175°C).
- Prepare and season pita slices as usual.
- Place in a single layer in the air fryer basket.
- Air fry for 5–6 minutes, shaking the basket halfway through.
Note: Depending on the air fryer model, you might need to adjust timing slightly.
Are Pita Chips Healthy?
Let’s talk nutrition. Are they really better than potato chips or other snacks?
Homemade vs. Store-Bought
- Lower in preservatives
- Less sodium
- Custom portion control
- Healthier oils (like olive oil)
You get to skip the processed oils and excess salt that come with store-bought varieties. Plus, you can choose whole wheat pita for more fiber and nutrients.
Calories & Macros (Per 1 oz serving)
| Nutrient | Approx. Value |
|---|---|
| Calories | 120–140 |
| Fat | 5–7g |
| Carbs | 15–18g |
| Fiber | 1–3g |
| Protein | 2–3g |
Homemade pita chips are a smart snack—just don’t forget moderation is still key!
Pita Chips for Special Diets
One of the best parts about making pita chips at home? You can tailor them to nearly any dietary need. Whether you’re vegan, gluten-free, or cutting down on salt, homemade chips have your back.
Vegan-Friendly Pita Chips
Most basic pita bread and this recipe are already vegan! You’re using olive oil and seasonings—no dairy or animal products required. Want to add more flavor? Try:
- Nutritional yeast for a cheesy, savory taste
- Smoked paprika, chili, and cumin for a bold kick
- Lemon juice and herbs for a bright, zesty profile
Just double-check your pita bread’s ingredient list to be safe—some brands sneak in milk or honey.
Gluten-Free Options
Standard pita bread contains gluten, but don’t worry—there are solid alternatives:
- Look for gluten-free pita bread in health food stores or online.
- You can also use gluten-free flatbreads or tortillas. Just cut them the same way and follow the same baking steps.
Note: Gluten-free breads tend to crisp up a bit faster, so keep a closer eye while baking.
Low-Sodium Adjustments
Trying to cut back on salt? You can:
- Use herbs and spices instead of salt for flavor
- Add a dash of vinegar or lemon juice to the oil for a tangy punch without the sodium
- Bake them plain and dip them into flavorful low-salt spreads like avocado or garlic hummus
Using Stale Pita Bread for Chips
Don’t toss that day-old pita! Stale pita is actually perfect for making chips. In fact, slightly dried-out bread crisps up even better because it contains less moisture.
How to Refresh Slightly Stale Bread:
If your pita is hard as a rock, sprinkle it with a tiny bit of water and microwave it for 10–15 seconds. This softens it just enough to slice and prep for baking.
Once cut, follow the usual steps—season, oil, and bake. The result? A crunchy chip that gives your “waste” a delicious second life.
Pro tip: This is an awesome way to stretch leftovers or rescue bread that would otherwise go uneaten.
Pita Chips for Kids
Looking for a snack that kids will love—and actually eat? Pita chips are a hit with little ones, and you can even make them part of the process!
Make It Fun
- Use cookie cutters to cut fun shapes before baking (stars, hearts, dinosaurs—why not?)
- Let kids choose their seasoning: cinnamon sugar, cheese, or even just plain
- Turn it into a dipping game—pair with different color dips like beet hummus, green guac, or orange roasted pepper spread
Kid-Friendly Flavors
- Cheesy Ranch: Mix dry ranch seasoning with shredded cheese and oil
- PB & Cinnamon Sugar: Use sweet pita chips with peanut butter or a nut-free spread
- Mini Nachos: Add shredded cheese and melt in the oven for kid-sized nachos
Involving kids in the kitchen makes them more likely to try (and love) new foods. It’s a fun, tasty bonding activity, too!
FAQs about Pita Chip Recipe
1. Can I use naan instead of pita bread?
Yes! Naan makes thicker, chewier chips, but they still crisp up well in the oven. Just bake a bit longer and cut into smaller pieces for best results.
2. How long do pita chips last?
Homemade pita chips last about 5–7 days when stored in an airtight container at room temperature. Keep them cool and dry to maintain that crunch.
3. Can I freeze pita chips?
Technically, yes—but it’s not ideal. Freezing can introduce moisture and affect the crispness. It’s better to freeze the pita bread and make fresh chips when ready.
4. What’s the best oil to use for pita chips?
Olive oil is the top choice for flavor and health, but avocado oil, sunflower oil, or canola oil also work well if you prefer a neutral taste.
5. Why are my pita chips soft instead of crispy?
Soft chips usually mean they weren’t baked long enough or were overcrowded on the tray. Make sure to spread them out, flip halfway, and let them cool completely before storing.
Conclusion
So there you have it—your ultimate step-by-step guide to making homemade pita chips. They’re quick, customizable, and way better than anything in a bag. Whether you like them salty, spicy, or sweet, these crunchy little triangles are about to become your go-to snack.
What makes pita chips even more awesome? They’re simple enough for a weeknight snack, fancy enough for a party platter, and flexible enough to meet just about any taste or dietary need.
Once you’ve made a batch or two, you’ll never go back to store-bought. Ready to grab that pita bread and preheat the oven? Trust me—your snack game is about to level up big time.