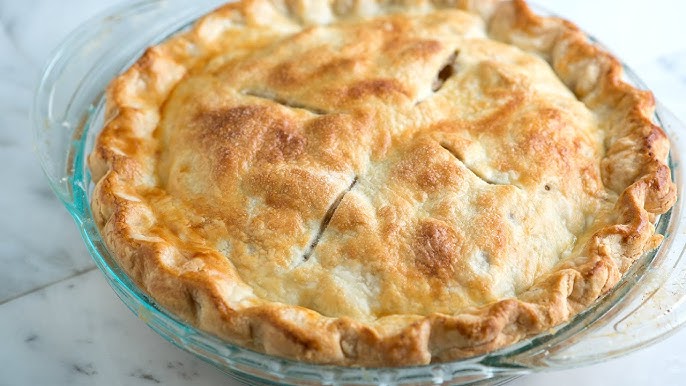
Pie Dough Recipe: Let’s be real—nothing beats the taste and texture of a homemade pie crust. It’s buttery, flaky, and just melts in your mouth. Store-bought crusts? Sure, they’re convenient, but they often fall short when it comes to flavor and texture. If you’ve ever struggled with a tough, crumbly, or bland crust, this guide will change everything for you.
Making pie dough from scratch sounds intimidating, but it’s actually pretty simple once you get the hang of it. The trick lies in mastering a few basic techniques and understanding how each ingredient plays its role. This guide will walk you through everything step by step—no fluff, no complicated jargon, just straight-up tips to help you make pie dough like a pro. Whether you’re baking a fruit pie, savory quiche, or holiday favorite, a solid dough foundation makes all the difference.
Ready to roll (pun totally intended)? Let’s dive into the ingredients you’ll need for the ultimate pie dough.
Ingredients for Perfect Pie Dough
A flawless pie crust starts with the right ingredients. You don’t need anything fancy—just a few kitchen staples. But how you use them makes all the difference.
Basic Ingredients:
- All-purpose flour – 2 ½ cups (make sure to spoon and level, not scoop)
- Unsalted butter – 1 cup (cold and cut into cubes)
- Salt – 1 tsp (enhances the flavor)
- Sugar – 1 tbsp (optional, but adds a touch of sweetness)
- Ice water – 6-8 tbsp (ice cold, added gradually)
Ingredient Breakdown:
- Flour is the backbone of your crust. All-purpose is the standard go-to, offering a balance between tenderness and structure.
- Butter gives flavor and that irresistible flakiness. Keeping it cold is non-negotiable. Cold fat equals flaky layers.
- Salt and sugar enhance taste. Don’t skip the salt—it’s not just for savory pies.
- Ice water brings everything together. Too much makes the dough sticky, too little makes it crumble. The key is balance.
Optional Add-ins:
- Shortening or lard – For extra flakiness, some bakers mix butter with shortening.
- Vinegar or vodka – Just a teaspoon can help prevent gluten development, keeping the crust tender.
Feel free to play around once you’re comfortable. Want a nutty flavor? Swap in a little almond flour. Want it richer? Try an egg yolk. The base recipe stays solid, and the flavor tweaks are all yours.
Tools You’ll Need
You don’t need a kitchen packed with gadgets to make a good pie dough, but having the right tools definitely helps. Think of these as your baking sidekicks.
Essential Tools:
- Large mixing bowl – For combining your ingredients without the mess.
- Pastry cutter or fork – To work the butter into the flour (unless you’re using your fingers or a food processor).
- Measuring cups and spoons – Precision is everything here.
- Rolling pin – To roll the dough out evenly.
- Plastic wrap – For chilling the dough.
- Baking sheet – Just in case things get messy in the fridge.
Nice-to-Have Extras:
- Food processor – Speeds things up, but not necessary.
- Bench scraper – Helps handle the dough without overworking it.
- Pastry mat or silicone baking mat – Keeps your rolling surface non-stick and easy to clean.
- Pie weights or dried beans – If you’re blind baking, these are essential.
You can absolutely go old-school and still get amazing results. Just use what you’ve got—and don’t stress if your tools aren’t picture-perfect.
Step-by-Step Instructions to Make Pie Dough
Now for the good stuff. Let’s break down the pie dough process into simple, foolproof steps. This is where the magic happens.
Step 1: Measuring Your Ingredients Correctly
Baking is a science. Even a little too much flour or water can ruin the texture of your dough. So take the time to measure carefully.
- Spoon and level your flour: Don’t scoop it straight from the bag. Use a spoon to fill your measuring cup, then level it off with a knife.
- Cold butter only: Dice it and pop it back into the fridge while you prep everything else.
- Ice water, not just cold water: Toss a few ice cubes into your measuring cup, then spoon out the water. This keeps the fat from melting too early.
This step sets the foundation for everything that follows. Get it right, and you’re already halfway to pie heaven.
Step 2: Mixing the Dry Ingredients
Grab your bowl and whisk together the flour, salt, and sugar. This may seem basic, but evenly distributing the dry ingredients ensures every bite of crust has balanced flavor.
- Whisk, don’t stir: Whisking helps fluff the flour and incorporate air for a lighter dough.
- If you’re using spices or herbs, like cinnamon or thyme (for savory crusts), add them now.
You’re prepping the stage for the butter—so mix well, but keep it gentle. No need to overdo it.
Step 3: Cutting in the Fat
This is where things start to feel real. Add your cold butter to the dry mix and start cutting it in.
- If using a pastry cutter, press down and twist until you get pea-sized clumps.
- No cutter? Use two forks or even your fingers—just work quickly to keep everything cold.
- You’re aiming for a crumbly texture with visible chunks of butter. These chunks = flakiness when baked.
Resist the urge to overwork it. Too fine a mix means you’ve lost your layers. Chunky is good here—trust the process.
Step 4: Adding Ice Water Gradually
Here’s where patience pays off. Once your butter is evenly cut into the flour mixture, it’s time to bind it all together—and water is the magic ingredient. But too much water? That’s a one-way ticket to a gummy, dense crust.
- Start with 1 tablespoon at a time. Drizzle the ice water around the edge of the bowl, then gently toss the dough using a fork or your hands.
- The goal is moist crumbs that hold together when pinched, not a sticky ball. You may need anywhere from 6 to 8 tablespoons depending on the humidity, flour, and even your butter.
- Avoid pouring all the water in at once. You want to slowly hydrate the flour without over-saturating it.
As the dough begins to come together, switch from a fork to your hands and press it into a loose ball. It’s okay if there are still dry bits—you’ll handle that in the next step. Just remember: it’s easier to fix dry dough than it is to save a soggy mess.
Step 5: Forming and Chilling the Dough
This is one of the most important steps—and the most skipped. But if you want that golden, flaky crust that doesn’t shrink in the oven, chilling is non-negotiable.
- Once the dough has come together, divide it in half (if making a double crust), then form each half into a disc about 1-inch thick.
- Wrap each disc tightly in plastic wrap and refrigerate for at least 1 hour. Overnight is even better.
- Chilling allows the gluten to relax and the butter to firm up again. Both are essential for a tender crust that holds its shape.
During the chill time, the flour absorbs moisture evenly, which means a smoother, easier roll-out later. Don’t rush it. If you’re in a pinch, a 30-minute freeze can help—but nothing beats that slow, cool rest in the fridge.
Rolling Out the Dough Perfectly
Alright, it’s showtime! You’ve prepped and chilled like a champ—now let’s get rolling.
- Flour your surface and rolling pin lightly to prevent sticking. Too much flour and your crust gets tough, so use just enough.
- Start from the center and roll outward, rotating the dough a quarter turn every few strokes. This keeps the shape round and thickness even.
- If cracks form at the edges, press them together gently or patch with extra dough.
- Your rolled-out dough should be about ⅛ inch thick and at least 2 inches wider than your pie dish. This gives you enough overhang for crimping or folding under.
If the dough sticks or gets too soft, pop it back into the fridge for a few minutes. Don’t fight it—let the butter stay cold. Transfer the dough to your pie dish by gently rolling it over your pin, then unrolling it into the pan. Press it in lightly, avoiding stretching (which causes shrinkage).
Crimp, flute, or fork the edges as you like—and chill again for 10–15 minutes before filling or blind baking.
Blind Baking (Optional but Important)
Ever baked a custard pie or quiche only to end up with a soggy bottom? Blind baking is the answer.
Blind baking means partially or fully pre-baking your crust before adding the filling. This helps set the structure and keeps it crisp.
Here’s how to do it right:
- Roll out your chilled dough and fit it into your pie dish.
- Dock the bottom with a fork to prevent bubbling.
- Line with parchment paper or foil and fill with pie weights or dried beans.
- Bake at 375°F (190°C) for 15–20 minutes, then remove the weights and bake another 5–10 minutes until lightly golden.
If you’re baking a no-bake pie, go the full distance—until the crust is crisp and golden. For pies that will go back into the oven with filling, a light golden hue is perfect.
Blind baking might sound extra, but it’s a game-changer for cream pies, lemon meringue, or any pie where a soggy base just won’t do.
Storing and Freezing Pie Dough
Life gets busy, and sometimes you want to prep ahead—enter the magic of storing and freezing pie dough. One of the biggest perks of homemade pie crust is that it stores beautifully, letting you bake fresh pies at a moment’s notice.
Short-Term Storage:
- Refrigerator: Once your dough is formed into discs and tightly wrapped, it can sit happily in the fridge for up to 3 days.
- Just remember to let it soften slightly at room temperature (about 10–15 minutes) before rolling it out. Cold dough is great—but too cold and it’ll crack.
Freezing Instructions:
- To Freeze: Wrap each dough disc in a layer of plastic wrap, then place it in a zip-top freezer bag or airtight container. Label it with the date.
- Shelf Life: Pie dough lasts up to 3 months in the freezer without losing quality.
- To Use: Thaw in the refrigerator overnight before rolling out.
If you want to freeze already-rolled pie crusts, place them in a pie tin, wrap tightly in plastic wrap, and then foil. You can go from freezer to oven—just give it a few extra baking minutes. This trick is especially helpful around the holidays.
Common Mistakes to Avoid
Pie dough isn’t rocket science, but a few slip-ups can ruin even the best efforts. Here are the most common mistakes and how to dodge them:
1. Overmixing the Dough
- Too much handling activates the gluten in flour, leading to a tough, chewy crust. Mix just until the dough holds together—no more.
2. Skipping Chill Time
- We’ve said it before, but it bears repeating: cold dough is flaky dough. Don’t skip the chill. It gives the butter a chance to firm up and the flour time to relax.
3. Adding Too Much Water
- A sticky dough means it’s too wet. Add water slowly, tablespoon by tablespoon, and stop as soon as it starts to clump together.
4. Rolling Unevenly
- A crust that’s too thick in spots and too thin in others bakes unevenly. Rotate your dough as you roll and keep checking thickness.
5. Forgetting to Dock or Use Weights for Blind Baking
- Skipping these steps can lead to bubbling or shrinking. A few fork pricks and some pie weights save you the stress.
6. Stretching the Dough in the Pan
- Gently fit it into the dish. Stretching causes it to bounce back or shrink in the oven. Let the dough fall naturally and trim the excess.
Avoiding these common errors takes your pie game from average to bakery-worthy.
FAQs about Pie Dough Recipe
1. What are the essential ingredients for pie dough?
To create the perfect pie dough, you’ll need just a few basic ingredients: all-purpose flour, cold butter (or an alternative fat like shortening or lard), salt, and ice water. Some recipes may also call for a touch of sugar to enhance the flavor.
2. Why should butter be cold in pie dough?
Using cold butter in your pie dough is crucial because it helps to create those deliciously flaky layers we all love. When cold butter hits the hot oven, it releases steam, which puffs up the dough, creating that irresistible texture.
3. Can I make pie dough in advance?
Absolutely! Pie dough can be made ahead and stored in the refrigerator for up to 3 days or in the freezer for up to three months. Just make sure to wrap it tightly in plastic wrap to avoid any freezer burn or odor absorption.
4. Is there a difference between using butter and shortening in pie dough?
Yes, there’s a noticeable difference. Butter will give your dough a richer flavor and flakier texture, while shortening tends to make the dough easier to handle and can produce a more tender crust. Some bakers prefer a mix of both to balance flavor and texture.
5. How do I prevent my pie dough from shrinking when baked?
To prevent shrinking, make sure not to overwork the dough. Also, chilling your shaped dough in the pie dish before baking can help maintain its shape. Additionally, you can blind bake (pre-bake with weights like dry beans or pie weights) the crust to set its structure.
6. What is the best way to roll out pie dough?
The best way to roll out pie dough is on a lightly floured surface. Start from the center and work your way outwards, rotating the dough occasionally to ensure an even thickness and to prevent sticking. Aim for a thickness of about 1/8 to 1/4 inch.
7. Can I use a food processor to make pie dough?
Yes, a food processor can be a quick and efficient way to make pie dough. Just pulse the dry ingredients with the fat until the mixture resembles coarse crumbs, then add ice water in short bursts until the dough starts to come together.
Conclusion
And there you have it—the ultimate guide to making pie dough from scratch. From picking your ingredients to rolling it out and baking it to golden perfection, every step matters. It’s not just about following a recipe—it’s about feeling the dough, understanding the process, and having the confidence to tweak and experiment as you go.
Sure, store-bought crusts are convenient, but they don’t hold a candle to the homemade kind. Once you make it yourself and taste the difference, you’ll never look back. Plus, it’s oddly therapeutic—kneading, rolling, chilling—it’s a form of edible art.
So the next time you’re baking up a juicy peach pie, hearty pot pie, or a classic apple number, you’ll know exactly how to craft the perfect crust. Roll up those sleeves and give it a go. Happy baking!


