Pickles Recipe: Pickles are one of those delightful little sides that sneak their way onto your plate and suddenly steal the show. Crunchy, tangy, sometimes sweet or spicy, pickles can elevate any meal. But store-bought jars? They often fall flat. That’s where homemade pickles come in. Making them yourself isn’t just satisfying—it’s surprisingly easy, cost-effective, and customizable.
So, what are pickles, exactly? Simply put, pickles are vegetables (most commonly cucumbers) that have been preserved in a solution of vinegar, water, salt, and spices. This pickling process doesn’t just preserve the food—it transforms it. You’re left with vibrant, tangy bites that can last months in your fridge.
Now, why bother making pickles at home when supermarkets have entire aisles dedicated to them? Well, for one, you control everything: the ingredients, the level of crunch, the flavor. Want spicy garlic-dill pickles? Go for it. Craving a sweet-and-sour combo with onions and jalapeños? Easy. Plus, homemade pickles skip the preservatives and additives that come with many commercial brands.
Whether you’re brand new to pickling or just want a foolproof method, this step-by-step guide has got you covered.
Ingredients You’ll Need
Before diving into the process, let’s gather what you’ll need. One of the beauties of pickling is that the ingredient list is straightforward and flexible. You can scale up or down based on how many jars you’re making.
Essential Ingredients
Here’s your base formula for a classic brine and crisp cucumber pickles:
- Fresh cucumbers (preferably pickling cucumbers or Kirby cucumbers)
- White distilled vinegar or apple cider vinegar
- Water (filtered is best)
- Kosher salt or pickling salt
- Garlic cloves
- Fresh dill (or dill seeds if fresh isn’t available)
- Mustard seeds
- Black peppercorns
This will give you the classic dill pickle profile. The salt draws out moisture and helps preserve the cucumbers. Vinegar brings the tang, while spices add complexity.
Optional Add-Ins for Extra Flavor
Want to experiment? Here are a few extras to jazz up your brine:
- Red pepper flakes or sliced jalapeños for heat
- Sugar or honey for sweet pickles
- Bay leaves or coriander seeds for earthiness
- Turmeric for color and flavor
- Onion slices for an extra savory layer
Feel free to mix and match based on your flavor preferences.
Equipment Checklist
Pickling doesn’t require fancy gadgets, but having the right tools makes the job smoother and helps your pickles turn out perfect.
Basic Tools You’ll Need
- Mason jars with lids (pint or quart size, depending on batch size)
- Large pot for boiling the brine
- Cutting board and knife
- Measuring cups and spoons
- Funnel (super handy when pouring brine)
- Tongs or jar lifter
If you’re doing a big batch or want to water-bath can your pickles for shelf storage, you’ll also want a canner pot and a rack.
Sterilizing Your Jars Properly
Before you fill those jars, sterilize them to kill off any bacteria that could ruin your pickles.
Here’s how:
- Wash jars and lids in hot, soapy water.
- Rinse well.
- Submerge jars in boiling water for 10 minutes, then air dry on a clean towel.
- Keep the jars warm until ready to use to avoid cracking when hot brine is added.
Sterilization is especially important if you’re planning on shelf-storing your pickles instead of keeping them in the fridge.
Choosing the Right Vegetables
Cucumbers are the poster child of pickling, but don’t stop there. Many vegetables take to pickling beautifully—and bring their own flavors and textures to the table.
Best Vegetables for Pickling
- Cucumbers: Stick to pickling cucumbers—they’re firmer and less watery than the typical slicing variety.
- Carrots: Sweet, crunchy, and colorful.
- Cauliflower: Absorbs flavor well and stays firm.
- Green beans: Great for spicy or savory mixes.
- Red onions: Mild and sweet when pickled—perfect for tacos.
- Radishes: Peppery and pretty in pink.
- Beets: Sweet, earthy, and vibrant.
Tips for Freshness and Prep
Always start with the freshest produce you can find. Old, soft vegetables will lead to mushy pickles—and nobody wants that.
A few pro tips:
- Wash vegetables thoroughly and trim off any soft spots.
- For cucumbers, slice off the blossom end—it contains enzymes that can soften the pickle.
- Slice uniformly if you’re doing spears or chips, so they pickle evenly.
- If using whole cucumbers, poke a few holes with a fork to help the brine seep in.
Step-by-Step Pickles Recipe
Time for the fun part. Let’s make some pickles!
Step 1: Clean and Prep Your Ingredients
- Wash your cucumbers and other vegetables well.
- Cut them into your desired shapes—spears, chips, or keep them whole.
- Peel garlic and prepare any herbs and spices you want to add.
Step 2: Make the Brine
In a pot, combine:
- 1 cup white vinegar
- 1 cup water
- 1 tablespoon kosher salt
- 1 tablespoon sugar (optional)
Bring to a boil and stir until the salt (and sugar, if used) dissolve completely. You can scale this ratio up depending on how many jars you’re making.
Step 3: Pack the Jars
- Place garlic, dill, and spices at the bottom of each jar.
- Pack in your sliced or whole cucumbers tightly but don’t crush them.
- Add any other flavorings like onions or peppers.
Step 4: Pour the Brine and Seal
- Pour the hot brine into the jars using a funnel, leaving about ½ inch of headspace.
- Tap the jar gently to release air bubbles.
- Wipe the rims clean and screw on the lids.
Step 5: Store and Wait
- Let the jars cool to room temperature.
- Store in the fridge for at least 48 hours before tasting (longer = more flavor).
- For shelf-stable pickles, process the jars in a boiling water bath for 10 minutes.
Pickling Tips and Tricks
Making pickles sounds easy—and it is—but getting them just right? That’s an art. With a few extra tips and tricks, you’ll go from beginner to pickle pro in no time.
How to Get That Crunch
The number one complaint about homemade pickles? They’re too soft. Here’s how to keep that crisp bite:
- Start with fresh, firm cucumbers. The fresher the better—straight from a farmer’s market or garden is ideal.
- Use pickling salt, not table salt. Table salt contains additives that can make brines cloudy and impact texture.
- Chill cucumbers before pickling. An hour or two in ice water can help firm them up.
- Add grape leaves or horseradish leaves. These contain tannins that naturally help maintain crunchiness.
- Avoid overprocessing. If you’re water-bath canning, too much heat softens the pickles.
Balancing Sweetness, Salt, and Vinegar
Pickles are all about that flavor harmony. Too much vinegar can make them harsh. Not enough salt and they taste flat.
Here’s a simple brine ratio that works well:
- 1 cup vinegar
- 1 cup water
- 1 tablespoon kosher salt
- 1-2 teaspoons sugar (optional)
Want it sweeter? Add more sugar. Want it spicy? Toss in red chili flakes or a halved jalapeño. Like it punchy? Use more garlic. This is where you get to have fun—make it your own!
And remember: flavors intensify the longer the pickles sit, so go easy at first. Taste after a few days, then adjust in your next batch.
Storage and Shelf Life
Once your pickles are jarred and cooled, how long do they last—and how should you store them? Let’s break it down.
How Long Do Homemade Pickles Last?
There are two types of homemade pickles: refrigerator pickles and canned (shelf-stable) pickles.
- Refrigerator pickles last about 2 to 3 months. Keep them chilled and sealed. The flavor deepens over time.
- Canned pickles, if processed correctly in a boiling water bath, can last up to a year in a cool, dark place. Once opened, move them to the fridge.
Check for signs of spoilage: off smell, fizzing, mold, or softness. If in doubt, toss it out.
Best Practices for Storing Pickles
- Label each jar with the date you made them.
- Store in a cool, dry spot if canning.
- Once opened, always refrigerate.
- Keep the vegetables submerged in brine—exposure to air can lead to spoilage.
Pro tip: Pickles are best enjoyed after sitting for at least 3 to 5 days, but they hit peak flavor around the 2-week mark.
Variations You Can Try
Once you’ve nailed the basic recipe, it’s time to branch out. There’s a whole world of pickles beyond the classic cucumber-dill.
Spicy Pickles
Love heat? Add spice to your life with:
- Red pepper flakes
- Fresh jalapeños or habaneros
- Crushed black pepper
- Whole dried chili peppers
Combine heat with sweetness for a bold contrast, or just go full inferno if that’s your thing.
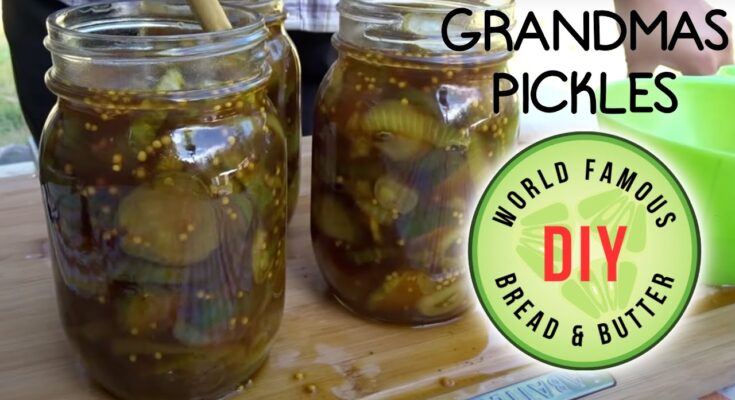
Sweet Bread and Butter Pickles
These are perfect for sandwiches. To make them:
- Use more sugar (up to ½ cup per 2 cups of brine).
- Add mustard seeds, celery seeds, and onion slices.
- Use apple cider vinegar for a tangy twist.
They’re sweet, tangy, and addictive.
Garlic-Dill Pickles
Want intense, savory flavor? This one’s a winner:
- Load up the jar with peeled garlic cloves (2-4 per jar).
- Use lots of fresh dill sprigs.
- Add black peppercorns, bay leaves, and a pinch of mustard seed.
Perfect alongside burgers or even eaten straight from the jar (we won’t judge).
Common Mistakes to Avoid
Even though pickling is simple, a few easy mistakes can ruin your batch. Here’s what not to do:
Overpacking Jars
It’s tempting to jam as many cucumbers as you can into the jar—but don’t. Overpacking prevents brine from circulating properly. That leads to uneven pickling, air pockets, and mushy spots. Pack tightly, but leave room for brine to flow and cover everything.
Using the Wrong Vinegar
Not all vinegar is created equal. Stick with 5% acidity white vinegar or apple cider vinegar. Avoid flavored vinegars unless you’re following a trusted recipe—they can affect taste and pH, which impacts preservation.
Not Letting Them Sit Long Enough
We get it—you want to dive in. But pickles need time to absorb the brine. For best results, wait at least 48 hours, but a week or more is ideal. The longer they sit, the better they taste. Patience = flavor.
Skipping Sterilization
If you’re canning for shelf storage, sterilization is a must. Dirty jars or unclean lids can introduce bacteria that ruin your pickles—or worse, make you sick.
Benefits of Eating Pickles
Beyond being a delicious snack or sandwich topper, pickles come with a surprising range of health benefits. That’s right—these tangy little delights are more than just a tasty treat.
Gut Health
Pickles, especially fermented pickles, are great for your gut. During the fermentation process, naturally occurring bacteria like Lactobacillus develop, which act as probiotics. These good bacteria support digestion and a balanced microbiome, which can boost everything from nutrient absorption to immune health.
Even vinegar-based (non-fermented) pickles offer digestive perks. The vinegar can help regulate blood sugar and improve satiety after meals.
Nutrient Retention
Pickles retain most of the nutrients of the raw veggies—think vitamin K, potassium, and antioxidants—especially when made fresh at home. Plus, the acidity of the brine can help preserve these nutrients longer than in their raw state.
Add spices like garlic, dill, or turmeric, and you’re not just adding flavor—you’re adding natural anti-inflammatory and antioxidant power.
Low-Calorie Snack
Looking for a low-cal snack with big flavor? Pickles are perfect. A single pickle spear has just a handful of calories but loads of taste. This makes them ideal for curbing cravings without ruining your diet.
Need to watch your sodium intake? Opt for low-sodium pickling recipes—easy to make at home, unlike many store-bought options.
Serving Suggestions
You made your pickles—now what? Time to enjoy them! Here are some of the tastiest, most creative ways to serve up your homemade goodies.
With Sandwiches and Burgers
This one’s a no-brainer. Pickles and sandwiches are a match made in heaven. Add them to:
- Grilled cheese for a tangy twist
- Burgers to balance out the richness
- Pulled pork or brisket sandwiches for texture and zing
- Tuna or chicken salad sandwiches for extra crunch
They also make a great side on their own—just slice and serve.
In Salads or Charcuterie Boards
Chop up your pickles and toss them in:
- Potato salad or pasta salad
- Deviled eggs for a tangy boost
- Coleslaw for a bite of brightness
- Macaroni and cheese for an unexpected pop of flavor
Or add them to a charcuterie board alongside cured meats, cheeses, olives, and nuts. Pickles cut through the richness and bring balance to every bite.
Other Creative Ideas
- Fry them up: Deep-fried pickles with ranch dip? Yes, please.
- Blend into dressings: Pickle juice adds zing to homemade vinaigrettes.
- Use the brine: Don’t toss that liquid! Pickle brine makes a fantastic base for marinades, salad dressings, or even a hangover-curing Bloody Mary.
Quick Pickles vs. Fermented Pickles
Ever wonder what the difference is between quick pickles and fermented ones? Both are tasty, but they’re made in very different ways—and offer different benefits.
What’s the Difference?
Quick Pickles (also called refrigerator pickles):
- Made with vinegar, water, and salt.
- Stored in the fridge immediately.
- Ready to eat in a few days.
- No fermentation involved.
- Bright, tangy, and crunchy.
Fermented Pickles:
- Made using only water and salt (no vinegar).
- Sit at room temperature for a week or more.
- Naturally fermented by beneficial bacteria.
- Have a complex, sour flavor.
- Rich in probiotics.
Pros and Cons of Each Method
| Feature | Quick Pickles | Fermented Pickles |
|---|---|---|
| Speed | Ready in 1–3 days | Takes 1–2 weeks |
| Shelf Life | 2–3 months in fridge | 3–6 months if properly fermented |
| Health Benefits | Lower probiotic content | High in probiotics |
| Flavor Profile | Vinegar tang | Deep, sour, complex |
| Ease of Making | Beginner-friendly | Requires more attention |
Both methods have their place. Want fast results and bold vinegar flavor? Go quick. Want gut-friendly benefits and rich flavor? Try fermenting!
FAQs about Pickle Recipes
1. What ingredients do I need for a basic pickle recipe?
For a classic pickle, you’ll need cucumbers, water, vinegar, salt, and some dill or other herbs for flavor. Spices like garlic, mustard seeds, and peppercorns are optional but can add a great kick.
2. How long does it take to make homemade pickles?
Homemade pickles can be ready in as little as a few hours for quick pickles, or they can be fermented over several weeks for deeper flavor. The choice is yours, depending on how tangy you like them!
3. Do I need any special equipment to make pickles at home?
Not really! A clean jar, some fresh ingredients, and a bit of patience are all you need. If you’re planning to ferment your pickles, make sure the jars are airtight to get that perfect crunch.
4. Are there any health benefits to eating pickles?
Absolutely! Pickles are low in calories and contain beneficial bacteria that can help maintain digestive health. Just watch the sodium content, as pickles can be quite high in salt.
5. Can I pickle vegetables other than cucumbers?
Definitely! Carrots, onions, peppers, and even fruits like mangoes and pears make delicious pickles. Experimenting with different veggies and fruits can lead to some exciting flavors.
6. What’s the best vinegar to use for making pickles?
White vinegar is commonly used due to its clear color and strong acidity, which is great for preserving crunch. Apple cider vinegar is another popular choice for a slightly sweeter, milder pickle.
7. How do I ensure my pickles stay crunchy?
The key to crunchy pickles is to ensure that the cucumbers are fresh and to use grape leaves or alum in your brine, which can help maintain firmness.
8. Can I reuse pickle brine?
Yes, you can reuse brine for making another batch of pickles or as a flavorful addition to salad dressings and marinades. Just make sure it hasn’t spoiled and still smells fresh.
9. What are the most common mistakes when making pickles?
Overcooking the brine, using cucumbers that aren’t fresh, and not sealing the jars properly are common pitfalls. Keep it crisp, fresh, and tightly sealed!
Conclusion
And there you have it—your ultimate step-by-step guide to making pickles at home. Whether you’re going for quick fridge pickles or diving into fermentation, making pickles is as rewarding as it is fun. You’ll get bold, vibrant flavors, total control over ingredients, and a jar full of pride every time you pop that lid.
So grab some fresh cucumbers, whip up your favorite brine, and get pickling. Once you’ve had homemade pickles, you’ll never go back to store-bought again.
Happy pickling!


