Pickled Egg Recipe: Pickled eggs aren’t just an old-timey bar snack anymore—they’re back in style and surprisingly easy to make at home.
Whether you’re trying to spice up your snack game, preserve surplus eggs, or just enjoy something tangy and satisfying, this guide will walk you through everything you need to know.
We’re talking the full step-by-step breakdown from boiling the eggs to sealing the jars. So, let’s roll up our sleeves and get into the art of pickling eggs!
What Are Pickled Eggs?
Pickled eggs are hard-boiled eggs that have been peeled and then preserved in a brine solution made with vinegar, salt, and spices. This brine not only preserves the eggs but also infuses them with a bold, tangy flavor that gets better with time. Originating from the days before refrigeration, pickling was a smart way to store eggs long-term. These days, it’s more about flavor and fun than food preservation.
They’re often found in mason jars, sometimes with vibrant pink hues if beet juice is added. Over time, the eggs absorb the flavors of the brine, transforming into a zesty, protein-packed snack.
Why Pickled Eggs Are a Popular Snack
Pickled eggs are beloved for more than just their taste. Here’s why:
- Long shelf life – When stored properly, pickled eggs can last for weeks.
- Low-carb and keto-friendly – Great for people on low-carb diets.
- Versatile – Enjoy them on their own, sliced on a salad, or chopped into deviled eggs.
- Zero waste – Ideal for using up surplus eggs.
- Customizable – You can flavor them however you want: spicy, sweet, garlicky, or herby.
From rustic farmhouse kitchens to modern health-conscious snackers, pickled eggs have something for everyone.
Ingredients Needed for Pickled Eggs
Core Ingredients
To get started with classic pickled eggs, you don’t need much. Just a few simple ingredients that are likely already in your pantry.
Here’s what you’ll need:
- 12 large eggs – Fresh but not too fresh; slightly older eggs are easier to peel.
- 2 cups white vinegar – The base of your pickling liquid.
- 1 cup water – Dilutes the vinegar for a more balanced flavor.
- 1 tablespoon salt – Pickling or kosher salt works best.
- 1 tablespoon sugar – Optional, but it rounds out the acidity.
- 1 teaspoon black peppercorns – For a subtle kick.
- 1 teaspoon mustard seeds – Adds warmth and depth.
- 2 garlic cloves (smashed) – For an aromatic touch.
- 1 bay leaf – Traditional and delicious.
This combo gives you a classic, tangy brine with enough complexity to keep things interesting.
Optional Add-Ons for Extra Flavor
Once you’ve mastered the basic recipe, the fun really begins. Here are some ideas to make your pickled eggs your own:
- Beet juice – For sweet, earthy flavor and a brilliant magenta color.
- Chili flakes or jalapeños – If you like it hot.
- Fresh dill – For a Scandinavian twist.
- Onion slices – Adds tangy sweetness.
- Cloves or allspice – For a more aromatic profile.
- Apple cider vinegar – A milder, fruitier vinegar option.
Feel free to mix and match based on your taste preferences.
How to Prepare Eggs for Pickling
Boiling the Perfect Eggs
The first—and arguably most important—step in making pickled eggs is boiling them correctly. Overcooked eggs turn rubbery and develop an unappetizing green ring around the yolk, while undercooked eggs are just messy. Here’s a foolproof method:
- Place the eggs in a single layer in a large saucepan.
- Cover with cold water about an inch above the eggs.
- Bring to a gentle boil over medium-high heat.
- Once boiling, remove from heat and cover with a lid.
- Let sit for 12-14 minutes depending on the size of the eggs.
- Drain and transfer immediately to an ice water bath to stop the cooking.
This process ensures creamy yolks and shells that come off easily.
Peeling and Cooling Tips
Peeling eggs can be a pain, but with the right approach, it’s a breeze:
- Use slightly older eggs – they peel more easily than fresh ones.
- After the ice bath, gently crack the shells all over by tapping them on a counter.
- Roll them lightly under your palm to loosen the membrane.
- Peel under cold running water to help remove any stubborn bits.
Once peeled, let the eggs sit in the fridge for a few hours to ensure they’re completely cold. Warm eggs + hot brine = mushy disaster.
Making the Pickling Brine
Basic Brine Recipe
The brine is where the magic happens. This is what gives your eggs their signature tang and personality. Here’s a classic base recipe:
Ingredients:
- 2 cups white vinegar
- 1 cup water
- 1 tbsp salt
- 1 tbsp sugar
- 1 tsp peppercorns
- 1 tsp mustard seeds
- 2 garlic cloves
- 1 bay leaf
Instructions:
- Combine all ingredients in a saucepan.
- Bring to a boil, then reduce to a simmer for 5 minutes.
- Let it cool slightly before pouring over your eggs.
Flavor Variations You Can Try
Ready to get creative? Here are a few brine variations you can experiment with:
- Spicy Brine: Add 1 sliced jalapeño or 1 tsp chili flakes.
- Beet Brine: Add ½ cup beet juice for color and sweetness.
- Sweet Brine: Increase sugar to 3 tbsp and add sliced onion.
- Asian-Inspired Brine: Swap vinegar with rice vinegar, add soy sauce and ginger slices.
These tweaks let you customize your eggs to match your flavor cravings.
Step-by-Step Instructions for Pickling Eggs
Step 1: Sterilizing Your Jars
Before you even think about pouring brine or dropping in those perfectly boiled eggs, it’s crucial to get your jars squeaky clean. Sterilization helps ensure that no bacteria sneaks in and ruins your batch. This is the foundation of any safe pickling process.
Here’s how to properly sterilize your jars:
- Wash jars and lids in hot, soapy water. Rinse them well.
- Place the jars (without lids) in a large pot.
- Cover with water and bring it to a boil.
- Boil for 10 minutes to kill any lingering germs.
- Remove carefully with tongs and set them upside down on a clean towel to air dry.
- Boil the lids separately for 5 minutes and dry them the same way.
It might seem like overkill, but trust me—this extra step will keep your pickled eggs fresh, safe, and delicious for weeks.
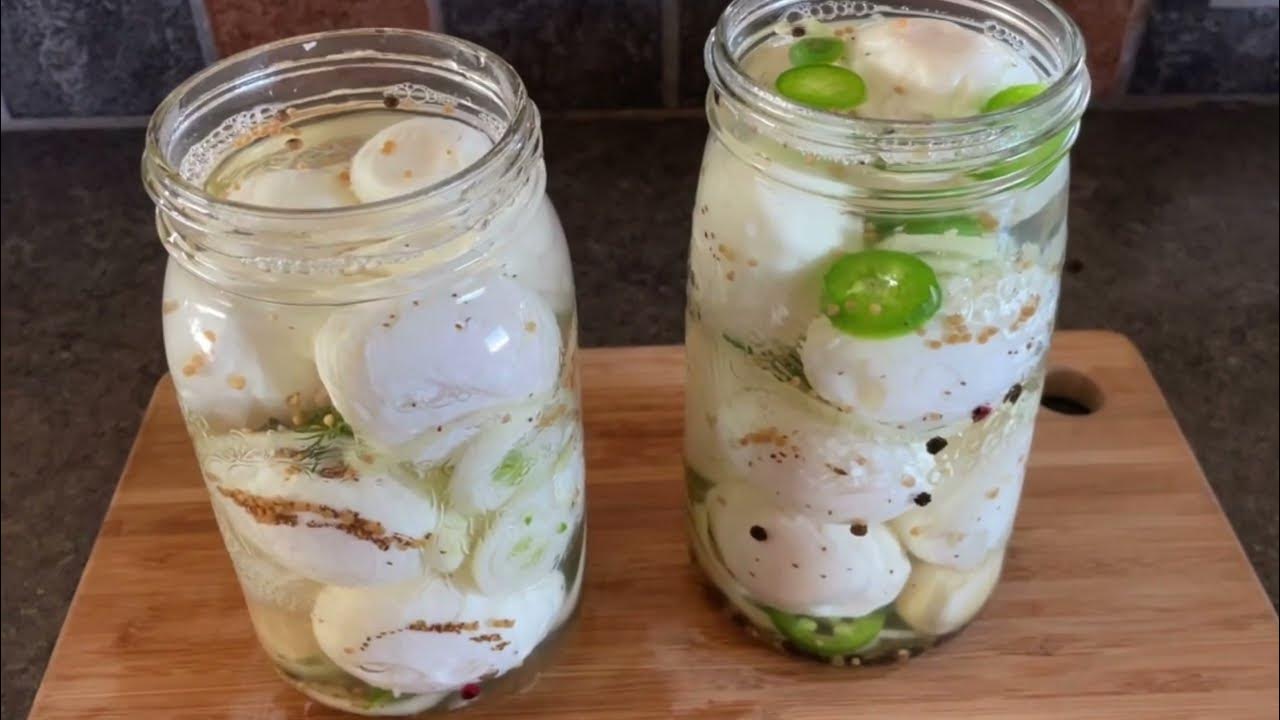
Step 2: Adding Eggs and Brine
Once your jars are ready and the eggs are peeled and chilled, it’s time to bring everything together. This is the fun part—the transformation begins here!
Step-by-step:
- Place your peeled hard-boiled eggs into the sterilized jar. Pack them gently but snugly—don’t crush them!
- Toss in any add-ins like sliced onions, garlic cloves, fresh dill, or chilies.
- Slowly pour the warm (not boiling!) brine over the eggs, covering them completely.
- Tap the jar lightly on the counter to remove any air bubbles.
- If needed, top off with extra vinegar to fully submerge the eggs.
Pro tip: Always make sure the eggs are fully submerged in the brine to avoid spoilage or discoloration. If they float, weigh them down with a slice of onion or a fermentation weight.
Step 3: Sealing and Storing Properly
Now that your jar is filled with all that goodness, it’s time to seal the deal.
- Wipe the rim of the jar clean with a damp cloth to ensure a good seal.
- Place the lid on and tighten it—just until it’s snug. Don’t overtighten.
- Let the jar cool to room temperature, then pop it in the refrigerator.
And now comes the hardest part: waiting.
For the best flavor, let your pickled eggs sit for at least 3 to 5 days before eating. Some people prefer a full week—or even two—to really let the flavors soak in. The longer they sit, the deeper the taste.
Storage Tips:
- Always store in the fridge. This isn’t shelf-stable canning.
- Use within 4 weeks for the best quality.
- Always use a clean utensil when removing eggs—no fingers!
Tips for the Best Pickled Eggs
How to Avoid Rubbery Texture
Nobody likes a bouncy egg. If you’ve tried pickled eggs before and found them too rubbery, the culprit is likely overcooking. Here are a few tricks to avoid that fate:
- Stick to the 12-14 minute boiling rule—no more.
- Use the ice bath right after boiling to stop further cooking.
- Don’t pickle eggs while still warm—always let them cool fully first.
Keeping it gentle at every stage makes for tender, flavorful eggs.
How Long Should You Let Them Sit?
While they’re safe to eat after a couple of days, patience really pays off with pickled eggs. Here’s a breakdown:
- 3-5 days: Light flavor, slightly tangy.
- 7-10 days: Full flavor development.
- 2+ weeks: Bold, punchy flavor with firm texture.
You can taste-test along the way to find your personal sweet spot.
Ways to Enjoy Pickled Eggs
Pickled eggs are more versatile than you might think. Sure, they’re great as a quick snack, but they can also elevate everyday dishes.
Here are some tasty ways to use them:
- On a charcuterie board – Slice and serve with cured meats and cheeses.
- In salads – Add them to green salads, potato salad, or grain bowls.
- Deviled eggs with a twist – Mash the yolks with mayo, mustard, and a splash of brine for an extra zing.
- On toast – Layer slices on avocado toast or cream cheese and rye.
- Egg salad upgrade – Chop them into your classic egg salad recipe for more depth.
The options are endless. If you like bold, savory flavors, you’ll find dozens of ways to enjoy these beauties.
Safety Tips for Homemade Pickled Eggs
Keep Them Refrigerated
Homemade pickled eggs are not shelf-stable like store-bought canned goods. They must be kept in the fridge at all times. Leaving them out at room temperature can invite dangerous bacteria like botulism.
Always Use Clean Utensils
Cross-contamination can ruin a whole batch. Always use clean utensils (not your fingers) to remove eggs from the jar. This small habit helps maintain the freshness and safety of your pickled goodies.
Watch for Signs of Spoilage
If your pickled eggs ever smell off, become slimy, or change color dramatically, don’t eat them. Trust your senses—when in doubt, throw them out.
Creative Variations of Pickled Eggs
Beet Pickled Eggs (Vibrant & Sweet)
Beet pickled eggs are a stunning and flavorful twist on the classic recipe. The beets not only lend a gorgeous magenta hue to the eggs but also add a subtly sweet, earthy flavor that complements the tang of the vinegar perfectly.
To make beet pickled eggs:
- Follow the classic brine recipe, but add ½ to 1 cup of beet juice (from canned beets or freshly boiled).
- You can also slice a few beets and place them in the jar for extra color and texture.
- Let the eggs soak for at least 5 days. The longer they sit, the deeper the color penetrates, often giving a dramatic pink gradient when sliced.
These are perfect for serving at brunches, holidays, or anytime you want to impress guests with something simple yet show-stopping.
Spicy Jalapeño Pickled Eggs
Love a little heat with your snack? Spicy jalapeño pickled eggs are here for you. These are especially good for fans of bold flavors or anyone following a low-carb or keto diet who craves something zesty.
How to add the heat:
- Add 2–3 sliced jalapeños to the jar.
- Include 1 tsp red pepper flakes in the brine.
- Try adding a few dashes of hot sauce or a chopped habanero for the brave-hearted.
Over time, the eggs absorb the heat and develop a complex, spicy flavor profile. Great for pairing with a cold beer or a smoky BBQ spread.
Curry-Spiced Pickled Eggs
For an exotic twist, try curry pickled eggs. These eggs have a golden glow and a rich, aromatic flavor, thanks to the addition of curry powder and turmeric.
To make them:
- Add 1 tablespoon of yellow curry powder and 1 teaspoon of turmeric to the classic brine.
- Include sliced onions and garlic for even more depth.
They’re excellent in rice bowls, chopped into wraps, or just eaten as-is for a snack that wakes up your taste buds.
FAQs about Pickled Egg Recipe
What are pickled eggs?
Pickled eggs are hard-boiled eggs that have been cured in a mixture of vinegar, salt, spices, and other flavorings. This preservation method not only extends the egg’s shelf life but also infuses them with a unique, tangy taste.
How long do pickled eggs last?
Properly stored in a refrigerated and airtight container, pickled eggs can last for up to 3-4 months. Always ensure that the eggs are fully submerged in the pickling solution and the jar is sealed tightly.
Can I use apple cider vinegar for pickling eggs?
Absolutely! Apple cider vinegar is a popular choice for pickling eggs due to its mild, fruity flavor, which complements the eggs well. You can also experiment with white vinegar or a combination of different vinegars for varied flavors.
Do pickled eggs need to be refrigerated?
Yes, pickled eggs must be refrigerated at all times. Due to the risk of botulism when stored improperly at room temperature, it is crucial to keep them chilled to maintain safety and freshness.
Are pickled eggs healthy?
Pickled eggs are a nutritious snack that offers a good source of protein, essential amino acids, and several vitamins and minerals. However, they are also high in sodium, so it’s best to consume them in moderation.
What spices can I use for pickled eggs?
Classic spices for pickling eggs include mustard seeds, peppercorns, garlic cloves, and bay leaves. Feel free to get creative and add turmeric, chili flakes, or dill for a customized flavor twist.
How long should I wait before eating pickled eggs?
For the best flavor development, wait at least one to two weeks before consuming pickled eggs. This patience allows the eggs to fully absorb the pickling spices and vinegar, enhancing their taste.
Can I pickle eggs with beets for a different flavor?
Definitely! Adding beets to your pickling solution not only imparts a sweet, earthy flavor but also gives the eggs a vibrant pink color, making them a fun and appealing addition to any meal or snack platter.
Conclusion
Pickled eggs may sound like a throwback snack from a dusty tavern or grandma’s pantry, but they’re actually a bold, protein-packed treat that fits right into modern kitchens. From the basic recipe to wild, creative variations, these eggs are endlessly customizable and surprisingly simple to make.
All you need are some good eggs, a bit of vinegar, a handful of spices, and a little patience. Whether you like them spicy, sweet, or classic, once you get the hang of it, you’ll be making batch after batch to keep in the fridge.
So go ahead—boil those eggs, whip up some brine, and start pickling. Your snack game is about to level up in the tastiest way possible.