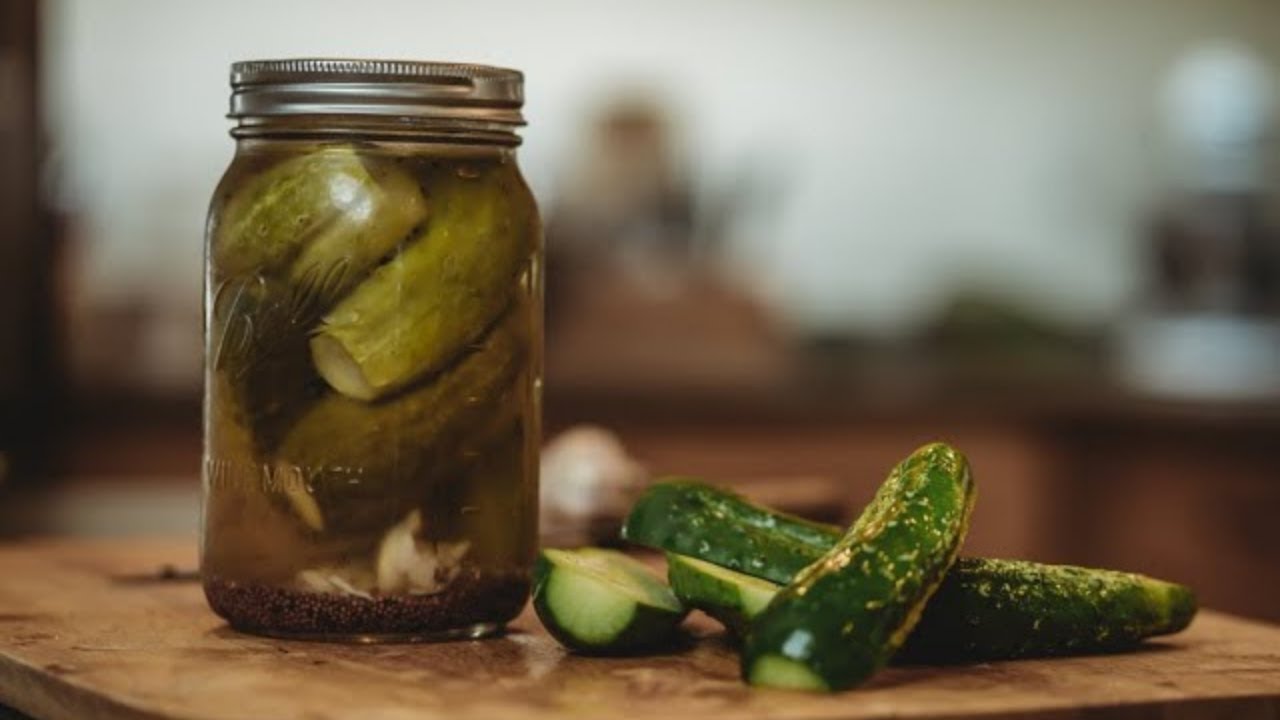
Pickled Cucumbers Recipe: There’s something incredibly satisfying about biting into a crisp, tangy, homemade pickle. Whether you love the salty snap of a dill pickle or the subtle sweetness of bread and butter slices, learning how to pickle cucumbers from scratch is a rewarding skill.
It’s not just about preserving your garden’s bounty; it’s about creating flavor-packed, crunchy delights you can enjoy all year round.
In this guide, you’ll get everything you need—from ingredients to storage tips—to become a pickle pro. If you’re a fan of bold flavors and DIY kitchen projects, this is for you. Let’s dive into the salty-sour world of pickled cucumbers!
Types of Pickled Cucumbers
Not all pickles are created equal. Depending on your taste preferences and how you plan to use them, you can choose from a variety of pickled cucumbers.
Dill Pickles
Dill pickles are the most popular type—tangy, briny, and seasoned with dill weed or dill seeds. They’re perfect with sandwiches, burgers, or just eaten on their own.
Bread and Butter Pickles
These are slightly sweet and often include onions and mustard seeds. They’re a great choice for snacking or adding a tangy bite to meat and cheese platters.
Sweet Pickles
True to their name, sweet pickles are loaded with sugar and spices. They pair beautifully with grilled meats and creamy dishes.
Kosher Pickles
Made in the traditional Jewish deli style, kosher pickles include garlic and dill, but what sets them apart is the fermentation process and spice mix.
Benefits of Making Homemade Pickles
There’s a lot to love about going the DIY route with pickles. For starters, they’re healthier and more customizable than store-bought versions.
- Healthier Option: No preservatives or artificial flavors.
- Budget-Friendly: A batch of homemade pickles costs less than one jar at the store.
- Custom Flavors: Love garlic? Add more. Want spicy? Toss in some chili flakes.
- Eco-Friendly: Use reusable jars and cut down on plastic waste.
Plus, there’s just something wholesome and satisfying about making your own food from scratch.
Essential Equipment for Pickling
Before diving into the ingredients, make sure you’ve got the right tools to make the pickling process smooth and safe.
- Mason Jars (pint or quart size) with tight-fitting lids
- Jar Funnel – makes filling the jars neater
- Tongs – to safely handle hot jars
- Large Pot – for boiling the brine and sterilizing jars
- Measuring Cups & Spoons
- Cutting Board & Knife – for prepping cucumbers and spices
Having the right tools doesn’t just make the job easier—it helps preserve food safely.
List of Ingredients You’ll Need
Let’s get to the good stuff—what exactly do you need to make delicious pickled cucumbers?
Basic Ingredients:
- Fresh cucumbers – about 2 lbs (Kirby cucumbers work great)
- White vinegar – 2 cups (can substitute with apple cider vinegar)
- Water – 2 cups
- Pickling salt – 2 tbsp (non-iodized)
- Garlic cloves – 4 to 6, smashed
- Fresh dill – 4 to 6 sprigs or 2 tbsp dried dill seeds
- Mustard seeds – 2 tsp
- Black peppercorns – 1 tsp
- Optional: Red chili flakes, sugar (for sweet pickles), sliced onions, bay leaves
You can scale this recipe up or down depending on how many jars you want to make.
Choosing the Right Cucumbers
Picking the right kind of cucumber is a game-changer. Not all cucumbers are created equal when it comes to pickling.
Best Varieties:
- Kirby Cucumbers – crunchy and the gold standard for pickling
- Persian Cucumbers – thin-skinned and slightly sweet
- Gherkins – small, perfect for whole pickles
Tips for Selecting:
- Choose small to medium-sized cucumbers for better crunch
- Avoid cucumbers with soft spots or blemishes
- Pick cucumbers that are firm and evenly colored
Freshness is key—ideally, use cucumbers within 24 hours of picking or buying.
How to Sterilize Your Jars Properly
Clean jars are crucial to avoid spoilage. Here’s how to do it right:
Water Bath Method:
- Wash jars and lids in hot soapy water.
- Place jars in a large pot of boiling water for 10 minutes.
- Remove carefully using tongs and place them upside down on a clean towel.
Oven Method:
- Wash jars and lids.
- Place jars in a 225°F (107°C) oven for 20 minutes.
- Boil the lids for 5 minutes separately.
Sterilizing your jars keeps bacteria and mold away, so don’t skip this step!
Step-by-Step Guide to Pickling Cucumbers
Let’s break it down into simple steps so you can follow along with confidence.
Step 1: Preparing the Brine
In a saucepan, combine water, vinegar, and salt. Heat gently, stirring until the salt fully dissolves. Remove from heat and let the brine cool slightly. You can add sugar if you prefer a sweeter pickle.
Step 2: Preparing the Cucumbers
Wash the cucumbers thoroughly and trim off the ends. Slice them into spears, rounds, or leave whole, depending on your preference. For extra crunch, soak the cucumbers in cold water for about 30 minutes, then drain.
Step 3: Packing the Jars
Place clean jars on a flat surface. Add flavorings such as garlic cloves, dill, mustard seeds, or peppercorns to the bottom. Pack the cucumbers tightly into the jars without crushing them.
Step 4: Pouring the Brine
Carefully pour the warm brine over the cucumbers, making sure they are fully submerged. Leave a little space at the top of each jar. Gently tap the jars to release air bubbles.
Step 5: Sealing and Storing
Seal the jars with tight-fitting lids and let them cool to room temperature. Refrigerate for at least 24–48 hours before eating. The longer they sit, the more flavorful they become. Enjoy your homemade pickled cucumbers! 🥒✨
Pickling Methods: Quick Pickles vs. Fermented Pickles
When it comes to pickling cucumbers, you’ve got two main routes: quick pickling and fermentation. Each method has its unique perks, flavors, and timelines.
Quick Pickles (Refrigerator Pickles)
- Speed: Ready in as little as 24–48 hours.
- Flavor: Tangy, sharp, and fresh-tasting.
- Storage: Must be kept in the fridge and used within a few months.
- How It Works: Vinegar acts as the primary preservative, killing off bacteria and giving that punchy flavor instantly.
Quick pickles are perfect if you want to whip up a batch for a BBQ or just don’t want to wait too long. They’re also beginner-friendly and safe because vinegar does all the heavy lifting.
Fermented Pickles
- Time: Takes 1–4 weeks for full fermentation.
- Flavor: Complex, tangy, slightly sour—real “old-school” pickle taste.
- Storage: Can be stored for a longer period if properly canned or refrigerated.
- How It Works: Cucumbers sit in a saltwater brine, and natural bacteria (lactobacillus) do the preserving.
Fermentation takes patience and attention but rewards you with rich, probiotic goodness that boosts gut health and gives that unmistakable traditional flavor.
Flavor Variations to Try
Once you’ve nailed the basics, it’s time to experiment and get creative with your pickled cucumbers. You can build your flavor profiles based on your taste preferences or the cuisine you’re pairing them with.
Spicy Pickles
- Add red pepper flakes, sliced jalapeños, or even habaneros to turn up the heat.
- Pair great with grilled meats, tacos, or as a spicy snack.
Garlic and Herb Infusion
- Include extra garlic cloves, fresh thyme, rosemary, or tarragon.
- These make great charcuterie board additions and pair well with cheeses.
Asian-Inspired Pickles
- Add rice vinegar, ginger slices, soy sauce, and a bit of sesame oil.
- A fantastic topping for banh mi sandwiches, rice bowls, and dumplings.
Mix and match to create your perfect custom pickles. The beauty of DIY is that there are no hard rules—just delicious outcomes!
Troubleshooting Common Pickling Problems
Pickling might be simple, but like all kitchen adventures, things can go sideways. Here’s how to fix the most common issues:
Cloudy Brine
- Possible Cause: Using iodized salt or dirty jars.
- Fix: Use pickling or kosher salt. Make sure everything is properly cleaned and sterilized.
Mushy Pickles
- Possible Cause: Overripe cucumbers or brine that wasn’t hot enough.
- Fix: Always use fresh, firm cucumbers and ensure your brine is boiling when poured.
Mold Growth
- Possible Cause: Air exposure or improper sealing.
- Fix: Ensure jars are sealed tightly. Use a water bath canner for long-term storage. If mold forms, discard the jar immediately.
Mistakes happen—but with a few quick fixes, you’ll be back on the path to pickling perfection.
Storage Tips for Longer Shelf Life
How you store your pickled cucumbers affects their crunch, flavor, and safety. Let’s cover the best ways to keep them fresh and delicious.
Refrigerator Pickles
- Store in the fridge in airtight jars.
- Best consumed within 2 to 3 months.
- No need to process in a water bath.
Canned Pickles
- Use a water bath canning method.
- Shelf-stable for up to 1 year in a cool, dark pantry.
- Always check for bulging lids or weird smells before eating.
Tips:
- Label each jar with the date.
- Keep them out of direct sunlight.
- Don’t open a sealed jar until you’re ready to eat—it shortens the shelf life.
Proper storage means your pickles stay crisp, flavorful, and safe to eat for months to come.
How to Serve and Enjoy Pickled Cucumbers
Pickled cucumbers are incredibly versatile and can be added to just about any meal for a tangy, crunchy twist.
As a Snack
- Eat them straight from the jar (you’re not alone—we all do it!)
- Pair with popcorn or nuts for a salty-sour combo
In Sandwiches and Burgers
- Add slices to grilled cheese, turkey wraps, or pulled pork sliders
- Chop and mix into tuna or egg salad for extra zing
With Cheese Boards
- Place spears or slices next to cheeses, olives, and crackers
- Try with sharp cheddar, brie, or gouda for a flavor bomb
Other Creative Ideas:
- Chop into potato or pasta salad
- Blend into a tangy pickle dip
- Use pickle juice in cocktails (hello, pickleback shots!)
With so many possibilities, pickled cucumbers become more than just a condiment—they’re a kitchen essential.
FAQs about Pickled Cucumbers Recipe
1. Can I reuse the brine for a second batch of pickles?
Not recommended. The acidity and salt levels change after the first batch, making it less effective for preserving. Always make a fresh brine.
2. How long do pickled cucumbers last?
Refrigerator pickles last about 2–3 months. Canned pickles can stay fresh for up to a year if stored properly.
3. Can I use any kind of vinegar?
Stick to white distilled or apple cider vinegar with at least 5% acidity. Avoid balsamic or malt vinegar as they alter taste and acidity.
4. Why are my pickles soft?
Overripe cucumbers, slow processing, or not using pickling salt can lead to mushy pickles. Always use firm, fresh cucumbers.
5. Do I have to refrigerate pickled cucumbers?
Yes, if they’re quick pickles. Only pickles processed in a water bath can be stored at room temperature.
Conclusion
Making pickled cucumbers at home is a deeply rewarding kitchen project that pays off with every bite. With just a handful of ingredients and a little patience, you can craft jars of crisp, flavorful pickles tailored exactly to your taste. Whether you’re into the quick zing of refrigerator pickles or the rich depth of fermented ones, this guide has walked you through everything you need to know—step by step.
So grab those fresh cucumbers, clean your jars, and get pickling. Your sandwiches, snacks, and future self will thank you.