Pickled Beet Recipe: Pickled beets are one of those nostalgic, sweet-and-sour treats that often evoke warm memories of grandma’s kitchen or holiday feasts. These vibrant red gems are beets that have been cooked, peeled, and preserved in a tangy, slightly sweet vinegar brine. They can be stored for weeks and are great as a snack, salad topping, or flavorful side dish. This method of preserving beets also intensifies their natural earthiness, giving them a uniquely punchy flavor.
Unlike raw or simply roasted beets, pickling transforms the texture into something slightly softer while infusing the beets with the bold flavor of the brine. You’ll find that the longer they sit, the more developed and complex the taste becomes. It’s one of the easiest ways to stretch your harvest or elevate a store-bought bunch of beets into something special.
Why You’ll Love This Recipe
This pickled beet recipe is perfect whether you’re a beginner in the kitchen or a seasoned cook. It’s simple, requires minimal ingredients, and doesn’t need fancy canning equipment. The finished beets are sweet, tangy, and deliciously vibrant—both in color and taste. Plus, they make your fridge look gourmet-ready and are an excellent conversation starter at gatherings.
There’s something satisfying about opening a jar of something you made yourself. Not only are you skipping preservatives and extra sugars found in store-bought versions, but you also control every element—spice level, sweetness, acidity. Once you’ve made your first batch, you’ll be hooked. They’re great in salads, on toast, with cheeses, or even straight from the jar.
Ingredients Needed for Pickled Beets
Fresh Ingredients You’ll Need
To get that fresh, earthy flavor that only homemade pickled beets can offer, start with quality produce. Here’s what you’ll need:
- Beets (about 6 medium or 3 large) – Red beets are classic, but you can also use golden or chioggia (candy-striped) beets for a twist.
- Water – For boiling the beets and part of the brine.
- White vinegar – Gives the tang. You can also use apple cider vinegar for a slightly fruitier taste.
- Sugar – Balances the acidity. You can adjust to taste depending on how sweet or tart you like your pickles.
- Salt – Just a pinch to enhance all the other flavors.
Optional for added depth:
- Onions – Thinly sliced red onions add extra bite.
- Garlic – One or two cloves, crushed, give a richer flavor.
- Spices – Mustard seeds, peppercorns, bay leaves, or cloves for a more aromatic brine.
Pantry Staples for the Pickling Brine
The brine is the heart of the recipe—it gives the beets their sharp, vinegary bite. Here’s what goes into a basic pickling brine:
- 2 cups vinegar
- 1 cup water
- ½ to 1 cup sugar (depending on how sweet you like it)
- 1 tablespoon salt
- Optional spices: 1 tsp mustard seeds, ½ tsp peppercorns, 2 bay leaves, 2-3 whole cloves
You can tweak these quantities based on how intense or mild you want the flavor to be. Want a savory edge? Reduce the sugar and add more spices. Craving something zingy? Add a little more vinegar or even a splash of citrus juice.
Tools and Equipment Required
Essential Kitchen Tools
You don’t need a fancy kitchen to make pickled beets. In fact, most of what you need is probably already in your kitchen:
- Large pot – For boiling the beets.
- Cutting board and knife – To peel and slice your beets.
- Measuring cups and spoons – Precision matters with pickling.
- Jars with lids – Mason jars or any clean glass jars with tight-fitting lids will do.
Optional Tools for Convenience
These aren’t must-haves, but they make the process easier:
- Vegetable peeler – For peeling cooked beets. Some people prefer using their hands and rubbing the skins off, but a peeler keeps things neat.
- Canning funnel – Makes transferring beets into jars cleaner and quicker.
- Tongs – To handle hot jars or beets without a mess.
Having the right tools keeps your workspace organized and your workflow smooth, especially when dealing with vibrant, staining ingredients like beets.
Step-by-Step Pickled Beet Recipe Instructions
Step 1 – Prepare the Beets
Start by giving your beets a good scrub. Beets grow underground, so they can be quite dirty. Leave the root tail and about an inch of the stem intact—this prevents the beets from “bleeding” too much during boiling and keeps their color vibrant. If the greens are attached, you can remove them (and save them for sautés or smoothies).
Place the cleaned beets in a large pot, cover with water, and bring to a boil. Boil until they’re fork-tender—usually around 30-45 minutes, depending on size.
Step 2 – Cook the Beets
Let them boil at a medium heat until a fork or skewer easily pierces through the center. Don’t overcook—you want them tender but not mushy. When done, transfer them to a bowl of cold water. This stops the cooking and makes them easier to handle. Let them cool until they can be comfortably touched.
Once cool, the skins should slip off easily. If not, use a vegetable peeler or rub them with a paper towel.
Step 3 – Peel and Slice
Now that your beets are cooked and cooled, it’s time to peel them. You’ll find that the skin peels away quite easily—sometimes just rubbing with your fingers or a paper towel does the trick. If you encounter a stubborn patch, a paring knife or vegetable peeler can help. Be careful though—beet juice stains! So you might want to wear gloves or use an old cutting board.
Once peeled, slice the beets to your desired thickness. You can go with thin rounds, wedges, or even julienne strips if you’re feeling fancy. The thickness will affect how quickly the beets absorb the brine—thinner slices pickle faster, while thicker cuts maintain more bite. Keep them uniform so they pickle evenly.
If you’re adding onions or garlic, now’s the time to slice those too. Red onions add color and a bit of sweetness, while garlic adds a savory punch. Both elevate the flavor profile of your final product.
Step 4 – Prepare the Pickling Brine
In a medium saucepan, combine your vinegar, water, sugar, salt, and any spices you’re using. Bring it to a gentle boil over medium heat, stirring until the sugar and salt dissolve completely. Once it starts to bubble and smells pungent (in a good way), your brine is ready.
This brine is the magic potion—it’s what gives pickled beets their distinctive tang. You can adjust the flavor by experimenting with different types of vinegar (apple cider vinegar gives a fruity note, while balsamic adds richness) or varying the spice mix. Some people toss in a cinnamon stick or star anise for a festive flavor twist.
Taste the brine before pouring it over your beets. It should be tangy, a little sweet, and well-balanced. If it feels too sharp, add a bit more sugar; if too sweet, a dash more vinegar will balance it out.
Step 5 – Combine and Jar
Now comes the fun part—jarring! Sterilize your jars by washing them in hot, soapy water and rinsing well, or by placing them in boiling water for a few minutes. Then, fill each jar with your sliced beets (and onions or garlic, if using), packing them in but not crushing them.
Pour the hot brine over the beets, covering them completely. Use a spoon to gently press them down if needed. Make sure there’s a bit of space at the top of each jar—about ½ inch. Seal the jars tightly with clean lids.
Let them cool to room temperature before storing. If you’re not using a water bath canning method, these pickled beets will need to be refrigerated. They taste best after sitting for at least 24–48 hours to let the flavors really meld.
Storage and Shelf Life of Pickled Beets
How to Store Them Properly
Once your jars are sealed and cooled, it’s time to stash them away. If you’ve processed them using the water bath canning method, you can store the jars in a cool, dark pantry for up to a year. For refrigerator pickled beets (which this recipe is), simply place the jars in the fridge.
Label each jar with the date you made them. This makes it easy to track freshness. Make sure to always use clean utensils when scooping beets out—this keeps bacteria at bay and extends their life.
How Long Do Pickled Beets Last?
Refrigerated pickled beets last about 4–6 weeks, though they’re usually gobbled up long before that. If you’ve canned them properly, they can last 9–12 months unopened. Once opened, store in the fridge and use within 1–2 months for best flavor and texture.
Keep an eye out for cloudiness, off smells, or changes in texture—these could mean spoilage. But don’t worry, with clean prep and proper storage, your pickled beets will stay fresh and delicious.
Tips and Tricks for the Best Pickled Beets
Flavor Variations
One of the best things about pickled beets is how easy they are to customize. Once you’ve mastered the basic recipe, it’s fun to get creative and experiment with different flavor profiles. Want something a bit more savory? Try adding:
- Fresh herbs like dill or thyme
- Crushed garlic cloves for an earthy bite
- Chili flakes or sliced jalapeños for a spicy kick
- Whole spices such as coriander seeds, star anise, or cinnamon for a more aromatic experience
You can even infuse the brine with citrus peel or use red wine vinegar for a more robust, deeper flavor. Mixing in other vegetables like carrots, pearl onions, or even slices of ginger can add both visual appeal and unique taste combinations.
Common Mistakes to Avoid
Even with a simple recipe like this, there are a few pitfalls to avoid:
- Skipping sterilization: Dirty or unsterilized jars can lead to spoilage or contamination. Always clean thoroughly.
- Uneven slicing: This affects how the beets absorb the brine. Stick with even cuts.
- Overcooking: Mushy beets don’t hold up well during pickling. Aim for tender, not soft.
- Not letting them rest: Pickled beets need at least 24 hours to develop their full flavor. The longer they sit, the better they taste.
Also, keep an eye on the vinegar-to-water ratio in your brine. Too little vinegar can make them unsafe for long-term storage, while too much might be overpowering. Stick with a well-balanced brine for the best results.
Serving Suggestions and Pairings
What to Serve With Pickled Beets
Pickled beets are as versatile as they are tasty. They bring a tangy, slightly sweet flavor that can elevate a wide range of dishes. Here are a few serving suggestions:
- Salads – Add to mixed greens with goat cheese, walnuts, and balsamic vinaigrette.
- Sandwiches and wraps – Slice thinly for a juicy, tangy crunch.
- Charcuterie boards – A colorful addition next to cheeses and cured meats.
- Burgers and sliders – They give an unexpected zing that pairs beautifully with grilled meats.
For something lighter, try adding pickled beets to a grain bowl with quinoa, roasted vegetables, and a tahini dressing. Their vibrant color also makes any dish instantly Instagram-worthy.
Creative Uses in Dishes
If you’re feeling a bit more adventurous, pickled beets can be used in:
- Tartines or open-faced toasts with ricotta and arugula
- Pasta salads for a sweet and tangy contrast
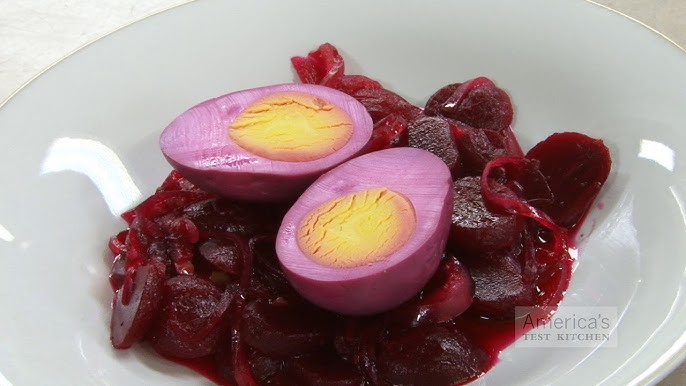
- Deviled eggs for a pop of color and flavor
- Soups and stews as a garnish or flavor booster
Their sweet-sour flavor also works well with creamy or fatty dishes—think creamy risottos, rich cheeses, or anything fried. The acidity helps cut through richness and balance the dish.
Health Benefits of Pickled Beets
Nutritional Value
Beets are a nutritional powerhouse. Even when pickled, they retain many of their health benefits. Here’s what you’re getting in every bite:
- Fiber – Good for digestion and keeping you full
- Folate – Essential for cell growth and regeneration
- Potassium – Helps regulate blood pressure
- Iron – Important for blood health
- Antioxidants – Especially betalains, which have anti-inflammatory properties
Pickling does add sugar and salt, so it’s best to enjoy them in moderation. But when you make them at home, you control how much of those extras go in.
Gut Health and Probiotics
If you go the traditional fermentation route instead of using vinegar brine, your beets can also offer probiotic benefits. Fermented pickled beets help support gut health by encouraging the growth of beneficial bacteria in your digestive system.
Even the vinegar-based version can aid digestion, thanks to the acetic acid content. This helps stimulate stomach acid, which can improve nutrient absorption and prevent bloating.
FAQs about Pickled Beet Recipe
Can You Use Canned Beets?
Yes, you can! If you’re short on time, canned beets are a convenient alternative. Just make sure to drain and rinse them before adding to the brine. They won’t have the same firm texture as fresh beets, but they’ll still soak up all that delicious flavor.
Do You Have to Refrigerate Pickled Beets?
If you don’t use a proper canning method, then yes—refrigeration is a must. Refrigerator pickles are quick and easy, but they need to be stored cold to stay safe. Canned and sealed jars can be stored at room temperature until opened.
Are Pickled Beets the Same as Fermented Beets?
Not quite. Pickled beets are preserved in a vinegar brine, while fermented beets are made using a natural fermentation process without vinegar. Both are tangy and tasty, but fermentation creates probiotics that are great for gut health.
How Soon Can You Eat Pickled Beets After Making Them?
They’re technically ready as soon as they cool, but for the best flavor, let them sit at least 24–48 hours. This gives the brine time to fully infuse the beets and bring out that sweet-tangy goodness.
Can You Reuse the Brine?
You can reuse the brine once to pickle another batch, but it may be less potent the second time around. Always boil it before reusing to kill any bacteria. Don’t reuse brine that’s been sitting too long or appears cloudy.
Conclusion
There you have it—your complete, step-by-step guide to making delicious, tangy, and vibrant pickled beets right at home. Whether you’re looking to preserve your garden harvest, spice up your meals, or just try something new, this recipe is a simple and satisfying way to get started. From choosing your ingredients to mastering the brine, every step is easy and rewarding. So roll up your sleeves, grab those jars, and get pickling!