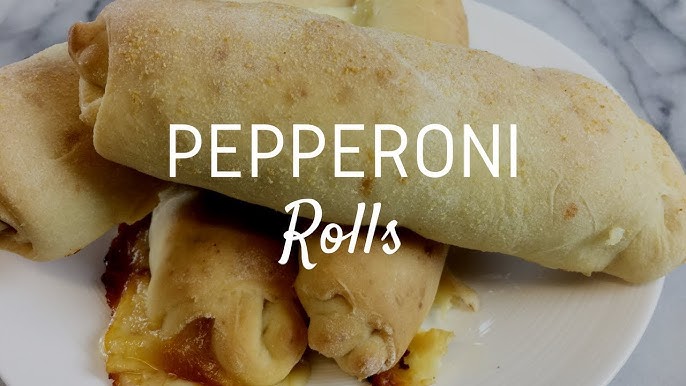
Pepperoni Roll Recipe: If there’s one comfort food that perfectly bridges Italian flavors with American convenience, it’s the pepperoni roll. Born in West Virginia, this simple yet satisfying snack has become a staple in lunchboxes, game-day spreads, and family dinner tables across the U.S. It’s essentially a soft bread roll filled with savory pepperoni—and sometimes cheese—baked to golden perfection. Think of it as a mini pizza wrapped in warm, fluffy dough. Sounds mouthwatering, doesn’t it?
Why You’ll Love This Recipe
You don’t need to be a master baker to whip up a batch of these beauties. This recipe is beginner-friendly, with a dough that’s forgiving and easy to handle. Plus, pepperoni rolls are highly customizable—add your favorite cheeses, try different meats, or throw in some veggies if you’re feeling fancy. Whether you’re planning a party, prepping for the week ahead, or just indulging in a late-night snack, these pepperoni rolls are about to become your new obsession.
Ingredients You’ll Need
For the Dough
You can opt for store-bought dough to save time, but homemade always brings a special touch. Here’s what you’ll need if you’re making your dough from scratch:
- 3 ½ cups all-purpose flour
- 1 packet (2 ¼ tsp) active dry yeast
- 1 cup warm water (about 110°F)
- 2 tablespoons olive oil
- 1 tablespoon sugar
- 1 teaspoon salt
This dough yields a soft, pillowy bread that crisps up perfectly on the outside while staying moist inside. Want a richer dough? Swap water for milk and throw in an egg yolk for extra tenderness.
For the Filling
The stars of the show:
- 1 to 2 cups sliced pepperoni (regular or turkey)
- 1 to 2 cups shredded mozzarella cheese (optional but recommended)
- Optional additions: parmesan, provolone, marinara for dipping
Go light for a snack or heavy for a meal—this is your roll, your rules.
Kitchen Tools Required
Essentials for a Smooth Baking Experience
Before diving into the process, make sure you have the right tools at hand. It will save you time and help you stay organized:
- Mixing bowls
- Measuring cups and spoons
- Stand mixer (optional, but helpful)
- Rolling pin
- Baking sheet
- Parchment paper or non-stick spray
- Kitchen towel or plastic wrap (for dough proofing)
- Sharp knife or dough cutter
If you’re using a stand mixer, use the dough hook attachment—it makes kneading a breeze. Otherwise, your hands are the best tools you’ve got!
Step-by-Step Instructions
Step 1 – Preparing the Dough
Start by activating your yeast. In a large mixing bowl, combine warm water, sugar, and yeast. Let it sit for about 5-10 minutes until frothy. This step ensures your yeast is alive and ready to work its magic.
Once the yeast is activated, add in the olive oil, salt, and half of the flour. Mix until combined, then slowly add the remaining flour. Knead the dough for about 8-10 minutes by hand or 5 minutes in a stand mixer until it’s smooth and elastic.
Form the dough into a ball, place it in a greased bowl, cover it with a towel or plastic wrap, and let it rise in a warm place for about 1 hour, or until doubled in size. This rising stage is where the magic happens—fluffy dough is key to a perfect roll.
Step 2 – Rolling Out and Layering
Once the dough has risen, punch it down gently to release the air. Turn it out onto a lightly floured surface and roll it into a large rectangle—about ¼ inch thick.
Now comes the fun part: layering. Evenly distribute your pepperoni slices across the dough, leaving a ½ inch border on all sides. Sprinkle your shredded mozzarella generously, or layer provolone slices for a gooier center. Want to get fancy? Add a sprinkle of Italian seasoning or garlic powder for a flavor boost.
Step 3 – Rolling and Sealing the Pepperoni Rolls
Starting from the long side, roll the dough tightly into a log, just like you would a jelly roll. Pinch the seam shut and turn the log seam-side down.
Using a sharp knife or dough cutter, slice the log into even rolls—each about 2 inches thick. You should get around 10-12 rolls depending on the size.
Place the rolls on a parchment-lined baking sheet, spacing them slightly apart. Cover with a kitchen towel and let them rest for 15-20 minutes while you preheat your oven to 375°F (190°C). This mini proofing session gives the dough a final rise, making your rolls extra soft and fluffy.
Step 4 – Baking the Rolls
Brush the tops of your rolls with a little olive oil or melted butter. This gives them that golden, glossy finish. Pop them into your preheated oven and bake for 18-22 minutes, or until the tops are golden brown and the cheese is bubbly and irresistible.
Let them cool for a few minutes before serving—they’ll be hot! Serve with warm marinara or garlic butter for dipping, and prepare to watch them disappear fast.
Tips for Perfect Pepperoni Rolls
There’s a fine line between “pretty good” and “wow, these are incredible” when it comes to baking. Here are some tips to make sure your pepperoni rolls land in that “wow” category every single time:
- Use fresh ingredients: Your dough will rise better, and your rolls will taste fresher. Old yeast or stale flour can ruin the texture.
- Don’t overfill: It’s tempting to pack in as much pepperoni and cheese as you can, but too much filling will cause the rolls to leak or burst during baking.
- Let the dough rise fully: Cutting the rising time short might save a few minutes, but you’ll pay for it in flavor and fluffiness. Give the dough time to double in size.
- Seal the rolls well: If you don’t pinch the seam tightly, they’ll unravel in the oven. Use a little water along the edge if needed for a tight seal.
- Rotate the pan mid-baking: Ovens have hot spots. Rotating the pan halfway through ensures an even golden-brown finish.
- Brush with butter after baking: This adds a rich flavor and makes the tops extra irresistible.
Stick with these tricks, and you’ll be churning out bakery-quality pepperoni rolls right from your kitchen.
Common Mistakes to Avoid
Even simple recipes have their pitfalls. Here’s what NOT to do when making pepperoni rolls:
- Skipping the yeast activation: If your yeast isn’t alive, your dough won’t rise. Always proof it in warm water with sugar to be sure.
- Using cold ingredients: Cold dough is hard to roll and won’t rise properly. Keep ingredients at room temperature.
- Overworking the dough: Too much kneading makes the dough tough. You want it soft and elastic, not rubbery.
- Crowding the pan: Pepperoni rolls need space to expand. If they’re too close, they’ll stick together and bake unevenly.
- Underbaking: Rolls that look done on top may still be doughy inside. Make sure the bottoms are golden and the centers are fully cooked.
- Not preheating the oven: A hot oven is essential for getting that perfect rise and color right off the bat.
Avoiding these common mistakes ensures your pepperoni rolls come out just the way they should—fluffy, cheesy, and utterly delicious.
Variations of the Classic Pepperoni Roll
The classic version is great, but there’s room to get creative! Here are some tasty variations you can try:
Cheesy Explosion
Add a mix of cheeses like cheddar, provolone, or pepper jack along with the mozzarella. You can even stuff a cube of mozzarella into the center of each roll for a melty core.
Meat Lover’s Dream
Throw in cooked bacon, sausage crumbles, or even salami slices along with the pepperoni. Each bite packs a meaty punch.
Veggie Delight
Add sautéed onions, bell peppers, mushrooms, or spinach to the filling. This balances the richness of the pepperoni and adds a pop of color and flavor.
Spicy Kick
Love heat? Add jalapeños, red pepper flakes, or a spicy hot sauce drizzle before rolling them up.
Sweet & Savory
A little honey or brown sugar mixed into the dough adds a subtle sweetness that contrasts beautifully with the salty pepperoni.
Feel free to experiment and make it your own. The possibilities are endless!
How to Store and Reheat Pepperoni Rolls
These rolls are excellent for make-ahead meals or leftovers. Here’s how to store and bring them back to life without losing quality.
Storage
- Room Temperature: Store in an airtight container for up to 2 days.
- Refrigerator: Wrap individually in foil or plastic wrap and refrigerate for up to 5 days.
- Freezer: Flash freeze them on a tray, then transfer to a freezer bag. They’ll keep for up to 3 months.
Reheating
- Microwave: Wrap in a damp paper towel and heat for 30–45 seconds.
- Oven: Reheat at 350°F (175°C) for 10–12 minutes for a crispy outside and warm center.
- Air Fryer: A quick 5–7 minutes at 350°F can revive that fresh-baked texture.
Pro tip: Brush with a little butter or oil before reheating for added moisture and flavor.
What to Serve with Pepperoni Rolls
Pepperoni rolls are pretty satisfying on their own, but if you’re planning a full meal or party platter, pairing them with the right sides and dips takes them to another level.
Dipping Sauces
- Marinara Sauce: A classic choice. Its tangy tomato base complements the rich pepperoni and cheese.
- Ranch Dressing: Adds a cool, creamy contrast to the warm, spicy filling.
- Garlic Butter: Perfect for brushing on top or dipping—rich and irresistible.
- Spicy Mustard or Aioli: Offers a zesty twist if you’re in the mood for something different.
Side Dishes
- Caesar Salad: Crisp, fresh, and the perfect counterbalance to the richness of the rolls.
- Pasta Salad: Serve cold pasta salad with olives, feta, and Italian dressing for a well-rounded meal.
- Roasted Vegetables: Great for adding some nutritious flair to your plate.
- Soup: Tomato basil, minestrone, or even creamy potato soup go perfectly with pepperoni rolls.
When serving at parties, lay out a platter with multiple dips and let guests mix and match. It’s always a crowd-pleaser.
Nutritional Information
Let’s talk numbers. While pepperoni rolls aren’t a health food by any means, knowing what you’re eating is always a good idea—especially if you’re watching calories or macros.
| Nutrient | Approximate Per Roll (with cheese) |
|---|---|
| Calories | 250–300 |
| Protein | 10–12g |
| Fat | 14–16g |
| Carbohydrates | 24–28g |
| Sodium | 500–600mg |
| Sugar | 1–2g |
Note: These numbers can vary depending on portion size, ingredients, and additional fillings. If you’re going for a lighter version, use turkey pepperoni, less cheese, and whole wheat flour.
FAQs about Pepperoni Roll Recipe
1. Can I make pepperoni rolls ahead of time?
Absolutely! They can be fully baked and frozen or kept in the fridge for up to 5 days. Just reheat before serving.
2. Can I use pre-made pizza dough?
Yes, store-bought dough is a time-saver and works well. Just let it rest at room temperature before rolling it out.
3. Are pepperoni rolls spicy?
Not really, unless you use spicy pepperoni or add hot sauce. They’re usually savory and slightly salty.
4. Can I make these vegetarian?
Of course! Replace the pepperoni with sautéed veggies, plant-based meat, or just extra cheese.
5. What’s the origin of the pepperoni roll?
It was invented in West Virginia, primarily as a portable lunch for coal miners. Over time, it evolved into a beloved snack and party food.
Conclusion
There you have it—a complete, step-by-step guide to making the ultimate pepperoni rolls. Whether you’re feeding a hungry crowd or simply treating yourself to a cheesy, savory snack, these rolls never disappoint. They’re easy to make, endlessly customizable, and downright addictive. Try them once, and you’ll be hooked.
If you’ve never made homemade dough before, don’t stress—this recipe is beginner-friendly and forgiving. And once you get the hang of it, you’ll want to try all the variations and make it your signature dish.
So roll up your sleeves, fire up that oven, and get ready to enjoy one of the most comforting, flavor-packed snacks around.