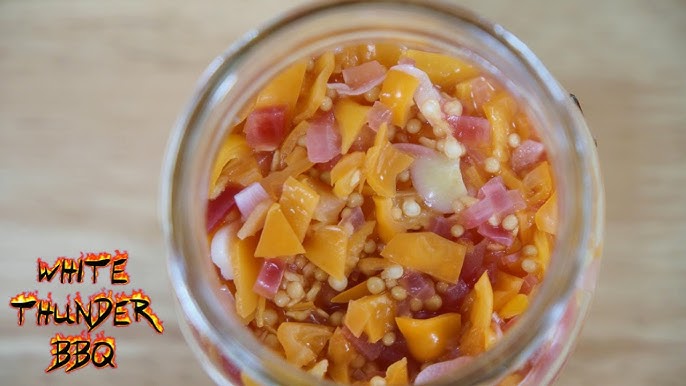
Pepper Relish Recipe: If you’ve ever tasted something sweet, spicy, and tangy all at once, there’s a good chance you’ve encountered the delightful world of pepper relish. This versatile condiment can transform sandwiches, burgers, grilled meats, or even a simple cracker with cheese into something extraordinary. Whether you prefer it mild or fiery hot, this homemade pepper relish recipe will soon become a staple in your fridge—or your pantry shelf.
You don’t need to be a pro chef to whip up a batch either. If you can chop, stir, and simmer, you’re all set. Making pepper relish is easy, affordable, and a fantastic way to use up extra peppers from your garden or grocery haul. Plus, the ability to customize it to your taste means you’ll never want to go back to store-bought versions again.
So, ready to level up your condiment game? Let’s dive right in.
Types of Pepper Relish
There’s no one-size-fits-all here—pepper relish comes in many forms depending on the peppers and flavors you love most.
Sweet Pepper Relish
This is your classic deli-style relish, usually made with bell peppers and sugar. It’s bright, mild, and perfect for hot dogs, burgers, or mixed into a tuna salad.
Hot Pepper Relish
If you’re into bold flavors and like a little heat, hot pepper relish made with jalapeños, serranos, or habaneros is for you. It brings a spicy punch and is amazing on grilled meats or added to marinades.
Mixed Pepper Relish
Want the best of both worlds? A blend of sweet and hot peppers makes for a dynamic relish that’s balanced in heat and sweetness. This is often the crowd-pleaser version and works for a variety of dishes.
Health Benefits of Peppers
Besides being delicious, peppers are also packed with nutrition.
- Vitamins Galore: Peppers are rich in Vitamin C, A, and several B vitamins, making them great for immune health and vision.
- Low in Calories: Perfect for those watching their calorie intake.
- Antioxidant-Rich: They contain powerful compounds like capsaicin (especially in hot peppers) and carotenoids, which have anti-inflammatory properties.
- Metabolism Boosting: Some studies suggest hot peppers can temporarily boost metabolism and help burn fat.
Making relish at home gives you full control over added sugar and sodium, keeping it healthier than store-bought versions.
Best Peppers to Use
Choosing the right pepper is the foundation of a good relish. Here’s a quick breakdown:
Bell Peppers
- Sweet, colorful, and juicy
- Adds body and natural sweetness
- Best for sweet or mild relishes
Jalapeños
- Medium heat level
- Adds a nice bite without overwhelming
- Great for hot and mixed relishes
Banana Peppers
- Mild and tangy
- Great for texture and color
- Ideal for people who like a little zing without too much heat
Other options: Fresno, Serrano, Habanero (use with caution), Poblano, or even Shishito peppers for mild heat lovers.
List of Ingredients You’ll Need
Let’s talk about the essential building blocks for a basic but customizable pepper relish recipe.
Fresh Ingredients:
- 4 cups finely chopped bell peppers (mix red, yellow, and green)
- 1–2 cups hot peppers (jalapeños, serranos, etc.)
- 1 medium onion, finely chopped
- 3 cloves garlic, minced
Pantry Staples:
- 1 ½ cups white vinegar (5% acidity)
- 1 cup granulated sugar (adjust to taste)
- 1 tablespoon salt
- 1 teaspoon mustard seeds
- ½ teaspoon celery seeds
Optional Add-ins:
- ½ cup grated carrot (adds sweetness)
- 1 tablespoon honey or brown sugar (for deeper sweetness)
- Chili flakes (for extra heat)
- Diced pineapple or mango (adds tropical twist)
Make sure to use fresh, firm peppers for the best texture and flavor.
Kitchen Tools You’ll Need
You don’t need anything fancy, but having the right tools makes the process smoother.
Basic Kitchen Utensils:
- Cutting board & sharp knife
- Large saucepan or Dutch oven
- Wooden spoon
- Measuring cups and spoons
For Canning (Optional):
- Sterilized jars with lids
- Jar funnel
- Tongs or jar lifter
- Water bath canner (for long-term shelf storage)
If you’re not canning, just a few clean jars with tight lids for fridge storage will do!
Preparation Tips Before You Begin
Before diving in, spend a few extra minutes prepping your ingredients properly. It makes a massive difference.
Cleaning Peppers:
- Rinse thoroughly under cold water
- Remove stems, seeds, and membranes
- For hot peppers, wear gloves to avoid skin irritation
Chopping Techniques:
- Dice the peppers finely for a smoother relish
- Use a food processor for faster prep (but don’t puree!)
- Keep onion pieces small so they cook evenly
Pro tip: Lay all your chopped ingredients on a towel for 5–10 minutes to absorb excess moisture—this helps your relish thicken faster during cooking.
Step-by-Step Guide to Making Pepper Relish
Let’s get to the heart of the process. Here’s how to make a flavor-packed pepper relish in just a few simple steps.
Step 1: Chop the Peppers
Use a sharp knife or food processor to finely dice all your peppers and onions. You want small, even pieces so they cook evenly and blend into a smooth relish.
Step 2: Combine and Cook
In a large saucepan, combine the chopped peppers, onions, garlic, vinegar, sugar, salt, and spices. Stir well to dissolve the sugar.
Bring the mixture to a gentle boil over medium-high heat. The kitchen will start to smell incredible—sharp, sweet, and tangy all at once.
Step 3: Simmer and Reduce
Lower the heat and let it simmer uncovered for 30–40 minutes. Stir occasionally. The mixture will reduce and thicken as the liquid evaporates and the flavors concentrate.
If the mix starts drying out too fast, you can add a splash of water or more vinegar.
Step 4: Taste and Adjust
Taste the relish. Want more tang? Add vinegar. Too sweet? Add a pinch of salt or chili flakes. Too spicy? A bit more sugar or a mild pepper can balance it out.
Step 5: Cool and Store
Once thickened and flavorful, remove from heat. Let it cool slightly before transferring to jars. Store in the refrigerator for up to 1 month—or proceed to canning for longer storage.
Canning Pepper Relish for Long-Term Storage
If you’re going to put in the effort to make this relish, why not preserve it for months to come? Canning is easier than it sounds, and it’s the best way to store relish safely at room temperature.
Sterilizing the Jars
Before filling your jars, make sure they’re properly sterilized:
- Wash jars and lids in hot, soapy water.
- Boil the jars in water for 10 minutes.
- Keep them warm until ready to fill.
This prevents bacteria from forming and ensures a tight seal.
Filling the Jars
- Use a jar funnel to carefully ladle hot relish into jars, leaving about ½ inch of headspace.
- Wipe the rims clean with a damp cloth.
- Place the lid on top and screw on the bands just until fingertip-tight.
Water Bath Processing
- Place filled jars in a boiling water bath canner.
- Make sure the water covers the jars by at least 1 inch.
- Boil for 10 minutes (adjust for altitude if needed).
- Remove and let cool completely.
You’ll hear a satisfying “pop” as the lids seal. Once sealed, the jars can be stored in a cool, dark place for up to a year.
Refrigerator vs Pantry Storage
So where should your relish live? Depends on how you made it.
Refrigerator Relish:
- Great for small batches
- Keeps for 3–4 weeks
- Must be stored in the fridge
Canned Relish (Pantry Storage):
- Shelf-stable for up to 1 year
- Must be canned properly
- Store in a cool, dark place
Once opened, even canned relish needs to go into the fridge and be consumed within a few weeks.
Ways to Customize Your Relish
Pepper relish is super versatile. Make it your own by experimenting with flavors.
Add Fruit:
- Pineapple for tropical sweetness
- Mango for a creamy texture and flavor
Spice It Up:
- Add more hot peppers or crushed red chili flakes
- Mix in a dash of smoked paprika for a smoky kick
Sweeten Naturally:
- Use honey or maple syrup for a more natural sweetness
- Try brown sugar for a deeper molasses note
You can also adjust the texture—make it chunkier or smoother depending on how you plan to use it.
Serving Suggestions
Once you’ve got your relish, the possibilities are endless. It’s like a secret weapon in your kitchen.
Use as a Topping:
- On hot dogs, burgers, or grilled sausages
- With scrambled eggs or omelets
- On baked potatoes or roasted veggies
Use as a Condiment:
- Mix into mayo for a spicy spread
- Add to sandwiches and wraps
- Stir into cream cheese for a dip
Use in Cooking:
- Spoon over grilled chicken or pork
- Stir into rice or grain bowls
- Add to pasta salads for a zesty boost
Pro tip: Mix a spoonful into vinaigrettes or marinades for extra flavor depth.
Common Mistakes to Avoid
Even simple recipes can go sideways if you’re not careful. Here’s what to watch out for:
1. Overcooking the Peppers
Cook too long and you’ll lose the texture. You want them soft but still slightly crisp.
2. Not Sterilizing Jars
If you skip proper sterilization, your relish could spoil. Even worse—it could grow harmful bacteria.
3. Using the Wrong Vinegar
Stick with white vinegar or apple cider vinegar that has 5% acidity. Other vinegars might not be acidic enough to safely preserve the relish.
Troubleshooting Your Relish
Something feel a little off? Don’t worry—there are quick fixes for most issues.
Too Watery?
- Simmer longer to reduce liquid
- Try draining excess moisture before cooking
Too Sweet?
- Add more vinegar or salt
- Mix in chopped green tomatoes or an extra onion
Too Spicy?
- Add more bell peppers to dilute
- Stir in a bit of sugar or fruit
Not Tangy Enough?
- Splash in more vinegar after cooking
- Lemon juice can help brighten it up too
Nutritional Information and Serving Size
Here’s a quick look at the nutritional profile of a typical sweet pepper relish:
| Nutrient | Amount per 2 tbsp serving |
|---|---|
| Calories | 30 |
| Carbohydrates | 7g |
| Sugar | 6g |
| Fat | 0g |
| Sodium | 150mg |
| Fiber | 1g |
| Vitamin C | 20% RDA |
Note: Values vary depending on ingredients and preparation method.
FAQs about Pepper Relish Recipe
1. Can I freeze pepper relish?
Yes! Let it cool completely, then store in airtight freezer-safe containers. It can be frozen for up to 6 months. Thaw in the fridge before using.
2. How long does homemade pepper relish last?
In the fridge, it lasts 3–4 weeks. Canned relish stored properly in a cool, dark place can last up to a year.
3. Can I use frozen peppers?
You can, but the texture may be softer. For best results, thaw and drain them well before using.
4. Is pepper relish keto-friendly?
Yes, with modifications! Use a sugar substitute like erythritol instead of sugar to keep it low-carb.
5. What’s the difference between relish and chutney?
Relish is usually more finely chopped and tangy, while chutney is thicker, more saucy, and often sweeter with added fruits and spices.
Conclusion
There’s something truly satisfying about creating your own condiments, and pepper relish might just be the most rewarding of them all. It’s colorful, packed with flavor, and endlessly versatile. Whether you’re into sweet, spicy, or somewhere in between, you can tailor this recipe to fit your taste perfectly.
Plus, once you learn how to make a batch, you’ll never have to buy another overpriced jar from the store again. It’s budget-friendly, easy to customize, and makes a fantastic gift for friends or family.
So grab some peppers, fire up the stove, and start cooking your way to relish perfection. Trust me—once you taste that homemade magic, you’ll wonder why you didn’t try it sooner.