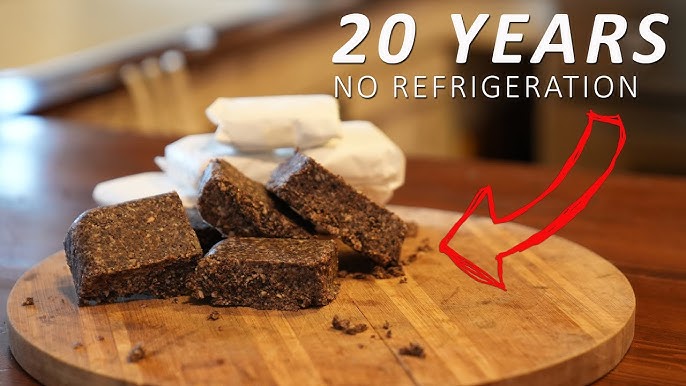
Pemmican Recipe: Pemmican is a high-energy, nutrient-dense food originally created by Indigenous peoples of North America. It combines lean dried meat, rendered fat, and sometimes berries into a compact, shelf-stable block. Its simplicity and durability made it a vital staple for nomadic tribes, fur traders, and early explorers. Unlike modern protein bars or processed survival food, pemmican is entirely natural and doesn’t require refrigeration, making it ideal for long journeys, survival situations, or even everyday snacking if you’re living off the grid or following a carnivore diet.
This food might not win beauty contests, but in terms of functionality, it’s unbeatable. Rich in protein and fat—two macronutrients essential for sustained energy—pemmican is a pure powerhouse. Think of it as nature’s original energy bar. And the best part? You only need three simple ingredients to make it at home.
Brief History and Cultural Significance
The word “pemmican” comes from the Cree word “pimi,” which means fat or grease. Native American tribes like the Cree, Ojibwa, and Métis perfected the recipe, which was later adopted by fur traders during the 18th and 19th centuries. Back then, pemmican wasn’t just food—it was currency, fuel for expansion, and sometimes even a lifesaver in brutal winters.
The Hudson’s Bay Company and North West Company relied heavily on pemmican to sustain long-distance voyageurs and explorers. It was lightweight, required no cooking, and could last for years when stored properly—exactly what these adventurers needed. Over time, pemmican faded from mainstream use but has seen a resurgence, particularly among preppers, survivalists, and health enthusiasts seeking nutrient-dense food with zero preservatives.
Why Pemmican is Still Relevant Today
Nutritional Value
Pemmican is an incredibly dense source of calories and nutrition. The traditional blend of lean meat and fat provides a perfect macronutrient balance for energy and endurance. A single serving can deliver 300-400 calories, primarily from healthy fats and complete protein—ideal for low-carb, paleo, keto, or carnivore diets.
The protein helps build and repair muscles, while the fat offers long-lasting energy. There’s virtually no sugar or carbs unless you decide to mix in dried fruits like cranberries or blueberries. Plus, if you make it yourself, there are no additives or preservatives—just real, whole food. It’s like jerky on steroids, but with more staying power.
Long Shelf Life and Portability
One of the biggest perks of pemmican is its long shelf life. When stored correctly in a cool, dry place, it can last several months—or even years—without refrigeration. That’s because the meat is fully dried and the fat acts as a natural sealant, keeping out air and moisture.
Its portability also makes it perfect for hikers, campers, soldiers, or anyone who needs a no-fuss, grab-and-go energy source. Whether you’re building an emergency food supply or just want a healthy snack that can survive your backpack for weeks, pemmican has your back.
Ingredients Needed for Traditional Pemmican
Selecting the Right Meat
The foundation of any great pemmican starts with lean, red meat. The best options include beef, bison, elk, deer, or moose—meats with low fat content that can be thoroughly dried. Avoid fatty cuts; fat can spoil over time and reduce shelf life. Think sirloin, round, or flank steak—something you’d use for jerky.
Before you begin, trim off all visible fat. Fat that’s not rendered into tallow can go rancid and ruin your entire batch. Once you’ve selected your meat, slice it into thin strips. The thinner the better—it speeds up the drying process and ensures an even texture.
Choosing the Fat (Tallow)
You’ll need rendered animal fat, also known as tallow, to bind your pemmican. Tallow is made by slowly melting down beef or bison fat and straining out impurities. It cools into a firm, butter-like consistency that’s perfect for preserving and adding moisture to dried meat.
Not all fats are equal here. Avoid lard or store-bought fats with additives. Instead, source fat directly from a butcher or use trimmings from your chosen meat. Once rendered, tallow becomes shelf-stable and acts as a protective layer, sealing the meat from air and bacteria.
Adding Optional Ingredients (Berries, Honey)
Traditional pemmican is just meat and fat, but many people like to jazz it up a bit. Dried berries like cranberries, blueberries, or cherries add a touch of sweetness and antioxidants. Some recipes even include a drizzle of honey for flavor and natural preservation.
If you’re going to add fruit, make sure it’s 100% dry—any residual moisture can introduce mold. Keep the fruit ratio low (about 10-15%) to maintain shelf life and avoid a sticky mess. Think of it as a flavor accent, not a primary ingredient.
Equipment You’ll Need
Essential Tools for Making Pemmican
To make pemmican properly, you’ll need a few basic tools. Here’s a quick checklist:
- Dehydrator or oven for drying meat
- Sharp knife or meat slicer
- Blender or food processor (for grinding)
- Pot or slow cooker (for rendering fat)
- Mixing bowl
- Loaf pan or silicone molds
- Airtight containers or vacuum seal bags
A dehydrator is ideal because it maintains a consistent low temperature, but an oven set on low (around 150°F or 65°C) can work too—just be sure to crack the door open to allow moisture to escape.
Safety and Sanitation Tips
Working with meat and fat means cleanliness is key. Wash your hands and tools thoroughly before and after use. Use clean cutting boards and avoid cross-contamination. Proper drying and fat rendering are essential to prevent spoilage. Any leftover moisture in your ingredients can be a breeding ground for bacteria.
Store your finished pemmican in a cool, dry place. If you’re planning on long-term storage, vacuum sealing is a smart move. It keeps out air, reduces moisture, and extends shelf life dramatically.
Step-by-Step Guide to Making Pemmican
Step 1: Preparing the Meat
Start by selecting high-quality, lean meat—beef, venison, or bison are top choices. Trim off every bit of visible fat to prevent spoilage later. Slice the meat into thin strips—ideally no thicker than ¼ inch. You want them to dry evenly and thoroughly, and thin slices help speed up the process.
If you’re using a meat slicer, it can save you a lot of time and give you consistent cuts. If not, a sharp kitchen knife works just fine. Lay out your slices on a clean tray or directly onto dehydrator racks. At this stage, you can season them lightly with salt if you want a touch of flavor, but avoid adding anything that retains moisture.
Consistency in thickness ensures uniform drying, which is crucial for the next step. The thinner and more uniform the slices, the less likely you are to end up with under-dried, spoil-prone meat.
Step 2: Drying the Meat
This is where the magic begins. Drying the meat properly is perhaps the most crucial step. Whether you use a dehydrator or an oven, you’ll want to set the temperature to around 150°F (65°C). This is hot enough to dry the meat without cooking it, which is exactly what you want.
Arrange the slices so they’re not touching—airflow is essential. If you’re using an oven, leave the door slightly ajar to let moisture escape. This process can take anywhere from 6 to 12 hours depending on thickness and humidity. You’ll know it’s done when the meat snaps crisply rather than bends.
Properly dried meat is lightweight, dark, and brittle. If there’s any give or moisture left, you need more time. Don’t rush this. Incomplete drying will compromise the shelf life of your pemmican and could lead to mold.
Step 3: Grinding the Meat
Once the meat is completely dried, the next step is grinding it into a fine powder. This might sound unusual, but pulverizing the dried meat increases surface area and makes it easier to mix evenly with the fat.
You can use a blender, food processor, or even a mortar and pestle if you’re going old-school. Pulse the dried meat until it becomes a fibrous, flaky powder. This is what forms the base of your pemmican, giving it that classic texture.
Some folks prefer a slightly coarser grind, while others like it almost powder-fine. There’s no right or wrong—just make sure the meat is fully dried and ground into small enough pieces to mix well with the tallow.
Step 4: Rendering the Fat
Rendering the fat into tallow is the trickiest step, but it’s also what gives pemmican its long shelf life. To start, chop your raw fat into small chunks and place them in a heavy-bottomed pot or slow cooker. Heat slowly over low heat, stirring occasionally to prevent burning.
As it melts, the fat will separate from the solid bits (called cracklings). Continue heating until the bubbling slows and the solids turn golden brown—this means the fat has fully rendered. Strain the liquid fat through cheesecloth or a fine sieve into a heat-safe bowl or jar.
Let it cool slightly but not solidify—you want it warm and pourable when mixing. Tallow should be clear, golden, and free of impurities. If stored properly in a sealed container, it can last for months at room temperature.
Step 5: Mixing Ingredients
This is where it all comes together. In a large bowl, combine your ground meat with enough warm tallow to coat everything evenly. The typical ratio is about 60% meat to 40% fat by weight, but you can adjust to your preference. Stir thoroughly to ensure every fiber of meat is coated.
If you’re adding dried berries or a touch of honey, now’s the time. Be cautious—too much sugar or moisture can shorten shelf life. Mix until the texture resembles a thick, pliable dough. It should hold its shape without crumbling or dripping fat.
Don’t be afraid to get hands-on here. Gloves can help if you’re worried about the mess. This stage is where you control the consistency and ensure every bite of pemmican has that rich, energy-packed blend.
Step 6: Molding and Storing
Spoon the mixture into molds, loaf pans, or simply shape into bars by hand. Press it down firmly to eliminate air pockets, which can lead to spoilage. Let it cool and solidify completely at room temperature or in the fridge.
Once firm, remove from the mold and wrap in wax paper, parchment, or vacuum seal. Store in a cool, dry place, preferably in an airtight container. Properly made pemmican can last up to a year without refrigeration—longer if frozen or vacuum-sealed.
Label your batches with dates, especially if you’re experimenting with ingredients. It’s also helpful to keep track of ratios for future tweaking.
Modern Twists on Traditional Pemmican
While the original pemmican was just meat and fat, today’s version allows for a bit of culinary creativity. Think of it as the DIY energy bar you can customize. Adding dried fruits like blueberries, cranberries, or cherries not only enhances the flavor but also adds a splash of color and a touch of natural sugar. Just remember to keep the fruit portion modest—no more than 10–15% of the total weight—to preserve the integrity and shelf life of the pemmican.
Another great modern twist is incorporating nuts or seeds. Chopped almonds, sunflower seeds, or chia seeds add texture, crunch, and even more nutrition. Want a sweet note? A spoonful of honey or maple syrup can work wonders—but again, use sparingly.
You can also experiment with spices. A pinch of cayenne, black pepper, garlic powder, or smoked paprika can turn basic pemmican into a savory gourmet snack. Just be mindful of how added spices might impact storage, especially if they introduce moisture.
These tweaks don’t just change the taste—they let you tailor your pemmican to your dietary needs or flavor preferences, whether you’re looking for more carbs, a spicy kick, or a sweeter bite.
Tips for Storing and Preserving Pemmican
Storage is key to getting the most out of your homemade pemmican. If done right, it can last several months—even years—without refrigeration. The trick lies in minimizing exposure to air, moisture, and light.
Here are some pro tips:
- Vacuum Seal It: Use a vacuum sealer to remove air and keep the pemmican shelf-stable longer. It’s one of the best ways to prevent spoilage.
- Cool, Dark Place: Keep your pemmican in a pantry, basement, or cupboard away from sunlight and heat.
- Freeze for Long-Term Storage: If you’ve made a large batch, freezing some of it can extend shelf life to multiple years. Just make sure to thaw it slowly to preserve texture.
- Label and Date: Always label your storage containers with the date you made the pemmican. This helps you rotate your stock and consume older batches first.
If you notice any changes in smell, taste, or texture—especially signs of mold or rancidity—it’s best to discard the batch. When made and stored correctly, however, pemmican can be one of the most reliable emergency or travel foods you’ll ever make.
How to Use Pemmican in Meals
Pemmican is versatile enough to eat straight out of the wrapper or incorporate into meals. Traditionally, it was consumed raw in bar form, especially when on the move. But there are more ways to enjoy it today:
- Eat as a Snack: Slice a chunk off and enjoy it on a hike, during a work break, or after a workout. It’s satisfying and curbs hunger fast.
- Add to Soups or Stews: Melt a bit into boiling water and add vegetables or grains for a quick, nourishing stew. The fat emulsifies into a rich broth.
- Fry with Eggs or Veggies: Use it like bacon bits—fry pieces in a pan and mix with eggs, greens, or root veggies for a high-fat, high-protein breakfast.
- Stuff into Wraps or Flatbreads: For a hearty meal, stuff pemmican into homemade flatbreads or wraps with some pickled veggies or sauce.
You can also crumble it into salads or mix with rice for a protein boost. Its rich flavor and fatty texture make it a unique and satisfying addition to any meal.
Common Mistakes to Avoid
Making pemmican seems simple, but there are common pitfalls that can ruin the batch if you’re not careful:
- Using Fatty Meat: Any remaining fat in the dried meat can spoil, especially if not rendered. Always trim fat thoroughly before drying.
- Not Drying Meat Enough: Slightly damp meat may seem fine at first but invites mold over time. The meat should snap, not bend.
- Inadequate Rendering: If you don’t fully render the fat, leftover impurities can go rancid. Take your time and strain well.
- Overloading with Extras: Adding too many fruits, nuts, or honey compromises shelf life. Stick to traditional ratios for storage reliability.
- Skipping Airtight Storage: Leaving pemmican exposed to air shortens its lifespan dramatically. Always seal it tightly.
- Poor Hygiene: Dirty tools or hands can introduce bacteria. Sanitize everything you use to prevent contamination.
Avoid these mistakes and your pemmican will reward you with months—or even years—of tasty, shelf-stable nutrition.
FAQs about Pemmican Recipe
1. Can I use pork or chicken to make pemmican?
No. Pork and chicken fats don’t render well and are more prone to spoilage. Stick with beef, bison, or game meats for safety and longevity.
2. Is pemmican suitable for vegetarians or vegans?
Traditional pemmican is meat-based, so it’s not vegetarian. However, you could try plant-based versions using nut butters and seeds, though shelf life will be shorter.
3. How long does pemmican last without refrigeration?
Properly made and stored pemmican can last 6–12 months without refrigeration and up to several years if vacuum sealed and frozen.
4. Can I use a microwave to melt the tallow?
It’s not recommended. Melting fat in a microwave can be uneven and unsafe. Use low heat on a stovetop or slow cooker instead.
5. What’s the best meat to use for pemmican?
Lean cuts like eye of round, sirloin, or flank steak are ideal. Bison and venison are traditional and also excellent choices.
Conclusion
Pemmican isn’t just a relic from history—it’s a timeless superfood that offers serious nutritional value with minimal ingredients. Whether you’re prepping for emergencies, hiking across mountains, or simply trying to eat cleaner, this old-school survival food still delivers in every way. With just lean meat, rendered fat, and optional fruit, you can make a meal that lasts for months, fuels your body, and fits into almost any diet.
It’s the ultimate DIY snack—simple, powerful, and time-tested. And once you’ve made it once, you’ll wonder why more people don’t.


