Pecan Praline Recipe: If you’ve ever tasted a rich, buttery pecan praline, you know just how heavenly these Southern treats can be. Making them at home might sound intimidating, but with the right guidance, you’ll be whipping up batches like a seasoned confectioner in no time. Whether you’re prepping for the holidays, craving a sweet snack, or making edible gifts, this guide breaks it all down—step by step.
What Are Pecan Pralines?
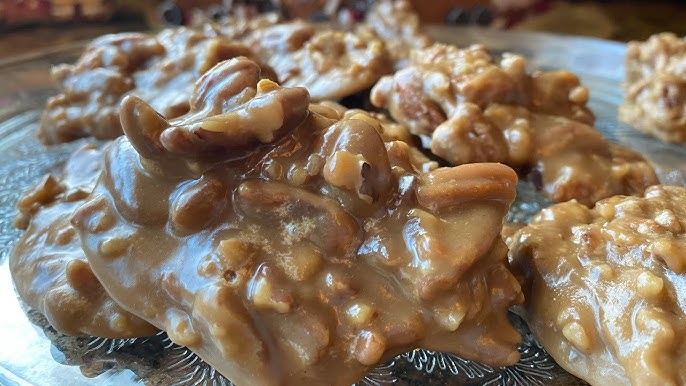
Pecan pralines are sugary, nutty candies that are a staple in the American South. At their core, they’re made by combining sugar, butter, cream, and pecans, resulting in a rich, melt-in-your-mouth confection. The texture lies somewhere between fudge and caramel—creamy yet firm, with a crunchy pecan punch.
Pralines are often mistaken for brittle or toffee, but they’re quite different. Brittle is hard and snappy, while pralines are soft and sugary. Think of them like a pecan pie in candy form. You don’t need a culinary degree to get them right; just a little patience, the right tools, and a bit of Southern charm.
The Origins of Pecan Pralines
These sweets have French roots. Originally known as “pralines” in France, the candy was made using almonds coated in caramelized sugar. When French settlers came to Louisiana, they adapted the recipe using the region’s abundant pecans and cream. Thus, the pecan praline was born—a Southern twist on a European classic.
Over the years, pecan pralines have become deeply embedded in Louisiana and Texan culture, particularly around Mardi Gras and the holidays. They’re often sold in gift shops and specialty stores, but making them from scratch gives you that authentic, homemade touch.
Ingredients You’ll Need
Basic Ingredients Breakdown
To make classic pecan pralines, you’ll need just a few staple items:
- 2 cups granulated sugar – the main sweetening agent.
- 1 cup brown sugar (light or dark) – adds depth and richness.
- 1 cup heavy cream or evaporated milk – creates the creamy texture.
- 4 tablespoons unsalted butter – gives that buttery, decadent finish.
- 2 cups pecan halves or chopped pecans – the star of the show.
- 1 teaspoon vanilla extract – enhances flavor.
Each ingredient plays a critical role. The combination of brown and white sugar creates a well-rounded sweetness. Butter adds a silky mouthfeel, while the cream thickens and smooths out the mixture. Pecans, of course, give it that crunch and nutty bite that pralines are known for.
Optional Additions for Flavor Twists
While the traditional recipe is amazing on its own, you can customize your pralines with optional ingredients for a unique twist:
- Pinch of salt – to balance the sweetness.
- Maple syrup or honey – for a deeper, earthy flavor.
- Cinnamon or nutmeg – for a hint of spice.
- Bourbon or rum – adds a boozy kick, great for grown-up treats.
- Dark chocolate drizzle – for extra indulgence.
Play around with these additions to find your signature flavor. Just be mindful of the quantities; too much liquid or spice can alter the texture.
Kitchen Tools and Equipment
Must-Have Tools
Before you begin, gather these essential tools:
- Heavy-bottomed saucepan (3-quart or larger) – prevents scorching.
- Candy thermometer – ensures you hit the right temperature.
- Wooden spoon or heat-resistant spatula – for stirring.
- Baking sheet lined with parchment paper – where the pralines will cool.
- Measuring cups and spoons – accuracy matters in candy making.
Precision is everything when making pralines. A heavy-bottomed pan distributes heat evenly, helping you avoid burning the sugar. The thermometer is crucial because pralines must reach the “soft ball stage” (around 235–240°F) to set properly.
Helpful Add-ons for Convenience
Though not essential, these tools can make life easier:
- Ice water bowl – to quickly test the candy’s readiness.
- Spoon rest – keeps sticky utensils off your counter.
- Cooling rack – helps air circulate under the parchment for faster cooling.
- Silicone baking mat – reusable and perfect for candy making.
Setting up your kitchen ahead of time saves stress and keeps you focused on the fun part—cooking! Trust us, you’ll want everything in place once the sugar starts bubbling.
Step-by-Step Instructions
Step 1: Prepping Your Workspace
Start by laying out all your ingredients and tools. Measure everything beforehand—yes, everything. Candy-making moves fast, and there’s no time to fumble with sugar or cream once the heat is on. Place parchment paper or a silicone mat on a flat baking sheet. This is where you’ll drop your pralines to cool.
Make sure your candy thermometer is calibrated and clean. Also, keep a damp cloth nearby for quick cleanups because sugar syrup is sticky business.
Step 2: Mixing the Ingredients
Now the fun begins! In your heavy-bottomed saucepan, combine the granulated sugar, brown sugar, cream (or evaporated milk), and butter. Set the heat to medium and stir gently but consistently. The goal is to dissolve the sugars evenly without scorching the bottom of the pan.
Once everything is well mixed, clip your candy thermometer onto the side of the saucepan. You want the tip submerged in the mixture but not touching the bottom—this gives the most accurate reading. Stir occasionally as the mixture heats up to prevent crystallization and burning.
As it begins to bubble, it’ll thicken and take on a rich, golden caramel hue. This is a good sign! But keep an eye on that thermometer. You’re aiming for the “soft ball stage,” which is between 235°F and 240°F. It can take about 10–15 minutes to reach this point, depending on your stove and the size of your batch.
Step 3: Cooking the Mixture to Perfection
Once you hit the target temperature, immediately remove the pan from the heat. Overcooking by even a few degrees can cause your pralines to become too hard or grainy, so act quickly but carefully.
Add the vanilla extract and chopped pecans to the hot mixture. Stir it in gently but thoroughly—this is where the candy starts to thicken up and become glossy. The aroma at this point is heavenly: nutty, buttery, and sweet.
Let the mixture sit for about 1 to 2 minutes, stirring occasionally to help it cool slightly. This cooling period is crucial. It allows the mixture to set just enough so that when you drop it onto the parchment, it holds its shape rather than running all over the place.
Step 4: Dropping the Pralines
Using a tablespoon or small scoop, quickly spoon dollops of the mixture onto your prepared baking sheet. Work fast—the mixture begins to harden as it cools. Aim for mounds about 2 to 3 inches wide. Don’t worry if they’re not perfect circles; part of their charm is in their rustic, handmade look.
If your mixture gets too hard to drop easily, place the pan back on low heat for a few seconds to soften it just enough to finish the batch. Be cautious though—you don’t want to bring it back to a full boil.
Let the pralines sit at room temperature to cool and set. This usually takes about 30 to 60 minutes. Once firm, they should peel off the parchment easily and have a glossy, slightly cracked surface.
Step 5: Cooling and Storing
Once your pralines are completely cooled and firm to the touch, it’s time to store—or eat! If you’re saving them for later (good luck with that), place them in an airtight container. Separate layers with wax paper to prevent sticking.
Stored properly, pralines can last up to two weeks at room temperature. Avoid humid environments, as moisture can ruin their texture. If you live in a particularly humid area, consider storing them in the refrigerator.
You can also freeze pralines for longer storage. Wrap them individually in plastic wrap, then store in a freezer bag or airtight container. They’ll keep for about 2 months in the freezer. Just thaw them at room temperature before serving.
Tips for Perfect Pecan Pralines
Common Mistakes and How to Avoid Them
Even seasoned cooks can mess up pralines. Here are some common pitfalls and how to steer clear:
- Overcooking the sugar: This results in hard, brittle pralines. Stick closely to the soft ball stage (235°F to 240°F).
- Under-cooking the sugar: Leads to runny or gooey pralines that never set. Always use a thermometer to be sure.
- Stirring too little or too much: Stirring is essential, but too much can introduce air and cause crystallization. A smooth, gentle stir is best.
- Skipping the cooling step before dropping: If the mixture is too hot when you drop it, it spreads too much and creates flat, sticky candies.
- Using wet utensils or pans: Water and candy-making don’t mix. Ensure all your tools are completely dry before you start.
Texture and Flavor Hacks
Want pralines that truly wow? Try these tips:
- Toast the pecans first: Toasted pecans add an extra depth of flavor. Just bake at 350°F for 5–7 minutes before using.
- Add a pinch of sea salt: It enhances the sweetness and balances the flavors.
- Use dark brown sugar: It contains more molasses, resulting in a richer, deeper flavor.
- Stir in crushed pretzels or bacon bits: For a sweet and savory twist.
Serving Suggestions
Perfect Pairings
Pecan pralines are delightful on their own, but pairing them with the right drinks or treats can elevate the experience. Here are a few serving ideas:
- Coffee or espresso: The bittersweet edge of coffee balances the pralines’ sweetness perfectly. Try serving them alongside a creamy cappuccino or dark roast for a café-style snack.
- Vanilla or butter pecan ice cream: Crumble pralines over a bowl of ice cream for a crunchy, nutty topping.
- Cheese platter addition: Believe it or not, pralines can be a fun addition to a savory cheese board. Pair them with aged cheddar, brie, or gouda for a sweet-savory contrast.
- Dessert table centerpiece: Stack pralines on a decorative plate and place them front and center at a party or holiday gathering.
Their versatility makes pralines great for everything from casual snacking to upscale entertaining. Plus, their rustic look and rich taste never fail to impress.
Gifting and Presentation Ideas
Looking to share the love? Pecan pralines make excellent gifts. Here’s how to present them like a pro:
- Wrap individually in wax paper: This keeps them from sticking and makes each one feel special.
- Place in decorative tins or mason jars: Add a ribbon or tag for that homemade charm.
- Use small bakery boxes with a clear window: Perfect for showcasing their texture and color.
- Add a recipe card: If you’re giving them to fellow bakers or candy lovers, include your recipe as a thoughtful touch.
Homemade pralines show you put time and care into your gift. Whether it’s for the holidays, a birthday, or a hostess gift, they’re a delicious and heartfelt option.
Storing and Shelf Life
How to Keep Them Fresh
Pecan pralines are best enjoyed fresh, but with proper storage, you can extend their shelf life without compromising texture or flavor.
- Room Temperature: Store in an airtight container at room temperature. Separate layers with wax or parchment paper to prevent sticking. Keep away from direct sunlight or heat.
- Refrigeration: Not ideal unless you live in a humid climate. If you must refrigerate, use an airtight container and allow the pralines to return to room temperature before eating.
- Avoid plastic bags: Unless they’re wrapped individually. Plastic bags can cause moisture buildup, which leads to stickiness and graininess.
Properly stored, pralines can last up to two weeks at room temperature and up to two months when frozen.
Can You Freeze Pralines?
Yes, freezing works surprisingly well—just take the right steps:
- Cool completely: Make sure pralines are fully cooled and set.
- Wrap individually: Use plastic wrap or wax paper to wrap each praline.
- Use a freezer-safe bag or container: Place wrapped pralines inside and seal tightly to prevent freezer burn.
- Label and date: They’re best consumed within 2 months.
- Thaw gently: Let them thaw at room temperature (don’t microwave), and they’ll be just as delicious as the day you made them.
Frozen pralines are a smart make-ahead treat for holidays or events, especially if you’re short on time closer to the big day.
FAQs about Pecan Praline Recipe
Why are my pralines grainy?
Graininess often happens when the sugar crystallizes during cooking. Stirring too much or cooking at the wrong temperature can cause this. Always use a candy thermometer and stir gently.
Can I make pralines without a candy thermometer?
Yes, but it’s riskier. Use the soft ball test—drop a bit of the mixture into cold water. If it forms a soft, pliable ball, it’s ready.
Are pralines gluten-free?
Yes! All the standard ingredients in pralines are naturally gluten-free. Just be sure to check labels if you’re adding extras like flavored extracts or drizzles.
What’s the best time of year to make pecan pralines?
Anytime! But they’re especially popular during the fall and winter holidays when warm, rich treats are most appreciated.
Can I use other nuts instead of pecans?
Absolutely. Walnuts, almonds, or cashews make excellent substitutions. Just ensure they’re toasted and chopped similarly to pecans.
Conclusion
Pecan pralines are more than just candy—they’re a Southern tradition, a homemade gift, and a bite-sized indulgence that warms the heart. With just a few simple ingredients, a bit of patience, and the steps we’ve laid out here, you can create a treat that looks gourmet and tastes like it came from your grandmother’s kitchen.
Whether you’re making them for a holiday party, to satisfy a sweet craving, or just to try something new, pecan pralines are always a good idea. Don’t be afraid to experiment with flavors and textures to make them your own. And once you master the basics, the possibilities are endless.


