Pecan Pie Bars Recipe: There’s something irresistibly comforting about pecan pie—gooey, rich, and full of warm nutty goodness. But when you turn that classic into handheld bars? You get a fuss-free version that’s just as delicious and incredibly convenient to serve. Pecan pie bars are the perfect solution when you’re craving something sweet, buttery, and nutty but don’t want to deal with pie crusts or fancy presentation. These bars deliver all the flavor of a traditional pecan pie but with half the effort and twice the portability.
Pecan pie bars are a hit during the holidays, especially Thanksgiving and Christmas, but they’re also fantastic year-round. Whether you’re baking for a potluck, a family gathering, or simply treating yourself on a cozy weekend, these treats are guaranteed to please. Plus, you can whip them up with pantry staples, which is always a win.
Difference Between Pecan Pie and Pecan Pie Bars
You might be wondering—aren’t pecan pie bars just pecan pie in a different shape? Sort of, but there are key differences. First off, the crust. While traditional pecan pie uses a flaky pie crust, pecan pie bars typically use a shortbread crust. It’s buttery, crumbly, and the perfect base to balance out the sticky filling.
Second, the texture of the filling can vary. Pecan pie bars often have a slightly firmer filling to make them easier to cut and handle. The richness is still there, but the consistency is just a touch denser. And lastly, serving is easier. No need to mess with slicing perfect wedges—just cut into squares or rectangles and serve. It’s pie, evolved!
Ingredients Needed
For the Crust
To make the foundation of your pecan pie bars—the buttery, melt-in-your-mouth shortbread crust—you’ll need:
- 1 cup unsalted butter, softened
- 2/3 cup granulated sugar
- 2 1/2 cups all-purpose flour
- 1/4 tsp salt
This crust is the secret weapon. It’s rich and simple, allowing the sweet, nutty topping to shine without overpowering it. It holds everything together while adding a touch of savory depth to each bite.
For the Filling
The pecan topping is where the magic really happens. For a sticky, sweet, and nut-packed layer, gather the following:
- 3 large eggs
- 1 cup light corn syrup
- 1 cup packed brown sugar
- 2 tbsp unsalted butter, melted
- 1 tsp pure vanilla extract
- 2 cups chopped pecans
This combination gives the classic gooey texture and rich flavor. The brown sugar adds a caramel note, while the vanilla rounds everything out. You can opt for dark corn syrup or a mix of honey and maple syrup if you prefer to avoid corn syrup altogether.
Optional Add-ins and Variations
Want to level up your pecan pie bars? Here are a few optional tweaks you can try:
- Chocolate chips – Sprinkle 1/2 cup on the crust before adding the filling.
- Bourbon – Add 1 tablespoon for a Southern twist.
- Coconut flakes – Mix in 1/4 cup for added texture.
- Sea salt – A light sprinkle on top post-baking enhances the flavor dramatically.
Feel free to experiment. Pecan pie bars are forgiving and fun to customize to your taste.
Equipment Required
Before you dive into baking, make sure you’ve got these essentials ready:
- 9×13 inch baking dish
- Mixing bowls (one large, one medium)
- Electric mixer or hand whisk
- Measuring cups and spoons
- Rubber spatula
- Parchment paper or non-stick spray
- Cooling rack
- Sharp knife for cutting
Having everything prepped and on hand will make the baking process smoother and more enjoyable. Clean counters and ready tools mean no scrambling midway through!
Step-by-Step Instructions
Step 1 – Preheat and Prepare Your Baking Dish
Start by preheating your oven to 350°F (175°C). This ensures even baking from the get-go. Next, line a 9×13-inch baking dish with parchment paper or lightly grease it with non-stick spray. If you use parchment, leave an overhang on the sides to lift the bars out easily once they’ve cooled. This step saves time and cleanup—and ensures your bars come out in one beautiful piece.
Now that your oven and pan are ready, it’s time to build the base.
Step 2 – Make the Buttery Shortbread Crust
The crust is the first component you’ll bake—and it’s what gives these bars their signature structure and richness. In a large bowl, combine 1 cup softened butter and 2/3 cup granulated sugar. Beat the mixture until it’s light and fluffy. This step ensures a tender, flaky bite and helps the crust hold together beautifully.
Once creamed, slowly add in 2 1/2 cups all-purpose flour and 1/4 teaspoon of salt. Mix until a crumbly dough forms. You don’t want to overmix here; stop once it resembles coarse crumbs. Pour the dough into your prepared baking dish and press it evenly into the bottom using clean hands or the back of a measuring cup. The key is evenness—no high spots, no holes. A flat surface bakes better and supports the filling evenly.
Bake the crust for 18–20 minutes, or until it’s just lightly golden. Don’t worry if it seems soft—it’ll firm up as it cools. Remove it from the oven and let it rest while you prepare the filling.
Step 3 – Prepare the Sweet and Nutty Pecan Filling
While the crust cools slightly, it’s time to whip up the star of the show—the luscious pecan topping. In a large bowl, whisk together 3 large eggs, 1 cup corn syrup, and 1 cup packed brown sugar until smooth. This combo gives you that classic, sticky-sweet filling everyone loves. For extra richness, stir in 2 tablespoons melted butter and 1 teaspoon vanilla extract.
Finally, fold in 2 cups of chopped pecans. Some people prefer whole pecans for presentation, but chopped pecans distribute better and make the bars easier to slice and eat. Make sure the nuts are fully coated in the sugary mixture—this ensures even distribution and flavor in every bite.
Want to jazz it up? At this stage, you could stir in chocolate chips, shredded coconut, or a splash of bourbon for a grown-up twist. But the classic version? Still unbeatable.
Step 4 – Assemble and Bake to Perfection
Pour the pecan filling over the warm crust. Use a spatula to spread it evenly from corner to corner. Make sure the nuts are distributed fairly across the surface so every square has the perfect balance of crunch and gooeyness.
Now it’s time to bake again. Slide the pan back into your 350°F oven and bake for 30–35 minutes, or until the filling is set and just slightly jiggles in the center. The edges should be golden, and the top should look shiny and slightly crackled.
Pro tip: Don’t overbake! If the filling gets too firm in the oven, your bars might turn out dry or crumbly. When in doubt, gently tap the pan—if the center barely jiggles, it’s done.
Remove the bars and place them on a wire rack. Let them cool completely in the pan before slicing. This part is crucial. If you try to cut them while warm, the filling will run, and you won’t get those clean, beautiful squares.
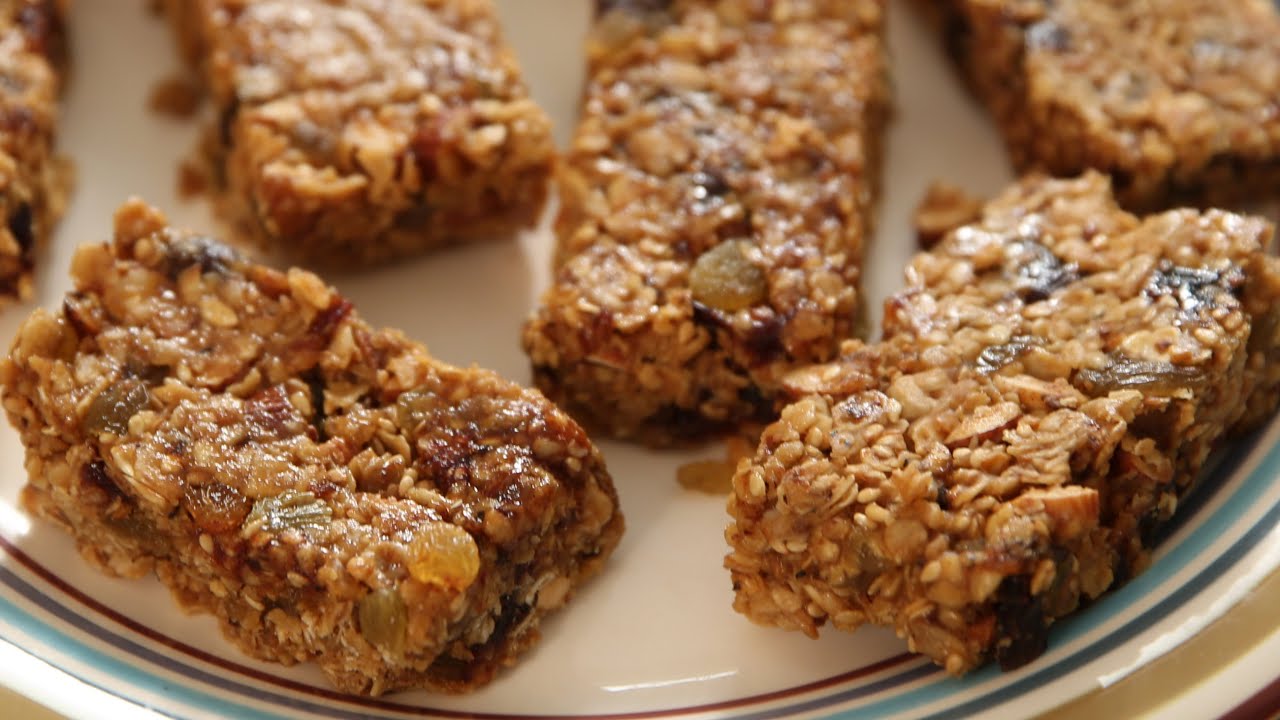
Step 5 – Cool, Slice, and Serve
Cooling is the hardest part—especially with that nutty, sugary aroma filling your kitchen. But patience pays off. Once the bars have cooled entirely, use the parchment overhang to lift them out of the dish and transfer them to a cutting board.
Grab a sharp knife and slice into squares or rectangles. Wipe the knife clean between cuts for the neatest results. You can serve these as-is or top them with a scoop of vanilla ice cream for an extra treat.
Perfect for parties, holidays, or a weekend indulgence, these pecan pie bars are buttery, crunchy, sweet, and seriously addictive. And because they hold up so well, you can make them a day in advance and store them for later.
Tips and Tricks for the Perfect Pecan Pie Bars
- Use room temperature eggs and butter – This helps everything blend more evenly and gives the bars a better texture.
- Toast the pecans first – A quick toast (5–7 minutes at 350°F) enhances their nutty flavor dramatically.
- Don’t overbake the filling – Slight jiggle in the center is good. Overbaking leads to a dry texture.
- Let them cool completely – For neat slices, patience is key. Cutting too early results in a gooey mess.
- Line the pan with parchment – Makes removal and cleanup a breeze.
Want extra crunch? Add a sprinkle of coarse sea salt to the top right after baking. The contrast between sweet and salty takes these bars to a whole new level.
Storage and Freezing Instructions
Pecan pie bars are not only delicious but also incredibly practical when it comes to storing and serving later. Whether you’re planning ahead for a big gathering or just trying to stretch out your sweet tooth satisfaction, here’s how to make the most of your batch.
Room Temperature Storage
If you plan to eat the bars within a couple of days, storing them at room temperature is totally fine. Just make sure to let them cool completely before packing them up. Place the bars in an airtight container with parchment paper between layers to prevent sticking. Keep them in a cool, dry place, and they’ll stay fresh for up to 3 days.
Refrigerator Storage
Want to extend their shelf life a little? Pop them in the fridge. Pecan pie bars keep well in the refrigerator for up to 7 days. Store them in an airtight container, and again, separate layers with parchment paper. You can enjoy them straight from the fridge or let them come to room temperature before serving. A quick 10-second zap in the microwave also works if you love them slightly warm.
Freezing Instructions
Yes, pecan pie bars freeze beautifully! This makes them a perfect make-ahead dessert. To freeze:
- Let the bars cool completely.
- Cut into individual squares.
- Wrap each bar tightly in plastic wrap or foil.
- Place the wrapped bars into a freezer-safe zip-top bag or airtight container.
Frozen bars will last up to 3 months. When you’re ready to enjoy them, simply thaw in the fridge overnight or at room temperature for a couple of hours. They’ll taste just as incredible as the day you baked them.
FAQs about Pecan Pie Bars Recipe
Can I use store-bought crust?
You can, but it’s not recommended. Store-bought crusts are often too thin or too crumbly to hold up to the rich pecan filling. The homemade shortbread crust in this recipe is simple and gives the bars the perfect texture.
How long do pecan pie bars last?
When stored properly in an airtight container at room temperature, they’ll last about 3 days. In the fridge, you can stretch that to 7 days. For long-term storage, freeze them for up to 3 months.
Can I freeze pecan pie bars?
Absolutely! These bars freeze really well. Wrap them individually and store in a freezer-safe bag. Thaw in the fridge or at room temp when you’re ready to serve.
What type of pecans should I use?
Use fresh, unsalted, chopped pecans. Toasting them beforehand brings out more flavor, but it’s optional. Avoid overly salty or seasoned nuts as they can overpower the sweetness.
How do I make these bars gluten-free?
Substitute the all-purpose flour in the crust with a 1:1 gluten-free flour blend that contains xanthan gum. Double-check that your corn syrup and vanilla extract are also gluten-free, and you’re good to go!
Conclusion
Pecan pie bars are everything you love about classic pecan pie—just in a more convenient, bite-sized package. From the buttery shortbread crust to the gooey, caramelized pecan topping, every bite is packed with rich, comforting flavor. They’re easy to make, easy to store, and even easier to devour. Whether you’re serving them at a holiday dinner, bringing them to a potluck, or sneaking one as a late-night snack, these bars are guaranteed to impress.
What makes them even better? You can make them ahead of time, customize them with your favorite mix-ins, and store them for later without losing any of that magical flavor. If you’ve never made pecan pie bars before, now’s the time to try. You might just find yourself skipping traditional pie altogether!