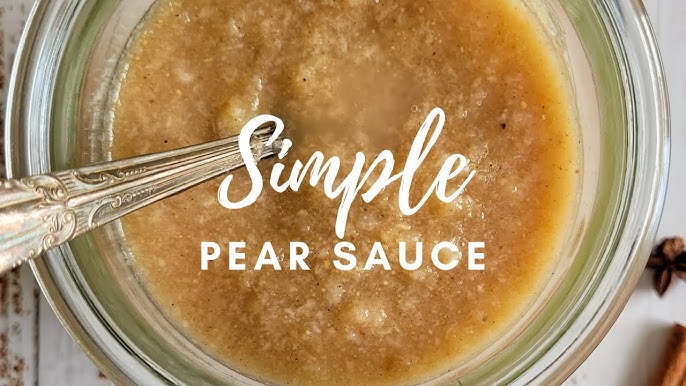
Pear Sauce Recipe: Pear sauce is one of those wholesome, old-fashioned treats that never really goes out of style. Think of it as applesauce’s slightly sweeter, silkier cousin.
Made by simmering down fresh pears into a smooth puree, this sauce is naturally sweet, mild in flavor, and packed with nutrients. Whether you’re looking for a healthy snack, a tasty side dish, or a way to use up a bumper crop of pears, this recipe is a total win.
In the steps below, I’ll walk you through everything from picking the best pears to storing your finished sauce for later. Get ready to fall in love with one of the simplest, tastiest things you can make in your kitchen.
Health Benefits of Pear Sauce
Beyond its cozy taste and comforting texture, pear sauce brings serious health perks to the table. Pears themselves are a nutrient-dense fruit loaded with fiber, antioxidants, and essential vitamins. When you simmer them down into a sauce without overloading it with added sugars, you preserve much of what makes pears so good for you.
First off, pears are a fantastic source of dietary fiber, especially soluble fiber, which helps support digestion and keeps you feeling full. That means pear sauce can be a satisfying snack without the sugar crash. Pears also contain vitamin C, an immune booster, along with potassium, which supports heart health.
There’s more: the natural antioxidants in pears—especially in the skin—may help reduce inflammation and oxidative stress. And if you’re trying to eat cleaner or stick to a low-calorie diet, pear sauce is a guilt-free way to satisfy your sweet tooth.
For little ones and older folks alike, the soft, easy-to-eat texture makes pear sauce ideal. It’s gentle on the stomach, soothing for sore throats, and naturally hydrating thanks to its high water content. Basically, pear sauce is comfort food with benefits.
Best Pears for Pear Sauce
Not all pears are created equal when it comes to making pear sauce. Some varieties cook down better than others, while some are sweeter or more tart, giving your sauce a different flavor profile.
Here are a few favorites:
- Bartlett Pears – Juicy, sweet, and quick to soften when cooked. A top pick.
- Anjou Pears – Firm, mildly sweet, and ideal if you like a thicker, chunkier sauce.
- Bosc Pears – A little more dense and aromatic, with hints of spice.
- Comice Pears – Incredibly sweet and soft, though sometimes hard to find.
When selecting pears, go for ripe but not overripe. They should give slightly when you press near the stem but shouldn’t feel mushy. Overripe pears can be overly watery or ferment too quickly once cooked.
Pro tip: mix a few varieties! It gives your sauce more depth and a fuller flavor.
Tools and Equipment You’ll Need
Before you start, make sure you have the right tools on hand. Nothing fancy, just some basics:
Must-Have Tools:
- Cutting board & knife – For peeling and chopping pears
- Peeler – Speeds up the prep
- Large saucepan or pot – Where the magic happens
- Blender or immersion blender – For pureeing to a silky finish
- Wooden spoon – For stirring without scratching your pan
Optional but Helpful:
- Food mill – For a rustic texture and skin-on sauce
- Slow cooker or Instant Pot – For hands-off cooking
- Jars or containers – To store your sauce
Having these on hand makes the whole process faster, smoother, and easier.
List of Ingredients You’ll Need
Here’s your base list. You can tweak it depending on your taste or dietary preferences.
Basic Ingredients:
- 8–10 ripe pears (about 3–4 lbs)
- 1/2 cup water (or apple juice for a sweeter kick)
- 1–2 tsp lemon juice (optional, helps preserve color)
Optional Add-ins:
- 1/2 tsp cinnamon
- 1/4 tsp nutmeg
- Pinch of ground cloves
- 1–2 tbsp maple syrup or honey (if you like it sweeter)
- Vanilla extract (for a hint of warmth)
That’s it. Simple, clean, and totally customizable.
Step-by-Step Guide to Making Pear Sauce
Let’s walk through this recipe step-by-step so you can nail it the first time.
Step 1: Wash and Prep the Pears
Start by rinsing your pears under cool water. Even if you’re peeling them, it’s good practice to wash off any dirt or pesticide residue. Dry them with a clean towel before peeling.
Step 2: Peel, Core, and Chop
Use a peeler to remove the skin (or leave it on for extra fiber and a rustic texture). Slice each pear in half, scoop out the core, and chop them into 1-inch pieces. Uniform size helps them cook evenly.
Step 3: Cook the Pears
Place chopped pears in a large pot. Add your water or juice. Bring it to a boil, then reduce heat and simmer uncovered for about 20–30 minutes, stirring occasionally. The pears should become soft and fragrant.
Step 4: Add Spices (Optional)
Once softened, stir in any spices you like—cinnamon, nutmeg, a touch of clove, or even vanilla. Let it simmer for another 5 minutes to let those flavors bloom.
Step 5: Puree to Desired Texture
Use an immersion blender right in the pot, or transfer the pears to a blender in batches. Blend until smooth, or pulse a few times if you like a chunkier texture. It’s your sauce—make it your way.
Step 6: Taste and Adjust
Now’s the time to taste. Need more sweetness? Add maple syrup or honey. Too thick? Add a splash more water. A bit too tart? Try a pinch of sugar.
Step 7: Cool and Store
Let your sauce cool for about 30 minutes before transferring it into jars or containers. Store in the fridge or freeze for later.
Stovetop vs. Slow Cooker vs. Instant Pot
When it comes to making pear sauce, you’ve got options. The stovetop method is the most traditional, but modern appliances like the slow cooker and Instant Pot can make things easier, especially if you’re multitasking or making a large batch.
Stovetop
- Pros: Quick, great control over texture and taste, no special tools required.
- Cons: Requires more hands-on time and stirring.
- Best for: Small to medium batches, when you’re ready to monitor the sauce.
Slow Cooker
- Pros: Hands-off cooking, allows for deeper flavor as it simmers longer.
- Cons: Takes several hours, and you may still need to blend the sauce after.
- Best for: Set-it-and-forget-it cooks, busy families.
Instant Pot
- Pros: Super fast, locks in flavor and nutrients with pressure cooking.
- Cons: Requires some learning curve, and natural release takes time.
- Best for: Busy people who want homemade sauce without spending a lot of time in the kitchen.
No matter which method you choose, the final result is delicious. It’s all about picking the one that fits your schedule and cooking style.
How to Customize Your Pear Sauce
One of the best parts about homemade pear sauce is how easy it is to customize. Think of it as a blank canvas—you can tweak the flavors, sweetness, and even the texture based on your preferences.
Flavor Add-Ins
- Cinnamon + Vanilla: A warm, cozy combo.
- Ginger + Lemon Zest: Bright and spicy.
- Cardamom + Clove: Exotic and aromatic.
- Apple-Pear Mix: Add chopped apples for a sweet-and-tangy twist.
Texture Choices
- Smooth: Blend it until silky. Great for babies or spreading on toast.
- Chunky: Pulse gently or mash with a fork for a rustic feel.
- Skin-On: If you like extra fiber and don’t mind the texture, leave the skins on!
Mix and match to create your signature sauce. Once you do, it’ll be hard to go back to store-bought!
Sweetened vs. Unsweetened Pear Sauce
Naturally, pears are sweet—especially ripe ones—so many people skip the sugar entirely. But sometimes, a little extra sweetness can enhance the flavor, especially if you’re using less ripe pears or mixing in tart fruits.
When to Add Sweeteners
- If the pears are under-ripe or tart
- When making dessert sauces or toppings
- If serving to someone with a major sweet tooth
Natural Sweeteners to Try
- Maple syrup
- Honey
- Coconut sugar
- Medjool dates (blend them in for natural sweetness)
Remember: start with a little, taste, and adjust. It’s easier to add more than to fix an overly sweet sauce.
Pear Sauce for Babies
Pear sauce is a gentle, naturally sweet food that’s perfect for babies starting solids. It’s easy to digest, soft in texture, and full of nutrients.
How to Make It Baby-Friendly
- Skip the sugar and salt—babies don’t need it.
- Go smooth: Use a blender or food processor to make it lump-free.
- Introduce spices slowly: If desired, try a dash of cinnamon, but avoid anything too strong at first.
- Use ripe pears: The riper the fruit, the easier it is on a baby’s tummy.
It’s best to consult your pediatrician, but generally, pear sauce is one of the safest and most loved starter foods for babies aged 6 months and up.
Ways to Use Pear Sauce
Think pear sauce is just for eating with a spoon? Think again. It’s incredibly versatile and can be used in sweet or savory dishes, snacks, or even as a baking ingredient.
Tasty Uses:
- As a side: Serve it with pork chops, chicken, or roast turkey.
- In baking: Use it in muffins, pancakes, or cakes instead of oil or butter.
- On breakfast foods: Swirl into oatmeal, yogurt, or spread on toast.
- For snacks: Dip graham crackers or drizzle over cottage cheese.
- In smoothies: Adds sweetness and creaminess without added sugar.
Once you start incorporating pear sauce into meals, it’ll quickly become a staple.
Storing and Freezing Pear Sauce
So you’ve made a big batch—awesome! Now let’s make sure you store it properly so it stays fresh and tasty.
Refrigerating:
- Let the sauce cool completely.
- Store in airtight jars or containers.
- Lasts about 7–10 days in the fridge.
Freezing:
- Pour sauce into freezer-safe containers, leaving about an inch at the top for expansion.
- You can also use silicone ice cube trays or freezer bags.
- Frozen pear sauce lasts up to 6 months.
To thaw, simply move the container to the fridge overnight or reheat gently on the stove. Always stir well after thawing to bring back that smooth texture.
How Long Does Pear Sauce Last?
The shelf life depends on how you store it. Here’s a quick breakdown:
| Storage Method | Duration |
|---|---|
| Refrigerator | 7–10 days |
| Freezer | Up to 6 months |
| Room Temp (Canned) | 12–18 months (sealed properly) |
Keep an eye out for changes in smell, color, or texture. If it smells sour or looks off, it’s time to toss it.
Troubleshooting Common Issues
Not every batch will be perfect. Here are a few problems you might run into—and how to fix them.
Too Thin?
- Simmer longer with the lid off to evaporate excess liquid.
- Stir in a mashed banana or applesauce to thicken naturally.
Too Thick?
- Add a splash of water, juice, or even a bit of milk for creaminess.
Too Bland?
- Boost with lemon juice, cinnamon, or a pinch of salt.
- Blend in another fruit like mango or berries for added flavor.
Off Color?
- Pears can brown easily. Add a touch of lemon juice during cooking to preserve a light, golden color.
FAQs about Pear Sauce Recipe
1. Can I leave the skin on when making pear sauce?
Yes! Leaving the skin on adds fiber and nutrients. If you blend it well, you likely won’t even notice the difference. Just make sure to wash the pears thoroughly.
2. Is pear sauce good for weight loss?
Absolutely. Pears are low in calories and high in fiber, making pear sauce a filling, low-calorie snack—especially when made without added sugars.
3. How do I can pear sauce for long-term storage?
To can pear sauce, you’ll need sterilized jars and a water bath canner. Process the jars in boiling water for about 20 minutes (adjust based on altitude). This can make them shelf-stable for up to 18 months.
4. What if I don’t have a blender?
No problem! Use a potato masher or food mill for a chunkier texture. It won’t be as smooth, but it’ll still taste amazing.
5. Can I mix other fruits with pears in the sauce?
Definitely. Apples, peaches, plums, and even berries pair wonderfully with pears. Just adjust the cooking time based on the fruit’s firmness and water content.
Conclusion
From start to finish, it’s simple: pick ripe pears, prep them, cook them down, and blend to your perfect texture. You can tweak the flavors with spices like cinnamon or ginger, keep it sugar-free or sweeten to taste, and store it easily for future use. And let’s not forget how many ways you can use it—in baking, cooking, or just by the spoonful.
This is the kind of recipe that becomes a staple. Once you try it and realize how much better homemade pear sauce tastes compared to store-bought, there’s no going back. It’s fresh, clean, and tailored exactly to your liking.
So next time you have extra pears on hand or want to try something new in the kitchen, remember this guide. Delicious, nutritious, and made with love—your homemade pear sauce is ready to shine!