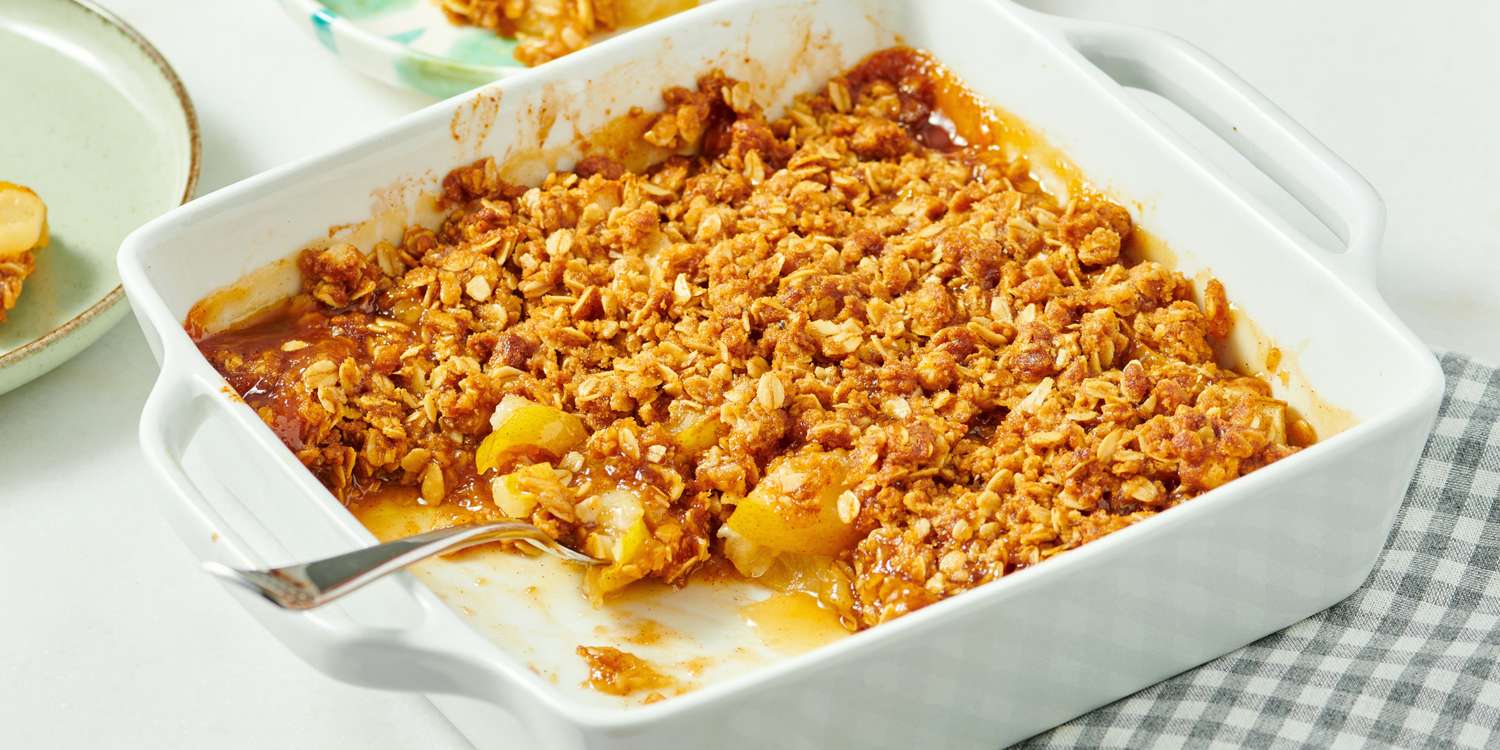
Pear Cobbler Recipe: There’s something deeply nostalgic and comforting about a warm pear cobbler straight from the oven. Maybe it’s the golden, buttery crust that gives way to syrupy-sweet fruit, or maybe it’s the smell of cinnamon and nutmeg wafting through the house. Either way, this classic dessert hits all the right notes—especially on a chilly evening. Whether you’re a seasoned baker or a total beginner, this easy pear cobbler recipe is here to guide you every step of the way. You don’t need fancy tools or hard-to-find ingredients—just ripe pears, pantry staples, and a love for good food.
Cobbler, unlike pies, is incredibly forgiving. You don’t have to roll out a crust or fuss with lattices. It’s more rustic, more relaxed, and arguably more satisfying. That’s what makes it the go-to dessert for both weeknight treats and holiday gatherings. This guide will show you not only how to make it but how to make it perfectly. Let’s get cozy and dive into the world of pear cobbler.
Benefits of Making Pear Cobbler at Home
Why not just buy it from the store or grab a premade mix? Because when you make pear cobbler at home, you’re in control—of the flavor, the sugar, the texture, and everything in between. Homemade pear cobbler allows you to adjust the sweetness depending on how ripe your fruit is, toss in your favorite spices, or even make it gluten-free or dairy-free if needed.
You also get to skip the preservatives and artificial ingredients found in boxed or frozen versions. The result? A fresher, more vibrant flavor that tastes like something your grandma made from scratch. Plus, baking cobbler can be a therapeutic, feel-good activity. The aroma alone is enough to lift your mood. Not to mention, it’s a budget-friendly way to use up fruit that’s just past its prime.
And let’s not forget—the compliments. Serve this at your next get-together, and you’ll be the hero of the night. People will ask for the recipe. They’ll go back for seconds. And you’ll feel a deep sense of accomplishment knowing you made that magic happen.
List of Ingredients You’ll Need
For the Pear Filling:
- 5 to 6 medium ripe pears (about 5 cups), peeled and sliced
- ½ cup granulated sugar
- 1 tablespoon lemon juice
- 1 teaspoon vanilla extract
- 1 teaspoon ground cinnamon
- ¼ teaspoon nutmeg
- 2 tablespoons all-purpose flour or cornstarch (to thicken)
For the Cobbler Topping:
- 1 cup all-purpose flour
- ½ cup granulated sugar
- 1 tablespoon baking powder
- ¼ teaspoon salt
- 1 teaspoon ground cinnamon (optional)
- ½ cup unsalted butter (1 stick), melted
- ¾ cup milk (any kind)
Optional Add-ins & Substitutes:
- Brown sugar instead of white for richer flavor
- Maple syrup or honey in place of some sugar
- Ground ginger or cardamom for a spicy twist
- Almond or oat milk for dairy-free option
- Gluten-free flour blend for a GF version
All ingredients should be at room temperature for best results. Fresh pears work best, but canned or frozen (thawed and drained) can be used in a pinch.
Equipment You’ll Need
To make this pear cobbler recipe seamless, it helps to have the right tools. Here’s what you’ll need:
- 9×9-inch or 8×8-inch baking dish (ceramic or glass preferred)
- Mixing bowls (one for filling, one for topping)
- Peeler and sharp knife
- Whisk or fork for mixing
- Measuring cups and spoons
- Spatula or wooden spoon
- Oven mitts
- Cooling rack
Optional but helpful:
- Pastry cutter (if using cold butter instead of melted)
- Microplane for zesting lemon or grating nutmeg
- Ice cream scoop for serving (because warm cobbler + ice cream = heaven)
Now that your kitchen’s prepped, it’s time to make magic…
Choosing the Right Pears
Not all pears are created equal, especially when it comes to baking. Some are too soft and will turn to mush, while others hold their shape beautifully. For cobbler, your best bets are:
- Bartlett: Juicy and aromatic. Great balance of sweet and tart.
- Bosc: Firm, crisp, and holds up well during baking.
- Anjou: Mild flavor and good texture for cooked desserts.
Make sure your pears are ripe but not overripe. You want them soft enough to slice easily but still with some structure. If your pears are rock hard, let them sit in a paper bag at room temp for 2–3 days to ripen.
Pro tip: A ripe pear will give slightly when pressed near the stem. If you’re unsure, cut one open—if it smells sweet and isn’t grainy, it’s good to go.
Peel the pears for the best texture. While the skin is edible, it can get tough during baking. Also, slice them uniformly to ensure even cooking—aim for ¼-inch thick slices.
Step-by-Step Guide to Making Pear Cobbler
Let’s roll up those sleeves! Here’s exactly how to make a homemade pear cobbler from start to finish.
Step 1: Preheat and Prep
Set your oven to 350°F (175°C). Lightly grease your baking dish with butter or non-stick spray.
Why it matters: Starting with a hot oven ensures the cobbler topping rises properly and gets beautifully golden.
Step 2: Make the Pear Filling
In a large mixing bowl, combine:
- Sliced pears
- Sugar
- Lemon juice
- Vanilla extract
- Spices (cinnamon and nutmeg)
- Flour or cornstarch
Gently toss until pears are evenly coated. Pour the mixture into the prepared baking dish and spread it out evenly.
Pro tip: If your pears are extra juicy, add an extra tablespoon of flour or cornstarch to avoid a runny filling.
Step 3: Prepare the Cobbler Topping
In another bowl, whisk together:
- Flour
- Sugar
- Baking powder
- Salt
- Cinnamon (if using)
Pour in the melted butter and milk. Stir until just combined. Don’t overmix—it’s okay if it’s a little lumpy.
The batter will be thick but pourable. If it feels too thick, add an extra splash of milk.
Step 4: Assemble the Cobbler
Drop spoonfuls of the batter over the pear filling. You don’t need to spread it—just let it naturally flow. It will rise and spread as it bakes, creating a rustic crust.
Optional: Sprinkle a little sugar and cinnamon on top for an extra-crispy golden finish.
Step 5: Bake to Golden Perfection
Place the dish in the oven and bake for 45–55 minutes, or until the topping is golden brown and a toothpick inserted in the center comes out clean.
You’ll know it’s done when:
- The filling is bubbling
- The top is set and golden
- The kitchen smells like a cozy hug
Let cool for at least 15 minutes before serving—this allows the juices to thicken and the flavors to meld.
Step 6: Serve and Enjoy!
Scoop into bowls while still warm. Top with vanilla ice cream, whipped cream, or a drizzle of caramel sauce.
Trust me, one bite and you’ll wonder why you haven’t made this sooner.
Secrets to a Perfect Cobbler Every Time
Making a cobbler might seem simple—and it is—but there are a few tricks that can take your dessert from good to unforgettable. First, don’t skimp on the butter. Butter is what gives the cobbler topping its rich, flaky texture. If you’re going dairy-free, go for a high-quality vegan butter, but don’t substitute with oils—they won’t give the same golden crust.
Next, balance is key. Pears are naturally sweet, so taste your fruit before adding sugar. If your pears are super ripe, cut back on the sugar a bit. On the flip side, if they’re still a little tart, add an extra spoonful. Spices also matter—cinnamon and nutmeg are classics, but adding a pinch of ground ginger or cardamom can add a warm, unexpected twist.
Make sure not to overmix your cobbler batter. A few lumps are totally fine—overmixing creates a dense, chewy topping rather than the light, fluffy one you want. And finally, let your cobbler rest after baking. This helps everything set and allows the flavors to really shine.
Want an extra pro tip? For added crunch and presentation, sprinkle coarse sugar over the topping just before baking. It creates a beautiful golden crust that crackles under your spoon.
Serving Suggestions
Now comes the fun part—eating it! Pear cobbler is incredibly versatile when it comes to how you serve it. The most classic pairing? A big scoop of vanilla ice cream on top of a warm cobbler. The cold and creamy ice cream melts into the warm filling, creating a contrast that’s hard to beat.
Not into ice cream? A dollop of homemade whipped cream does the trick just as well. Or go fancy with mascarpone or crème fraîche. Feeling extra indulgent? Drizzle some warm caramel sauce or a splash of bourbon glaze for a grown-up twist.
This dessert is great on its own but also works well with beverages. Try it with a hot cup of chai, mulled cider, or even a glass of dessert wine. Hosting a dinner party? Serve it in individual ramekins with a sprig of mint for an elegant touch.
And don’t forget—it’s just as good the next day. Pair it with your morning coffee or turn it into a sweet brunch side. There are no rules when it comes to enjoying this dish.
Make-Ahead Tips
Life’s busy—we get it. That’s why this recipe is super make-ahead friendly. You can prepare both the filling and the topping ahead of time, store them separately in the fridge, and then assemble and bake when you’re ready.
Here’s how:
- Filling: Make up to 24 hours in advance. Keep it covered in the fridge to prevent browning. If it releases too much liquid overnight, just stir in a teaspoon of extra flour before baking.
- Topping: Mix the dry ingredients and store them in a container. Add the wet ingredients just before baking, or mix the batter and refrigerate for up to 12 hours.
Want to freeze it? Assemble the entire cobbler, wrap it tightly, and freeze before baking. When ready, bake straight from the freezer—just add about 10–15 extra minutes to the baking time.
Leftovers reheat beautifully, making this an ideal dessert for meal prep or a spontaneous sweet tooth attack.
How to Store Leftovers
Let your cobbler cool completely before storing—this prevents condensation from making it soggy. Once cooled:
- Room Temp: Store covered for up to 1 day.
- Fridge: Store in an airtight container for up to 4 days.
- Freezer: Wrap tightly and freeze for up to 3 months.
To reheat, pop it in the oven at 350°F for 10–15 minutes to bring back that crisp top. For single servings, the microwave works too—just heat in 30-second intervals until warm.
Pro tip: Add a splash of milk or water before reheating to keep the filling moist.
Variations You’ll Love
Pear cobbler is a great base recipe, and the possibilities are endless when it comes to variations. Here are a few ideas to spice things up:
- Pear and Cranberry Cobbler: Add 1 cup of fresh or dried cranberries to the filling for a tart kick.
- Ginger-Pear Cobbler: Add 1 tablespoon of finely grated fresh ginger to the filling and a pinch of ground ginger to the topping.
- Pear and Apple Cobbler: Use a 50/50 mix of pears and apples for texture and flavor variety.
- Gluten-Free Pear Cobbler: Swap the flour for a 1:1 gluten-free baking blend. Works beautifully.
- Vegan Pear Cobbler: Use plant-based butter and non-dairy milk. It still bakes up tender and delicious.
You can also experiment with herbs like rosemary or thyme in the filling for a savory-sweet vibe. Or add chopped nuts like walnuts or pecans on top for crunch.
Common Mistakes to Avoid
Even a simple dessert like cobbler can go wrong if you’re not careful. Here are some common pitfalls to watch for:
- Using Overripe Pears: Mushy pears will make your filling watery and bland.
- Not Enough Thickener: Pears can release a lot of juice while baking. If you skip the flour or cornstarch, you’ll end up with soup, not cobbler.
- Overmixing the Batter: Leads to dense, rubbery topping.
- Underbaking: You need that golden-brown crust. If it looks pale, give it a few more minutes.
- Wrong Dish Size: Too big, and the topping spreads thin. Too small, and it overflows.
Take your time, taste as you go, and follow the steps closely. You’ll get it just right.
Nutritional Information (Approximate Per Serving)
Here’s a rough estimate for one serving (1/8th of the cobbler):
| Nutrient | Amount |
|---|---|
| Calories | 310 |
| Carbs | 48g |
| Sugars | 27g |
| Fat | 11g |
| Protein | 3g |
| Fiber | 3g |
Keep in mind these numbers can vary depending on ingredients and portion size. To lighten it up, use less sugar, opt for low-fat milk, or substitute half the butter with applesauce.
Why This Recipe Works
What makes this pear cobbler recipe so special? It hits all the right notes: it’s easy to make, incredibly flavorful, and practically foolproof. The combination of buttery crust and soft, cinnamon-kissed pears is the definition of comfort food.
This recipe has been tested, tweaked, and tasted multiple times to ensure it works—every single time. Whether you’re baking for a family dinner, a holiday feast, or just because, it’s a recipe you’ll come back to again and again.
It’s adaptable, affordable, and absolutely addicting. The sweet scent alone is enough to draw everyone into the kitchen. And when that golden crust cracks under your spoon? Pure magic.
FAQs about Pear Cobbler Recipe
1. Can I use canned pears instead of fresh?
Yes! Just make sure they’re well-drained. Reduce the sugar in the filling slightly since canned pears are usually packed in syrup.
2. What’s the best way to tell if the cobbler is done baking?
Look for a golden-brown top and bubbling fruit filling. A toothpick inserted into the topping should come out clean.
3. Can I make pear cobbler without cinnamon?
Of course! If you’re not a fan of cinnamon, try nutmeg, cardamom, or leave the spices out altogether for a more neutral flavor.
4. How do I make this cobbler more festive for the holidays?
Add cranberries, orange zest, or a splash of spiced rum to the filling. A streusel topping also adds a holiday twist.
5. Can I double this recipe for a crowd?
Absolutely! Just use a 9×13-inch baking dish and double all ingredients. Bake time may need an extra 5–10 minutes.
Conclusion
Pear cobbler is more than just a dessert—it’s a warm hug in a bowl, a celebration of fall flavors, and a reminder that the simplest recipes are often the most satisfying. Whether you’re craving a cozy weeknight treat or need a guaranteed crowd-pleaser for your next gathering, this pear cobbler recipe delivers. It’s easy, flexible, and irresistibly good. So grab those pears, fire up the oven, and let the magic begin.