Peanut Fudge Recipe: Who doesn’t love a rich, creamy, melt-in-your-mouth piece of peanut fudge? Whether you’re craving a sweet afternoon pick-me-up or need a no-fail dessert for your next gathering, peanut fudge is one of those timeless treats that hits the spot every single time. It’s the kind of recipe that reminds you of holidays, cozy kitchens, and warm memories with family.
But here’s the best part: making peanut fudge at home is surprisingly easy, and you don’t need to be a pastry chef to get it right. You just need the right ingredients, a few tips, and a little bit of patience. In this guide, we’re going to walk you through how to make the creamiest, richest peanut fudge step-by-step. Trust me, once you try it, you’ll never go back to store-bought fudge again!
Why You’ll Love This Peanut Fudge
There are plenty of desserts out there, but there’s something extra special about peanut fudge. First off, it only takes a handful of ingredients – most of which you probably already have in your pantry. It’s also super versatile. Want it sweeter? Add more sugar. Prefer a crunch? Toss in some chopped peanuts. Looking for a chocolate twist? Swirl in some melted chocolate.
Plus, this peanut fudge recipe doesn’t require a candy thermometer or any fancy techniques. That means even beginners can whip up a batch that tastes like it came straight from a gourmet candy shop.
Here’s why this recipe is a crowd favorite:
- Quick to make – Done in under 20 minutes (plus chilling time).
- No baking required – Just heat, stir, and chill.
- Customizable – Add chocolate, nuts, sea salt, or whatever you fancy.
- Perfect for gifting – Slice it up, wrap it pretty, and make someone’s day.
What is Peanut Fudge?
Peanut fudge is a type of candy that combines the creamy richness of peanut butter with the soft, dense texture of traditional fudge. It’s made by heating peanut butter, sugar, and a fat source (like butter), then allowing the mixture to set and firm up into squares or blocks.
Unlike chocolate fudge, which can be a bit finicky and often needs a candy thermometer, peanut fudge is much more forgiving. The key is balancing the sugar and fat to get that perfect, sliceable texture.
It’s sweet, nutty, and a little salty – a flavor combo that just works. Whether you’re making it for a holiday treat platter, giving it as a homemade gift, or just keeping a stash in the fridge for “emergencies,” peanut fudge never disappoints.
Types of Peanut Butter You Can Use
Creamy vs. Crunchy
You can’t go wrong with either one. Creamy peanut butter gives your fudge a smooth, silky texture. Crunchy, on the other hand, adds little bits of peanuts for that extra bite and texture. If you love a bit of crunch in your desserts, go for it. Just be sure to stick with a reliable brand that’s not too oily.
Natural vs. Processed
Natural peanut butter (the kind with just peanuts and salt) can work, but it may separate or give you an oilier texture. Processed peanut butter (like Jif or Skippy) is ideal for this recipe because it’s more stable and blends smoothly. If you’re set on using natural, make sure it’s well-stirred and not overly runny.
List of Ingredients You’ll Need
Basic Ingredients:
- 1 cup unsalted butter
- 1 cup peanut butter (creamy or crunchy)
- 1 tsp vanilla extract
- 1 tsp salt (optional, if using unsalted peanut butter)
- 3 ¾ cups powdered sugar
Optional Add-ins:
- ½ cup chopped peanuts – For added crunch.
- ½ cup mini chocolate chips – For a chocolate twist.
- Pinch of sea salt – Sprinkle on top for a sweet-salty finish.
- 1 tsp cocoa powder – Swirl into the mixture for a chocolate swirl.
- ½ tsp cinnamon or nutmeg – For a hint of spice.
Most of these ingredients are pantry staples, making this a fantastic last-minute dessert idea.
Kitchen Tools & Equipment
To make the process smooth and mess-free, gather the following:
- Medium saucepan
- Whisk or wooden spoon
- Measuring cups & spoons
- 8×8-inch baking dish or pan
- Parchment paper or foil
- Rubber spatula
- Knife for slicing
You don’t need any fancy mixers or thermometers. Just a stove and some stirring power!
Preparation Tips Before You Begin
Before you dive into melting and mixing, a few quick tips can help things go more smoothly:
- Line your pan first. Use parchment paper or foil, leaving some hanging over the sides for easy lifting later.
- Measure ingredients ahead of time. Once things get hot, you’ll need to move quickly.
- Use low to medium heat. High heat can scorch the peanut butter or make the mixture too grainy.
- Stir continuously. This helps prevent burning and keeps the texture creamy.
- Don’t overcook. Once everything is combined and smooth, take it off the heat.
Proper prep can make the difference between good fudge and perfect fudge.
Step-by-Step Guide to Making Peanut Fudge
Step 1: Gather All Ingredients
Begin by assembling everything you need: butter, creamy peanut butter, granulated sugar, milk, vanilla extract, and a pinch of salt. Having all ingredients measured and ready will make the process fast and smooth.
Step 2: Prepare the Pan
Line an 8×8-inch baking pan with parchment paper or lightly grease it with butter. Leave some parchment overhang so the fudge can be lifted out easily once set.
Step 3: Melt the Butter
In a medium saucepan, melt the butter over low to medium heat. Stir occasionally to prevent browning. Once melted, you’re ready for the next step.
Step 4: Add Peanut Butter
Add the creamy peanut butter to the melted butter. Stir continuously until the mixture becomes smooth and fully combined. This forms the rich base of the fudge.
Step 5: Add Sugar & Mix
Pour in the granulated sugar and a pinch of salt. Stir to incorporate completely. The sugar will melt and begin to dissolve as the mixture heats up.
Step 6: Boil the Mixture
Add milk and bring the mixture to a gentle boil. Continue boiling for 2–3 minutes while stirring constantly. This step helps the fudge set properly and gives it the right texture.
Step 7: Add Vanilla Extract
Remove the saucepan from heat and stir in the vanilla extract. This adds warmth and enhances the peanut flavor.
Step 8: Pour into Prepared Pan
Immediately pour the hot mixture into your prepared baking pan. Spread it evenly using a spatula. Work quickly, as fudge thickens fast.
Step 9: Chill and Set
Place the pan in the refrigerator for 2–3 hours, or until the fudge is firm and fully set. Chilling ensures clean slices and a smooth texture.
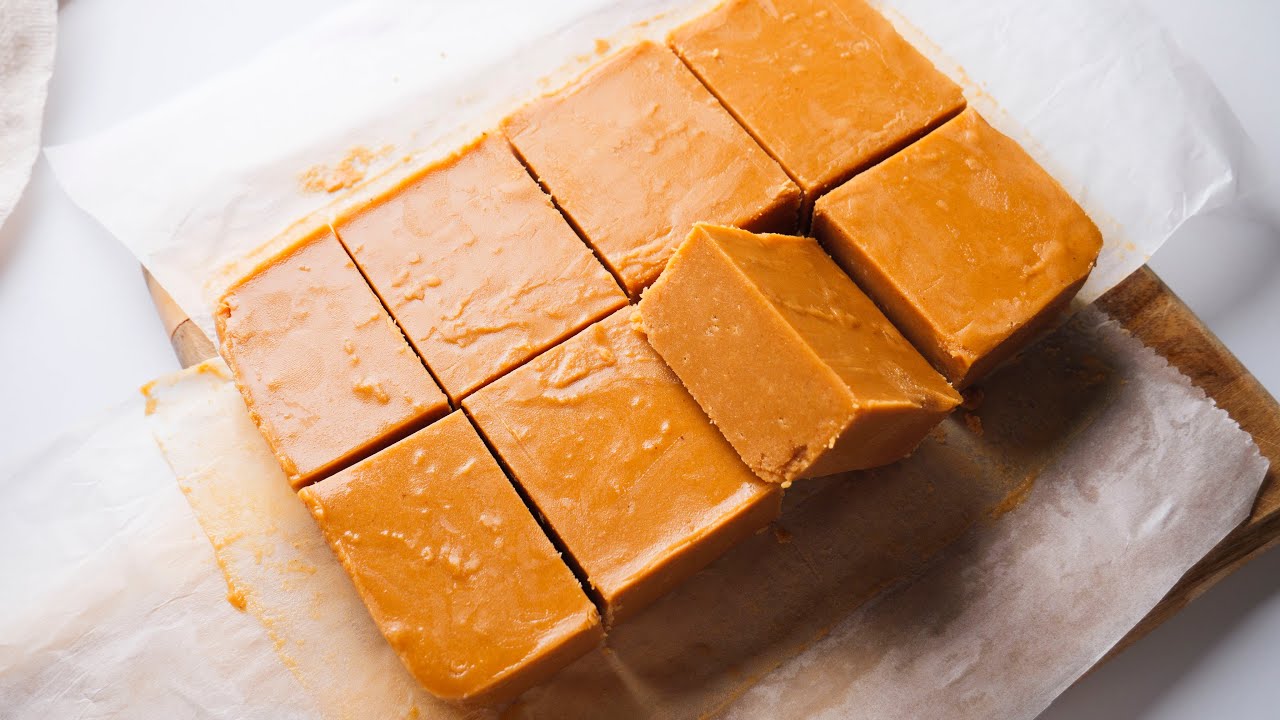
Step 10: Slice and Serve
Lift the fudge out of the pan, cut it into squares, and enjoy! Store leftovers in an airtight container.
Troubleshooting Common Fudge Issues
Even simple fudge recipes can go sideways sometimes. Let’s fix that.
Fudge Too Soft?
- You may not have added enough powdered sugar.
- The fudge didn’t set long enough—give it more chill time.
- Too much peanut butter or not enough heat could be the culprit.
Fudge Too Hard?
- It may have been overcooked or boiled for too long.
- Try letting it rest at room temperature for a few minutes before cutting.
Grainy Texture?
- Usually due to undissolved sugar or not stirring enough.
- Use powdered sugar, not granulated, for the smoothest finish.
- Stir constantly while heating the mixture.
Tips for Perfect Peanut Fudge Every Time
- Use quality peanut butter – The better the peanut butter, the better the flavor.
- Don’t skip the parchment – Makes removal and cleanup way easier.
- Keep an eye on heat – Medium to low heat is your friend.
- Customize it – Don’t be afraid to add nuts, spices, or chocolate.
- Chill completely – Give your fudge time to set; rushing ruins texture.
- Use a clean knife – Wipe between cuts for sharp, pretty pieces.
These tips will turn you into a peanut fudge pro in no time.
How to Store Peanut Fudge
Once your fudge is cooled and cut, you’ll want to keep it fresh:
- Refrigerator: Store in an airtight container with parchment paper between layers. Keeps for up to 2 weeks.
- Room Temp: If your house is cool, you can store it on the counter in a sealed container for about 5-7 days.
- Avoid Humidity: Moisture can cause the fudge to sweat and get sticky. A dry, cool place is ideal.
This recipe is also great for making ahead and storing for later snacking.
Freezing Peanut Fudge: Does It Work?
Yes, absolutely! Peanut fudge freezes like a dream.
Here’s how:
- Wrap pieces individually in plastic wrap or wax paper.
- Place in an airtight freezer-safe container or zip-top bag.
- Label it with the date.
It will keep in the freezer for up to 3 months. When you’re ready to enjoy, let it thaw in the fridge or at room temperature for a couple of hours. The texture remains surprisingly consistent even after freezing.
Creative Variations of Peanut Fudge
Chocolate Swirl Peanut Fudge
Melt ½ cup of chocolate chips, and swirl them into the top of the fudge just before chilling. You get a beautiful marbled look and a chocolatey surprise in every bite.
Nutty Peanut Fudge
Add chopped almonds, walnuts, or pecans for texture. Toast them lightly before adding for an even richer taste.
Vegan Peanut Fudge
Substitute:
- Vegan butter or coconut oil instead of dairy butter
- Plant-based powdered sugar
- Natural peanut butter with no added milk solids
Still creamy, still dreamy – no animals harmed!
Is Peanut Fudge Healthy?
Well… fudge is a treat. It’s not exactly a health food, but that doesn’t mean you can’t enjoy it mindfully.
Nutritional Breakdown (per square, approx):
- Calories: 150-180
- Sugar: 15-20g
- Fat: 8-10g
- Protein: 2-3g
Healthier Substitutes:
- Use natural peanut butter to cut added sugar.
- Swap powdered sugar with monk fruit or stevia blends.
- Use coconut oil instead of butter for a healthier fat.
Small tweaks can turn this indulgence into something you can feel a little better about.
Peanut Fudge for Gifting
Want to really impress someone? Wrap up a few squares of peanut fudge in a cute box or tin, and you’ve got a homemade gift from the heart.
Add a hand-written tag, or layer it with parchment and ribbon. This fudge makes a perfect:
- Holiday treat
- Teacher gift
- Hostess thank-you
- DIY party favor
Who wouldn’t love a little package of peanutty perfection?
FAQs about Peanut Fudge Recipe
Can I use almond butter instead?
Yes! Almond butter works great as a substitute, but the flavor will be slightly milder and nuttier.
How long does peanut fudge last?
Stored in the fridge, it lasts up to 2 weeks. In the freezer, up to 3 months.
Can I double the recipe?
Absolutely. Just use a larger pan (like 9×13″) and make sure to evenly spread the mixture.
What if I don’t have vanilla extract?
You can skip it or substitute with a drop of maple syrup or almond extract for a twist.
Can I make this in the microwave?
Yes! Melt the butter and peanut butter together in a microwave-safe bowl, stir in the sugar and vanilla, and pour into a pan to chill. Super quick and easy.
Conclusion
Peanut fudge is one of those timeless recipes that brings comfort, joy, and a whole lot of deliciousness with every bite. It’s ridiculously easy to make, completely customizable, and never fails to satisfy that sweet tooth. Whether you’re making it for yourself, sharing it with friends, or wrapping it up as a homemade gift, peanut fudge always delivers.
So, what are you waiting for? Grab those ingredients, clear off a bit of counter space, and start stirring up some magic. Trust me—once you taste homemade peanut fudge, there’s no turning back.