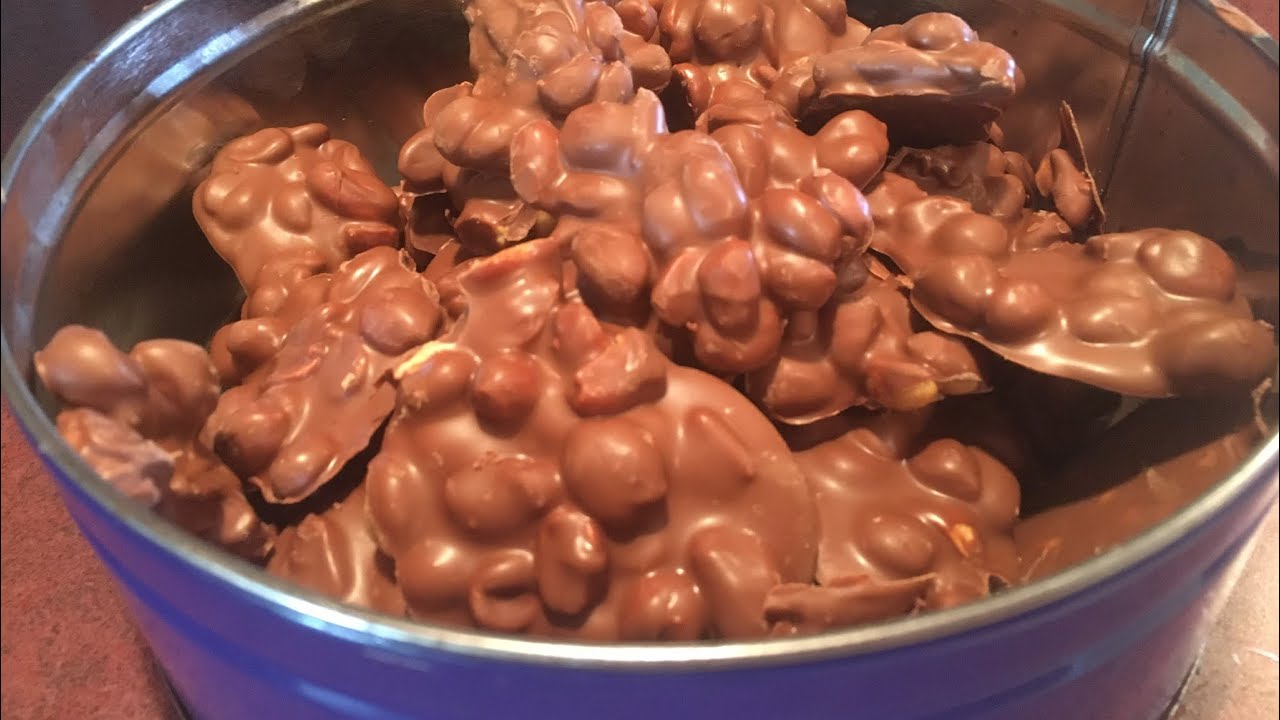
Peanut Clusters Recipe: Peanut clusters are the ultimate sweet-and-salty treat—crunchy roasted peanuts coated in a smooth, rich layer of melted chocolate. These bite-sized goodies are perfect for holiday parties, homemade gifts, or simply satisfying your sweet tooth. With just a few ingredients and minimal effort, you can whip up a batch of peanut clusters that taste like they came straight from a candy shop. The beauty of peanut clusters lies in their simplicity. They’re quick to make, require no baking, and can be customized with various ingredients to suit your taste.
Why Peanut Clusters Are So Popular?
Why do people go nuts over peanut clusters? Well, they offer that magical balance of crunchy, creamy, salty, and sweet. They’re a classic homemade candy that has stood the test of time. Kids love them, adults crave them, and they make an easy crowd-pleaser at any event. They’re also highly versatile—you can make them with milk, dark, or white chocolate, and throw in extra goodies like sea salt, dried fruit, or even a touch of spice for some heat. Not only do they taste incredible, but they’re also ridiculously easy to make, even for a total beginner in the kitchen.
Essential Ingredients for Peanut Clusters
Choosing the Right Chocolate
The quality of your chocolate makes a huge difference in the final product. You can use chocolate chips, chocolate bars, or melting wafers. Semi-sweet chocolate offers a classic balance, while dark chocolate provides a rich and slightly bitter depth. Milk chocolate delivers extra sweetness, perfect for those with a serious sweet tooth. If you’re a fan of white chocolate, that’s another excellent option—but make sure it’s real white chocolate made with cocoa butter, not just sugar and oil.
Some of the best chocolates for melting include:
- Ghirardelli melting wafers
- Baker’s chocolate bars
- Nestle or Hershey’s chocolate chips (for convenience)
Pro tip: Avoid using candy coating or chocolate bark unless you’re making large batches for events. While they melt well, they often lack the rich flavor of real chocolate.
Types of Peanuts to Use
The star of the show is, of course, the peanuts. Roasted and salted peanuts are the go-to choice because they add a savory crunch and contrast beautifully with the sweetness of the chocolate. If you’re watching your sodium intake, opt for unsalted peanuts or use a mix. Avoid raw peanuts unless you plan to roast them yourself—they’ll lack the crunch and flavor needed for that classic cluster taste.
Here are your main options:
- Dry-roasted salted peanuts (most common)
- Honey-roasted peanuts (for a touch of sweetness)
- Unsalted roasted peanuts (healthier option)
Optional Add-ins for Extra Flavor
Want to spice things up? Peanut clusters are super customizable. You can add all sorts of mix-ins to tailor them to your taste buds or the occasion:
- Mini marshmallows
- Crushed pretzels
- Toffee bits
- Dried cranberries or cherries
- Sea salt flakes on top
Just be careful not to overload your clusters. The goal is to complement the peanuts and chocolate, not overshadow them.
Tools and Equipment You’ll Need
Kitchen Tools Checklist
Before you dive into making peanut clusters, make sure you have the right tools on hand. The process is simple, but a few key items will make it smooth and mess-free:
- Microwave-safe bowl or double boiler – for melting the chocolate
- Rubber spatula or wooden spoon – for mixing
- Baking sheet – for laying out the clusters
- Parchment paper or silicone mat – to prevent sticking
- Cookie scoop or tablespoon – to portion the clusters evenly
- Airtight container – for storing the finished product
That’s it! No fancy kitchen gadgets needed. The simplicity is part of what makes this recipe so approachable.
Step-by-Step Guide to Making Peanut Clusters
Step 1: Preparing the Ingredients
Gather your ingredients and measure everything out before you start. This is known as mise en place, and it ensures you don’t scramble for things mid-process. Measure out your peanuts and chocolate, and prep any add-ins you’re including. If you’re using chocolate bars, chop them into small, uniform pieces so they melt evenly.
Step 2: Melting the Chocolate
You can melt chocolate using two main methods:
- Microwave method: Place chocolate in a microwave-safe bowl. Heat in 30-second intervals, stirring between each session until smooth.
- Double boiler method: Fill a pot with a couple of inches of water and bring to a simmer. Place a heatproof bowl on top (but not touching the water), and stir the chocolate until melted.
Avoid overheating the chocolate—it can seize and turn grainy. Stir gently and patiently until it’s silky smooth.
Step 3: Mixing Peanuts and Chocolate
Once your chocolate is fully melted, add the peanuts. Stir until every nut is completely coated. If you’re adding extras like marshmallows or dried fruit, toss them in now and gently fold everything together.
Want an even coating on all your clusters? Be thorough but gentle—you don’t want to break the peanuts.
Step 4: Portioning the Clusters
Line your baking sheet with parchment paper. Use a cookie scoop or tablespoon to drop spoonfuls of the chocolate-peanut mixture onto the sheet. Aim for small mounds—you want bite-sized treats that are easy to eat.
Make sure there’s a bit of space between each cluster to prevent them from sticking together.
Step 5: Cooling and Hardening
Now comes the hardest part: waiting! Let the clusters cool at room temperature for a few hours until they harden completely. If you’re short on time, pop them in the fridge for 20-30 minutes.
Once hardened, transfer the clusters to an airtight container. They’re ready to enjoy!
Tips and Tricks for Perfect Peanut Clusters
Getting the Right Texture
Texture is everything when it comes to peanut clusters. The ideal cluster should have a satisfying crunch from the peanuts balanced by a smooth and creamy chocolate coating. Achieving this harmony comes down to two main factors: your ingredients and your technique.
First, always use fresh, crunchy roasted peanuts. If they’ve been sitting in the pantry for too long, they might have gone soft or lost their flavor. Freshly roasted nuts offer that snap and nuttiness you need.
Next, don’t skimp on the chocolate quality. Low-grade chocolate tends to be waxy and doesn’t melt well. You want a glossy, rich melt that envelops each peanut and clings tightly as it sets.
Another trick? Use a cooling rack underneath your parchment paper if you’re refrigerating. This allows for better air circulation, helping the chocolate set more evenly and preventing soggy bottoms.
Lastly, try to keep your portions consistent. Using a cookie scoop ensures each cluster is the same size, which means even cooling and more professional-looking results.
Preventing Chocolate Bloom
Ever noticed white streaks or spots on your chocolate after it hardens? That’s called chocolate bloom. While it’s safe to eat, it doesn’t look great—especially if you’re planning to gift your clusters.
Bloom usually happens when the chocolate is cooled too slowly or exposed to moisture or heat fluctuations. To avoid this:
- Don’t touch the clusters with wet hands or utensils.
- Store them in a cool, dry place away from sunlight.
- Avoid refrigerating unless necessary. If you must, seal them tightly to prevent condensation.
Tempering the chocolate (melting it slowly and bringing it to the right temperature) is another way to reduce blooming. It’s not essential for homemade clusters but a good step if you’re making large batches for gifting or sale.
Creative Variations of Peanut Clusters
White Chocolate Peanut Clusters
White chocolate fans, this one’s for you. Swap out the regular chocolate for a high-quality white chocolate (look for cocoa butter on the ingredients list). White chocolate pairs especially well with:
- Dried cranberries or cherries for a tart contrast
- Crushed peppermint for a festive holiday twist
- Coconut flakes for a tropical vibe
Just remember, white chocolate is sweeter than dark or milk, so balance it out with salted peanuts or a sprinkle of sea salt on top.
Spicy Peanut Clusters
Looking to kick things up a notch? Add a little heat! Spicy peanut clusters combine the rich sweetness of chocolate with a subtle chili kick. You can incorporate:
- A pinch of cayenne pepper or chili powder
- Crushed red pepper flakes
- Even a few drops of hot sauce (go easy here)
The heat complements the chocolate’s sweetness in a surprisingly addictive way—perfect for adults who like bold flavors.
Holiday-Themed Peanut Clusters
Turn your peanut clusters into seasonal favorites by playing with flavors and toppings:
- Halloween: Add candy corn or orange and black sprinkles.
- Christmas: Use white chocolate, red/green sprinkles, and crushed candy cane.
- Valentine’s Day: Try milk chocolate with heart-shaped sprinkles or red edible glitter.
- Easter: Top with pastel M&Ms or mini chocolate eggs.
Use festive candy wrappers or boxes to make them gift-ready!
How to Store and Preserve Peanut Clusters
Shelf Life and Storage Tips
Storing your peanut clusters properly ensures they stay fresh and delicious for weeks. Here’s how to do it right:
- Room Temperature: Keep clusters in an airtight container in a cool, dry place. They’ll stay fresh for up to 2 weeks this way.
- Refrigerator: Store in a sealed container to prevent moisture from getting in. They’ll last up to a month, but be aware of possible chocolate bloom.
- Freezer: Yes, peanut clusters freeze beautifully. Wrap them in wax paper, place them in an airtight container, and they’ll keep for up to 3 months. Let them thaw at room temperature before serving.
Pro tip: Place parchment paper between layers if you’re stacking clusters. This prevents them from sticking together and getting squished.
For gift-giving, individual wrapping with cellophane or foil works great. Add a decorative label or ribbon for a personal touch.
FAQs about Peanut Clusters Recipe
1. Can I use other nuts instead of peanuts?
Absolutely! Try almonds, cashews, pecans, or even a mixed nut blend. Just ensure they’re roasted for the best flavor.
2. Are peanut clusters gluten-free?
Yes, as long as you use gluten-free chocolate and ingredients. Always double-check packaging for hidden gluten or cross-contamination warnings.
3. Can I freeze peanut clusters?
Yes! Peanut clusters freeze well. Just store them in an airtight container, separated with parchment paper, and thaw at room temperature.
4. How do I keep the chocolate from seizing?
Avoid introducing water to the chocolate. Use dry utensils and bowls, and melt slowly over low heat.
5. Can I make peanut clusters in the microwave?
Yes! Melt the chocolate in 30-second intervals, stirring each time, until smooth. Then mix in your peanuts and continue with the recipe.
Conclusion
Peanut clusters are one of those magical treats that manage to be both incredibly simple and irresistibly delicious. With just a few ingredients, minimal equipment, and less than an hour of your time, you can whip up a batch of chocolate-covered perfection that everyone will love. Whether you’re making them for the holidays, a party, or just a personal indulgence, they never disappoint.
So go ahead, raid your pantry, melt that chocolate, and start scooping. These clusters might just become your new favorite sweet treat. And once you’ve mastered the basic version, don’t be afraid to experiment with different flavors, textures, and toppings. There’s a whole world of peanut cluster possibilities waiting to be explored.