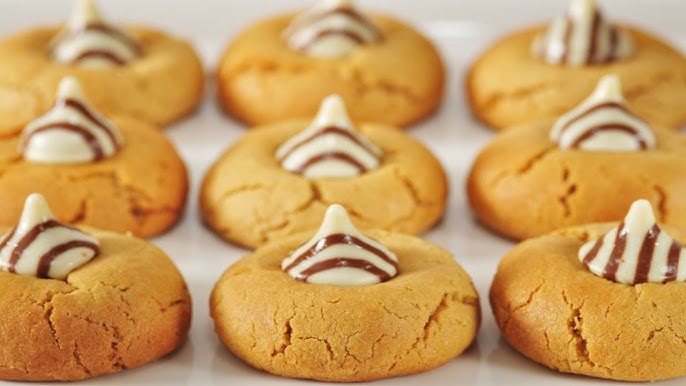
Peanut Butter Blossoms Recipe: Few cookies hold the same nostalgic charm as Peanut Butter Blossoms. These soft, chewy peanut butter cookies topped with a chocolate kiss have been a staple in American kitchens for decades. Whether you’re baking for the holidays, a potluck, or just craving something sweet and comforting, this classic recipe never disappoints. The delightful combination of nutty peanut butter and creamy milk chocolate creates a treat that’s both visually appealing and irresistibly tasty.
Baking these cookies is not just about the end result—it’s an experience. The aroma that fills your kitchen as the cookies bake is pure comfort. And when you press that chocolate kiss into the warm cookie center, it slightly melts, forming a beautiful swirl of sweetness that melts in your mouth.
The Sweet History Behind Peanut Butter Blossoms
The Peanut Butter Blossom cookie has a charming backstory dating back to the 1950s. It was first created by Freda Smith of Ohio, who entered her recipe in the Pillsbury Bake-Off Contest in 1957. Although she didn’t win the grand prize, her cookie quickly became one of the most beloved recipes in American households. The combination of a peanut butter cookie base with a chocolate kiss pressed on top became an instant classic, and over time, it became a holiday must-have across the country.
What makes this cookie so iconic is its simplicity. With just a few pantry staples, anyone can whip up a batch of cookies that looks impressive and tastes even better. The Peanut Butter Blossom perfectly embodies the warmth of home baking—simple ingredients, a touch of creativity, and a whole lot of love.
Why Everyone Loves This Classic Cookie
There’s something universally comforting about Peanut Butter Blossoms. The cookie has the perfect balance of textures and flavors—soft and chewy on the inside, slightly crisp on the edges, with a chocolate center that melts into every bite.
Beyond their taste, these cookies are versatile. They’re ideal for cookie swaps, gifting, or even as an after-school treat. You can make them festive by rolling them in colored sugar during the holidays or switch up the chocolate kiss flavor for variety. They also store beautifully, making them perfect for baking ahead of time.
Ultimately, people love Peanut Butter Blossoms because they represent a moment of joy and nostalgia. They remind us of family gatherings, Christmas mornings, and those cherished moments when baking was more about sharing love than just making food.
Ingredients You’ll Need
Before we dive into the steps, let’s get everything ready. Having your ingredients measured and prepared makes the process smoother and ensures your cookies turn out perfect every time.
Core Ingredients for the Cookie Dough
Here’s what you’ll need to make a classic batch of Peanut Butter Blossoms (about 36 cookies):
| Ingredient | Amount | Notes |
|---|---|---|
| All-purpose flour | 1 ¾ cups | Spoon and level to avoid compacting |
| Baking soda | 1 tsp | Helps cookies rise evenly |
| Salt | ½ tsp | Balances sweetness |
| Unsalted butter (softened) | ½ cup (1 stick) | Room temperature is best |
| Creamy peanut butter | ½ cup | Smooth for classic texture |
| Granulated sugar | ½ cup | Adds crispness |
| Brown sugar (packed) | ½ cup | Adds moisture and chewiness |
| Egg | 1 large | Room temperature for smooth blending |
| Vanilla extract | 1 tsp | Enhances flavor |
| Milk chocolate kisses | 36 pieces | Unwrapped before baking |
| Extra sugar (for rolling) | ¼ cup | Optional, for added sparkle |
Essential Tools and Equipment
To make this process seamless, you’ll need:
- Large mixing bowl
- Electric mixer (hand or stand)
- Measuring cups and spoons
- Baking sheets
- Parchment paper or silicone mats
- Cooling rack
Tips for Choosing the Best Peanut Butter
For best results, use creamy peanut butter like Jif or Skippy. Avoid natural peanut butter with oil separation—it can alter the dough texture and make it too crumbly. If you want a stronger peanut flavor, you can mix half creamy and half crunchy peanut butter, but keep in mind that this might slightly affect the cookie’s smoothness.
Step-by-Step Guide to Making Peanut Butter Blossoms
Now that your ingredients are ready, it’s time to start baking! Follow these simple steps for foolproof results every time.
Step 1 – Preparing the Cookie Dough
In a large mixing bowl, cream together softened butter, peanut butter, granulated sugar, and brown sugar until light and fluffy. Add an egg, a splash of vanilla extract, and mix well. Gradually stir in flour, baking soda, and a pinch of salt until a smooth dough forms.
Step 2 – Rolling and Shaping the Cookies
Scoop out small portions of dough and roll them into 1-inch balls. Coat each ball lightly in granulated sugar for that classic sparkle. Place them evenly spaced on a parchment-lined baking sheet.
Step 3 – Baking to Perfection
Preheat your oven to 350°F (175°C). Bake the cookies for 8–10 minutes, just until they’re puffed and lightly golden around the edges — don’t overbake; they’ll continue firming up as they cool.
Step 4 – Adding the Chocolate Kiss
The magic moment! As soon as the cookies come out of the oven, gently press a chocolate kiss into the center of each one. The warmth of the cookie will slightly melt the chocolate, helping it stick perfectly.
Step 5 – Cooling and Serving
Let the cookies cool completely on a wire rack so the chocolate sets. Serve them warm for gooey centers or at room temperature for the perfect chewy-crisp bite. Sweet, nutty, and oh-so-chocolatey — a timeless treat!
Pro Tips for Perfect Peanut Butter Blossoms
Everyone can make Peanut Butter Blossoms, but making perfect ones takes a bit of insider knowledge. These tips will help you achieve bakery-quality results every time.
- Use room temperature ingredients – This ensures even mixing and prevents the dough from becoming dense.
- Chill your dough – A short chill helps control spreading, keeping your cookies beautifully round and soft in the center.
- Don’t overbake – Take them out when they still look slightly underdone; they’ll finish setting as they cool.
- Press chocolate while hot – Timing is everything. The cookies should be warm enough to soften the chocolate base but not so hot that it melts completely.
- Avoid natural peanut butter – Its oil separation can cause flat, greasy cookies. Stick to classic creamy peanut butter.
If you want your cookies extra chewy, replace a tablespoon of sugar with a tablespoon of honey—it adds a hint of sweetness and locks in moisture.
Avoiding Common Mistakes
Even experienced bakers can run into issues when making Peanut Butter Blossoms. Here are some common problems and how to fix them:
- Cookies spreading too much: Dough was too warm. Chill it for at least 30 minutes before baking.
- Crumbly dough: Too much flour or natural peanut butter can cause dryness. Add a tablespoon of milk to moisten.
- Chocolate kiss melting too much: Wait 1–2 minutes after baking before pressing the chocolate in.
- Cookies too dry: Overbaking or overmixing can lead to dryness—mix just until ingredients are combined and bake for 8–10 minutes max.
By following these adjustments, you’ll consistently get cookies that are picture-perfect—soft, flavorful, and beautifully balanced.
How to Keep Cookies Soft and Chewy
The secret to irresistibly soft and chewy Peanut Butter Blossoms lies in moisture retention and proper storage. While these cookies naturally have a tender crumb from the combination of butter, brown sugar, and peanut butter, there are a few extra tricks that can make all the difference.
First, focus on the baking time. The golden rule is to slightly underbake. Remove the cookies from the oven when the edges are set, but the centers still look a bit soft. As they cool, they’ll continue to firm up without becoming dry.
Next, the type of sugar you use matters. Brown sugar adds moisture and chewiness due to its molasses content. If you want ultra-soft cookies, slightly increase the brown sugar ratio—use ¾ cup brown sugar and ¼ cup white sugar instead of an even split.
Another pro tip is to add a teaspoon of cornstarch to your dry ingredients. Cornstarch prevents over-spreading and helps the cookies stay pillowy soft.
When storing, always ensure your cookies are completely cooled before sealing them in an airtight container. Add a slice of fresh bread or apple to the container—this little trick helps retain moisture and keeps your cookies soft for days.
If your cookies ever harden, pop one or two into the microwave for 10 seconds. The peanut butter aroma will come alive again, and they’ll taste freshly baked.
Lastly, avoid refrigerating baked cookies. The cold air can dry them out. Instead, store them at room temperature for up to 5 days, or freeze them properly for longer storage.
With these tips, your Peanut Butter Blossoms will stay deliciously soft and chewy—just like they came out of the oven.
Creative Variations and Add-Ons
While the traditional Peanut Butter Blossom is already perfect, there’s always room for creativity in the kitchen. You can easily put a fun twist on this classic by changing flavors, shapes, or toppings.
1. Chocolate Lover’s Twist
For chocolate fanatics, substitute ¼ cup of flour with cocoa powder to create a rich chocolate peanut butter cookie base. Then, top it with a dark chocolate kiss or even a drizzle of melted chocolate for double decadence.
2. Nutty Crunch Version
Add ½ cup of chopped peanuts or pecans to the dough for extra crunch and texture. This gives your cookies a rustic, bakery-style feel.
3. Holiday Blossoms
Make your cookies festive by rolling them in colored sugar or sprinkles before baking. Red and green for Christmas, pink for Valentine’s Day, or orange for fall—the possibilities are endless.
4. Stuffed Peanut Butter Blossoms
Want to surprise your guests? Place a mini peanut butter cup or caramel-filled kiss in the center instead of the regular chocolate kiss. The gooey center adds a delicious twist.
5. Gluten-Free Option
Swap the all-purpose flour for gluten-free baking flour (1:1 ratio) and ensure your peanut butter doesn’t contain added wheat ingredients. The result? The same chewy, nutty flavor—just gluten-free!
6. Vegan Peanut Butter Blossoms
Replace butter with vegan margarine, use a flaxseed egg (1 tbsp flaxseed + 3 tbsp water), and choose dairy-free chocolate kisses. You’ll still get that same melt-in-your-mouth experience without using animal products.
7. Salted Caramel Blossoms
Sprinkle a pinch of sea salt on top of each chocolate kiss right after pressing it in. The mix of sweet, salty, and nutty flavors creates a gourmet-style cookie.
Experimenting with these variations keeps the recipe exciting and adaptable for any occasion. You can make a different version every holiday season and never get bored!
Seasonal Peanut Butter Blossom Ideas
Peanut Butter Blossoms are timeless, but tailoring them to fit seasonal celebrations makes them even more special. Here are some ideas to make them festive year-round:
- Christmas Blossoms: Roll dough balls in red, green, or gold sugar crystals. Use candy cane-flavored chocolate kisses for a peppermint twist.
- Valentine’s Day Blossoms: Roll in pink sugar or heart-shaped sprinkles. Top with Hershey’s Hugs for a white-and-dark chocolate swirl.
- Easter Blossoms: Use pastel-colored sugars and white chocolate kisses. Add a touch of lemon zest for a light spring flavor.
- Halloween Blossoms: Roll in orange and black sugar and use dark chocolate kisses or pumpkin spice-flavored ones.
- Winter Wonderland Blossoms: Roll in sparkling white sugar and dust lightly with powdered sugar after cooling for a snowy look.
Each seasonal version adds a unique flair while keeping the signature peanut butter and chocolate combination intact. These cookies are perfect for bake sales, parties, or gift boxes, making them one of the most versatile desserts you can bake.
Storing and Freezing Peanut Butter Blossoms
Proper storage ensures that your Peanut Butter Blossoms stay fresh, soft, and flavorful for days—or even weeks! Whether you’re prepping ahead for the holidays or simply want to keep a stash for later, here’s how to do it right.
How to Store at Room Temperature
Once your cookies are completely cooled, place them in an airtight container with parchment paper between layers to prevent sticking. Store at room temperature for up to 5 days.
To keep them soft, add a slice of white bread to the container. The cookies will absorb moisture from the bread, staying tender and chewy. Replace the bread slice every 2–3 days as needed.
Avoid storing them in the fridge, as this can dry out the cookies and make the chocolate turn dull.
How to Freeze Dough and Baked Cookies
Freezing is a great option if you want fresh-baked cookies anytime without starting from scratch.
To freeze unbaked dough:
- Roll the dough into balls, coat them in sugar, and place them on a baking sheet.
- Freeze for 1 hour or until solid, then transfer to a zip-top freezer bag.
- Label with the date and freeze for up to 3 months.
When ready to bake, preheat your oven and bake straight from frozen—just add 1–2 extra minutes to the baking time.
To freeze baked cookies:
- Allow them to cool completely.
- Arrange in layers with parchment paper between each layer.
- Seal in an airtight container or freezer bag and freeze for up to 2 months.
Thaw at room temperature for 30–60 minutes before serving, and they’ll taste as fresh as the day you made them.
Nutritional Information
Here’s a breakdown of the nutritional profile for one standard-sized Peanut Butter Blossom (based on a batch of 36 cookies):
| Nutrient | Amount per Cookie |
|---|---|
| Calories | 120–130 kcal |
| Total Fat | 7 g |
| Saturated Fat | 2.5 g |
| Carbohydrates | 14 g |
| Sugars | 8 g |
| Protein | 3 g |
| Fiber | 1 g |
| Sodium | 90 mg |
Healthier Substitutes
Want to lighten up your recipe? Try these smart swaps:
- Use natural peanut butter with no added sugar (stir well before using).
- Substitute half of the sugar with coconut sugar or honey for a more natural sweetness.
- Replace all-purpose flour with whole wheat pastry flour for added fiber.
- Use dark chocolate instead of milk chocolate for more antioxidants.
These simple adjustments make your cookies a bit healthier without compromising on taste.
FAQs about Peanut Butter Blossoms Recipe
1. Can I use natural peanut butter in this recipe?
Yes, but it may slightly change the texture. If you use natural peanut butter, make sure it’s well stirred and not too oily. You may need to chill the dough longer for best results.
2. How long do peanut butter blossoms stay fresh?
They stay fresh for about 5 days at room temperature when stored in an airtight container. For longer storage, freeze them for up to 2 months.
3. What type of chocolate works best?
Classic Hershey’s milk chocolate kisses are the traditional choice, but you can also use dark, white, or caramel-filled versions for variety.
4. Can I make the dough ahead of time?
Absolutely! The dough can be refrigerated for up to 48 hours before baking. Just let it sit at room temperature for 10–15 minutes before rolling.
5. Are peanut butter blossoms gluten-free?
They’re not gluten-free by default, but you can use a 1:1 gluten-free baking flour to easily make them gluten-free without changing the texture or flavor.
Conclusion
Peanut Butter Blossoms aren’t just cookies—they’re a piece of baking history and a symbol of warmth, nostalgia, and homemade love. With their soft peanut butter base, sugar-dusted exterior, and iconic chocolate kiss, these cookies bring joy to every bite.
From the first mix of ingredients to the final swirl of chocolate, every step of this recipe is about creating moments worth savoring. Whether you stick to the traditional version or try one of the creative variations, Peanut Butter Blossoms are guaranteed to impress family, friends, and even yourself.
So grab your mixing bowl, unwrap those chocolate kisses, and fill your kitchen with the irresistible aroma of freshly baked goodness.