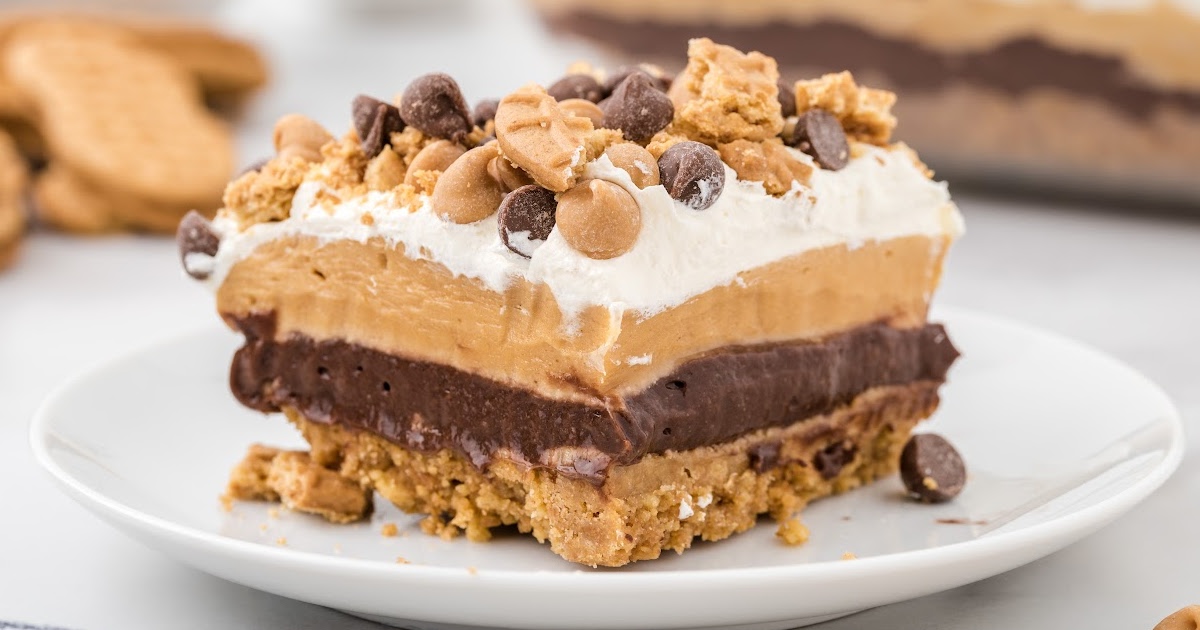
Peanut Butter Bars Recipe: Who doesn’t love the creamy, nutty goodness of peanut butter combined with rich chocolate? Peanut butter bars are a simple yet indulgent dessert that strikes the perfect balance between salty and sweet. With their no-bake convenience and crowd-pleasing flavor, they’ve become a go-to recipe in many households. Whether you’re hosting a party, looking for an easy homemade gift, or just want to treat yourself after a long day, peanut butter bars deliver every single time.
Unlike complicated baked goods, peanut butter bars require minimal ingredients and effort. Most recipes take under 20 minutes of prep time and don’t even need an oven. That means you can whip up a batch even on your busiest days. And the best part? You can customize them to your taste—add a little crunch, some sea salt, or swap the chocolate layer for white chocolate. The possibilities are endless!
Why Peanut Butter Bars are a Favorite Treat
There’s a reason peanut butter bars have stood the test of time. First and foremost, they’re ridiculously delicious. The smooth peanut butter base paired with a rich chocolate topping is a flavor combo that never gets old. But taste isn’t the only factor.
These bars are incredibly versatile. You can make them for holidays, potlucks, school lunches, or just to stock your fridge with an easy-to-grab snack. They also store well, meaning you can prepare them ahead of time and enjoy them all week long. Plus, you can cut them into any size you want—from bite-sized pieces to hearty dessert bars.
Let’s not forget how budget-friendly they are. Most of the ingredients are pantry staples, and there’s no need for expensive tools or specialty items. Whether you’re a seasoned baker or a total newbie in the kitchen, peanut butter bars are pretty much fail-proof.
Perfect Occasions to Make Peanut Butter Bars
Peanut butter bars shine at almost any event. They’re a hit at:
- Birthday parties – Easy to serve and universally loved.
- Holidays – Dress them up with sprinkles or festive toppings.
- Picnics and potlucks – No melting mess, just firm and tasty.
- Lunchbox treats – Pack a small piece for a mid-day surprise.
- Late-night cravings – You only need a few minutes and a microwave!
Their no-bake nature also makes them perfect for summer days when you’d rather not turn on the oven. You can even involve the kids—just measure, mix, and chill. They’re the ultimate family-friendly recipe.
Ingredients You’ll Need
Let’s talk ingredients. The beauty of peanut butter bars lies in their simplicity. Here’s everything you need for the classic version, plus some optional upgrades.
Core Ingredients for Peanut Butter Bars
Here’s your essentials list:
- 1 cup peanut butter – Smooth is standard, but chunky adds crunch.
- 1/2 cup unsalted butter – Melted, to bind and add richness.
- 1 3/4 cups powdered sugar – For sweetness and structure.
- 1 1/2 cups graham cracker crumbs – Adds texture and helps set the base.
- 1 1/4 cups semi-sweet chocolate chips – For the decadent top layer.
These ingredients create the base and topping layers, giving the bars their classic texture: firm, chewy, and indulgently sweet.
Optional Add-ins and Variations
Want to get creative? Try these:
- Crushed pretzels – Add a salty crunch.
- Mini marshmallows – For a fluffier texture.
- White chocolate chips – For a sweeter twist.
- Coconut flakes – A tropical hint.
- Sea salt flakes – Sprinkle on top for a gourmet finish.
- Dietary swaps are also easy: use gluten-free graham crackers, vegan butter, or almond butter instead of peanut butter. The recipe adapts beautifully.
Tools and Equipment Required
Kitchen Tools for Easy Preparation
One of the best things about making peanut butter bars is that you don’t need any fancy gadgets or professional equipment. Just a few basic kitchen tools will do the trick, and you likely already have them at home. Here’s what you’ll need to make the process smooth and simple:
- Mixing bowls: You’ll need at least two—one for the peanut butter base and another for melting chocolate.
- Measuring cups and spoons: Precision matters, especially for the sugar and butter quantities.
- Rubber spatula or wooden spoon: Perfect for mixing the ingredients and scraping the bowl clean.
- Microwave-safe bowl or double boiler: Essential for melting chocolate without burning it.
- 9×13 inch baking dish: Ideal for creating uniform bars. You can use a smaller dish for thicker bars.
- Parchment paper: Makes it easy to lift the bars out of the pan without sticking.
- Sharp knife: For clean, even slices once the bars are chilled and set.
These basic tools make the process easy and efficient, ensuring that even first-time bakers can pull off a perfect batch with minimal effort.
Baking vs. No-Bake Options
When it comes to peanut butter bars, you’ll often hear them called a “no-bake dessert”—and for good reason. The classic version doesn’t require any oven time at all. Instead, the bars firm up in the refrigerator, making them not just quicker to prepare but also ideal for hot weather when you want to avoid baking.
That said, there are baked versions available. These typically include ingredients like eggs and flour, and result in a more brownie-like texture. They’re delicious in their own right but are a bit more time-consuming and messier to make.
So, which is better?
- No-bake: Easier, faster, and great for warm weather.
- Baked: A bit more traditional and cake-like in texture.
If you’re in a rush or just don’t want to deal with the oven, go for the no-bake route. It offers the same satisfying taste with half the hassle.
Step-by-Step Peanut Butter Bars Recipe
Ready to get started? Here’s the step-by-step guide that breaks down exactly how to make peanut butter bars like a pro. Trust me—once you make them, you’ll want to keep a batch in the fridge at all times.
Step 1: Preparing the Base Mixture
Start by melting your butter. Place 1/2 cup of unsalted butter in a microwave-safe bowl and heat it in 20-second intervals until fully melted. Be careful not to overheat it.
Next, in a large mixing bowl, combine the melted butter with 1 cup of peanut butter. Stir until smooth and fully integrated.
Now, gradually add 1 3/4 cups of powdered sugar, mixing constantly. Once it begins to thicken, add in 1 1/2 cups of graham cracker crumbs. These will help bind the mixture and give it that perfect texture.
Use a spatula to blend everything together until the mixture is thick, uniform, and slightly crumbly but holds its shape when pressed.
Line your 9×13 baking dish with parchment paper and press the peanut butter mixture evenly into the pan. Make sure it’s packed down well and smooth on top for the chocolate layer to sit perfectly.
Step 2: Making the Chocolate Topping
Now, for the good stuff—chocolate. In a microwave-safe bowl, pour in 1 1/4 cups of semi-sweet chocolate chips. Add a tablespoon of peanut butter if you want a silkier, glossier topping.
Microwave the chocolate in 20-30 second bursts, stirring each time, until fully melted and smooth. Don’t rush this part—burnt chocolate is bitter and ruins the whole batch.
Once melted, pour the chocolate mixture over the peanut butter base. Use a spatula to spread it evenly across the surface. Make sure every corner is covered so each bite gets that chocolatey goodness.
Step 3: Assembling the Layers
This part is all about finesse. After you’ve spread the chocolate layer on top of the peanut butter base, gently tap the pan on the counter. This helps eliminate air bubbles and evens out the top layer.
If you’re adding any toppings—like chopped nuts, crushed pretzels, or sea salt—now’s the time to sprinkle them on while the chocolate is still soft.
Place the entire tray in the refrigerator and let it chill for at least 2 hours. This sets the chocolate and firms up the bars, making them easier to cut.
Step 4: Chilling and Setting the Bars
The chilling process is crucial—it’s what transforms your peanut butter mixture and melted chocolate into firm, sliceable bars. Once you’ve spread the chocolate layer and added any toppings, carefully transfer the baking dish to your fridge. Make sure it sits on a flat surface so the chocolate topping doesn’t shift or puddle unevenly.
You’ll want to chill the bars for a minimum of 2 hours, but for best results, leave them overnight. This ensures the layers fully solidify and makes the bars easier to cut without crumbling. If you’re short on time, you can pop the dish in the freezer for about 30-45 minutes, but keep an eye on it—freezing for too long can make the bars brittle and harder to cut.
Pro tip: Cover the dish with plastic wrap or foil to prevent the bars from absorbing any fridge odors (because no one wants their dessert tasting like last night’s lasagna).
Once fully chilled, the bars should be firm to the touch with a glossy chocolate top. That’s your sign they’re ready for the final step!
Step 5: Cutting and Serving
Now comes the fun (and slightly nerve-wracking) part—cutting the bars. First, remove the dish from the fridge and let it sit at room temperature for about 5-10 minutes. This softens the chocolate slightly and reduces cracking when you slice.
Carefully lift the entire block out of the dish using the parchment paper. Place it on a cutting board and grab a sharp knife. For clean, professional-looking bars, dip the knife in hot water and wipe it dry before each cut.
Cut the block into your desired size—most people go with 24 medium bars (6 rows by 4 columns), but you can do smaller bite-sized pieces for parties or larger chunks for serious peanut butter fans.
Serve them as is, or get fancy with a dollop of whipped cream or drizzle of caramel sauce. They’re great on a dessert platter or as a mid-day treat with coffee.
And remember, once cut, these bars should be stored in an airtight container in the fridge. They’ll stay fresh for up to 1 week, or you can freeze them for up to 2 months.
Tips and Tricks for the Best Peanut Butter Bars
If you want to make peanut butter bars that stand out, here are some expert tips and tricks to elevate your recipe from basic to bakery-worthy.
Getting the Texture Just Right
Texture is everything when it comes to peanut butter bars. You want a chewy, firm base with a silky-smooth chocolate top. Here’s how to achieve that:
- Use room temperature ingredients: This helps everything blend smoothly, especially the peanut butter and butter.
- Don’t skimp on the graham cracker crumbs: They give structure and crunch. Too little, and the bars will be mushy.
- Pack the base tightly into the pan: Use a flat spatula or the bottom of a glass to press down evenly. This prevents crumbling when you cut the bars.
- Let the chocolate layer cool a bit before pouring it: Hot chocolate can melt the peanut butter base and create a messy swirl. Let it cool for 1-2 minutes after melting.
Storage and Shelf Life
Proper storage keeps your bars tasting fresh and prevents them from drying out or getting soggy. Here’s how to store them right:
- Refrigerator: Store in an airtight container for up to 7 days. Keep layers of parchment paper between stacked bars to prevent sticking.
- Freezer: Wrap individual bars in plastic wrap, then place in a zip-top bag or container. Freeze for up to 2 months. Thaw in the fridge overnight or at room temperature for 30 minutes before serving.
- Room Temperature (Short Term): These bars can sit out for a few hours without issue—perfect for parties or snack tables. But if your kitchen is warm, refrigerate them to avoid a melted mess.
FAQs about Peanut Butter Bars Recipe
Q1: Can I make peanut butter bars with crunchy peanut butter?
Absolutely! Crunchy peanut butter adds a delightful texture to the bars. Just keep in mind that it may be slightly harder to spread evenly compared to smooth peanut butter.
Q2: Can I use almond or cashew butter instead of peanut butter?
Yes! You can substitute almond or cashew butter in equal amounts. Just be aware that it will change the flavor profile slightly, giving the bars a milder, nuttier taste.
Q3: What can I use instead of graham cracker crumbs?
Crushed digestive biscuits, vanilla wafers, or even finely ground oats can work as a substitute. Just aim for a similar crumb consistency to ensure the bars set properly.
Q4: How do I prevent the chocolate topping from cracking when cutting the bars?
Let the bars sit at room temperature for 5–10 minutes before slicing. Using a sharp knife dipped in hot water (and wiped dry) will also help you get clean, crack-free cuts.
Q5: Can I double the recipe for a larger crowd?
Definitely! Just use a larger pan, or divide the mixture evenly between two pans. Make sure to chill thoroughly so the bars set evenly throughout.
Conclusion
The beauty of this recipe lies in its versatility. From simple, no-bake versions to indulgent add-ons like pretzels or sea salt, there’s room to get creative and make it your own. Plus, the quick prep time and minimal cleanup make this dessert even more appealing.
So next time you’re craving something sweet but don’t want to heat up the oven or spend hours in the kitchen, give these peanut butter bars a try. One bite, and they’re sure to become a staple in your dessert rotation!


