Pasty Recipe: When you think of a hearty, satisfying, hand-held meal, a traditional Cornish pasty immediately comes to mind. Originating from the beautiful county of Cornwall, these pastries are beloved across the world. Whether you’re a culinary novice or a seasoned chef, making a pasty from scratch is an enjoyable and rewarding experience. In this step-by-step guide, you’ll learn how to make the perfect pasty from fresh, wholesome ingredients.
What is a Pasty?
A pasty (pronounced “pass-tee”) is a baked pastry filled typically with meat and vegetables. The classic version includes beef, potato, swede (rutabaga), and onion, all encased in a robust, crimped pastry shell designed to withstand travel. Miners in Cornwall made these a staple because they were easy to carry and eat while working underground. The crust served as a handy “handle,” which they discarded to avoid contamination from dirty hands.
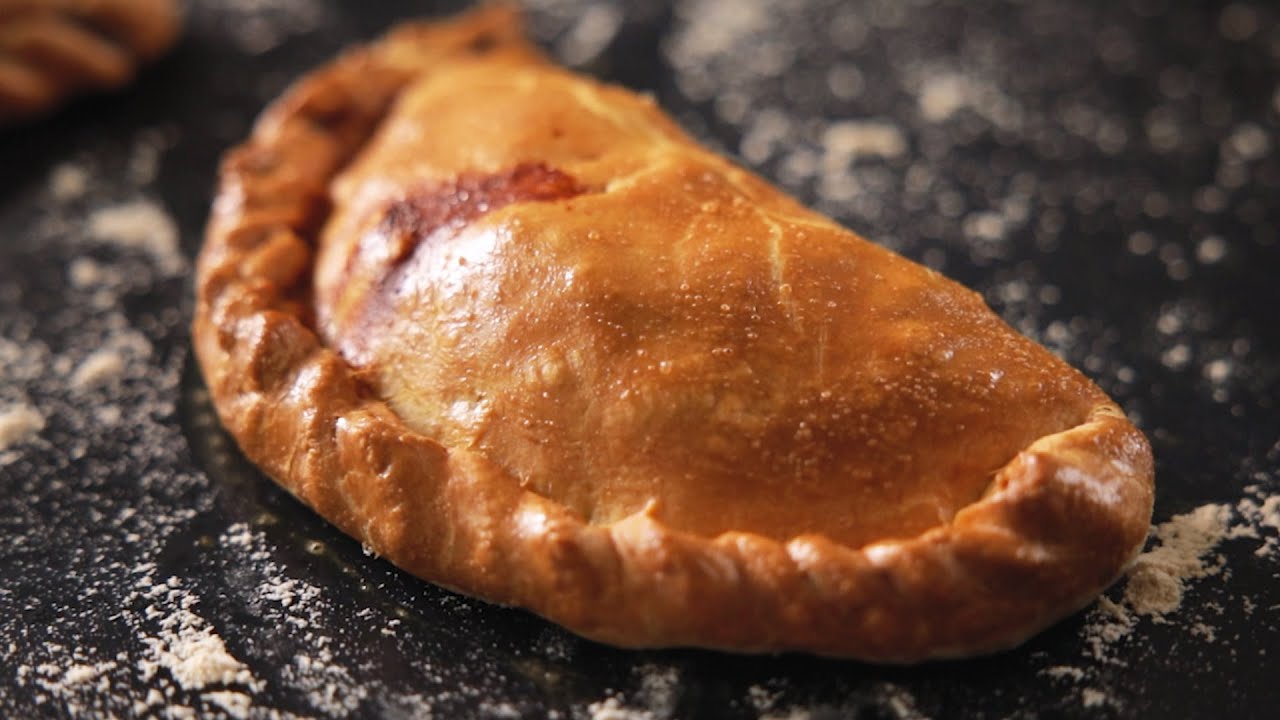
But pasties aren’t just practical; they’re delicious. When made correctly, the pastry is golden and flaky, and the filling is savory, juicy, and deeply comforting. Whether eaten hot or cold, they’re pure comfort food.
A Brief History of the Cornish Pasty
The Cornish pasty has been around since at least the 13th century, although it was the 17th and 18th centuries when it really cemented itself as a working-class staple. Traditionally, a proper Cornish pasty must be made following specific guidelines to earn the “Protected Geographical Indication” status, meaning true Cornish pasties must be made in Cornwall using specific ingredients.
These humble pastries grew alongside the mining industry, often filled with half savory and half sweet ingredients — a main meal and dessert all in one! The pasty’s portability, durability, and delicious flavor made it the ultimate working meal, and it still holds a beloved place in British hearts today.
Ingredients You’ll Need
Creating authentic pasties starts with gathering the right ingredients. Don’t worry — they’re simple, affordable, and easy to find.
For the Dough
The dough needs to be sturdy yet tender, strong enough to hold the filling without breaking but still buttery and soft inside. Here’s what you’ll need:
- 500g (about 4 cups) strong bread flour (for elasticity)
- 120g (about 1/2 cup) lard (for flakiness)
- 120g (about 1/2 cup) butter (for flavor)
- 1 tsp salt
- 175ml (about 3/4 cup) cold water
Using both lard and butter might sound indulgent, but it gives the pasty dough its signature texture — flaky yet substantial.
For the Filling
The filling is traditionally raw when encased in the pastry, allowing it to cook perfectly during baking:
- 350g (about 12 oz) good-quality beef skirt or chuck steak, diced small
- 1 large potato, finely diced
- 1 small swede (rutabaga), finely diced
- 1 medium onion, finely chopped
- Salt and pepper to taste
- A small knob of butter for each pasty
It’s important to dice all the filling ingredients uniformly to ensure even cooking. The choice of beef is also crucial — you want a cut that becomes tender and juicy as it bakes.
Essential Kitchen Tools
Before you start cooking, it’s wise to make sure your kitchen is stocked with the right tools to make the process smooth and stress-free.
Must-Have Utensils
- A large mixing bowl
- A rolling pin
- Sharp knives
- A pastry brush
- Baking trays
- Parchment paper
Having sharp knives is crucial here. You’ll need to dice your meat and veggies finely, and a blunt knife just won’t cut it — literally!
Handy Extras for Easier Prep
- Food processor (for blitzing the fat into the flour, if you prefer not to do it by hand)
- A dough scraper (to help lift and shape your dough)
- Digital kitchen scales (for precise measurements)
Preparation is half the battle won. Once your tools are set, you can focus on the joy of making your pasties instead of scrambling for missing utensils mid-recipe.
How to Make Pasty Dough from Scratch
Now comes the fun part — getting your hands messy! Making the dough from scratch is easier than you might think, and it’s incredibly satisfying.
Step 1: Mixing the Ingredients
Start by placing your flour and salt in a large mixing bowl. Add the lard and butter, cubed and cold. Rub the fats into the flour with your fingertips until the mixture looks like coarse breadcrumbs. If you prefer, you can use a food processor to pulse it gently.
Once the fat is distributed, slowly add the cold water, mixing gently until the dough just comes together. Don’t overwork it! Over-mixing develops gluten, which makes your pastry tough instead of tender.
The goal here is to have a cohesive, slightly tacky dough that holds together but isn’t sticky.
Step 2: Kneading and Resting
Once your dough forms, turn it out onto a floured surface. Knead it just a few times — enough to make it smooth but not elastic like bread dough.
Wrap the dough tightly in cling film (plastic wrap) and let it rest in the fridge for at least 30 minutes. This resting time is vital. It relaxes the gluten, making the dough easier to roll out and less likely to shrink during baking.
You can even make the dough a day ahead if you’re short on time. Just keep it refrigerated and covered well to prevent it from drying out.
Preparing the Traditional Filling
While your dough is chilling, it’s time to prep the filling. Fresh, quality ingredients shine in a traditional pasty, so take your time with this step.
Step 1: Chopping the Ingredients
Dice the beef skirt or chuck steak into very small pieces — think about the size of a fingernail. This ensures it cooks fully inside the pastry. Do the same for the potato, swede, and onion.
Even cutting is key! It guarantees that every bite you take has a perfect balance of meat, veg, and seasoning.
Step 2: Seasoning the Filling
Once chopped, toss all the ingredients together in a bowl. Season generously with salt and pepper. You can even sprinkle in a little thyme or parsley if you want a herbal note, although it’s not traditional.
If you like a juicier filling, dot a tiny piece of butter onto the filling of each pasty before sealing them up. This creates a rich, savory sauce inside as they bake.
Assembling the Pasties
Assembling your pasties is where artistry meets tradition. Don’t worry if your first few look a little rustic — the beauty of homemade pasties lies in their charm.
Step 1: Rolling Out the Dough
Take your chilled dough from the fridge and divide it into equal portions — this recipe should make about 4-6 good-sized pasties. On a lightly floured surface, roll each piece into a round disc about 20cm (8 inches) in diameter.
The dough should be about 5mm (1/4 inch) thick: thick enough to hold the filling but not so thick that it overwhelms the delicate balance of pastry to filling.
Keep unused dough covered with a cloth while you work to prevent it from drying out.
Step 2: Filling and Sealing
Spoon your seasoned filling onto one half of the dough circle, leaving about a 2cm (3/4 inch) border at the edge. Remember to add a little knob of butter on top of the filling for extra richness.
Fold the other half of the dough over the filling to create a semi-circle. Press the edges together firmly to seal.
Now for the traditional crimping: starting at one end, twist and pinch the dough all the way along the edge to create a rope-like seam. This signature crimp is not just decorative — it helps to keep all those juicy flavors locked inside.
If crimping feels tricky, you can simply press the edge with a fork — it’s not traditional but still delicious!
Place your assembled pasties onto a baking tray lined with parchment paper.
Before baking, brush the tops with a beaten egg to give them a beautiful golden shine.
Baking the Perfect Pasty
The magic happens in the oven. Baking your pasties properly ensures they come out crisp, golden, and filled with tender, juicy goodness.
Temperature and Timing
Preheat your oven to 220°C (425°F) — you need it nice and hot to set the pastry quickly.
Bake the pasties at 220°C (425°F) for the first 15 minutes, then reduce the heat to 180°C (350°F) and bake for a further 30-35 minutes.
This two-temperature method ensures that the pastry gets a lovely initial puff and color without burning before the filling has cooked through.
How to Tell When They’re Done
You’ll know your pasties are ready when they are a rich, deep golden brown all over and feel firm to the touch. If you’re unsure, you can insert a small skewer into one pasty — it should slide in easily without meeting resistance.
Don’t cut into them immediately after baking. Allow them to rest for 10 minutes — it lets the juices settle and keeps the filling moist instead of spilling out.
Tips for Perfect Pasties Every Time
Even seasoned bakers can have the occasional pasty disaster. Here’s how to get it right every time.
Common Mistakes to Avoid
- Overfilling: It’s tempting to pack them full, but overfilling makes them hard to seal and prone to bursting.
- Under-seasoning: The filling should be generously seasoned before sealing; you can’t add seasoning afterward.
- Poor sealing: Take your time with crimping or sealing. Any gaps will leak valuable juices.
- Skipping the egg wash: It might seem like an extra step, but it gives your pasty that irresistible golden glow.
Expert Tricks for Best Results
- Chill your assembled pasties for 20 minutes before baking. It helps the pastry firm up and hold its shape.
- Use bread flour instead of regular flour for a stronger, chewier pastry.
- Dice everything finely and uniformly for even cooking.
Pasties are a labor of love. Each time you make them, you’ll get a little better — and the delicious rewards are worth it.
Variations on the Classic Pasty
Once you’ve mastered the traditional recipe, you can start to get creative. The beauty of the pasty is its versatility — it’s a perfect blank canvas for all kinds of flavors.
Vegetarian and Vegan Options
For a vegetarian pasty, you can substitute the beef with a hearty vegetable like mushrooms or butternut squash. Add some crumbled cheese like feta or mature cheddar for extra flavor.
For vegan pasties, use plant-based butter or margarine for the pastry, and load up the filling with things like lentils, sweet potato, spinach, and spiced chickpeas. Just remember to season well and keep everything finely chopped.
Creative Fillings to Try
- Chicken and leek with a creamy mustard sauce
- Spiced lamb with sweet potato and coriander
- Cheese and onion with a hint of mustard
- Breakfast pasties filled with scrambled egg, sausage, and cheese
- Sweet pasties filled with apple, cinnamon, and raisins
The possibilities are endless! Once you know the basic method, you can fill your pasty with whatever your heart (or stomach) desires.
Serving Suggestions
Eating a freshly baked pasty is a delight on its own, but if you want to make a meal of it, here are some great ideas.
What to Serve with Your Pasty
- A simple green salad dressed with vinaigrette
- Pickled onions and gherkins
- A dollop of chutney (apple or tomato works wonderfully)
- Coleslaw for a crunchy, refreshing side
Pasties are hearty, so keep sides light and fresh to balance the richness.
Best Drinks to Pair With
- A cold, crisp cider (traditional Cornish choice)
- English ale or bitter
- A glass of light red wine like Pinot Noir
- Even a strong cup of tea works beautifully with a pasty!
How to Store and Reheat Pasties
If you’ve made a big batch (or just can’t resist having a few on hand), proper storage and reheating are essential to keeping your pasties tasting fresh and delicious.
Storage Tips
Pasties store beautifully, making them an excellent make-ahead meal.
- Refrigeration: Let pasties cool completely, then wrap them individually in cling film or place them in an airtight container. They will keep well in the refrigerator for up to 3 days.
- Freezing: If you want to store them longer, freezing is the way to go. Wrap each cooled pasty tightly in cling film, then foil, and place them in a freezer-safe bag or container. They can be frozen for up to 3 months.
Pro tip: Label your packages with the date, so you remember when you made them.
Best Ways to Reheat Without Losing Flavor
- From the fridge: Preheat your oven to 180°C (350°F). Place the pasty on a baking tray and heat for about 15–20 minutes until warmed through. Avoid using the microwave — it tends to make the pastry soggy.
- From frozen: No need to thaw! Simply bake in a preheated oven at 180°C (350°F) for 35–40 minutes. Cover loosely with foil halfway through if the pasty browns too quickly.
Reheating slowly in the oven keeps the pastry crisp and the filling moist — just the way a pasty should be!
FAQs about Pasty Recipe
1. What is a pasty?
A pasty is a traditional baked pastry filled with meat and vegetables, often associated with Cornwall, England. It’s known for its distinctive crimped edge and hearty, portable design.
2. What pastry is used for pasties?
Traditional Cornish pasties use a shortcrust pastry because it’s sturdy and holds the filling well. You can also use rough puff pastry for a flakier texture.
3. Can I make pasties ahead of time?
Yes! Pasties can be made in advance, refrigerated for up to 2 days, or frozen for up to 3 months. Just reheat them in the oven when ready to serve.
4. What fillings can I use in a pasty?
Classic fillings include beef, potatoes, onions, and swede (rutabaga). However, you can get creative with chicken, cheese, mushrooms, or even sweet fillings for a dessert twist.
5. How do I stop my pasties from leaking?
Seal the edges carefully by crimping tightly and avoid overfilling. Also, chilling the pasties before baking helps prevent leaks.
6. How long do you bake a pasty?
Bake at 180°C (350°F) for about 45–50 minutes, or until the pastry is golden brown and cooked through.
7. Are pasties eaten hot or cold?
Both! Traditionally, pasties were eaten cold by miners for lunch, but they are just as delicious served warm from the oven.
Conclusion
Making traditional Cornish pasties at home might seem like a big task at first, but with a little patience and a lot of love, it’s an incredibly rewarding experience. From mixing the buttery dough to sealing the hearty filling inside, every step brings you closer to a golden, flaky, delicious masterpiece.
Not only are pasties perfect for picnics, work lunches, and cozy dinners, but they also carry a rich history and tradition that makes every bite feel special. Once you’ve nailed the basic method, you can experiment endlessly with fillings to suit your tastes or dietary needs.
So, roll up your sleeves, grab your rolling pin, and get baking — because nothing beats the satisfaction of pulling a tray of homemade pasties from your oven, golden and steaming, ready to enjoy.


