Pão de Queijo Recipe: If you’ve ever tasted Brazilian cuisine, chances are you’ve come across the soft, cheesy delight known as Pão de Queijo. This iconic cheese bread is crispy on the outside, chewy on the inside, and incredibly addictive. Whether you’re planning a festive brunch or just want a cheesy snack with your coffee, this easy-to-follow guide will walk you through everything from ingredients to baking tips, making sure you nail the perfect batch every time.
Let’s dive in!
What is Pão de Queijo?
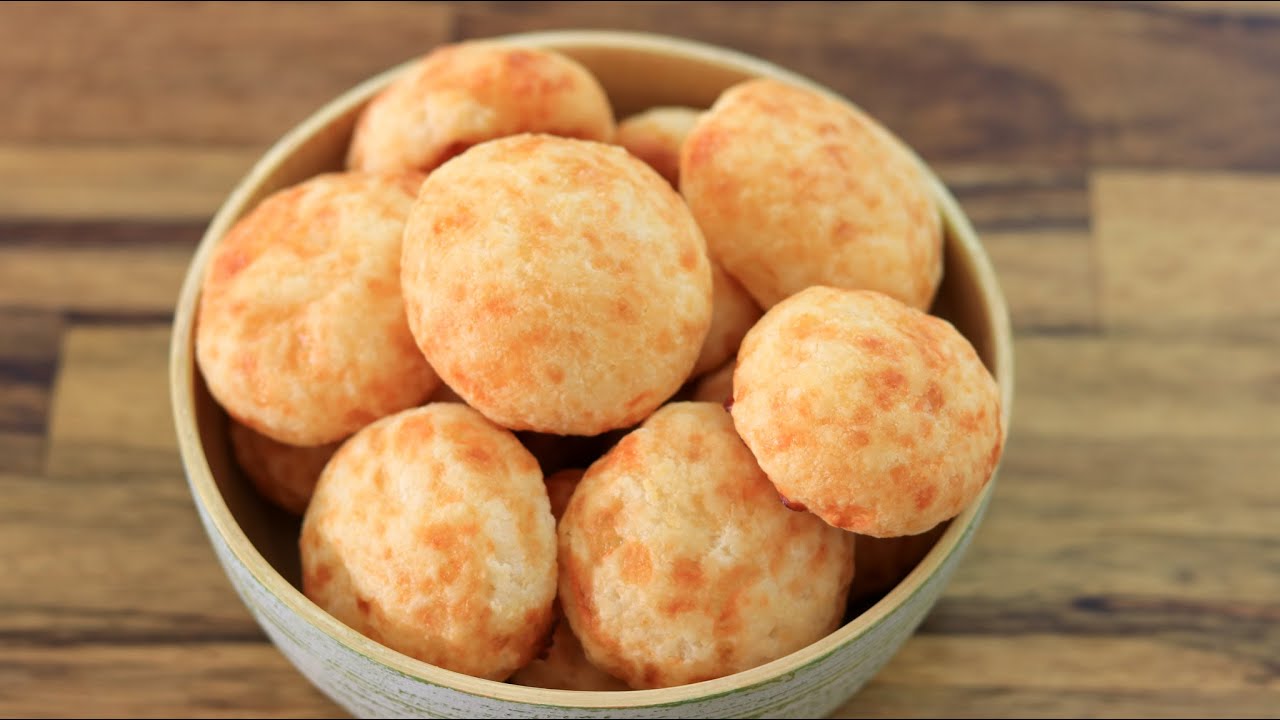
Pão de Queijo, literally meaning “cheese bread” in Portuguese, is a traditional Brazilian snack that’s gluten-free by nature and utterly delicious. Made primarily with tapioca flour and cheese, this bite-sized treat is more than just a bread roll — it’s a chewy, cheesy experience that delights your taste buds with every bite. It’s not quite a bread in the traditional sense, as it doesn’t require yeast and has a distinctly stretchy texture thanks to the cassava-based flour.
Imagine biting into a crispy golden ball that stretches with cheesy goodness—yeah, that’s Pão de Queijo!
This delicacy is incredibly popular not just in Brazil but worldwide, often found in cafes, bakeries, and breakfast spreads.
History and Origin of the Brazilian Cheese Bread
Pão de Queijo traces its roots back to the 18th century in the Brazilian state of Minas Gerais. Back then, wheat flour was scarce, so locals turned to tapioca flour made from cassava (a native plant to South America). Over time, they started incorporating cheese into the mixture, and thus, Pão de Queijo was born.
Originally a humble rural recipe, it slowly spread across Brazil and eventually became a national favorite. These days, you’ll find it in every Brazilian bakery, street market, and even frozen in supermarkets.
The rise of Brazilian cuisine around the world helped Pão de Queijo gain popularity globally. Its naturally gluten-free makeup has made it a hit with health-conscious foodies and those with dietary restrictions.
Why Pão de Queijo is Loved Worldwide
Why has Pão de Queijo captured hearts around the globe?
- Naturally Gluten-Free – Made with tapioca flour, it’s perfect for people avoiding gluten.
- Incredibly Versatile – Great for breakfast, snack, or party finger food.
- Easy to Make – With just a few ingredients, you can whip up a batch anytime.
- Customizable – From herbs to different cheeses, the possibilities are endless.
Plus, that stretchy, cheesy interior is unlike anything you’ve ever tasted. Once you pop one in your mouth, you’ll understand the hype.
Ingredients You’ll Need
Key Ingredients Overview
The charm of Pão de Queijo lies in its simplicity. You only need a handful of ingredients — and you probably already have most of them in your pantry.
Here’s what you’ll need:
- Tapioca flour (also known as tapioca starch): The star of the show. This is what gives the bread its chewy texture.
- Milk: Whole milk works best for richness.
- Butter or oil: Adds moisture and flavor.
- Eggs: For structure and moisture.
- Cheese: The heart and soul of the recipe — typically a mix of cheeses.
All these come together to form a dough that’s unique in texture, stretchy and slightly sticky, but ultimately very forgiving to work with.
Best Types of Cheese for Pão de Queijo
In Brazil, traditional Pão de Queijo is made using Minas cheese, which is mildly salty and melts beautifully. But if you’re outside Brazil, don’t worry — you can still make it work.
Here are some cheese options:
- Parmesan – Adds sharpness and a salty edge.
- Mozzarella – For that gooey stretch.
- Cheddar – Gives a deep, rich flavor.
- Queso Fresco or Cotija – Similar texture to Minas cheese.
A great combination is 50% Parmesan and 50% mozzarella for both flavor and stretch. Feel free to experiment until you find your perfect cheesy mix.
Optional Add-ins to Try
Want to put your own spin on this Brazilian classic? Here are a few fun and tasty additions:
- Garlic powder or minced garlic – for that extra savory punch.
- Chopped herbs – like rosemary, parsley, or oregano.
- Chili flakes or jalapeños – for a spicy kick.
- Bacon bits – because why not?
The base recipe is a canvas, and you can paint it however your taste buds desire.
Tools and Equipment
Basic Kitchen Tools Required
You don’t need a fancy kitchen to make Pão de Queijo. Just a few essentials will do:
- Mixing bowls – At least two: one for wet, one for dry ingredients.
- Measuring cups and spoons – Precision is important.
- Wooden spoon or spatula – The dough gets a bit tough to stir, so something sturdy helps.
- Baking sheet – A non-stick or parchment-lined tray is ideal.
- Oven – Preheated and ready to roll.
These are basic, everyday items, so there’s no barrier to getting started.
Optional Equipment for Best Results
If you’re looking to up your game:
- Stand mixer – Helps a lot if you’re making a big batch.
- Cookie scoop or ice cream scoop – For uniform-sized dough balls.
- Silicone baking mat – Keeps the bottom crisp without sticking.
With or without extras, this recipe is fully doable in a regular home kitchen.
Step-by-Step Guide to Making Pão de Queijo
Step 1 – Preheat and Prepare
Start by preheating your oven to 375°F (190°C). This step is essential to ensure that your Pão de Queijo puffs up correctly and gets that golden exterior. Line a baking sheet with parchment paper or use a silicone baking mat to prevent sticking. While the oven heats, it’s time to get your ingredients ready.
Measure out all your ingredients ahead of time. This mise en place (French for “everything in its place”) helps make the cooking process smooth and stress-free. Crack your eggs into a small bowl, shred your cheese, and have the tapioca flour and liquids ready to go.
Also, take this time to grease your hands lightly with oil or butter if you plan to shape the dough by hand later. This will make handling the sticky dough much easier.
Step 2 – Boil the Liquids
In a medium saucepan, combine the milk, butter (or oil), and a pinch of salt. Bring this mixture to a gentle boil over medium heat. Stir frequently to ensure the butter melts completely and doesn’t scorch.
As soon as it begins to boil and the butter is fully melted, remove the pan from heat immediately. This hot mixture is what you’ll pour over the tapioca flour to gelatinize it—a key step that gives Pão de Queijo its unique chewy texture.
Make sure not to skip this boiling step or underheat it. The hot liquid partially cooks the flour, activating the chewy quality that makes Pão de Queijo stand apart from regular bread rolls.
Step 3 – Mix with Tapioca Flour
Pour the hot milk-butter mixture slowly over the tapioca flour in a large mixing bowl. Use a wooden spoon or sturdy spatula to stir it quickly and thoroughly. The mixture will look a bit lumpy and dry at first—don’t worry, that’s normal.
You’ll see it start to come together into a sticky, stretchy dough. The texture should resemble thick mashed potatoes or sticky playdough. Let this mixture sit for 5 to 10 minutes so it cools down slightly before adding the eggs. Adding eggs while the dough is still hot could scramble them, and no one wants that.
This step is the secret sauce to achieving that perfect texture: chewy yet airy with a satisfying bite.
Step 4 – Add Eggs and Cheese
Once your dough has cooled enough, it’s time to mix in the eggs—one at a time. Crack the first egg into the dough and mix it until it’s fully incorporated. The dough will be sticky and tough, but keep going. You can use a stand mixer fitted with a paddle attachment if you prefer to avoid hand mixing.
After the eggs are mixed in, add your shredded cheese. Mix thoroughly until everything is evenly combined. You’ll end up with a thick, stretchy, cheesy dough that smells incredible. If it’s too runny, add a tablespoon or two of tapioca flour; if too dry, a splash of milk can help.
Don’t overmix—just ensure the dough is uniform and all the cheese is evenly distributed.
Step 5 – Shape the Dough Balls
Now comes the fun part—shaping the Pão de Queijo. Use your hands or a small scoop to form balls about the size of a golf ball (roughly 1 to 1.5 inches in diameter). If the dough is sticking too much, rub a bit of oil or water on your hands to prevent it.
Place the dough balls on your prepared baking sheet, spacing them about an inch apart. They won’t spread too much, but giving them space helps them puff evenly.
At this point, you can either bake them right away or freeze the unbaked balls for future use. To freeze, place them on a tray and flash freeze for 1 hour, then store in a zip-top bag. When you’re ready, bake directly from frozen—just add 3–4 extra minutes to the baking time.
Step 6 – Bake Until Golden
Slide the tray into your preheated oven and bake for 20–25 minutes, or until the tops are lightly golden and the cheese is bubbling slightly. Avoid opening the oven during baking; the heat is what helps them puff up beautifully.
You’ll know they’re ready when they’re golden brown on top and sound hollow when tapped gently on the bottom.
Once done, remove them from the oven and let them cool slightly on a rack. They’re best served warm, right out of the oven when the inside is still gooey and cheesy.
Congratulations—you’ve just made authentic Brazilian Pão de Queijo from scratch!
Pro Tips for Perfect Pão de Queijo
Avoiding Common Mistakes
Even though Pão de Queijo is a relatively simple recipe, there are a few pitfalls that can affect your final product:
- Using cold ingredients – The dough needs that hot milk to gelatinize the tapioca flour. Don’t skip that boiling step.
- Adding eggs too early – Let the dough cool before you add the eggs, or you’ll end up with scrambled eggs.
- Overmixing – Once the cheese and eggs are in, mix just enough to combine.
- Not measuring properly – Because there’s no yeast or rise time, ingredient ratios matter. Be accurate!
Follow these tips, and your cheese breads will come out perfect every time.
Tips for Chewy vs. Crispy Texture
Do you prefer your Pão de Queijo crispy on the outside or super chewy all the way through? Here’s how to adjust:
- For crispier exteriors: Bake a few minutes longer or brush the tops with oil before baking.
- For extra chewiness: Use more cheese, particularly stretchy ones like mozzarella.
- For a softer inside: Add an extra egg or a splash more milk for a wetter dough.
The beauty of this recipe lies in how adjustable it is. You can fine-tune the texture to suit your preference with just small tweaks.
Serving Suggestions
Best Time to Eat Pão de Queijo
Pão de Queijo is one of those rare baked goods that fit perfectly into almost any part of the day. In Brazil, it’s a staple during breakfast, commonly enjoyed with a hot cup of coffee. But don’t let that stop you—these cheesy bites are just as delightful for:
- Afternoon tea or coffee breaks
- Appetizers before a meal
- Side dish for soups or salads
- Late-night snacks
You can even serve them as part of a brunch spread alongside eggs, fruits, and spreads. Since they’re naturally gluten-free, they’re a wonderful addition to inclusive menus for guests with dietary restrictions.
They taste best warm, fresh out of the oven, when the cheese is gooey, and the crust is slightly crisp. If you’re reheating, make sure to warm them in the oven rather than the microwave to bring back that texture.
Perfect Pairings and Dips
While Pão de Queijo is perfect on its own, pairing it with the right side or dip can take things to the next level. Here are some ideas:
- Coffee or espresso – Especially with Brazilian café-style coffee.
- Chimichurri sauce – A herby, tangy contrast to the cheesy richness.
- Cream cheese or garlic butter – For spreading inside the warm bread.
- Guava paste (goiabada) – A sweet and salty combo loved in Brazil.
- Soup pairings – Like creamy tomato, squash, or chicken broth-based soups.
Don’t be afraid to experiment. These cheesy rolls are incredibly versatile, working with both savory and sweet accompaniments.
Storage and Reheating Tips
How to Store Leftovers
Freshly baked Pão de Queijo is hard to beat, but they store surprisingly well.
- Room Temperature: Store in an airtight container for up to 2 days.
- Refrigerator: If you want to keep them for up to 5–6 days, refrigerate them in a sealed container or zip-lock bag.
- Freezer: This is the best long-term storage option. You can freeze them before or after baking.
To freeze unbaked dough balls, place them on a tray until solid, then store in a bag for up to 3 months. When ready, bake them directly from frozen—no thawing needed!
Best Ways to Reheat Without Losing Texture
To maintain that crispy outside and chewy inside, skip the microwave when reheating. Instead:
- Oven: Preheat to 350°F (175°C) and heat for 8–10 minutes.
- Air Fryer: Reheat at 350°F for 4–5 minutes for extra crispiness.
- Toaster Oven: Ideal for single servings.
Avoid microwaving unless you’re in a hurry—it tends to make the texture rubbery.
Variations of Pão de Queijo
Vegan and Dairy-Free Options
Yes, it’s possible to make vegan Pão de Queijo! While the classic version relies heavily on cheese and eggs, you can get creative:
- Egg replacement: Use flax eggs (1 tbsp ground flax + 3 tbsp water) or commercial egg replacers.
- Dairy-free cheese: Choose a meltable vegan cheese with strong flavor.
- Plant-based milk: Almond, oat, or soy milk work well.
The result may differ in texture, but it can still be delicious and satisfying. Just make sure your tapioca flour is fresh and your cheese substitute melts well.
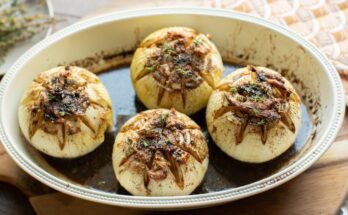
Stuffed Cheese Balls
Level up your Pão de Queijo game by adding fillings! Before baking, insert a small cube of filling into the center of the dough ball:
- More cheese – Cheddar, gouda, or cream cheese.
- Cooked sausage or ham – For a meaty surprise.
- Sautéed mushrooms or caramelized onions – For a gourmet twist.
The filling melts during baking, creating an ooey-gooey center. Make sure to seal the dough well so nothing leaks out.
Sweet Pão de Queijo Ideas
It might sound strange, but sweet versions are a thing in Brazil. Here are a few ways to turn these cheesy bites into a dessert:
- Add a touch of sugar to the dough.
- Mix in cocoa powder for chocolatey Pão de Queijo.
- Fill with dulce de leche or chocolate chips.
- Serve with fruit jams or Nutella on the side.
Sweet Pão de Queijo makes a unique addition to brunch or dessert tables.
Nutritional Information
Calories and Macronutrients
While Pão de Queijo is not exactly a “light” food, it’s a satisfying snack that can be part of a balanced diet. Here’s an approximate breakdown for one medium-sized ball (about 30g):
| Nutrient | Amount |
|---|---|
| Calories | 90–120 kcal |
| Carbohydrates | 10–12 g |
| Protein | 2–4 g |
| Fat | 4–6 g |
| Fiber | 0.5 g |
| Gluten | 0 g |
Keep in mind that these values vary based on the type and amount of cheese and fat used.
Health Benefits and Considerations
Pros:
- Gluten-Free – Ideal for celiacs and gluten-sensitive individuals.
- Protein-Rich – Thanks to the cheese and eggs.
- Low Sugar – Naturally low in sugar unless sweetened.
Cons:
- High in fat and sodium – So enjoy in moderation if you’re watching intake.
- Calorie-dense – They’re small but pack a punch.
If you’re eating clean, opt for low-fat cheeses and moderate your portion size. But for most people, Pão de Queijo can be enjoyed as an occasional treat or part of a balanced meal.
FAQs about Pão de Queijo Recipe
Can I freeze Pão de Queijo dough?
Absolutely! Shape the dough into balls and freeze on a tray. Once solid, transfer to a zip-lock bag and freeze for up to 3 months. Bake straight from frozen—just add 3–4 minutes to the bake time.
What can I substitute for tapioca flour?
Tapioca flour is essential for the chewy texture, and there’s really no perfect substitute. However, if absolutely necessary, cassava flour (not the same) or arrowroot might work—but results will vary.
Can I use different types of cheese?
Yes! Try mixing cheeses like cheddar, gouda, mozzarella, or Parmesan. Experiment with your favorites—just ensure the cheese melts well for best texture.
Why is my dough too sticky?
It might be too warm or have too much liquid. Let it cool slightly, and add a bit more tapioca flour a tablespoon at a time until it firms up.
How long does Pão de Queijo stay fresh?
They’re best fresh but can last 2 days at room temperature or 5–6 days in the fridge. Reheat in the oven to bring back that fresh-baked magic.
Conclusion
Pão de Queijo is more than just a bread roll—it’s a piece of Brazilian culture served in a golden, cheesy package. From its humble beginnings in the countryside of Minas Gerais to coffee shops across the globe, this gluten-free delight has won hearts with its unbeatable flavor and addictive texture.
Whether you’re a first-timer or a seasoned baker, this step-by-step guide gives you everything you need to master the perfect batch. Once you try one, we guarantee you’ll be hooked.
So roll up those sleeves, preheat that oven, and get ready to enjoy a little taste of Brazil in your kitchen. Bom apetite!