Pani Puri Recipe: Pani Puri, also known by names like Golgappa, Puchka, and Gupchup, is more than just a snack—it’s an experience! The burst of flavors, the crispy puris, and the tangy spicy water make it an all-time favorite street food in India and across South Asia.
Whether you’re craving a quick street-style fix or looking to recreate it at home, making Pani Puri from scratch is totally doable and incredibly satisfying.
What is Pani Puri?
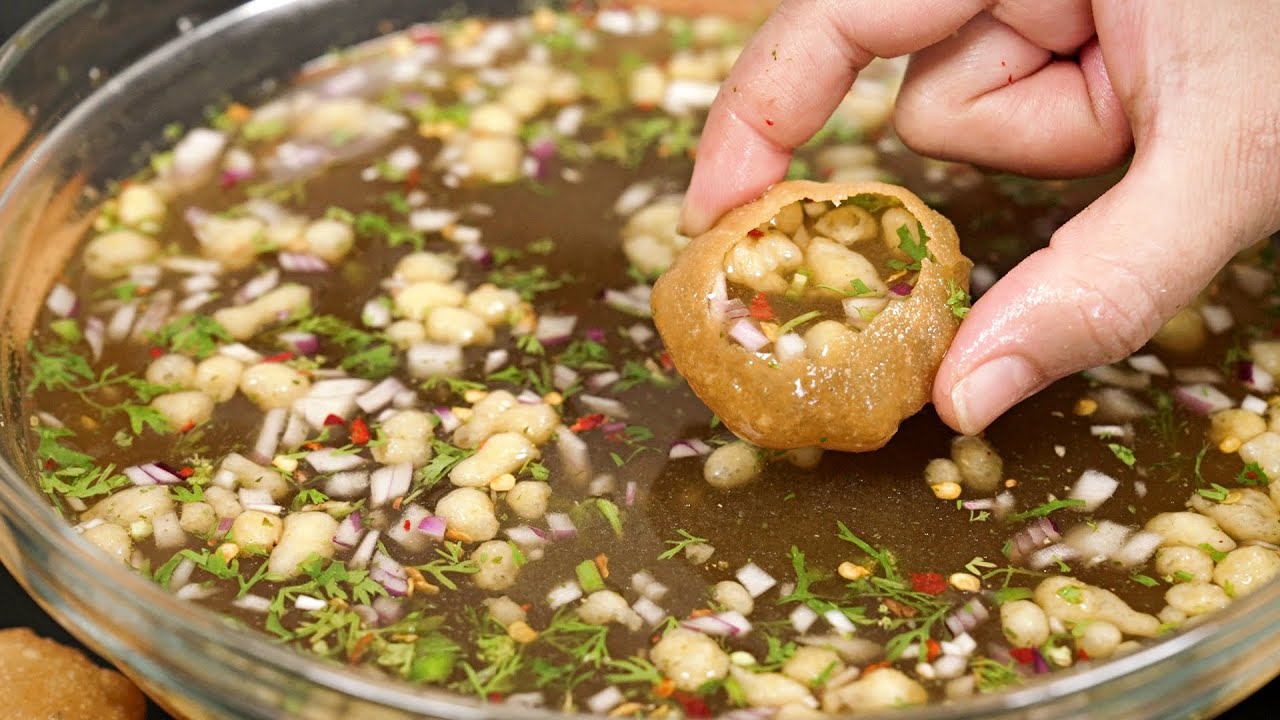
Pani Puri is a bite-sized round crispy hollow puri, filled with a mixture of spicy flavored water (pani), tangy chutney, mashed potato or chickpeas, and sometimes sweetened tamarind chutney. The whole puri is meant to be eaten in one bite, which results in a delightful explosion of taste in your mouth.
Originating from the Indian subcontinent, this snack has many regional versions. In Mumbai, it’s called Pani Puri. In Delhi and Northern India, you’ll hear Golgappa, while in Eastern states like West Bengal, it’s known as Puchka. Despite the different names, the love for this street food is universal.
Why is Pani Puri So Popular?
Its popularity lies in its flavor complexity and its interactive eating style. It combines spicy, tangy, and sweet tastes with textures ranging from crispy to soft. People love standing around a street cart, getting each puri freshly filled and devouring it on the spot. It’s a social food, a comfort food, and for many, a nostalgic memory from childhood.
Ingredients Required for Pani Puri
Let’s break down the ingredients so you can organize everything before you start. It’s best to have all elements prepped in advance.
For the Puris
- Semolina (Sooji) – 1 cup
- All-purpose flour (Maida) – 2 tbsp
- Salt – 1/4 tsp
- Water – as needed to make a firm dough
- Oil – for deep frying
For the Spicy Pani (Water)
- Fresh coriander leaves – 1/2 cup
- Fresh mint leaves – 1/2 cup
- Green chilies – 2 to 3 (adjust to taste)
- Tamarind pulp – 3 tbsp
- Black salt – 1 tsp
- Cumin powder – 1 tsp
- Chaat masala – 1 tsp
- Salt – to taste
- Ice cold water – 4 cups
For the Filling
- Boiled and mashed potatoes – 2
- Boiled chickpeas or black gram (optional) – 1/2 cup
- Chaat masala – 1/2 tsp
- Salt – to taste
- Optional: finely chopped onions, sev (crispy noodles), or sweet chutney
Step-by-Step Guide to Making Pani Puri
Step 1 – Preparing the Dough for Puris
Start by mixing semolina, all-purpose flour, and a pinch of salt in a bowl. Add water gradually and knead a firm dough. It should not be too soft or sticky. Cover the dough with a damp cloth and let it rest for at least 30 minutes. Resting helps the gluten develop and ensures your puris puff up well while frying.
After resting, knead the dough again for a few minutes to make it smooth and pliable. Divide it into small portions and roll each into thin circles. Thinner puris puff better and become crispier.
Step 2 – Shaping and Frying the Puris
Roll out the dough into a large sheet and use a small round cutter or a lid to cut out small circles (around 2-inch diameter). Cover them with a cloth to prevent drying.
Heat oil in a deep frying pan. Test by dropping a small dough piece—if it rises instantly, the oil is ready. Fry a few puris at a time. Gently press them with a spoon so they puff up. Fry until they turn golden brown and crisp. Remove and place them on paper towels to drain excess oil.
Let the puris cool completely before storing them in an airtight container. They can stay crisp for weeks if stored properly.
Step 3 – Making the Spicy and Tangy Pani
In a blender, combine mint, coriander, green chilies, and tamarind pulp with a little water. Blend into a smooth paste. Strain this mixture to remove fiber and rough bits.
In a large bowl, mix this paste with 4 cups of ice-cold water. Add black salt, chaat masala, cumin powder, and regular salt. Mix well and taste. Adjust the seasoning if needed. Chill in the fridge until serving for the best flavor.
Step 4 – Preparing the Filling
Boil the potatoes, peel them, and mash coarsely. You can mix in boiled chickpeas or kala chana for added texture. Sprinkle some chaat masala and salt to enhance the taste. For an extra zing, mix in finely chopped onions, green chilies, or a bit of sweet chutney.
Step 5 – Assembling the Pani Puri
The best part—assembling and eating! Crack a small hole on top of each puri. Fill it with the potato mixture, a bit of onion or chutney if you like, then dunk or pour in the spicy pani. Pop the whole thing into your mouth and enjoy the explosion of flavors.
You can also set up a DIY Pani Puri station at home. Serve the puris, filling, and flavored water separately so everyone can make their own just how they like it.
Tips and Tricks for the Perfect Pani Puri
Making Pani Puri at home might sound overwhelming, but with the right tips, it becomes a breeze. Let’s dive into some pro tricks that can take your homemade version to street-style perfection.
- Perfecting the Puri Dough: Use fine semolina (sooji/rava) for best results. The finer it is, the crispier and puffier the puris will be. Resting the dough for at least 30 minutes is crucial—this allows the gluten to develop, helping puris puff up and stay crispy.
- Even Rolling: When rolling out the puris, make sure they’re of even thickness. Uneven puris may not puff or will cook unevenly. Roll them thin, but not paper-thin, or they’ll break while filling.
- Oil Temperature Matters: Frying in the right temperature is key. If the oil is too hot, puris will brown quickly and remain raw inside. If too cold, they won’t puff. Medium-high heat is ideal. Test with a small piece of dough before frying in batches.
- Store Crispy Puris Properly: Once cooled, store puris in an airtight container away from moisture. Throw in a few grains of rice or a silica packet to prevent sogginess.
- Flavorful Pani: Chill the pani before serving—it enhances flavor and gives the refreshing kick pani puri is known for. You can also prepare it a few hours in advance to let the spices blend well.
- Customizable Fillings: Don’t limit yourself to just potatoes or chana. Try sprouts, grated carrots, moong beans, or even flavored sev. Some people love yogurt and sweet chutney for a Dahi Puri version.
- Clean Water: Use filtered or boiled and cooled water when preparing the spicy pani. It’s safer, especially since it’s consumed raw and cold.
By following these tips, you’ll make pani puri that not only looks impressive but tastes just like your favorite street-side vendor’s.
Serving Suggestions
Pani Puri isn’t just about flavor; it’s about the whole experience. Serving it right adds to the joy. Whether it’s a small family treat or a weekend gathering, here’s how to make your pani puri night unforgettable.
1. Set Up a DIY Pani Puri Bar: This is super fun, especially at parties. Arrange all the components separately:
- A big bowl of spicy pani (and maybe a sweet version too)
- The crispy puris
- A few types of fillings (potato, sprouts, chana)
- Sweet tamarind chutney
- Spicy green chutney
- Chopped onions, coriander, sev
This way, everyone can customize their puri just the way they like it. It also avoids soggy puris, since people assemble them one at a time.
2. Offer Different Waters: Want to level up your game? Serve 2 or 3 varieties of flavored pani:
- Mint-coriander (spicy)
- Tamarind-jaggery (sweet-sour)
- Raw mango or hing-jeera (funky twist!)
This adds variety and creates a whole tasting experience.
3. Keep it Chilled: Make sure the pani is served ice-cold. Use a large jug with ice cubes or store it in the fridge until serving. Cold pani really enhances the punchy flavors.
4. Garnish for the Win: Top filled puris with a little sev, fresh coriander, or a pinch of chaat masala for that final touch. Presentation matters when you’re impressing guests!
5. Accompaniments: Pair it with masala soda, lemonade, or lassi. Light drinks cleanse the palate and complement the flavors.
Pani Puri is not just a food item—it’s a celebration. Make it interactive, make it colorful, and most importantly, make it your own!
FAQs about Pani Puri Recipe
What ingredients are needed for the Pani Puri water?
To make the tantalizingly tangy pani for Pani Puri, you’ll need fresh mint leaves, cilantro, green chilies, tamarind pulp, black salt, regular salt, cumin powder, chaat masala, and some cold water. For an extra kick, a bit of ginger and a pinch of asafoetida can elevate the flavors.
How do you prepare the puris for Pani Puri?
While you can make puris at home by kneading semolina, all-purpose flour, baking soda, and water into a stiff dough, many prefer buying ready-made puris from the store for convenience. If you’re making them at home, roll the dough thin, cut small circles, and deep-fry them until crisp.
Can I make Pani Puri ahead of time?
Yes, you can prepare the pani in advance and refrigerate it to enhance its flavors. The puris can be stored in an airtight container. However, assemble the Pani Puris right before serving to maintain the crunch of the puris.
What are some common fillings for Pani Puri?
Traditional fillings include boiled and mashed potatoes, sprouted mung beans, chickpeas, and sweet-and-sour tamarind chutney. You can experiment with various toppings like pomegranate seeds or sev to add a unique twist.
Is Pani Puri gluten-free?
Typically, puris are made from semolina, which contains gluten. For a gluten-free version, you can use flour like chickpea flour or rice flour as substitutes to make the puris.
How do I serve Pani Puri?
To serve, crack a small hole on top of each puri, fill it with the prepared mixture of your choice, dip it into the chilled pani, and enjoy immediately. The burst of flavors is best experienced when eaten right away.
Conclusion
From making the dough to frying puris, blending the pani, and setting up your own chaat corner, every step is a journey into India’s rich street food culture. Whether you’re indulging alone or sharing with friends and family, the experience is always worth it.
So next time those street food cravings hit, don’t wait—roll up your sleeves, head to the kitchen, and treat yourself to a plate of homemade Pani Puri. Your taste buds will thank you!


