Pani Popo Recipe: Ever bite into a warm, fluffy bun drenched in silky-sweet coconut cream? That’s Pani Popo, a beloved Samoan dish that brings the taste of the islands straight into your kitchen. This tropical treat combines the comfort of freshly baked bread with the richness of coconut milk, creating a dessert (or breakfast!) that’s both nostalgic and downright addictive.
Pani Popo isn’t just a recipe—it’s a cultural staple across Polynesian communities. Whether it’s served during church gatherings, Sunday family meals, or festive occasions, this dish holds a special place in Samoan hearts. And the best part? You don’t have to travel thousands of miles to enjoy it. With just a few simple ingredients and some patience, you can whip up a batch of authentic Pani Popo in your own oven.
So, roll up your sleeves, preheat that oven, and get ready to create something magical and mouthwatering. You’re about to master one of the most delicious island secrets ever baked.
What is Pani Popo?
Pani Popo literally translates to “coconut buns” in Samoan. “Pani” is a borrowed word for bread or bun, and “Popo” refers to coconut. Together, they create the ultimate combination of soft yeast rolls soaked in sweet coconut milk sauce. Think of it as Samoa’s answer to sticky buns—but with coconut cream instead of caramel or icing.
Traditionally, Pani Popo is made from scratch using a rich, slightly sweet yeast dough. Once the rolls are shaped and placed into a baking dish, they’re smothered in homemade coconut milk sauce before baking. As they rise and bake, the buns soak up the sauce, giving you a moist, rich texture that melts in your mouth.
Pani Popo is more than just food—it’s a symbol of hospitality, family, and cultural pride. You’ll find it at any Samoan celebration, potluck, or holiday event. Whether you’re Samoan or just someone who appreciates good food, this recipe is bound to become a favorite in your kitchen.
Why You’ll Love This Recipe
Let’s be honest—who doesn’t love soft bread and sweet coconut cream? But here are a few more reasons why you’re going to adore this Pani Popo recipe:
- Tropical Flavor Explosion: Coconut milk brings a rich, creamy sweetness that’s unique and satisfying.
- Perfect for Any Time of Day: Eat it as breakfast, enjoy it with your afternoon tea, or serve it as a dessert.
- Easy to Customize: Want to make it vegan? Gluten-free? Add a filling? Totally possible!
- Beginner Friendly: No advanced baking skills needed. If you can make pizza dough, you can make Pani Popo.
- Make-Ahead Option: Prep the buns in advance, refrigerate overnight, and bake fresh in the morning.
- Great for Sharing: This recipe makes enough to feed a small crowd, perfect for potlucks and parties.
Once you make this once, you’ll be hooked. It’s the kind of recipe that quickly becomes a family favorite—and that coconut sauce? You’ll want to drink it by the spoonful.
Ingredients You’ll Need
To make authentic Pani Popo, you only need a handful of simple ingredients—most of which you probably already have in your pantry.
For the Dough:
- 3 ¾ cups all-purpose flour
- ¼ cup sugar
- 2 ¼ tsp (1 packet) active dry yeast
- 1 tsp salt
- 1 cup warm milk (around 110°F)
- ¼ cup melted butter or coconut oil
- 1 egg
For the Coconut Sauce (Fa’apopo):
- 1 can (13.5 oz) full-fat coconut milk
- ½ cup sugar (adjust to taste)
- 1 tbsp cornstarch (optional, for thicker sauce)
- ½ tsp vanilla extract (optional but tasty)
Optional Add-ins:
- Shredded coconut (for topping)
- Nutmeg or cinnamon (a pinch in the sauce)
Ingredient Tips:
- Coconut Milk: Go for full-fat canned coconut milk. Avoid the refrigerated kind—it’s too thin.
- Flour: All-purpose works great, but you can sub in bread flour for a chewier texture.
- Yeast: Make sure your yeast is fresh. Expired yeast = flat buns.
You can find all of these ingredients at your local supermarket. If you want authentic Samoan ingredients, try an island market or specialty store.
Kitchen Tools Required
Before diving into the baking process, let’s make sure your kitchen is fully equipped for Pani Popo success. Good tools don’t just make life easier—they ensure consistency and help avoid common baking disasters. Here’s what you’ll need:
Must-Have Tools:
- Large mixing bowl – For combining and kneading the dough.
- Measuring cups and spoons – Accuracy matters when it comes to yeast and flour.
- Whisk or spoon – To mix ingredients smoothly.
- Stand mixer with dough hook (optional) – Speeds up kneading and makes life easier.
- Plastic wrap or clean towel – For covering the dough during proofing.
- 9×13-inch baking dish – Perfect for arranging your rolls and baking them evenly.
- Small saucepan – To warm and dissolve sugar into the coconut milk sauce.
- Pastry brush (optional) – For brushing butter on top before or after baking.
Nice-to-Have Extras:
- Kitchen thermometer – To check the milk temperature or internal temp of buns.
- Bench scraper – Handy for shaping and cleaning your work surface.
- Silicone mat or floured surface – Prevents dough from sticking while kneading.
You don’t need a fancy kitchen setup for this recipe. As long as you can mix, knead, and bake—you’re golden!
Before You Start – Prep Tips
A little prep goes a long way in baking. It’s not just about the ingredients; it’s about how you treat them. Follow these tips to set yourself up for success.
1. Measure Accurately
Always level your flour with a knife and avoid scooping directly from the bag—it compacts the flour, leading to dense dough. For best results, use a kitchen scale.
2. Activate the Yeast Properly
Use warm milk around 105°F–110°F. Too cold, and your yeast won’t activate. Too hot, and it will die. Let it sit with a pinch of sugar for 5–10 minutes until it becomes frothy.
3. Room Temperature Ingredients
Make sure your egg and butter are at room temp. Cold ingredients slow down yeast activity.
4. Plan for Time
This is a yeast dough—it needs time to rise (twice!). So give yourself at least 3 hours from start to finish. It’s worth it, promise.
5. Grease Your Dish and Hands
This dough is soft and slightly sticky. Grease your hands before shaping the buns to keep things smooth.
Getting all this sorted before you begin will save you from mid-recipe stress. Prep once, bake like a pro.
Step-by-Step Guide to Making Pani Popo
Let’s roll up those sleeves and walk through this recipe one delicious step at a time. No shortcuts, no stress—just step-by-step goodness.
Step 1: Mix the Dough
In a large bowl, combine:
- Warm milk
- Sugar
- Yeast
Let it sit for about 5–10 minutes until it becomes foamy. This tells you the yeast is alive and ready to go.
Add the egg, melted butter (or coconut oil), salt, and 2 cups of flour. Mix until it forms a shaggy dough. Gradually add the remaining flour until it starts to pull away from the sides of the bowl.
Step 2: Knead the Dough
Turn the dough out onto a floured surface and knead for 8–10 minutes by hand (or 5–6 minutes with a stand mixer using a dough hook). The dough should become smooth, elastic, and slightly tacky—not sticky.
Too sticky? Add a tablespoon of flour at a time.
Too dry? Add a tablespoon of warm water.
Step 3: Let It Rise (First Proof)
Place the dough in a greased bowl and cover it with a towel or plastic wrap. Let it rise in a warm, draft-free spot for 1 to 1.5 hours, or until it doubles in size.
Pro Tip: Turn your oven on for just a minute, then turn it off—this creates a warm proofing box.
Step 4: Shape the Buns
Once risen, punch the dough down gently. Divide it into 12 equal pieces. Roll each into a ball and arrange them in a greased 9×13-inch baking dish, slightly spaced apart.
Step 5: Second Rise
Cover the baking dish and let the buns rise again for about 30–45 minutes. They should puff up and touch each other slightly.
This second proof is key to getting fluffy, pull-apart buns.
Step 6: Make the Coconut Sauce
While the buns are proofing, whisk together the coconut milk and sugar in a saucepan over medium heat. Stir until the sugar dissolves. If you like a thicker sauce, dissolve 1 tablespoon of cornstarch in 2 tablespoons of water and whisk it in until slightly thickened.
Add a splash of vanilla extract for extra depth.
Step 7: Pour and Bake
Preheat your oven to 350°F (175°C).
Once the buns have risen, pour the coconut milk mixture evenly over the buns. Make sure all of them are bathed in the sauce—it’s what makes the bottom sticky and rich.
Bake for 25–30 minutes until the tops are golden brown and the sauce is bubbling.
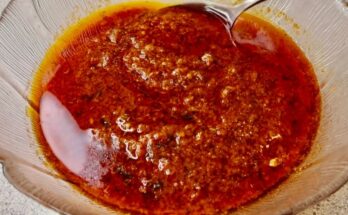
Making the Coconut Sauce (Fa’apopo)
The coconut sauce—Fa’apopo—is the soul of Pani Popo. Without it, you’ve just got plain dinner rolls. With it, you’ve got magic. Sweet, tropical, velvety magic that seeps into every bite.
Ingredients:
- 1 can (13.5 oz) full-fat coconut milk
- ½ cup white sugar (or brown sugar for a deeper flavor)
- 1 tbsp cornstarch (optional, for thicker sauce)
- ½ tsp vanilla extract (optional but recommended)
Directions:
- Pour the coconut milk into a small saucepan over medium heat.
- Add sugar and stir continuously until it’s fully dissolved.
- If using, mix cornstarch with a tablespoon of cold water to form a slurry, then add to the coconut milk mixture. Stir constantly to avoid clumping.
- Add vanilla extract and remove from heat once the sauce thickens slightly (this takes about 5–7 minutes).
This coconut sauce is not meant to be pudding-thick—it should be pourable and silky, just thick enough to cling to the buns without being watery.
Tips for the Perfect Sauce:
- Avoid boiling: Just heat gently until the sugar dissolves.
- Taste test: Like it sweeter? Add a bit more sugar. Prefer a more coconut-forward flavor? Cut back on the sugar slightly.
- Thicker sauce: More cornstarch or cook a little longer.
Pour it hot over your second-proofed buns right before they go into the oven. That’s when the magic happens—your rolls will soak in that sweet coconut bath as they bake.
Proofing Tips for Soft, Fluffy Buns
Want that soft, airy, cloud-like texture in your Pani Popo? It all comes down to proofing. Here’s how to get it just right:
The First Rise (Bulk Fermentation)
This is where your dough grows. It’s the foundation for a great crumb (the inside texture of the bread). Let your dough rise until it doubles in size, not just “rises a bit.”
- Time: 1 to 1.5 hours
- Environment: Warm, draft-free spot. An oven with the light on or a turned-off microwave with a cup of warm water works great.
- Check: Gently press your finger into the dough. If it springs back slowly, it’s ready. If it bounces right back, it needs more time.
The Second Rise (Final Proof)
After you shape your dough balls and place them in your dish, let them rise again. This step allows your rolls to puff up and ensures a delicate, tender texture.
- Time: 30–45 minutes
- Visual cue: The rolls should be touching or nearly touching each other and look slightly puffy.
Proofing Tips:
- Don’t rush it: Under-proofed dough = dense, chewy buns.
- Avoid over-proofing: If your rolls collapse or spread out too much, you waited too long.
- Use plastic wrap: Cover your dough to prevent it from drying out.
Master the rise, and you’ll master the bun.
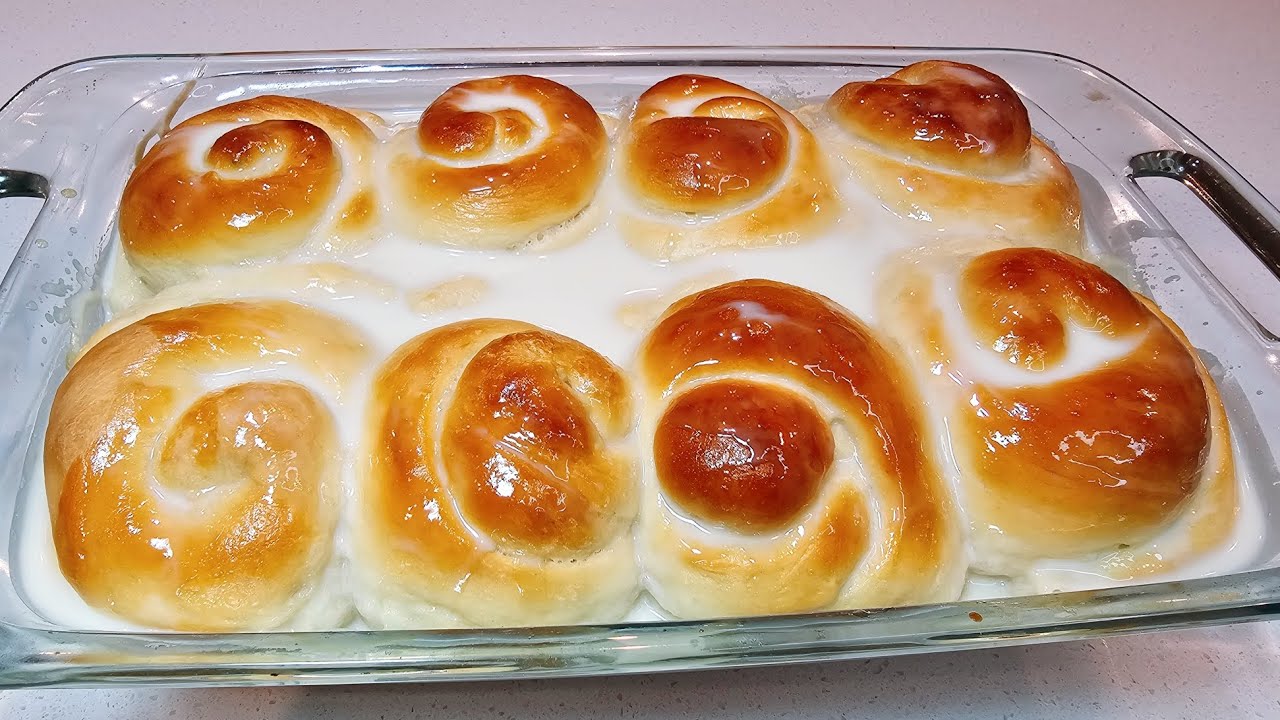
Baking the Perfect Pani Popo
This is the moment of truth—turning all that sweet coconut-soaked dough into golden brown perfection.
Oven Temperature
Bake your Pani Popo at 350°F (175°C). This allows the rolls to cook through without burning the tops.
Bake Time
- 25 to 30 minutes is the sweet spot.
- You want the tops to be golden and the coconut sauce bubbling around the edges.
- Insert a thermometer into the center of a roll—it should read 190°F (88°C) when done.
Watch the Sauce
Some of the sauce will soak into the buns. Some will bubble up around them, creating a gooey, golden base. That’s exactly what you want.
If the tops brown too fast before they’re fully cooked, loosely cover with foil for the last 5–10 minutes.
Finishing Touches
Once out of the oven, brush the tops with a little melted butter or leftover coconut sauce for a shiny, irresistible finish.
Let them cool for 5–10 minutes before serving (if you can resist). That sauce needs a moment to set—and you don’t want to burn your tongue!
How to Know When It’s Done
Not sure if your buns are fully baked? Don’t worry. Here are the signs of perfectly baked Pani Popo:
Visual Cues:
- Golden brown tops
- Sauce bubbling gently at the bottom
- Rolls puffed and slightly separating
Touch Test:
- Tap the top—it should sound slightly hollow
- Gently press a roll—it should spring back
Thermometer Test:
- Internal temp should be 190°F (88°C)
Avoid cutting into them too soon or they might feel doughy. Let them sit just a bit—you’ll thank yourself later.
Serving Suggestions
Now that you’ve got a pan full of warm, sticky, coconut-drenched rolls—how do you serve them?
Breakfast or Brunch:
- Serve warm with a hot cup of coffee or tea
- Add tropical fruits like mango, pineapple, or papaya on the side
- Pair with eggs and bacon for a sweet-savory combo
Dessert Time:
- Drizzle extra coconut sauce over the top
- Add a scoop of vanilla or coconut ice cream
- Dust with powdered sugar and toasted coconut
Party Treat:
- Serve at potlucks, luaus, or BBQs
- Slice into squares for easy serving
- Serve warm or at room temp (still delicious!)
However you serve it, one thing’s guaranteed—it’ll be gone in minutes.
Storing and Reheating Pani Popo
So you’ve made a big batch (or maybe doubled the recipe because you knew it’d be a hit)—now what? The good news is that Pani Popo stores well, and reheats like a dream.
How to Store:
At Room Temperature:
- Allow buns to cool completely.
- Cover the baking dish tightly with foil or transfer the buns to an airtight container.
- Store at room temperature for up to 2 days.
In the Fridge:
- For slightly longer storage, refrigerate in an airtight container for up to 4–5 days.
- Keep any extra coconut sauce separate, if possible.
Freezer Friendly:
- Pani Popo can be frozen for up to 2 months.
- Wrap each bun individually in plastic wrap, then place them in a zip-top freezer bag.
- You can also freeze the entire batch (once baked) by wrapping the whole pan in foil and sealing it well.
Reheating Tips:
Microwave:
- Wrap a single bun in a damp paper towel and microwave for 15–20 seconds.
- Add a drizzle of coconut milk or water if the bun feels dry.
Oven:
- Preheat to 300°F (150°C).
- Cover buns with foil and heat for 10–15 minutes.
- Optional: pour a little fresh coconut milk over the buns before reheating for extra moisture.
From Frozen:
- Thaw in the fridge overnight, then reheat using the oven method above.
- If you’re in a hurry, microwave a frozen bun in 30-second intervals until warm.
Reheated Pani Popo is nearly as good as fresh—moist, sweet, and comforting. You might even prefer it the next day when the flavors have had more time to meld.
Troubleshooting Common Problems
Even the best bakers run into issues. If your Pani Popo didn’t turn out perfect on the first try, don’t worry—here’s how to fix the most common problems.
1. My Dough Didn’t Rise
- Possible Causes: Inactive yeast, milk was too hot, or the environment was too cold.
- Fix: Always proof your yeast in warm milk (105–110°F). Use fresh yeast and let the dough rise in a warm, draft-free place.
2. The Rolls Turned Out Dense
- Possible Causes: Not kneading enough, not enough rising time, or too much flour.
- Fix: Knead until the dough is smooth and elastic. Give enough time for both rises, and avoid overloading with flour.
3. Sauce Was Too Watery
- Possible Causes: Thin coconut milk, not enough sugar, or undercooked.
- Fix: Use full-fat canned coconut milk. Let it simmer slightly to reduce. Add cornstarch for extra body.
4. Sauce Separated in the Oven
- Possible Causes: High oven temperature or poor mixing.
- Fix: Mix the coconut milk and sugar thoroughly. Try warming the sauce gently before pouring. Cover loosely with foil if baking too quickly.
5. Buns Got Too Brown on Top
- Possible Causes: Oven too hot or baked too long.
- Fix: Cover loosely with foil during the last 10 minutes of baking to prevent over-browning.
Remember—baking is both a science and an art. Don’t be discouraged by a hiccup or two. Each time you bake Pani Popo, you’ll get closer to that perfect, island-style bun.
Customizing Your Pani Popo
One of the coolest things about Pani Popo? It’s super easy to personalize. Want to make it your own? Try one of these fun twists:
1. Add Fillings
- Coconut Jam (Kaya) – spoon a bit into the center before rolling.
- Sweet Red Bean Paste – for a Polynesian-Asian fusion.
- Chocolate Chips – because coconut and chocolate? Yes please.
2. Try Different Flavored Coconut Milk
- Look for vanilla coconut milk or coconut milk with caramel to add a twist.
- Want something unique? Try infusing the sauce with pandan or cardamom.
3. Vegan Version
- Use coconut oil or vegan butter.
- Swap the egg with a flaxseed egg (1 tbsp flaxseed meal + 3 tbsp water).
- Double-check your sugar is vegan (some brands use bone char).
4. Healthier Swaps
- Use whole wheat flour (try a 50/50 mix with all-purpose to keep it soft).
- Reduce the sugar in both dough and sauce by 25–30%.
- Add chia seeds or flaxseeds for added fiber.
5. Topping Ideas
- Toasted shredded coconut
- Crushed macadamia nuts
- Powdered sugar with cinnamon dusting
Pani Popo is incredibly forgiving—feel free to experiment, remix, and make it suit your taste buds.
Nutritional Info (Approximate per bun)
Note: These values are estimates and can vary based on ingredient brands and serving sizes.
| Nutrient | Amount |
|---|---|
| Calories | 250–280 kcal |
| Carbohydrates | 36g |
| Protein | 4g |
| Fat | 10g |
| Saturated Fat | 8g |
| Sugar | 12g |
| Fiber | 1g |
| Sodium | 180mg |
Health Tips:
- Want to cut down on calories? Use light coconut milk and reduce the sugar slightly.
- Looking for more protein? Serve with Greek yogurt or a protein smoothie.
Remember, food is about joy too—so enjoy your Pani Popo guilt-free!
FAQs about Pani Popo Recipe
1. Can I use canned biscuit or dinner roll dough instead of homemade?
Yes, for a quick version, you can use canned dough. Just place them in a dish, pour the coconut sauce over, and bake. The flavor won’t be as rich as homemade, but it still works.
2. What can I substitute for coconut milk?
There’s really no perfect sub for the flavor of coconut milk in Pani Popo. But in a pinch, use evaporated milk with a drop of coconut extract. You can also try almond milk, but the flavor will differ.
3. Can I freeze Pani Popo before baking?
Yes! After shaping the dough into rolls, place them in a pan, cover tightly, and freeze. When ready to bake, thaw overnight in the fridge, let rise, pour sauce, and bake as usual.
4. Why did my coconut sauce separate?
It could be because it wasn’t mixed well or your oven was too hot. Make sure to stir the sauce well before pouring and bake at the correct temperature.
5. How sweet should Pani Popo be?
That’s up to you! Traditional versions are fairly sweet, but feel free to adjust the sugar in the dough and sauce to match your preference.
Conclusion
Pani Popo is more than just coconut buns—it’s comfort food at its finest. Sweet, fluffy, warm, and soaked in creamy coconut goodness, these rolls are a taste of Samoa in every bite. Whether you’re making them for breakfast, dessert, or a special family gathering, one thing’s for sure: they’ll disappear fast.
With just a little time and some pantry basics, you can bring this island tradition into your home. And once you do? There’s no turning back.
Try it once, and you’ll be dreaming of coconut sauce every weekend.