Pan Fried Pork Chops Recipe: There’s something incredibly satisfying about biting into a juicy, crispy-edged pork chop straight from the skillet.
Whether you’re cooking for a quick weeknight dinner or impressing guests, pan-fried pork chops are a timeless comfort food that delivers every time.
This step-by-step guide will walk you through everything from choosing the right cut to seasoning, frying, and serving with flair.
Let’s dig into one of the easiest and most rewarding dishes you can make at home.
Why Pan Fried Pork Chops Are a Classic Favorite
Pork chops have earned a permanent spot on dinner tables for generations. Why? They’re quick to cook, loaded with flavor, and incredibly versatile. You can season them simply or spice them up with herbs and marinades. The crispy, caramelized crust you get from pan frying adds a gourmet touch without much effort. Best of all, they pair well with just about anything—mashed potatoes, steamed veggies, or even a fresh salad.
Another reason they’ve stood the test of time is their adaptability. Whether you’re working with bone-in or boneless chops, thick or thin cuts, or going low-carb or full-on comfort food, there’s a perfect pork chop recipe for everyone. That’s the beauty of pan-fried pork chops: delicious doesn’t have to mean difficult.
What Makes a Perfect Pork Chop?
So, what separates a dry, tough pork chop from a tender, juicy one that melts in your mouth? It’s all about technique. A perfect pork chop is:
- Juicy on the inside with a golden-brown crust on the outside
- Well-seasoned but not overly salty
- Cooked just right—145°F internal temperature is the sweet spot
- Rested before serving to lock in all those juices
It’s not just the cooking that matters—the preparation is key. Choosing the right cut, seasoning properly, and avoiding overcooking all play a part in turning your pork chops from average to amazing.
Choosing the Right Cut of Pork Chops
Before you even touch a skillet, it starts with choosing the best pork chop. Not all cuts are created equal.
Bone-in vs. Boneless
- Bone-in pork chops tend to be juicier and more flavorful because the bone helps retain moisture and add depth during cooking.
- Boneless chops cook faster and are easier to eat, but they can dry out if you’re not careful.
Thickness Matters
Thicker chops (about 1 to 1.5 inches) are your best bet for pan frying. They’re easier to sear without overcooking the inside. Thin chops can go from tender to rubbery in seconds, so they require more attention.
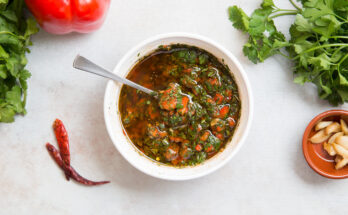
List of Ingredients You’ll Need
Here’s a straightforward list of everything you’ll need to make perfect pan-fried pork chops:
- 4 pork chops (bone-in or boneless, about 1 inch thick)
- 1–2 tablespoons olive oil
- 1 tablespoon unsalted butter
- Salt (to taste)
- Black pepper (freshly ground)
- Garlic powder (1 tsp)
- Onion powder (1 tsp)
- Paprika (1 tsp)
- Fresh rosemary or thyme (optional)
- 2–3 garlic cloves, smashed (optional)
- Lemon wedges (for serving, optional)
These basic ingredients form the flavor base for a classic pan-fried pork chop. You can always tweak based on your preferences, but this mix offers a great balance of seasoning without overpowering the pork.
Optional Add-ons and Flavor Enhancers
If you’re feeling adventurous or want to impress guests, here are a few extras that can elevate your chops:
- Apple cider vinegar or lemon juice – adds a bright note to cut the richness
- Mustard or Dijon glaze – offers a tangy, savory punch
- Chili flakes or cayenne – for a spicy kick
- Honey or brown sugar – for a sweet and savory contrast
- Soy sauce or Worcestershire sauce – adds umami depth
Don’t feel pressured to use them all—choose one or two that match your taste buds.
Essential Tools for Pan Frying
Having the right tools on hand makes the process smoother and safer. Here’s what you’ll need:
- Cast iron skillet or heavy-bottomed pan
- Tongs or a spatula
- Instant-read meat thermometer
- Paper towels
- Cutting board and knife
- Aluminum foil (for resting the meat)
A cast iron skillet is ideal for achieving a beautiful sear, but any sturdy frying pan will do in a pinch. Just avoid lightweight pans that don’t retain heat well.
Preparing the Pork Chops
Great pork chops start before they hit the heat. Let’s prep them properly.
Brining or Marinating (Optional)
Brining your pork chops in a saltwater solution for 30 minutes to 2 hours can help them retain moisture and enhance flavor. If you have the time, this step is totally worth it.
Alternatively, a simple marinade with olive oil, vinegar, herbs, and spices can tenderize and flavor the meat beautifully.
Patting Dry for the Perfect Sear
After brining or marinating, always pat your pork chops dry with paper towels. Moisture on the surface prevents browning and causes the meat to steam instead of sear.
Seasoning the Pork Chops
This is where flavor meets function. Mix your dry seasonings (salt, pepper, garlic powder, onion powder, and paprika) in a small bowl and rub them generously over both sides of the pork chops.
Don’t be shy here—seasoning is the key to that flavorful crust. Make sure the spices coat the meat evenly, and let them sit for 10–15 minutes to absorb the flavors before frying.
Step-by-Step Guide to Pan Frying Pork Chops
Now that everything’s prepped, let’s get cooking!
Step 1: Heat Your Pan
Place your skillet over medium-high heat and let it get hot—really hot. You want it hot enough to create a solid sear the second the pork hits the pan.
Step 2: Oil and Butter Combo
Add the olive oil first, then the butter. The oil raises the smoke point, while the butter adds flavor and helps brown the pork nicely.
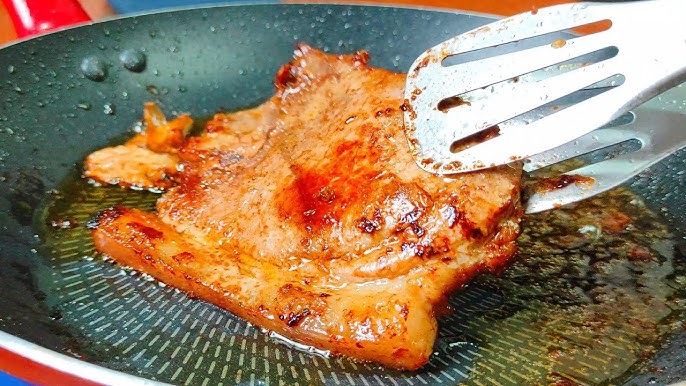
Step 3: Sear on High Heat
Lay the pork chops in the pan without crowding them. Let them sear undisturbed for 3–4 minutes. This is when the magic happens—the Maillard reaction creates that gorgeous golden crust.
Step 4: Flip and Finish Cooking
Flip the chops and lower the heat slightly. Add fresh herbs and smashed garlic if you’re using them. Cook another 3–5 minutes depending on thickness, spooning the melted butter over the chops occasionally.
Step 5: Resting the Chops
Remove the pork chops from the pan and tent them loosely with foil. Let them rest for 5 minutes. This locks in the juices and keeps them moist and tender when sliced.
How to Know When Pork Chops Are Done
Getting the timing right is essential to avoid dry or undercooked pork. The key is precision—don’t guess, measure!
Using a Meat Thermometer
The most reliable way to know your pork chops are cooked perfectly is by using an instant-read meat thermometer. You’re aiming for an internal temperature of 145°F (63°C). Insert the thermometer into the thickest part of the chop (not touching the bone if it’s bone-in) for the most accurate reading.
After hitting 145°F, remove the pork chops from the pan and let them rest. During this time, the residual heat continues to cook them slightly, known as “carryover cooking.” Resting also allows the juices to redistribute throughout the meat.
Visual Cues
Don’t have a thermometer? No worries—though it’s not as foolproof, there are visual cues to look for:
- The pork should no longer be pink in the center but still slightly moist.
- Clear juices (not pink or red) should run when you press down gently with a fork.
- The chop should be firm but with a slight give—if it’s rock hard, it’s probably overcooked.
Still, for consistent results, a thermometer is your best kitchen sidekick.
Tips for Extra Juicy Pan Fried Pork Chops
Want to go from good to legendary? These pro tips will make sure your pork chops are tender, juicy, and packed with flavor every time:
- Bring to room temperature before cooking: Letting the pork sit out for 20–30 minutes before frying helps it cook more evenly.
- Don’t skip the rest: After cooking, rest the chops under foil for 5–10 minutes to trap the juices inside.
- Use a spoon to baste: While the second side is cooking, spoon the hot butter and oil mixture over the chops to infuse flavor and moisture.
- Avoid moving them around: Once the chops are in the pan, don’t keep flipping or pressing them. Let them form a nice crust naturally.
- Cook based on thickness: Thicker chops need lower heat after searing, while thinner ones cook faster—adjust your technique accordingly.
These small changes can make a big difference.
Common Mistakes to Avoid
Even the best cooks slip up sometimes. Avoid these common pitfalls to ensure your pork chops are always top-notch:
- Overcooking: This is the number one mistake and leads to dry, rubbery meat. Always monitor the internal temperature.
- Under-seasoning: Pork has a mild flavor. Don’t be afraid to season it generously.
- Using cold pork chops: Throwing cold meat into a hot pan causes uneven cooking. Let them come to room temperature first.
- Crowding the pan: If the pan’s too crowded, the chops will steam instead of sear. Cook in batches if needed.
- Skipping the resting period: Resting allows juices to redistribute and prevents dry meat.
Keep these in mind, and you’ll master pork chops in no time.
Serving Suggestions
Pork chops are incredibly versatile and pair well with a wide variety of side dishes. Here are some tasty ideas to complete your meal:
Classic Sides
- Creamy mashed potatoes
- Steamed or roasted green beans
- Corn on the cob
- Buttery peas and carrots
Low-Carb Options
- Garlic sautéed spinach
- Cauliflower mash
- Roasted Brussels sprouts
- Zucchini noodles
Sauces and Garnishes
- Apple chutney or applesauce for a sweet contrast
- Pan gravy made from the pork drippings
- A squeeze of lemon or a splash of balsamic reduction
- Fresh herbs like parsley or thyme
The beauty of pork chops is how easily they match up with just about any side, from hearty comfort food to fresh and light fare.
Storing and Reheating Leftovers
Made too many pork chops? Lucky you—leftovers can be just as delicious the next day.
How to Store
- Let the pork chops cool completely before refrigerating.
- Wrap tightly in foil or store in an airtight container.
- Keep them in the fridge for up to 3–4 days.
How to Reheat
- Avoid the microwave if possible—it tends to dry out the meat.
- Instead, reheat in a skillet over low heat with a splash of broth or water and cover with a lid.
- Alternatively, you can place the chops in a 300°F (150°C) oven, covered with foil, for about 10–15 minutes.
The key is to reheat gently and slowly to preserve moisture and texture.
Nutritional Value of Pan Fried Pork Chops
Wondering if pork chops are a healthy choice? The answer depends on how you prepare them.
| Nutrient | Per 6 oz Chop (Approx.) |
|---|---|
| Calories | 250–300 |
| Protein | 30g |
| Fat | 15g |
| Saturated Fat | 5g |
| Carbohydrates | 0g |
| Sodium (Varies) | 200–400mg |
Pork is a great source of high-quality protein, B vitamins, and zinc. To keep things on the healthier side, use minimal oil and avoid heavy sauces.
FAQs about Pan Fried Pork Chops Recipe
1. Can I use boneless pork chops for this recipe?
Absolutely! Just keep a closer eye on the cooking time since boneless chops tend to cook faster and can dry out more easily.
2. Do I need to marinate pork chops before frying?
Not at all, but marinating or brining does enhance flavor and tenderness. If you’re short on time, seasoning and resting the meat before cooking works great too.
3. How can I keep my pork chops from drying out?
Use a meat thermometer to avoid overcooking, and always let the chops rest before slicing. Thicker chops also help retain moisture better.
4. Can I make pan fried pork chops ahead of time?
You can! Store them in the fridge and reheat gently in a skillet or oven to maintain texture and flavor.
5. What’s the best oil to use for pan frying pork chops?
A high smoke point oil like olive oil, avocado oil, or vegetable oil works best. Pair it with a little butter for added flavor.
Conclusion
Pan-fried pork chops are one of those dishes that manage to be both simple and satisfying. With just a few ingredients, a good pan, and the right technique, you can create a meal that feels gourmet without breaking a sweat. Whether you stick to the classic seasoning or explore bold flavors, the key is in the execution: get that perfect sear, don’t overcook, and always let the meat rest. Master this recipe, and you’ve got a go-to dinner that never disappoints.
Now it’s your turn to bring the sizzle to the skillet. Happy cooking!