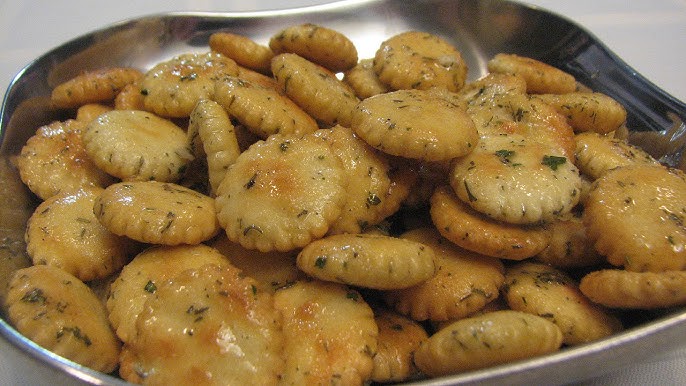
Oyster Crackers Recipe: Oyster crackers might be small, but they pack a crunchy punch. You’ve probably seen them bobbing around in bowls of clam chowder or tomato soup. These tiny round (or square!) crackers were originally served with oyster stews—hence the name. But today? They’re the unsung heroes of soups, chili bowls, and even snack time.
So why make them at home instead of grabbing a box from the store shelf? Simple: flavor, freshness, and fun. Homemade oyster crackers have a much richer, buttery taste than the bland commercial ones. Plus, they’re free from preservatives, mystery oils, and artificial junk.
Making these little guys at home is surprisingly easy and doesn’t take much time. It’s a beginner-friendly recipe, and once you’ve tried a batch, you’ll never go back to store-bought. Let’s dive into everything you need to create the perfect crispy, golden oyster crackers from scratch.
Ingredients You’ll Need
Before you get your hands floury, let’s break down exactly what you’ll need for a basic batch. The great thing about this recipe is its simplicity—you probably already have everything in your pantry.
Basic Ingredients:
- 1 1/2 cups all-purpose flour
- 1/2 teaspoon baking powder
- 1/2 teaspoon sugar
- 1/2 teaspoon salt
- 2 tablespoons unsalted butter (cold and cubed)
- 1/3 cup water (cold)
That’s it for the base. Yep—just six simple ingredients. These will give you a buttery, flaky cracker that pairs well with soups or makes for an addictive snack on their own.
Optional Seasoning Variations:
Want to add some flair? Try mixing any of the following into your dough or sprinkling on top before baking:
- Garlic powder
- Onion powder
- Paprika or cayenne (for a spicy kick)
- Dried herbs like rosemary or thyme
- Grated parmesan or nutritional yeast for a cheesy touch
Ingredient Notes:
- Flour: Stick to all-purpose for best results. Whole wheat is doable but will change texture and flavor.
- Butter: Use unsalted so you can control the saltiness.
- Water: Cold water helps the dough come together without making it sticky or too soft.
Kitchen Tools Required
You won’t need a ton of fancy equipment—this recipe is very low-maintenance. Here’s what you’ll want nearby:
- Mixing bowl
- Pastry cutter or fork
- Rolling pin
- Sharp knife or pizza cutter
- Baking sheet
- Parchment paper or silicone baking mat
- Measuring cups and spoons
- Spatula or offset knife (for lifting dough pieces)
Alternatives You Can Use:
- No rolling pin? Use a clean glass bottle.
- No pastry cutter? Two forks or your fingers will do.
- No parchment? Just grease your baking sheet with a light coat of butter or oil.
Prepping Your Kitchen Space
You’re about to handle flour, butter, and dough, so it’s worth organizing your space a little before you start.
- Clear your countertop and gather your ingredients.
- Preheat your oven to 375°F (190°C).
- Line a baking sheet with parchment paper.
- Have a lightly floured surface ready for rolling out dough.
A clean and organized kitchen always makes cooking more enjoyable—and far less stressful.
Step-by-Step Guide to Making Oyster Crackers
Let’s roll up those sleeves and get to the fun part: making the crackers! Follow this easy process to make sure your crackers come out crispy, flaky, and full of flavor.
Step 1: Mix the Dry Ingredients
Start by combining your dry ingredients in a large mixing bowl. Add all-purpose flour, baking powder, sugar, and salt. Whisk everything together to distribute the leavening and seasoning evenly. This ensures your crackers bake with a consistent texture and flavor.
Step 2: Cut in the Fat
Add cold butter or shortening to the dry mixture. Using a pastry cutter or your fingertips, work the fat into the flour until the mixture resembles coarse crumbs. Keeping the fat cold is key—it creates tiny pockets that give oyster crackers their signature light, crisp texture.
Step 3: Add Liquids and Knead
Pour in cold water or milk gradually while stirring with a fork. Mix until a soft dough forms. Transfer the dough to a lightly floured surface and knead gently for 1–2 minutes until smooth. Avoid overkneading, as it can make the crackers tough.
Step 4: Roll Out the Dough
Using a rolling pin, roll the dough into a thin sheet about ⅛ inch thick. The thinner the dough, the crisper the final crackers will be. Try to keep the thickness even to ensure uniform baking.
Step 5: Cut the Dough into Small Squares
With a sharp knife or pizza cutter, slice the dough into tiny squares—typically ½-inch pieces. You can also poke the tops with a fork for a classic look, though this step is optional.
Step 6: Place on Baking Sheet
Transfer the cut squares to a parchment-lined baking sheet, spacing them slightly apart. They won’t spread much but benefit from airflow.
Step 7: Bake to Golden Perfection
Bake in a preheated oven at 375°F (190°C) for 10–15 minutes or until lightly golden and crisp. Keep an eye on them to prevent overbrowning.
Step 8: Let Them Cool Completely
Once baked, transfer the crackers to a cooling rack. Allow them to cool fully—this helps them become extra crunchy. Store in an airtight container and enjoy!
Flavor Variations to Try
One of the best things about making oyster crackers at home? You get to customize the flavor. While the classic buttery version is delicious on its own, adding spices and seasonings can take these crackers to a whole new level.
1. Garlic & Herb Oyster Crackers
Add 1/4 teaspoon each of garlic powder, onion powder, and dried thyme to your dry mix. You can even sprinkle a little sea salt and crushed rosemary on top before baking. These pair beautifully with creamy soups like mushroom or broccoli cheddar.
2. Spicy Cajun Crackers
Love a little heat? Stir in a mix of paprika, cayenne pepper, and chili powder to the dough. After baking, lightly dust them with Cajun seasoning for an addictive snack with some serious kick.
3. Cheese-Flavored Crackers
Mix 2 tablespoons of grated parmesan or cheddar directly into your flour mix before adding butter. You can also sprinkle a bit of cheese on top before baking. This variation is a hit with kids and adults alike!
Tips for Flavoring Success:
- Don’t go overboard with liquid seasonings—they can mess with dough consistency.
- For toppings, brush lightly with melted butter or olive oil before adding seasonings so they stick better.
- Always taste test a small batch when trying something new.
Tips for Perfect Oyster Crackers
There’s a little art to getting oyster crackers just right. Crispy but not hard, golden but not burnt. These tips will help you nail it every single time.
Use Cold Ingredients
Cold butter and water help create flaky texture. If your kitchen is hot, chill your flour and tools for 10 minutes before starting.
Don’t Overwork the Dough
Overmixing leads to tough crackers. Once your dough comes together, knead just enough to make it smooth.
Roll Evenly
An even thickness ensures all your crackers bake at the same rate. Too thick = soft centers. Too thin = burnt edges.
Bake on the Middle Rack
The middle rack gives you even heat distribution. It prevents the bottom from browning too fast before the top is done.
Cool Completely Before Storing
Warm crackers in a container = soggy disappointment. Let them cool to room temp first.
Mistakes to Avoid:
- Using melted butter instead of cold (you’ll lose flakiness)
- Adding too much water (sticky dough = bad news)
- Overbaking (bitterness from burnt edges)
- Storing before cool (soggy texture)
How to Use Oyster Crackers
These tiny crackers are more versatile than you think. Sure, they’re iconic in soups, but that’s just the beginning.
Classic Uses:
- Clam Chowder: The OG pairing. Float a handful on top for that crunchy contrast.
- Tomato Soup: A match made in comfort-food heaven.
- Chili or Stews: Adds crunch and texture to any warm bowl.
Creative Snack Ideas:
- Seasoned Snack Mix: Mix with pretzels, nuts, and seasonings.
- Toss in Salads: Like mini croutons!
- Cracker Crusts: Crush and use as a crust for casseroles or mac and cheese topping.
- Trail Mix Addition: A savory addition to balance out sweet nuts or dried fruits.
These crackers are also perfect for on-the-go snacking. Throw a few in a zip bag and you’re set for road trips or lunchboxes.
Nutritional Breakdown
Let’s take a quick peek at what you’re eating. (Note: These values are approximate for a standard batch divided into 6 servings.)
| Nutrient | Amount per Serving |
|---|---|
| Calories | 120 kcal |
| Carbs | 15g |
| Protein | 2g |
| Fat | 5g |
| Saturated Fat | 3g |
| Fiber | 1g |
| Sugar | <1g |
| Sodium | 90mg |
Want to make them healthier? Try these swaps:
- Use whole wheat flour instead of all-purpose.
- Reduce butter and add a tablespoon of olive oil.
- Add flaxseeds or chia seeds for extra fiber.
Storing & Shelf Life
Now that you’ve baked a big beautiful batch of homemade oyster crackers, you’ll want to keep them fresh and crunchy for as long as possible.
Storage Tips:
- Store in an airtight container at room temperature.
- Keep away from heat and moisture.
- Add a silica gel packet if you’re storing long-term (optional but helps with humidity).
Shelf Life:
- Room temperature: Stays fresh for 7–10 days.
- Fridge: Not recommended—humidity can soften them.
- Freezer: Yes, you can freeze them! Seal in a ziplock bag and use within 2 months. Re-crisp in the oven for 3–5 minutes at 300°F before serving.
Homemade vs Store-Bought: A Comparison
Let’s break it down: is homemade really better than store-bought? Spoiler: YES.
| Factor | Homemade | Store-Bought |
|---|---|---|
| Flavor | Rich, buttery, fresh | Often bland and dry |
| Ingredients | Real & simple | Preservatives & additives |
| Cost | Cheaper per batch | More expensive per oz |
| Shelf Life | 1–2 weeks | Several months |
| Customizable? | 100% yes | Nope |
Homemade crackers win on taste, flexibility, and health. Plus, baking them is way more fun than grabbing a box off the shelf.
Fun Facts About Oyster Crackers
- Not made with oysters! Despite the name, there’s no seafood involved. The name comes from their traditional use with oyster stew.
- First created in the 1800s in the Northeastern U.S., likely in Boston or New Jersey.
- Also called “water crackers” in some regions because of their light, dry texture.
- Some companies used to stamp them with stars or dots—like tiny works of art!
- Originally designed to last long on ships during long voyages due to their low moisture content.
Kid-Friendly Cooking Tip
Want to make this recipe a fun family activity? Get the kids involved!
- Measuring ingredients is a great way to teach numbers and portion control.
- Let them use cookie cutters to make fun shapes.
- Older kids can help with rolling and cutting the dough.
- They’ll love sprinkling on seasoning—like tiny chefs in training.
Make it a weekend tradition and let them name their creations (Garlic Dinosaurs, Cheesy Stars—get creative!).
Gluten-Free or Vegan Options
Got dietary restrictions? No worries! This recipe can be tweaked for most diets.
Gluten-Free Option:
- Use a 1:1 gluten-free flour blend.
- Add 1/4 teaspoon xanthan gum for better structure.
- Expect slightly different texture, but still tasty.
Vegan Option:
- Use vegan butter (or chilled coconut oil).
- Make sure your sugar is certified vegan.
- Optional: add a touch of nutritional yeast for flavor depth.
The final result might be a bit lighter or more crumbly, but still flavorful and crunchy.
FAQs about Oyster Crackers Recipe
1. Can I make oyster crackers without butter?
Yes! Substitute with chilled coconut oil or vegan butter. Olive oil can work, but may slightly change the texture and flavor.
2. Why are my crackers not crunchy enough?
They may have been too thick or underbaked. Make sure to roll dough thin and let crackers cool completely before storing.
3. Can I add seeds or grains to the recipe?
Absolutely. Try sesame seeds, flaxseeds, or poppy seeds for extra texture and nutrition.
4. Are oyster crackers supposed to taste salty?
Not too salty. They should have a mild flavor to complement soups. You can always adjust salt levels to suit your taste.
5. How many crackers does one batch make?
Depending on how you cut them, one batch can make 100–120 mini crackers. Perfect for storing or sharing!
Final Thoughts
There you have it—a foolproof, step-by-step guide to making crispy, golden, totally addictive homemade oyster crackers. Whether you’re pairing them with soup, serving them at a party, or just snacking straight from the jar, these little bites of joy hit the spot every time.
Making your own crackers not only saves money but gives you total control over flavor and quality. Plus, once you get the hang of it, you’ll find yourself tweaking, experimenting, and perfecting your personal version.
So what are you waiting for? Get baking—and don’t be surprised if these become a permanent staple in your kitchen.

