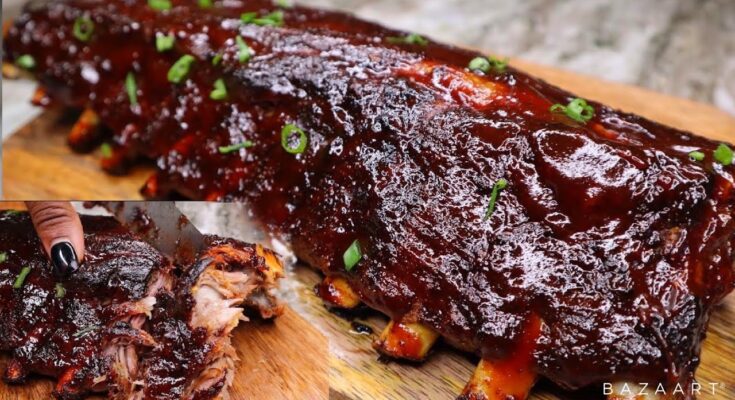
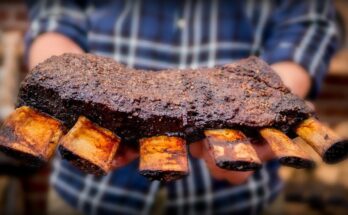
Oven Baked Ribs Recipe: Nothing beats the satisfaction of biting into a perfectly cooked, fall-off-the-bone rib drenched in rich, sticky BBQ sauce. While grilling might be the traditional method, oven-baked ribs are a game-changer, especially when you’re aiming for convenience without sacrificing flavor. Whether it’s a casual weekend dinner or a backyard party where the grill just isn’t an option, knowing how to make oven-baked ribs that taste like they came off a smoker is a serious kitchen skill.
Why are oven-baked ribs ideal? First, they’re fuss-free. No need to watch over a grill or worry about uneven cooking. Second, they cook low and slow, ensuring tender meat that practically melts in your mouth. And finally, they can be made any time of the year—rain or shine.
So if you’re ready to unlock a mouthwatering rib recipe that’ll turn your home kitchen into a BBQ haven, you’re in the right place. Let’s dive into each step of the process and make ribs that your taste buds—and your guests—won’t forget.
Choosing the Right Ribs
Baby Back vs. Spare Ribs
Before we even think about seasoning or cooking, you need to pick the right type of rib. Two main contenders dominate the rib world: baby back ribs and spare ribs.
Baby back ribs come from the upper part of the rib cage, near the spine. They’re leaner, shorter, and more tender—ideal for first-timers or anyone who prefers less fat and a quicker cook time. Plus, they tend to cook more evenly in the oven, making them foolproof.
Spare ribs, on the other hand, are cut from the belly area and are meatier with more fat. While they take longer to cook, they offer a rich, intense flavor that true BBQ lovers adore. The extra fat renders during baking, keeping the meat juicy and flavorful.
For oven-baking, both types can work wonderfully. If you’re going for tenderness and a milder bite, opt for baby backs. If you want something hearty and bold, spare ribs are the way to go.
How to Pick Fresh Ribs at the Store
Choosing the best ribs isn’t just about the type. You want quality cuts that’ll cook beautifully and taste amazing. Here’s what to look for:
- Color: The meat should have a pinkish-red hue. Avoid dull or gray-looking ribs.
- Marbling: Look for thin streaks of fat running through the meat. This fat keeps the ribs moist and flavorful.
- Packaging: Make sure there’s no excess liquid or a weird smell in the package. Ribs should be sealed tightly, without any tears or leaks.
- Bone Structure: Try to find ribs that have a uniform size. This helps them cook evenly.
Buying from a butcher instead of a supermarket can also give you fresher, higher-quality options—and they can remove the membrane for you if you ask nicely!
Ingredients You’ll Need
Spices and Seasonings
The secret to unforgettable oven-baked ribs is all in the rub. While you can go with store-bought spice mixes, nothing beats making your own. Here’s a classic DIY dry rub recipe:
- 2 tbsp brown sugar
- 1 tbsp paprika (smoked if you have it)
- 1 tbsp garlic powder
- 1 tbsp onion powder
- 1 tsp ground black pepper
- 1 tsp salt
- ½ tsp cayenne pepper (optional, for heat)
- 1 tsp dried oregano or thyme
This blend strikes the perfect balance between sweet, savory, and spicy. You can tweak it based on your personal taste—maybe add some cumin for earthiness or cinnamon for a subtle sweet punch.
Optional Add-ons for Extra Flavor
Want to elevate your ribs to gourmet status? Try these optional ingredients:
- Mustard Slather: Before applying your rub, coat your ribs in yellow mustard. It helps the seasoning stick and adds tang.
- Liquid Smoke: Just a few drops give your oven ribs a smoked flavor that rivals the grill.
- BBQ Sauce: Use your favorite brand or make your own with ketchup, vinegar, honey, and spices.
These little extras might seem minor, but they can add big flavor to your final dish.
Prepping the Ribs
Removing the Membrane
One of the most overlooked but crucial steps in prepping ribs is removing the silver skin—or membrane—from the bone side. This thin, papery layer can get tough and chewy when cooked. Removing it ensures better texture and flavor absorption.
Here’s how to do it:
- Flip the ribs bone-side up.
- Slide a butter knife under the membrane on one of the bones to loosen it.
- Grab the loosened edge with a paper towel and peel it off. It should come away in one piece.
It’s not the most glamorous task, but trust me—it makes a world of difference.
Seasoning and Marinating
Now that your ribs are cleaned and prepped, it’s time to coat them with your dry rub. Massage the spice blend generously into both sides of the meat. Let it sit for at least 30 minutes at room temperature, or better yet, refrigerate them overnight. The longer they marinate, the deeper the flavors penetrate.
If you’re using mustard or a wet marinade, apply it before the rub. Don’t be shy here—the more love you give your ribs now, the more flavor they’ll deliver later.
The Step-by-Step Baking Process
Low and Slow Cooking Method
This is where the magic happens. The key to juicy, tender oven-baked ribs is a slow roast at a low temperature. This method allows the connective tissues to break down gently, creating that fall-off-the-bone texture we all crave.
Step-by-step baking instructions:
- Preheat your oven to 275°F (135°C). This low temp is perfect for cooking ribs slowly and evenly.
- Wrap the ribs in foil: Lay out a large piece of aluminum foil, place the ribs on it meat-side up, and wrap them tightly. This traps steam and helps keep the ribs moist.
- Place on a baking sheet: Use a rimmed baking tray to catch any juices that might escape.
- Bake for 2.5 to 3 hours: The time depends on the thickness and type of ribs. Baby backs typically take 2.5 hours, while spare ribs may need closer to 3 hours.
Resist the urge to open the foil during baking—you want all that steam to stay locked in. You’ll know they’re ready when the meat starts to pull away from the bones and a fork slides in easily.
When to Add BBQ Sauce
Now for the fun part—adding that sticky, caramelized BBQ glaze.
Once your ribs are done cooking through, it’s time to unwrap them. Carefully open the foil (watch out for hot steam!) and transfer the ribs to a clean, dry baking sheet. Brush them generously with your favorite BBQ sauce.
For that perfect finish:
- Set your oven to broil.
- Place the ribs back in the oven (uncovered) for 5–7 minutes.
- Watch them carefully—the sugar in the sauce can burn quickly.
Broiling gives you that beautiful caramelization and a slight crisp to the edges, balancing the tender meat with a bit of crunch.
Alternatively, if you prefer an even glaze, you can do this final step on a hot grill for about 5 minutes. Either way, you’re locking in flavor and creating a picture-perfect finish.
Final Touches and Serving Suggestions
How to Get a Crispy Finish
Even though oven-baked ribs are traditionally soft and juicy, sometimes you want that extra crispy, caramelized bark that mimics the results of a grill or smoker. Thankfully, there are a few ways to achieve that delicious finish in the oven.
Here’s how you can do it:
- Broiling Method: As mentioned earlier, broiling for 5–7 minutes at the end of cooking crisps up the BBQ sauce and creates those flavorful burnt edges. Just make sure to keep a close eye on them—burnt and caramelized are just seconds apart!
- Unwrapped Final Bake: After your initial 3-hour low bake in foil, remove the foil and place the ribs back in the oven uncovered at 400°F (200°C) for 15–20 minutes. This helps evaporate any excess moisture and gives the outer layer a nice crust.
- Double Basting: Apply one layer of BBQ sauce, broil or bake, then brush on another coat and return to the heat. This builds layers of sticky, sweet, tangy glaze that clings to the ribs beautifully.
- Crank the Heat at the End: After slow cooking, a quick blast at 450°F (232°C) for 10 minutes can help you achieve that ideal crispiness without drying out the meat.
No matter which method you choose, let the ribs rest for about 5–10 minutes after removing them from the oven. This allows the juices to redistribute, making every bite more flavorful and moist.
What to Serve with Oven-Baked Ribs
Great ribs deserve great sides. You’ve already put in the effort to make tender, flavorful meat—now round out the meal with some delicious accompaniments. Here are some top-notch options:
Classic BBQ Sides:
- Coleslaw: The cool crunch of coleslaw pairs perfectly with the warm, smoky ribs. Try a vinegar-based slaw if you want to cut through the richness of the meat.
- Baked Beans: A sweet and savory classic, baked beans bring a hearty, comforting flavor that complements ribs perfectly.
- Cornbread: Slightly sweet, buttery cornbread is always a hit. You can even make a jalapeño version for an extra kick.
- Mac and Cheese: Creamy, cheesy, and decadent—this is a must-have with ribs.
Healthier Options:
- Grilled or Roasted Veggies: Zucchini, bell peppers, and corn on the cob roasted in the oven can balance the meal nicely.
- Simple Green Salad: A fresh, leafy salad with a zesty vinaigrette helps cleanse the palate.
- Sweet Potato Fries: A healthier twist on fries, and their sweetness matches beautifully with BBQ flavors.
Drinks and Dessert Ideas:
- Sweet Tea or Lemonade: Keep it classic with a refreshing Southern favorite.
- Craft Beer or Cider: A cold, crisp drink helps cut through the fat and complements the smoky flavors.
- Peach Cobbler or Apple Pie: End the meal with a warm, comforting dessert that keeps the Southern vibes going.
Pairing your ribs with a thoughtful spread of sides and drinks elevates your whole dinner into a full-on BBQ feast, no matter what time of year it is.
FAQs about Oven Baked Ribs Recipe
1. Can I make oven-baked ribs ahead of time?
Absolutely! You can cook the ribs fully in advance, then store them in the fridge. When you’re ready to serve, reheat them in the oven at 300°F for 15–20 minutes and apply fresh BBQ sauce before broiling for a few minutes to re-crisp the surface.
2. What’s the best type of BBQ sauce for oven ribs?
It depends on your taste! For a classic flavor, go with a sweet and tangy Kansas City-style sauce. For heat lovers, a spicy chipotle blend is perfect. If you like something smoky, opt for a hickory-based BBQ sauce or add a dash of liquid smoke.
3. Can I freeze leftover ribs?
Yes! Wrap the cooked ribs tightly in foil and place them in a freezer-safe bag. They’ll keep for up to three months. To reheat, thaw them overnight in the fridge, then warm in the oven at 300°F until heated through.
4. What if I don’t have aluminum foil?
If you’re out of foil, you can use a covered roasting pan or Dutch oven to bake the ribs. The goal is to trap steam during the slow cooking process, so any tight-sealing, oven-safe container will do the job.
5. How do I know when the ribs are done?
Perfectly cooked ribs will have the meat pulling slightly away from the ends of the bones. You should also be able to insert a toothpick or fork into the meat with little resistance. Internal temperature should be around 190°F–203°F for the most tender results.
Conclusion
There you have it—your ultimate step-by-step guide to making the best oven-baked ribs ever. Whether you’re a complete beginner in the kitchen or a seasoned home cook, this method guarantees juicy, tender, and flavorful ribs every time. The beauty of oven-baked ribs lies in their simplicity: no grill required, no complicated techniques, just good ingredients and a little patience.
By starting with quality meat, crafting a killer dry rub, marinating with care, and baking low and slow, you’re already 90% of the way to BBQ heaven. The finishing touches—like a rich BBQ glaze and a crispy broiled edge—are what take this dish from good to unforgettable. And when you pair your ribs with the right sides, you’re serving up a meal that hits every note: smoky, sweet, savory, crunchy, and creamy.
So next time you’re craving that backyard BBQ flavor, don’t wait for summer or stress about lighting the grill. Just follow this guide, pop those ribs in the oven, and let the slow roasting do its magic. Trust me—once you go oven-baked, you’ll be hooked.


