Oreo Pie Crust Recipe: If you’ve ever tasted a silky chocolate pie or creamy cheesecake with a rich, crunchy base, chances are you’ve enjoyed an Oreo pie crust. This iconic crust is a staple in dessert-making, known for its irresistible balance of sweetness, crunch, and deep chocolate flavor. What makes it truly special is its simplicity—you only need a few ingredients and minimal effort to create a bakery-quality base for your favorite pies and cheesecakes.
Imagine biting into a slice of chocolate mousse pie where the smooth, velvety filling melts in your mouth, followed by the satisfying crunch of the Oreo base. That’s the magic of an Oreo crust. It’s more than just a foundation—it’s a flavor booster that complements almost any dessert, from no-bake cheesecakes to frozen pies.
In this detailed step-by-step guide, you’ll learn how to make the perfect Oreo pie crust from scratch. Whether you’re an experienced baker or a complete beginner, this recipe will walk you through every step with precision and clarity. Ready to impress your guests or treat yourself? Let’s dive in.
Why Oreo Pie Crust Is So Popular
Oreo pie crusts have earned their spot as one of the most beloved dessert bases worldwide. Their popularity comes from more than just the rich, chocolaty taste—it’s also about convenience, versatility, and nostalgia. The combination of crunchy cookie crumbs and creamy butter creates a base that enhances the texture of any pie or cheesecake.
Unlike graham cracker crusts, Oreo crusts deliver a bolder, more indulgent flavor that pairs beautifully with cream, peanut butter, fruit, or even coffee-based fillings. Plus, they require no special baking skills—just crush, mix, and press. That’s it!
Another reason people love Oreo crusts is their adaptability. You can make it vegan, gluten-free, or dairy-free with simple swaps, making it suitable for almost any dietary preference. It’s a dessert foundation that’s stood the test of time—and for good reason.
Ingredients You’ll Need for Oreo Pie Crust
Before you start mixing and crushing, let’s go over what you’ll need. The beauty of this recipe lies in its simplicity. You can find all the ingredients at your local store or even in your pantry right now.
The Essential Ingredients Explained
Here’s what you’ll need for a 9-inch pie crust:
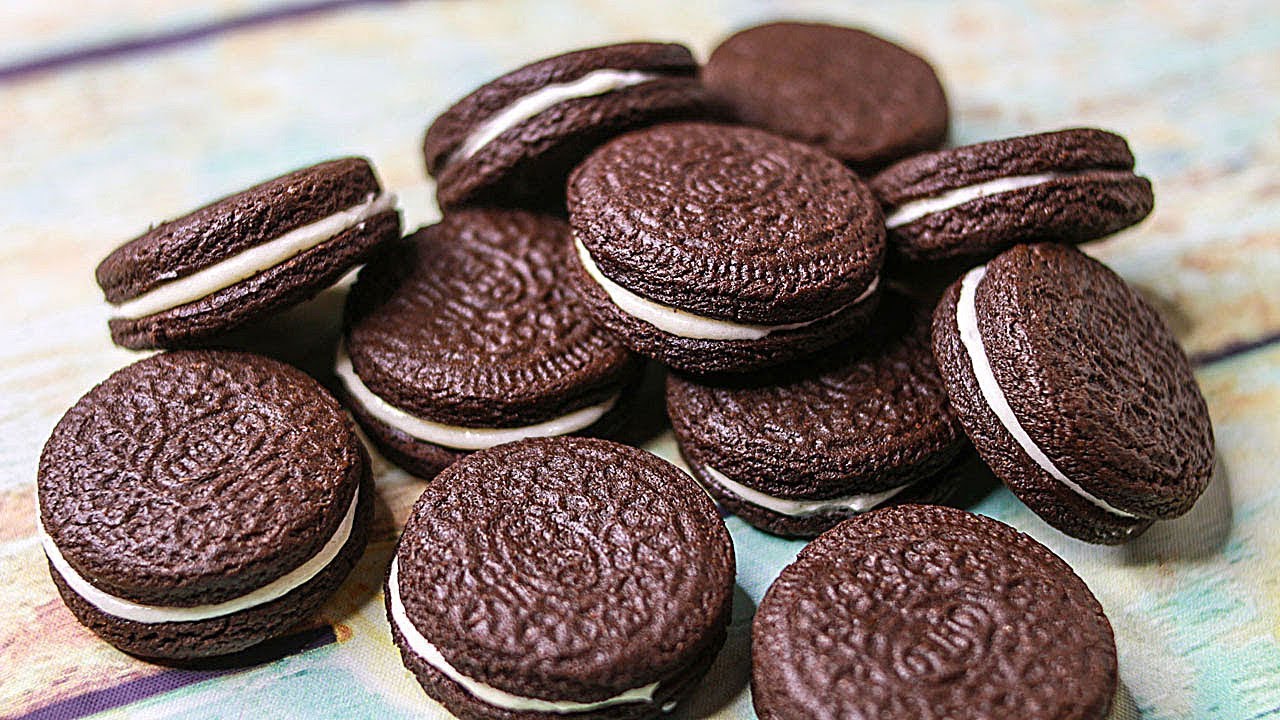
- 24–28 Oreo cookies (standard size, with the cream filling)
- 5 tablespoons unsalted butter, melted
- Pinch of salt (optional) – enhances the chocolate flavor
That’s it! Just two or three basic ingredients create a buttery, crumbly, and chocolatey crust that holds together perfectly under your pie filling.
If you’re using a food processor, the process is a breeze. However, if you prefer the old-fashioned method, a ziplock bag and rolling pin will do the trick.
Optional Add-ins for Extra Flavor
Want to take your crust up a notch? Try one of these flavorful variations:
- A tablespoon of sugar for extra sweetness (optional if using regular Oreos)
- A teaspoon of instant espresso powder – deepens the chocolate notes
- Crushed nuts like almonds or hazelnuts for added crunch
- Vanilla extract (½ teaspoon) for a hint of aroma
These small tweaks can transform your crust from simple to gourmet, depending on the dessert you’re making.
Tools and Equipment Required
Before jumping into the fun part—making the crust—it’s smart to have everything ready. Preparation makes the process smooth and mess-free.
Kitchen Tools You’ll Need
Here’s what you’ll need for this recipe:
- Food processor (or rolling pin and ziplock bag)
- Mixing bowl
- Measuring spoons
- 9-inch pie pan or tart pan
- Rubber spatula or spoon
- Measuring cup (for pressing crust evenly)
If you’re baking the crust, also keep your oven preheated to 350°F (175°C).
Preparing Your Workspace
Clean your counter, line your pie dish, and ensure you have enough space to spread out. Trust me—there’s nothing worse than cookie crumbs flying everywhere when you’re crushing Oreos! Lay down parchment paper if you want easier cleanup.
Once everything’s in place, it’s time to start making your Oreo pie crust masterpiece.
Step-by-Step Guide to Making Oreo Pie Crust
Step 1 – Gather and Prepare Ingredients
You’ll need about 24 Oreo cookies and 4 tablespoons of melted butter. You can use regular or double-stuffed Oreos depending on how rich you want the crust to be. No need to remove the cream — it helps bind everything together!
Step 2 – Crush the Oreos to Perfection
Place the Oreos in a food processor and pulse until they become fine crumbs. If you don’t have a processor, put them in a ziplock bag and crush with a rolling pin. The goal is a uniform, sandy texture with no big chunks.
Step 3 – Mix with Melted Butter
Pour the melted butter over the Oreo crumbs and mix thoroughly until the mixture looks like damp sand. The butter helps the crust hold its shape and adds that rich, indulgent flavor.
Step 4 – Press Mixture into the Pie Dish
Transfer the mixture to your pie dish. Use the back of a spoon or the bottom of a glass to press it evenly across the bottom and up the sides, creating a smooth, firm layer.
Step 5 – Bake or Chill the Crust
For a no-bake dessert, chill the crust in the fridge for about 30 minutes. If your recipe calls for baking, bake at 350°F (175°C) for 8–10 minutes. Either way, you’ll end up with a perfect Oreo base ready for any creamy filling!
Tips for the Perfect Oreo Pie Crust
How to Prevent Crust from Falling Apart
One of the biggest challenges home bakers face is getting the crust to stay intact when sliced. The trick is all in the butter ratio and pressing technique.
If your crust crumbles when you cut it, you probably used too little butter. Adding just one extra tablespoon can make a world of difference. Always ensure your crumbs are moist but not greasy before pressing them into the pan.
Also, don’t skip the chilling or baking step. Chilling firms up the butter, locking the crumbs together. If you skip it, the crust may fall apart as soon as you add the filling.
Finally, use a sharp knife when cutting your pie. It slices cleanly through the crust without pulling it apart.
Best Ways to Press the Crust Evenly
Consistency is key to a great-looking dessert. If your crust is uneven, your filling will also set unevenly. To avoid that, use the back of a flat measuring cup or glass to press the crumbs evenly into the pan.
Start from the center and work outward, making sure the corners are firm. Don’t press too hard, as that can make the crust overly dense. Instead, aim for a firm but gentle touch—enough to hold the shape without compacting it too tightly.
Pro tip: if you want a perfect edge, use your thumb to press the sides while smoothing the top with the measuring cup. It’ll look like it came straight from a bakery!
Variations of Oreo Pie Crust
Chocolate-Lover’s Dream
For those who can never get enough chocolate, this variation is for you. Mix two tablespoons of unsweetened cocoa powder into the Oreo crumbs before adding the butter. This deepens the chocolate flavor and gives your crust a richer, darker color.
You can also drizzle a thin layer of melted dark chocolate over the pressed crust before adding your filling for an indulgent twist. Once it cools, you’ll have a double chocolate layer that’s pure decadence.
Vanilla Oreo Twist
Craving something lighter? Swap regular Oreos for Golden Oreos. These vanilla-flavored cookies create a sweet, buttery crust that pairs perfectly with fruity or citrusy fillings like lemon cream or strawberry cheesecake.
Add a teaspoon of vanilla extract or lemon zest for an aromatic touch. This version is especially popular during spring and summer when you want a dessert that feels fresh and bright.
Minty Fresh Delight
Love mint and chocolate together? Use Mint Oreos to create a refreshing spin on the classic crust. Pair it with a rich chocolate mousse or mint chocolate chip ice cream pie.
For extra freshness, add a drop or two of peppermint extract when mixing the crumbs and butter. The cool mint flavor cuts through the richness and gives your dessert a beautiful balance.
Desserts You Can Make with Oreo Pie Crust
Classic Oreo Cheesecake
The most iconic dessert to pair with an Oreo crust is undoubtedly the Oreo cheesecake. This rich, creamy masterpiece is a dream come true for any dessert lover. The crunchy chocolate crust provides the perfect contrast to the velvety cream cheese filling, creating a balance that’s both satisfying and irresistible.
To make it, simply pour your cheesecake batter over the prepared crust and bake according to your cheesecake recipe. For a no-bake version, chill the crust, whip up a creamy filling of cream cheese, sugar, and whipped cream, and refrigerate overnight. Top it with crushed Oreos or a drizzle of chocolate ganache for a showstopping finish.
The result? A dessert that’s silky, crunchy, and absolutely heavenly in every bite. Perfect for birthdays, dinner parties, or when you simply want to indulge in something divine.
No-Bake Peanut Butter Pie
If you’re looking for something that requires no oven time but tastes like a bakery creation, this no-bake peanut butter pie is the answer. The Oreo crust complements the nutty, creamy filling perfectly, making it a match made in dessert heaven.
To prepare it, mix cream cheese, peanut butter, and powdered sugar, then fold in whipped cream until smooth. Pour the mixture into your chilled Oreo crust and refrigerate for at least 4 hours. The texture turns out silky and luscious, and the combination of chocolate and peanut butter is simply unbeatable.
Top it off with whipped cream, chopped peanuts, or a drizzle of chocolate syrup. It’s quick, easy, and guaranteed to impress anyone lucky enough to get a slice.
Frozen Ice Cream Cake
Another amazing dessert idea with an Oreo crust is a frozen ice cream cake. It’s the ultimate summer treat that’s surprisingly simple to assemble.
Start with your Oreo crust as the base. Then, layer your favorite ice cream flavors—think chocolate, vanilla, or cookies and cream—over it. Smooth it out and freeze for several hours until firm. For an extra wow factor, top it with whipped cream, hot fudge, and crushed Oreos before serving.
The result is a delightful combination of cold, creamy ice cream and crunchy Oreo base. Every bite offers that perfect mix of texture and flavor that keeps you coming back for more.
Common Mistakes and How to Avoid Them
Over-Crushing or Under-Crushing Oreos
Getting the texture right is key. If you crush the Oreos too finely, the crust will become dense and lose its signature crunch. On the other hand, if they’re too chunky, the crust won’t hold together properly and may crumble when sliced.
The goal is to achieve a texture similar to coarse sand—fine enough to stick together but not so powdery that it becomes muddy when mixed with butter. Always pulse in short bursts if using a food processor to control consistency.
If using a rolling pin, shake the bag gently between rolls to make sure no large chunks are hiding at the bottom.
Using Too Much or Too Little Butter
Butter acts as the glue for your Oreo crumbs, so getting the right ratio is crucial. Too little butter will make the crust crumbly and fragile, while too much butter will make it greasy and heavy.
A general rule of thumb: for every 24–28 Oreos, use about 5 tablespoons of melted butter. If your crumbs don’t stick together when pressed, add an extra teaspoon at a time until they hold their shape.
Also, remember to press the mixture firmly but gently into your pan—this ensures an even, sturdy base without compacting it too tightly.
Storing and Freezing Tips
How to Store in the Refrigerator
If you’re making your crust ahead of time, refrigeration is the best option. Once your crust is prepared (and baked or chilled, depending on your recipe), cover it tightly with plastic wrap or foil. Store it in the fridge for up to 5 days.
When you’re ready to use it, remove it from the refrigerator and let it sit at room temperature for about 10 minutes before filling. This prevents cracking or breaking when you add your filling.
How to Freeze for Future Use
Freezing your Oreo crust is a fantastic time-saver. To freeze, wrap the entire crust (in its pan) tightly in plastic wrap, followed by a layer of aluminum foil to prevent freezer burn. It can be stored for up to 2 months.
When you’re ready to use it, simply thaw it in the refrigerator overnight. If you plan to bake it after thawing, there’s no need to pre-bake—it will crisp up beautifully in the oven.
Freezing doesn’t affect the flavor or texture of the crust, making it perfect for meal prepping desserts ahead of special occasions.
Nutritional Information (Approximation)
Calorie Count
While this isn’t exactly a “diet” crust, it’s definitely a treat worth enjoying in moderation. A typical slice (1/8 of a 9-inch crust) contains approximately 180–200 calories, depending on the butter quantity and type of Oreo used.
Fat, Sugar, and Carbohydrate Breakdown
- Total Fat: 10–12g
- Saturated Fat: 5–6g
- Sugar: 12–15g
- Carbohydrates: 20–22g
- Protein: 1–2g
If you’re watching your intake, you can make lighter substitutions—use reduced-fat Oreos, light butter, or plant-based alternatives.
Expert Tips from Bakers
Secrets to the Perfect Texture
Professional bakers often stress the importance of balance in crust-making. The perfect Oreo crust should be firm enough to hold fillings but soft enough to cut smoothly.
To achieve this, refrigerate the crust for at least 30 minutes before adding the filling. If you’re baking it, make sure it’s cooled completely before filling to prevent sogginess.
Another secret? Use room-temperature butter when mixing—it blends more evenly with the crumbs, preventing oily spots.
Creative Serving Ideas
Want to make your dessert look like it came straight out of a bakery? Try these presentation tips:
- Drizzle chocolate ganache or caramel sauce over the crust edge before filling.
- Add a sprinkle of sea salt for a sophisticated sweet-salty touch.
- Decorate with whipped cream, Oreo pieces, or fruit slices before serving.
- Serve chilled desserts on a cold plate to enhance the creamy texture.
These simple tricks add a touch of elegance and elevate your Oreo pie crust from homemade to professional-level presentation.
FAQs about Oreo Pie Crust Recipe
1. Can I use reduced-fat Oreos?
Yes, reduced-fat Oreos work just fine. The texture might be slightly less creamy, but the taste and structure will remain great. You can also add a touch more butter to compensate for the missing fat.
2. Can I make this crust ahead of time?
Absolutely! You can make it up to 3–5 days in advance and store it in the refrigerator or freeze it for longer storage.
3. Should I bake or chill the crust?
That depends on your dessert. For no-bake fillings, chilling works best. For baked desserts, a quick 8–10 minute bake gives a firmer, more flavorful crust.
4. Can I use other cookies instead of Oreos?
Definitely! You can experiment with graham crackers, Biscoff cookies, or even chocolate chip cookies for a fun twist.
5. How do I fix a crumbly crust?
If your crust is too crumbly, add a bit more melted butter and mix until the crumbs hold together when pressed.
Conclusion
The Oreo pie crust is more than just a dessert base—it’s a flavor foundation that transforms any ordinary pie into something extraordinary. Its simplicity, versatility, and rich chocolate taste make it a must-have recipe in every baker’s collection.
Whether you’re making a creamy cheesecake, a frozen ice cream pie, or a no-bake peanut butter dream, this crust delivers a perfect balance of crunch and sweetness every single time. With just a few ingredients and easy steps, you can create a professional-quality crust that will wow your guests and satisfy every chocolate craving.
So, grab your Oreos, melt some butter, and get ready to whip up dessert magic. Once you’ve mastered this crust, your baking game will never be the same again!