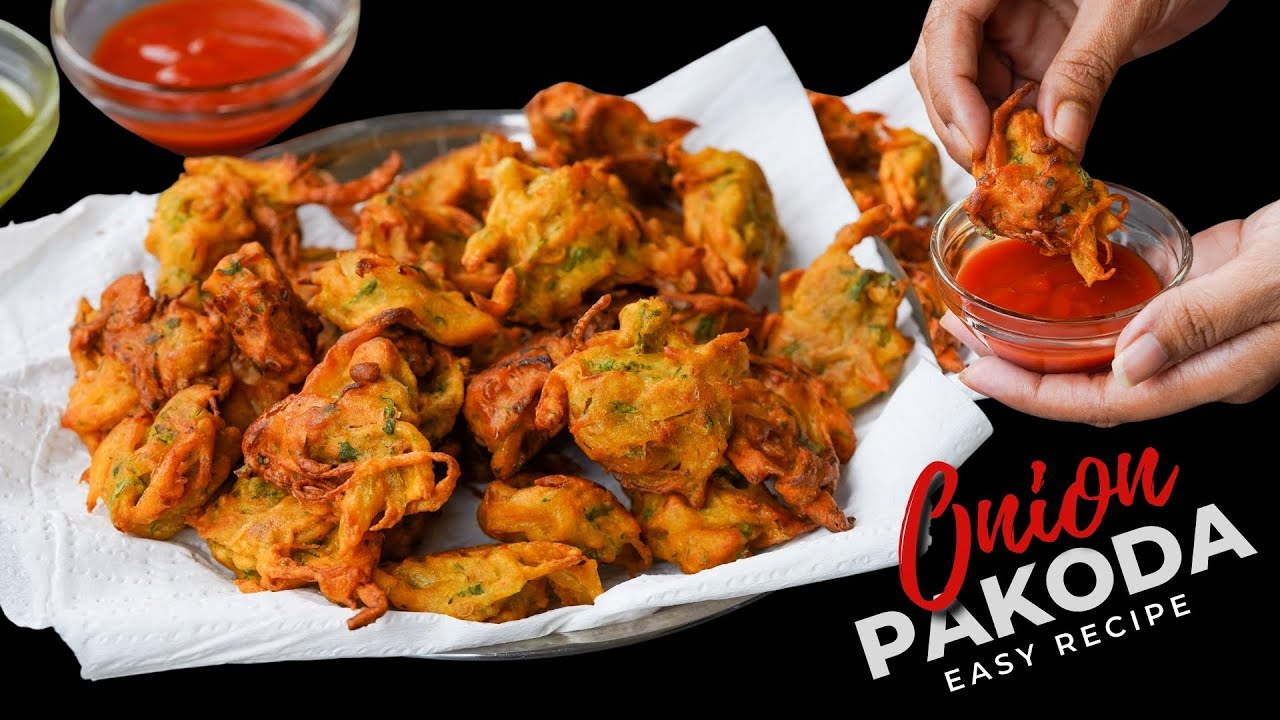
Onion Pakoda Recipe: Onion pakoda, also called onion bhaji or kanda bhaji in different parts of India, is a beloved deep-fried snack that’s perfect for tea time or rainy days.
These crispy golden fritters, made with sliced onions, gram flour (besan), and a mix of flavorful spices, are popular across Indian households for their simplicity and irresistible taste.
You can smell the aroma of pakodas wafting from street food stalls in the evenings—crispy on the outside, soft on the inside, and packed with bold flavors. But you don’t need to head to a stall to enjoy them—you can easily make them at home!
What Makes Onion Pakoda Special?
There’s something uniquely comforting about onion pakodas. The magic lies in their contrast—soft, slightly sweet onions encased in a crunchy, savory batter. They’re super easy to make and can be whipped up with pantry staples. No need for fancy gadgets or complicated steps—just a bowl, a pan, and a few ingredients. These pakodas are endlessly customizable. Want more heat? Add green chilies. Want extra crunch? Toss in some rice flour. You can make them in under 30 minutes and serve them hot with chai or tamarind chutney for that authentic Indian experience.
Why You’ll Love This Recipe
Here’s why you’re going to fall in love with this onion pakoda recipe:
- Quick and easy: No elaborate prep work required.
- Crispy texture: Learn the trick to getting the perfect crunch.
- Customizable: Make it spicy, herby, or cheesy.
- Gluten-free: Naturally made with gram flour—no wheat flour needed.
- Perfect for any occasion: Rainy days, family gatherings, or when unexpected guests drop by.
These pakoras are a true crowd-pleaser. Once you make them the right way, you’ll keep coming back to this recipe.
List of Ingredients You’ll Need
Here’s a handy checklist of all the ingredients you’ll need to make a batch of delicious onion pakodas. You likely have most of these in your kitchen already!
Basic Ingredients:
- 2 large onions, thinly sliced
- 1 cup besan (gram flour/chickpea flour)
- 2 tablespoons rice flour (for extra crispiness)
- Salt to taste
- 1 teaspoon red chili powder
- ½ teaspoon turmeric powder
- 1 teaspoon carom seeds (ajwain)
- ½ teaspoon cumin seeds
Optional Flavor-Boosting Additions:
- 2-3 green chilies, finely chopped
- A handful of fresh coriander leaves, chopped
- 8–10 curry leaves, chopped
- 1 teaspoon ginger-garlic paste
- A pinch of asafoetida (hing)
- ½ teaspoon garam masala
These ingredients come together in a matter of minutes to create magic. Don’t worry if you’re missing a few—there’s plenty of room to customize this recipe to your liking.
Equipment Required
Good news: you don’t need any fancy kitchen gadgets to whip up pakodas! Here’s what you’ll need:
- A deep frying pan or kadhai
- A large mixing bowl
- A slotted spoon
- Paper towels or a wire rack
- Sharp knife or slicer for cutting onions
- A skimmer or ladle for deep frying
Having these tools ready will make the whole process smoother and safer. Make sure your pan is deep enough to avoid oil spills while frying!
How to Choose the Right Onions
The onions you choose can make a big difference. Red onions are ideal—they have a sweet bite and crisp well when fried. Yellow onions also work, but avoid overly moist or freshly harvested ones, as they release too much water and make the batter soggy. Make sure to slice them thinly and uniformly for even cooking. Pro tip? Use a mandoline slicer for super thin, restaurant-style slices.
Preparation Tips Before You Start
- Make sure your onions are dry before slicing.
- Avoid adding too much water to the mixture.
- Use rice flour for that unbeatable crisp texture.
- Always fry on medium heat. Too high and they’ll burn outside, stay raw inside.
- Have your chutneys and tea ready. Pakodas wait for no one.
Step-by-Step Guide to Make Onion Pakoda
Step 1: Slice the Onions
Thinly slice 2 large onions lengthwise. The thinner, the better. Thick slices won’t crisp up and may stay chewy. Put them in a large mixing bowl and gently separate the layers with your hands.
Step 2: Add Salt and Let Them Sweat
Add a generous pinch of salt to the onions and let them rest for 10-15 minutes. This draws out the moisture from the onions, which will help in binding the batter later without needing to add extra water.
Step 3: Add Dry Ingredients
Once the onions have released water, add gram flour (besan), rice flour, chili powder, turmeric, ajwain, and your flavorings (ginger, green chilies). Mix thoroughly using your hands. Don’t add water yet—the onion moisture should be enough. You want a dry-ish, sticky mixture—not a runny batter.
Step 4: Mix Without Water
Continue mixing. If you feel the mixture is too dry to bind, sprinkle a teaspoon of water—not more. It should clump together when pressed. Too much water = soggy pakodas that won’t crisp.
Step 5: Heat the Oil
Heat oil in a deep pan or kadai. To test if the oil is ready, drop a small bit of batter—it should rise and sizzle immediately. Medium heat is ideal—hot enough to fry but not so hot that the outside burns instantly.
Step 6: Fry the Pakodas
Take small portions of the mixture and drop them gently into the oil. Don’t overcrowd the pan. Fry in batches and flip occasionally until golden brown and crispy. This takes around 5-7 minutes per batch.
Step 7: Drain Excess Oil
Remove the fried pakodas using a slotted spoon and place them on a plate lined with tissue to absorb excess oil. Let them sit for a minute before serving to retain crispness.
Tips for the Perfect Crispy Onion Pakoda
Getting that restaurant-style crunch is all about the little details. Here’s how to make sure your onion pakodas come out perfectly crispy every single time:
- Don’t add too much water: This is rule number one! Let the onions release their natural moisture after adding salt. Only add water if absolutely needed—and just a teaspoon or two.
- Use rice flour or cornflour: These are your secret weapons for extra crispiness. A tablespoon or two mixed with besan makes a noticeable difference.
- Fry in medium-hot oil: If the oil is too hot, the pakodas brown quickly outside but stay raw inside. Too cool, and they’ll absorb oil and turn soggy. Always test with a small portion first.
- Avoid overcrowding: Dropping too many pakodas at once lowers the oil temperature. This makes them greasy and limp.
- Serve immediately: Pakodas lose their crisp texture if left to sit too long. Serve them hot and fresh for the best experience.
Think of it like popping popcorn—each batch needs space and just the right heat to bloom perfectly.
Serving Suggestions
Onion pakoda is a versatile snack that shines on any plate. Whether you’re hosting a tea party, preparing a weekend snack, or just feeling snacky on a rainy day, pakodas hit the spot.
Here are some great ways to serve them:
- With Masala Chai: The classic Indian duo. Pakoda and chai is soul food.
- With Green Chutney: Made of coriander, mint, and green chilies—it adds freshness.
- With Tamarind Chutney: Sweet, tangy, and spicy—a perfect contrast to the savory pakoda.
- As a Chaat Base: Break pakodas into small chunks, top with yogurt, chutneys, and sev for a quick chaat.
- In a Sandwich: Use leftover pakoda in a buttered bread sandwich for a crunchy treat.
Pro tip: Serve with a slice of lemon on the side for a refreshing zing!
Chutneys and Dips That Go Well
Pairing your onion pakoda with the right chutney elevates the flavor tenfold. Here are a few popular options:
1. Mint-Coriander Chutney
- Coriander leaves
- Mint leaves
- Green chilies
- Lemon juice
- Salt
- Water for blending
2. Tamarind-Date Chutney
- Tamarind pulp
- Seedless dates
- Jaggery
- Cumin powder
- Black salt
3. Garlic Chutney (Spicy!)
- Dry red chilies
- Garlic cloves
- Oil
- Salt
Make one, or all three, and watch the pakoda party come alive.
Variations You Can Try
Love onion pakodas but want to mix it up? Here are some delicious versions you can try based on your taste buds:
Spicy Green Chili Pakoda
Chop up 3–4 green chilies and mix them directly into the batter. This one’s not for the faint-hearted but a must-try if you enjoy bold heat.
Paneer or Cheese Onion Pakoda
Add small cubes of paneer or shredded cheese to your onion mixture. It gives a creamy twist to your crispy pakoda.
Mint-Flavored Onion Pakoda
Chop a handful of fresh mint leaves and mix them in with the onions. It adds a burst of freshness and a beautiful aroma.
You can also toss in curry leaves, spinach, or even cabbage to create new versions while keeping the base recipe the same.
Common Mistakes to Avoid
Many people make pakoda, but only a few nail that perfect texture. Want to avoid the usual pitfalls? Keep these mistakes in check:
- Using too much water: This is the #1 reason for soggy pakodas.
- Thick onion slices: They won’t cook evenly and ruin the texture.
- Overcrowding the pan: Leads to uneven frying and oil temperature drops.
- Not letting onions sweat with salt: Crucial step for releasing moisture.
- Reusing the same oil too many times: It affects the flavor and color of your pakodas.
Keep these in mind and your pakodas will rival even your favorite snack shop!
Storage Tips for Leftovers
Let’s face it, pakodas taste best when fresh. But if you do have leftovers, here’s how to store and reheat them properly:
- Cool completely before storing to avoid sogginess.
- Place in an airtight container with paper towels to absorb moisture.
- Store in the fridge for up to 2 days.
- Reheat in a preheated oven or air fryer at 180°C (350°F) for 5-7 minutes to regain some of the crunch. Avoid microwaving—it makes them soft and chewy.
Still, the best way? Make just enough to enjoy right away!
Nutritional Value of Onion Pakoda
Let’s talk about what you’re eating. While pakodas are indulgent, they do offer some nutritional benefits:
| Nutrient | Approx. per 5 pakodas |
|---|---|
| Calories | 250-300 kcal |
| Carbohydrates | 20-25g |
| Protein | 5-7g |
| Fat | 15-20g |
| Fiber | 3-4g |
They are gluten-free (thanks to besan), and onions themselves are rich in antioxidants. But yes, they’re deep-fried, so moderation is key. Want a healthier version? Scroll down…
Healthier Alternatives to Deep-Frying
Craving pakoda but don’t want the oil? You’ve got options!
- Air Fryer Pakoda: Spray a little oil on shaped pakodas and air-fry at 180°C for 12-15 mins.
- Baked Pakoda: Preheat oven to 200°C, place pakodas on a greased tray, bake for 15-20 mins, flipping once.
- Shallow Frying: Use a flat pan with less oil and shape pakodas thinner so they cook through.
These versions are not 100% the same as deep-fried ones—but they’re guilt-free and surprisingly tasty.
FAQs about Onion Pakoda Recipe
1. Can I bake or air-fry onion pakodas instead of deep-frying?
Yes! While traditional pakodas are deep-fried, you can use an air fryer at 180°C for 10–12 minutes or bake them at 200°C for 15–20 minutes, flipping halfway. They may not be as crispy but are still tasty.
2. Why are my pakodas not crispy?
Too much water or thick batter often causes sogginess. Use minimal water, rice flour, and fry at the right temperature for best results.
3. Can I make the batter ahead of time?
It’s best to prepare and fry immediately. The onions release more water as they sit, which can ruin the texture. If you must prep ahead, slice onions and store separately from the dry mix.
4. What can I use instead of besan (gram flour)?
Besan is ideal, but you can substitute with chickpea flour or a mix of all-purpose flour and cornstarch. However, taste and texture will vary.
5. How do I reduce the spice level for kids?
Skip the green chilies and reduce chili powder. You can also serve with sweet chutneys or ketchup to balance the flavors.
Conclusion
There you have it—a complete, foolproof guide to making crispy, flavorful onion pakoda right at home. Whether it’s your first time or your hundredth, this recipe delivers every single time. From slicing onions right to picking your favorite chutney, it’s a joyful cooking experience that ends in crispy, golden perfection. Rainy day? Game night? Tea time? Onion pakoda has you covered.
So roll up your sleeves, grab those onions, and let the frying begin!