Onion Gravy Recipe: There’s something timeless and soul-warming about a rich, savory onion gravy. It’s the kind of food that wraps you in a culinary hug, especially on chilly evenings or during family dinners. But what makes onion gravy such a classic? It’s the simplicity—caramelized onions, a rich base, and a slow-simmered depth of flavor that tastes like home.
Onion gravy has been a staple in kitchens for generations, especially in British, American, and European cuisines. Whether poured over mashed potatoes, served alongside sausages, or used to elevate a humble meatloaf, onion gravy transforms the ordinary into something extraordinary. It’s one of those recipes that feels luxurious but comes together with basic pantry staples.
You don’t need fancy ingredients or a culinary degree to make a delicious onion gravy. What you do need is a bit of patience, some technique, and an appetite for big flavor. The beauty lies in how a few simple ingredients—onions, stock, flour, and seasoning—can create such a mouthwatering dish. It’s not just gravy—it’s a flavor bomb, a sauce with character, and a must-have for your recipe repertoire.
Popular Dishes that Pair with Onion Gravy
Wondering where to drizzle this deliciousness? Onion gravy is one of the most versatile sauces out there. It pairs beautifully with:
- Bangers and Mash – A traditional British dish made complete with rich onion gravy.
- Roast Beef or Chicken – Pour it generously over slices of roast for an extra hit of moisture and flavor.
- Meatloaf – A hearty American classic that comes alive with a blanket of gravy.
- Mashed Potatoes – Whether as a side or a main, fluffy mashed potatoes and onion gravy are a match made in comfort food heaven.
- Fried or Grilled Mushrooms – Great for vegetarians looking for a meat-free pairing.
- Poutine or Fries – Give your fries a gourmet upgrade with homemade onion gravy instead of plain brown gravy.
The pairing possibilities are endless, and once you master this recipe, you’ll find yourself wanting to pour it over just about everything.
Ingredients You’ll Need
Core Ingredients for Traditional Onion Gravy
Before diving into the cooking process, let’s take a close look at the star players that make up a traditional onion gravy. Each ingredient contributes its own texture, aroma, and depth to the final dish.
Here’s your essential shopping list:
- Onions – The star of the show. Yellow or brown onions are ideal for their balance of sweetness and sharpness. You’ll want to slice them thinly to ensure they caramelize evenly.
- Butter or Oil – For sautéing the onions. Butter gives a richer flavor, while oil (olive or vegetable) works well for a lighter taste.
- Flour – Used to thicken the gravy. All-purpose flour is the standard choice.
- Beef or Vegetable Stock – This adds richness and body. Use high-quality stock or homemade for best results.
- Salt & Pepper – The basic seasonings that bring everything together.
- Worcestershire Sauce – Optional, but adds a deep umami flavor that enhances the savory taste.
- Thyme or Bay Leaf – Optional herbs that bring subtle aromatic notes.
With just these simple ingredients, you’re already on your way to creating a flavorful, homestyle gravy that tastes like it’s been simmering on grandma’s stove for hours.
Optional Add-Ins for Extra Flavor
Want to level up your onion gravy? Consider these tasty add-ins:
- Garlic – Adds depth and warmth.
- Balsamic Vinegar – A splash enhances the sweetness of caramelized onions.
- Red Wine – For a French-style richness that pairs beautifully with beef.
- Cream – If you’re going for a creamy version, just a few tablespoons can change the texture dramatically.
- Mustard (Dijon or English) – Adds a sharp kick that balances sweetness.
- Soy Sauce or Tamari – Excellent for vegan versions to introduce umami without meat-based products.
These add-ins aren’t necessary for a traditional take, but they can help you tailor the flavor to your taste or match different dishes.
Ingredient Substitutions for Dietary Needs
Cooking for someone with specific dietary needs? No problem. Here are some smart swaps:
- Gluten-Free – Use gluten-free flour or cornstarch instead of all-purpose flour.
- Vegan – Skip the butter and opt for olive oil. Use vegetable stock and soy sauce instead of beef stock and Worcestershire sauce.
- Low-Sodium – Choose low-sodium broth and go easy on the added salt.
- Keto-Friendly – Use almond flour or xanthan gum for thickening.
It’s easy to adapt this classic gravy to fit your needs without sacrificing the flavor that makes it so crave-worthy.
Tools and Equipment
Basic Kitchen Tools Required
You don’t need a fancy kitchen setup to whip up a great onion gravy. Here’s what you’ll need:
- Heavy-Bottomed Skillet or Saucepan – Essential for even heat distribution and preventing burnt onions.
- Wooden Spoon or Silicone Spatula – Ideal for stirring and scraping up those flavor-packed brown bits.
- Sharp Knife and Cutting Board – For slicing onions thinly and evenly.
- Measuring Cups and Spoons – Precision matters when building balanced flavor.
- Whisk – Crucial for blending flour into the fat and stock without lumps.
These are all standard tools found in most kitchens, and they’ll make your cooking process smooth and enjoyable.
Pro Tips for Efficiency
- Prep Ahead – Slice onions in advance and store them in the fridge for up to 24 hours to save time.
- Use a Mandoline – For perfectly thin, even onion slices.
- Stock Cubes or Concentrates – Great for when you’re out of fresh stock. Just mix with hot water.
Once your tools and ingredients are ready, you’re all set to dive into the cooking process. Up next—step-by-step instructions that break down every part of making the perfect onion gravy.
Step-by-Step Guide to Making Onion Gravy
Step 1 – Prepping the Onions
The secret to any great onion gravy starts right here: with the onions. Thin, evenly sliced onions are key to caramelization, which builds that deep, complex flavor we all crave in a gravy.
Start by choosing yellow or brown onions. These varieties offer the best balance of sweetness and tang once cooked down. You’ll need about 2 to 3 large onions for a batch that serves 4-6 people.
Here’s how to prep them:
- Peel and halve the onions.
- Place the flat side down and slice into thin strips—aim for slices about 1/8 inch thick.
- Don’t rush this part. Uniform slices ensure even cooking and prevent burnt edges or mushy centers.
You can use a knife or a mandoline slicer. If you find yourself crying, try chilling the onions in the fridge first—it numbs the sulfur compounds that trigger tears.
Once sliced, place them in a bowl and keep them ready. You’re about to turn these humble layers into a luxurious base for your gravy.
Step 2 – Sautéing for Maximum Flavor
Once your onions are prepped, it’s time to bring out their sweetness and flavor through the sautéing process. This is arguably the most important step in making onion gravy, and it’s where the magic begins.
Start by heating 2 tablespoons of butter or oil in a heavy-bottomed skillet over medium-low heat. Don’t crank the heat up too high—you want a slow and steady caramelization, not a fast char.
Here’s what to do:
- Add the sliced onions to the pan.
- Stir to coat them in the melted butter or oil.
- Season with a pinch of salt—this helps draw out moisture and speeds up the caramelizing process.
- Stir frequently to prevent sticking and burning.
This step takes patience. The onions will go from translucent, to golden, and then to a deep amber-brown over 20–30 minutes. As they cook, they’ll shrink, soften, and become wonderfully sweet and savory. You’ll also notice some browned bits forming on the bottom of the pan—don’t toss those out! They’re flavor gold.
If you see the pan getting too dry or things start to burn, splash in a little water or stock to deglaze. Scrape up the browned bits and keep cooking. You can also add a teaspoon of sugar to encourage quicker caramelization, though it’s not necessary if you’re patient.
Caramelized onions are the foundation of your gravy’s depth. Rushing this part will shortchange the entire dish, so take your time—it’s worth it.
Step 3 – Adding Flour for the Roux
Once your onions are beautifully caramelized and your kitchen smells like a cozy French bistro, it’s time to build the roux. This is the thickening base that gives your gravy its signature body.
Sprinkle in 2 tablespoons of all-purpose flour evenly over the onions. Stir it in well so the flour absorbs all the butter or oil and coats the onions completely.
Important tips for this step:
- Keep stirring continuously for about 2-3 minutes. This helps cook out the raw flour taste and gives your gravy a nice, nutty undertone.
- Watch the color—it should deepen slightly, blending beautifully with the caramelized onions.
If you’re going gluten-free, substitute with gluten-free flour or use cornstarch (but mix cornstarch with cold liquid first to avoid clumps).
At this stage, your onions will look thick and pasty—that’s exactly what you want. Now you’re ready to add the liquid and create the actual gravy.
Step 4 – Pouring in Stock and Simmering
Time to transform that roux into a silky, rich gravy. Slowly pour in about 2 cups of beef or vegetable stock, stirring constantly to incorporate the flour and avoid any lumps.
Use a whisk for this part if you have one—it makes blending much easier.
Simmering process:
- Bring the mixture to a gentle boil, then reduce to a simmer.
- Stir regularly, letting it bubble softly for about 10–15 minutes.
- As it cooks, the gravy will thicken. If it’s too thick, add more stock or a splash of water. Too thin? Simmer a bit longer.
At this point, you’ll see your gravy come together—smooth, golden-brown, and flecked with those gorgeous onion bits. The flavor should be rich, savory, and full-bodied.
Now’s a good time to add 1 tablespoon of Worcestershire sauce, a dash of black pepper, and any herbs you enjoy (like a sprig of thyme or a bay leaf). Let it simmer another minute or two to blend everything together.
Want to go gourmet? Try adding a splash of red wine or balsamic vinegar to elevate the taste.
Step 5 – Seasoning and Finishing Touches
Your gravy is nearly ready, and now it’s all about finessing the final flavor. Taste a spoonful. What does it need?
Here’s a checklist for final adjustments:
- Salt – Add if it tastes flat.
- Pepper – For a gentle kick.
- Worcestershire Sauce or Soy Sauce – For more umami.
- A Touch of Mustard – If you want a tangy undertone.
- Cream or Butter – For extra richness and smooth texture.
Once you’re happy with the taste and texture, remove the gravy from heat. Fish out any herbs like bay leaves or thyme sprigs.
If you want a super smooth finish, you can strain the gravy using a fine mesh sieve—but most people love the hearty, rustic texture of onion chunks. It’s your call.
Pour the finished onion gravy into a serving bowl or gravy boat and serve hot.
Pro Tip: If you’re making this ahead of time, you can store it in the fridge for up to 4 days or freeze it for up to 2 months. Just reheat gently on the stove with a splash of water or broth to revive it.
Tips for Perfect Onion Gravy Every Time
Caramelization Secrets
If your onion gravy is tasting bland or watery, chances are the onions weren’t caramelized properly. This step is everything. It’s the backbone of flavor and determines how rich and robust your final dish will be.
Let’s unlock a few caramelization secrets:
- Low and Slow is the Way to Go
Never rush onions. Cooking them low and slow for 25–40 minutes will unlock their natural sugars and create that deep, jammy texture. - Avoid Overcrowding the Pan
Too many onions crammed into a small pan will steam instead of brown. Use a large skillet to allow the moisture to evaporate and browning to occur. - Don’t Stir Too Often
Let the onions sit undisturbed for a few minutes between stirs. This encourages browning on the bottom of the pan, which you can then scrape up for added flavor. - Use a Pinch of Sugar (Optional)
If you’re short on time or want to speed up caramelization, a pinch of sugar (especially brown sugar) can help. - Deglaze Wisely
Those brown bits stuck to the bottom? That’s called fond, and it’s flavor gold. Use a splash of broth, water, or wine to lift it off the pan and mix it into the onions.
Nail these tips and you’ll have onion gravy that tastes like it came from a restaurant—every time.
How to Avoid Lumps in Gravy
There’s nothing worse than a lumpy gravy when you’re aiming for velvety smoothness. Here’s how to make sure that never happens:
- Whisk Immediately After Adding Liquid
As soon as you pour in the broth or stock, grab your whisk and stir like your dinner depends on it—because it does. - Warm Liquid Helps
Using warm (not cold) stock helps the flour dissolve more evenly and prevents clumps from forming. - Use a Sieve (Optional)
If you still see lumps, just pass the gravy through a fine mesh sieve. It’s a quick fix and leaves you with restaurant-quality sauce. - Mix Flour Separately
If you’re nervous about adding flour directly to onions, make a quick slurry: mix the flour with a small amount of cool stock or water first, then stir that into the onions. This method is nearly foolproof.
Lump-free gravy isn’t hard—it just takes attention at the right moments.
Serving Suggestions
What to Serve with Onion Gravy
Now that your onion gravy is looking glorious, let’s talk about what to drizzle it over. Here are some irresistible pairings:
- Mashed Potatoes
The most classic pairing. Fluffy mashed potatoes and rich onion gravy is comfort food at its best. - Roast Dinners
Whether it’s roast beef, chicken, lamb, or even pork, onion gravy brings out the best in every bite. - Bangers and Mash
A British pub favorite—juicy sausages, buttery mash, and lashings of gravy. Doesn’t get better. - Fried Chicken or Pork Chops
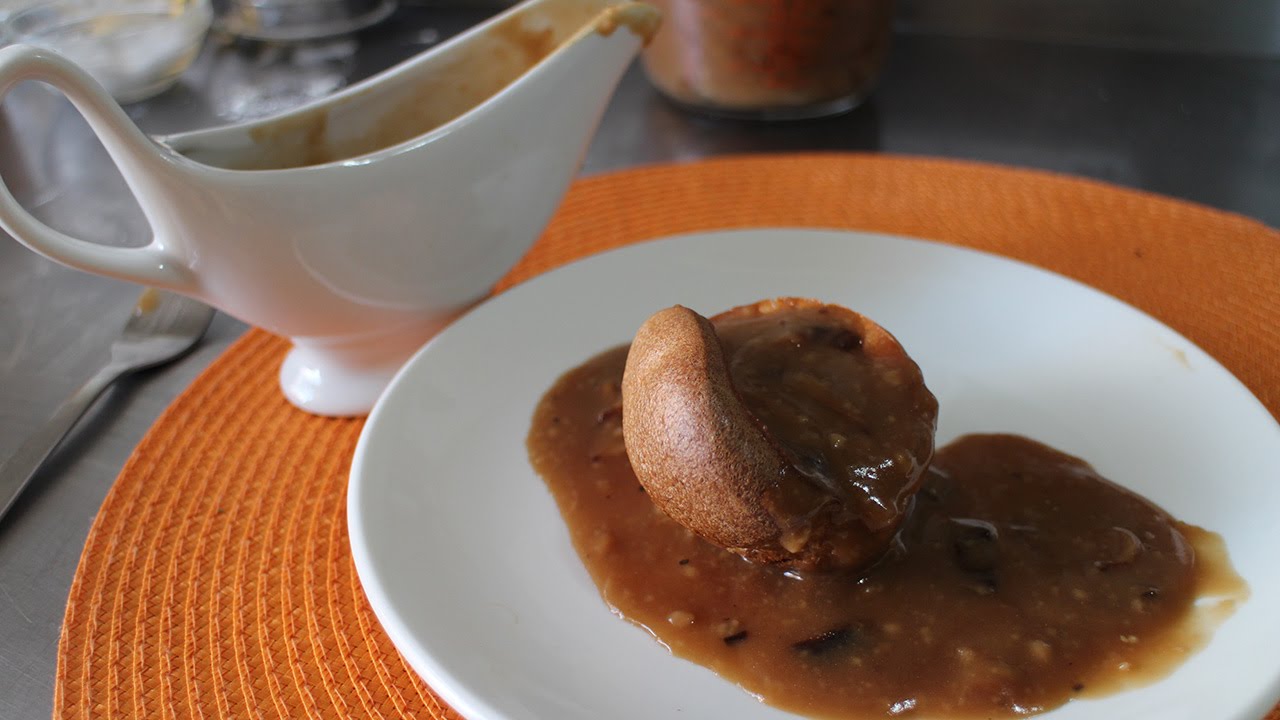
Swap out white gravy for onion gravy for a savory Southern twist. - Toad in the Hole
Yorkshire pudding meets sausage, and it’s begging for a generous pour of onion gravy. - Burgers or Meatloaf
Use onion gravy as a rich topping for burgers or classic meatloaf—it adds moisture and flavor. - French Fries or Poutine
Who needs cheese curds? Piping hot fries with onion gravy is addictive. - Savory Pies and Pastries
A drizzle of gravy over a slice of meat pie or pot pie? Yes, please.
Making It a Meal
If you want to build a full dinner around onion gravy, here’s a great lineup:
- Main: Grilled sausages or roasted chicken
- Side: Creamy mashed potatoes
- Veggie: Buttered peas or glazed carrots
- Bonus: A chunk of crusty bread to mop up every last drop
This isn’t just a side sauce—onion gravy can be the star of your dinner. Make it bold, make it flavorful, and let it shine.
Storage and Reheating Instructions
Fridge and Freezer Storage Tips
Got leftover gravy? Good news—it stores beautifully and may even taste better the next day.
In the Fridge:
- How long? Up to 4 days in an airtight container.
- Let it cool completely before storing.
- A mason jar or sealed glass container works best to avoid absorbing other fridge smells.
In the Freezer:
- How long? Up to 2 months.
- Portion into smaller containers or freezer bags so you only thaw what you need.
- Label with the date to keep track.
When freezing, note that some gravies may slightly change texture (especially if they contain cream). Re-whisking while reheating usually fixes this.
How to Reheat Without Losing Flavor
Whether from the fridge or freezer, reheat slowly and gently.
Reheating Instructions:
- Stovetop: Place in a saucepan over medium-low heat, stirring frequently. Add a splash of water or broth to loosen it up.
- Microwave: Heat in 30-second bursts, stirring in between. Again, add a touch of liquid if needed.
Avoid boiling—this can break the gravy or cause it to separate. A slow simmer is best for maintaining its silky texture.
Pro Tip: Freshen up the flavor with a little extra seasoning or a pat of butter during reheating.
Customizing Your Onion Gravy
Vegan and Vegetarian Variations
Want to enjoy this savory goodness without any animal products? Totally doable. Onion gravy is incredibly easy to adapt for a vegan or vegetarian lifestyle—and it still tastes amazing.
Here’s how to make it vegan:
- Use Vegan Butter or Olive Oil
Swap dairy butter for plant-based alternatives like vegan margarine or olive oil. Coconut oil can also work, but it may slightly alter the flavor. - Choose Vegetable Stock
Instead of beef or chicken broth, go for a rich vegetable stock. Make your own using carrots, onions, garlic, and celery for extra depth, or buy a high-quality store version. - Skip the Worcestershire Sauce
Most Worcestershire sauces contain anchovies. Use a vegan version, or substitute with soy sauce, tamari, or even balsamic vinegar for that umami punch. - Thickening Without Animal Products
Regular flour is already vegan, but if you’re gluten-free, use arrowroot, cornstarch, or potato starch to thicken your gravy.
Bonus Tip:
Add a teaspoon of nutritional yeast for a deeper, savory, almost cheesy note. It’s a secret ingredient many vegan chefs swear by.
You won’t miss the meat at all—this vegan onion gravy can hold its own against any traditional version.
Spicy Onion Gravy Option
Feeling adventurous? Give your gravy a bold kick by adding a bit of heat. Spicy onion gravy works wonders with grilled meats, burgers, or roasted veggies.
Add these for heat and depth:
- Chili Flakes or Powder – Start small and adjust to taste.
- Smoked Paprika – Adds both heat and a rich smokiness.
- Fresh Jalapeños or Red Chili – Finely diced and sautéed with the onions.
- Hot Sauce – A few dashes of your favorite can instantly change the flavor profile.
Balance is key—you want heat that enhances the gravy, not overwhelms it. Serve this fiery twist with grilled sausages or even over fries for a bold fusion dish.
Creamy Onion Gravy Twist
Sometimes, you want that ultra-smooth, velvety texture—enter creamy onion gravy. It’s luxurious, rich, and perfect for elevating your holiday meals or Sunday dinners.
To make it creamy:
- After your gravy has thickened, stir in ¼ to ½ cup of heavy cream, half-and-half, or even sour cream.
- For a dairy-free version, use unsweetened almond milk, coconut milk, or oat cream.
- Add a touch of Dijon mustard or horseradish for a zippy finish.
Creamy onion gravy pairs beautifully with chicken, turkey, pork chops, and mashed cauliflower. Just don’t serve it cold—it needs to be hot to stay luscious and smooth.
Common Mistakes to Avoid
Burnt Onions
Burnt onions = bitter gravy. And once that bitterness sets in, it’s hard to fix.
Here’s how to avoid it:
- Low Heat is Crucial – Always caramelize onions over medium-low or low heat. High heat will scorch the sugars and ruin the flavor.
- Watch the Pan Closely – Onions can go from golden to burnt in a flash if left unattended.
- Use the Right Pan – A heavy-bottomed skillet distributes heat more evenly and prevents hotspots.
If you accidentally overcook the onions and they’re just starting to brown too much, try deglazing with a bit of water or wine to save them. But if they’re burnt-black? Start over. It’s worth the extra time.
Over-Seasoning
With gravy, it’s easy to go overboard. Salty stock, soy sauce, Worcestershire, and butter all bring their own saltiness. Add too much, and you’ll have a salt bomb on your hands.
Here’s how to avoid it:
- Taste as You Go – Always taste before adding extra salt or seasoning.
- Use Low-Sodium Stock – Gives you more control over the final flavor.
- Balance It Out – If it’s too salty, add a splash of water, cream, or unsalted stock to mellow it out.
Seasoning should enhance the onions, not drown them out. The best gravy hits that sweet spot of rich, savory, and perfectly balanced.
Nutritional Breakdown
Calories per Serving
Wondering how this indulgent gravy fits into your diet? Here’s a rough nutritional breakdown based on a standard serving size of ¼ cup (about 60ml):
| Nutrient | Amount (per ¼ cup serving) |
|---|---|
| Calories | 90–110 |
| Total Fat | 6g |
| Saturated Fat | 3g |
| Carbohydrates | 7g |
| Sugars | 3g |
| Protein | 1g |
| Fiber | 1g |
| Sodium | 350–500mg (depending on stock and seasoning) |
These numbers can vary widely based on the ingredients used—especially the type of stock, fat, and any cream added. For a lighter version, use vegetable stock, olive oil, and skip the cream. For a richer take, go all-in with butter, full-fat cream, and a meat-based stock.
FAQs about Onion Gravy Recipe
1. Can I use red onions instead of yellow?
Yes! Red onions offer a sweeter, slightly milder flavor and can give your gravy a unique twist. They also add a deeper color.
2. Can onion gravy be frozen?
Absolutely. Store it in airtight containers or freezer bags for up to 2 months. Just reheat slowly and add a splash of stock or water if needed.
3. What can I use instead of beef stock?
Vegetable stock is a great substitute. For extra depth, add soy sauce or mushroom broth to mimic the richness of beef stock.
4. How do I thicken gravy without flour?
Try cornstarch, arrowroot powder, or even a bit of mashed potato. Make a slurry with a little cold water before adding to hot gravy.
5. How long does onion gravy last?
In the fridge, it keeps well for up to 4 days. Just store it in an airtight container and reheat gently on the stove.
Conclusion
Onion gravy isn’t just a sidekick—it’s a star. Whether you’re pouring it over buttery mashed potatoes, using it to enhance a roast, or adding it to a comfort food classic like bangers and mash, onion gravy brings serious flavor and heart to any meal. With just a handful of pantry ingredients, some patience, and a few tricks up your sleeve, you can master this rich, golden-brown sauce that’ll have your family licking their plates.
Remember, it’s all about the slow caramelization, thoughtful seasoning, and tasting as you go. Once you’ve nailed your version, you’ll wonder how you ever lived without it.