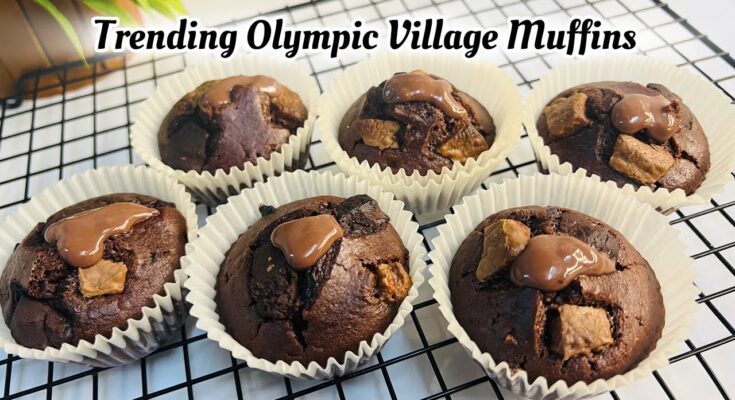
Olympic Village Chocolate Muffins Recipe: Ever wondered what kind of treats fuel the world’s top athletes? The Olympic Village Chocolate Muffins are a delicious, energy-packed option that has become famous among athletes and fans alike. Known for their rich, chocolatey taste and soft, fluffy texture, these muffins offer a perfect balance of indulgence and sustenance.
Here, we’ll take you through each step to create your own Olympic-style chocolate muffins that are sure to impress everyone at the table.
Ingredients Required
To make these muffins, you’ll need a mix of dry and wet ingredients, along with a few optional add-ins for extra flavor.
Dry Ingredients:
- 1 ½ cups all-purpose flour
- ½ cup unsweetened cocoa powder
- 1 cup granulated sugar
- 1 tsp baking powder
- ½ tsp baking soda
- ¼ tsp salt
Wet Ingredients:
- 2 large eggs
- ¾ cup milk (whole or 2% for best results)
- ½ cup vegetable oil or melted butter
- 1 tsp vanilla extract
Optional Add-ins:
- 1 cup chocolate chips (for extra chocolaty flavor)
- ½ cup chopped nuts, like walnuts or pecans
- ¼ cup shredded coconut
Equipment Needed
Essential Baking Tools:
- Muffin pan: Standard 12-cup muffin tin.
- Mixing bowls: Separate bowls for dry and wet ingredients.
- Whisk: To mix the ingredients.
- Rubber spatula or wooden spoon: For folding the ingredients together.
Optional Equipment:
- Ice cream scoop: Perfect for even portioning of muffin batter.
- Cooling rack: Allows muffins to cool evenly.
Preparation Tips
Before you start mixing, there are a few helpful tips that can make a big difference:
- Measure Ingredients Accurately: Use measuring cups and spoons for precise measurements.
- Room Temperature Ingredients: Ensure that eggs and milk are at room temperature to help the batter mix smoothly and achieve a fluffy texture.
- Pre-Prep Your Workspace: Have all ingredients and tools ready before starting.
Step-by-Step Recipe Instructions
Step 1: Preheat Your Oven
Preheating is key to successful baking, as it allows the muffins to rise evenly. Set your oven to 350°F (175°C) and let it warm up fully while you prepare the batter.
Step 2: Prepare the Muffin Pan
Using either paper liners or lightly greasing each cup with a non-stick spray will prevent the muffins from sticking and make cleanup easier.
Step 3: Mix the Dry Ingredients
In a large bowl, combine:
- Flour
- Cocoa powder
- Sugar
- Baking powder
- Baking soda
- Salt
Whisk the dry ingredients thoroughly to break up any clumps, especially the cocoa powder, for a smooth, even texture.
Step 4: Combine the Wet Ingredients
In a separate bowl, whisk together:
- Eggs
- Milk
- Vegetable oil or butter
- Vanilla extract
Make sure the wet ingredients are fully blended and smooth. This mixture should be at room temperature to avoid any lumps when combined with dry ingredients.
Step 5: Combine Wet and Dry Mixtures
Pour the wet ingredients into the dry ingredients, stirring gently. Avoid overmixing—overmixing can lead to dense muffins. A few small lumps are okay; the batter should be thick but pourable.
Step 6: Fold in Chocolate Chips and Extras
Now, add any chocolate chips or optional ingredients like nuts or shredded coconut. Gently fold them into the batter with a spatula to distribute them evenly without overworking the batter.
Step 7: Fill the Muffin Cups
Using a spoon or an ice cream scoop, fill each muffin cup about ¾ full. This amount allows the muffins to rise well without overflowing.
Step 8: Bake the Muffins
Place the muffin pan in the preheated oven and bake for 18-22 minutes. Keep an eye on them, as baking times may vary slightly depending on your oven. You’ll know they’re done when a toothpick inserted into the center comes out clean or with a few moist crumbs.
Step 9: Cool and Serve
Let the muffins cool in the pan for a few minutes, then transfer them to a cooling rack. Once cooled, they’re ready to enjoy! You can serve them warm with a little butter or at room temperature for a quick, delicious snack.
Tips for Storing Muffins
- Store in an Airtight Container: Keep your muffins fresh by storing them in an airtight container at room temperature for up to 3 days.
- Freezing Option: Freeze any leftover muffins in a sealed bag for up to 3 months. Just reheat them in the microwave for 20 seconds to enjoy a warm muffin anytime.
Common Mistakes to Avoid
- Overmixing the Batter: This can lead to dense muffins. Mix until just combined for the best texture.
- Incorrect Oven Temperature: Too high or low can cause uneven rising or burning, so use an oven thermometer if possible.
FAQs about Olympic Village Chocolate Muffins Recipe
What makes Olympic Village Chocolate Muffins unique?
These muffins are celebrated for their rich chocolate flavor and moist, fluffy texture, inspired by the treats enjoyed in the Olympic Village. Made with high-quality cocoa and a touch of espresso, they deliver a deep chocolate taste that’s truly satisfying.
Can I make Olympic Village Chocolate Muffins gluten-free?
Yes! Substitute the all-purpose flour with a gluten-free baking blend. Ensure all other ingredients are gluten-free to maintain the best taste and texture.
What ingredients are essential for Olympic Village Chocolate Muffins?
Key ingredients include all-purpose flour, cocoa powder, chocolate chips, baking powder, sugar, eggs, milk, and a hint of espresso for depth. These simple yet quality ingredients bring out the iconic chocolatey richness.
How can I make these muffins extra moist?
To achieve maximum moistness, consider adding a dollop of Greek yogurt or sour cream to the batter. This not only keeps the muffins tender but enhances the flavor as well.
How should I store Olympic Village Chocolate Muffins?
Store the muffins in an airtight container at room temperature for up to 3 days. For longer storage, freeze them for up to 3 months, thawing at room temperature before enjoying.
Conclusion
These Olympic Village Chocolate Muffins are a delectable treat that’s perfect for any occasion. With this recipe, you can recreate the taste of the Olympic Village right in your own kitchen. Experiment with different add-ins to make the recipe uniquely yours, and enjoy each bite knowing it’s a taste inspired by the world’s best athletes.


