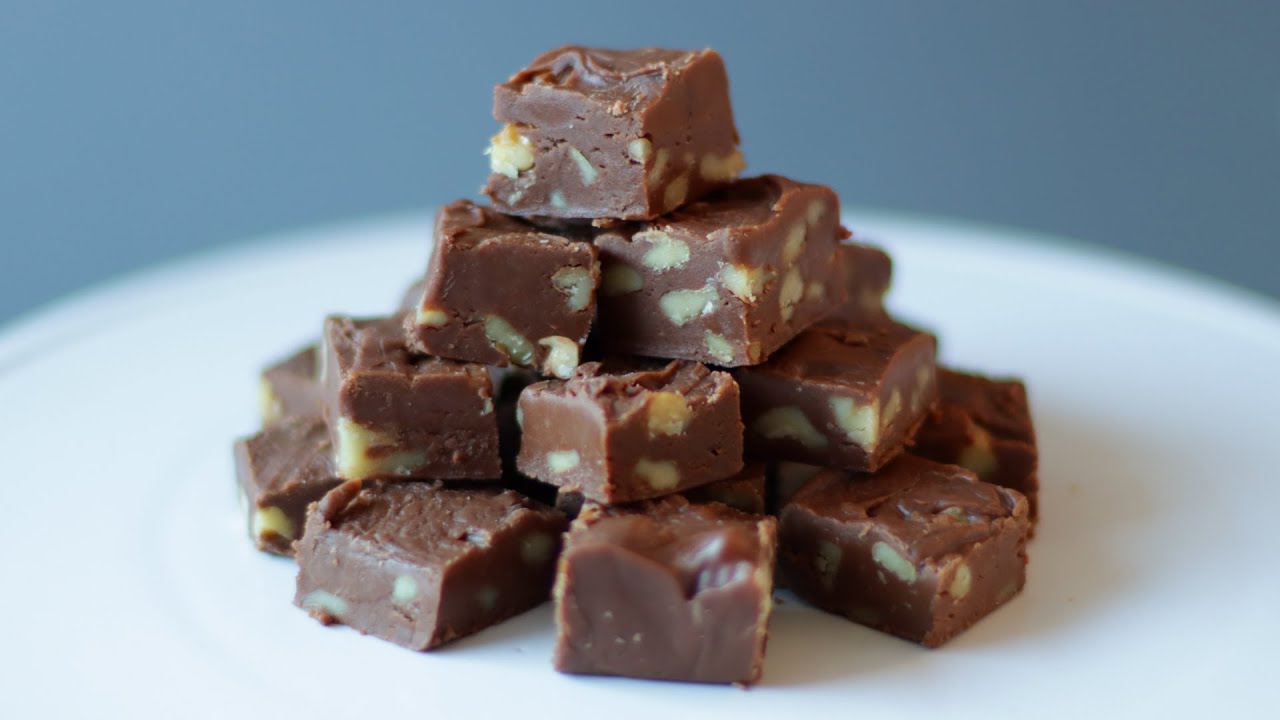
Old Fashioned Fudge Recipe: If you’ve ever craved a piece of smooth, creamy, melt-in-your-mouth chocolate fudge just like grandma used to make, then you’re in the right place. Old-fashioned fudge is a timeless dessert that captures the essence of homemade comfort. This isn’t the quick microwave version — it’s the traditional stovetop method that delivers a perfect balance of sweetness and texture. With a few simple ingredients, a bit of patience, and the right technique, you’ll create fudge that rivals any candy shop. Let’s dive into the magic of making this classic treat!
What Makes Old Fashioned Fudge Special
Unlike modern shortcuts that rely on condensed milk or marshmallow cream, old-fashioned fudge is made the traditional way — by boiling sugar, milk, and cocoa until the mixture reaches the perfect soft-ball stage. The result? A dense, velvety chocolate candy that holds its shape yet melts beautifully in your mouth. What makes this recipe stand out is its simplicity. No fancy ingredients or tools — just good old-fashioned cooking. Each bite delivers that nostalgic, rich cocoa flavor with a delicate grain that tells you it was made by hand, not by machine.
Making fudge this way takes a little practice, but the payoff is worth every minute. It’s a recipe passed down through generations — a small act of love that fills your kitchen with warmth and sweet aroma. The beauty of it lies in its authenticity: just pure, rich chocolate bliss.
A Sweet Trip Down Memory Lane
For many, fudge brings back cherished memories of holidays, family gatherings, and cozy evenings by the fire. Maybe your grandmother used to make it every Christmas, or perhaps you remember the old candy shop downtown that had those perfect chocolate squares in the glass display case. Old-fashioned fudge connects us to those moments. It’s more than a dessert — it’s a tradition. And when you make it yourself, you’re continuing that sweet legacy.
Ingredients You’ll Need for Classic Old Fashioned Fudge
Essential Ingredients and Their Purpose
Here’s what you’ll need to make about 36 squares of delicious old-fashioned fudge:
| Ingredient | Quantity | Purpose |
|---|---|---|
| Granulated Sugar | 2 cups | The base of the fudge that provides sweetness and structure. |
| Unsweetened Cocoa Powder | ½ cup | Adds rich chocolate flavor. |
| Whole Milk | 1 cup | Helps dissolve sugar and gives fudge a creamy texture. |
| Unsalted Butter | 4 tablespoons | Adds richness and smoothness. |
| Pure Vanilla Extract | 1 teaspoon | Enhances the flavor and aroma. |
| Salt | ¼ teaspoon | Balances the sweetness and deepens the chocolate taste. |
Each ingredient plays a vital role in creating the right texture and flavor. The sugar must dissolve perfectly to avoid graininess, while the cocoa gives that deep, chocolatey base. Whole milk is essential for creaminess — don’t substitute with water or low-fat milk, as it affects consistency. Finally, butter and vanilla bring the fudge together for that classic homemade finish.
Choosing the Right Chocolate for the Best Flavor
When it comes to fudge, not all cocoa is created equal. For a rich and authentic flavor, always use unsweetened natural cocoa powder rather than Dutch-processed. The natural acidity in this cocoa reacts perfectly with the sugar and milk, creating that deep, traditional chocolate profile. Premium brands like Hershey’s Natural or Ghirardelli Unsweetened Cocoa work beautifully.
If you want an even richer taste, you can substitute part of the cocoa with finely chopped semi-sweet chocolate or dark chocolate. This adds a luxurious texture and deepens the flavor, but remember — the original old-fashioned version sticks with pure cocoa for authenticity.
Equipment You’ll Need
Basic Tools for Homemade Fudge
Making fudge doesn’t require a kitchen full of gadgets, but having the right tools can make a big difference:
- Heavy-bottomed saucepan (2 or 3-quart size): Prevents scorching during boiling.
- Wooden spoon or silicone spatula: Ideal for stirring without scratching the pan.
- Candy thermometer: Ensures accurate temperature control (soft-ball stage: 234°F to 240°F).
- 8×8-inch square baking pan: Perfect for setting and cutting the fudge.
- Parchment paper or aluminum foil: For easy removal once the fudge sets.
- Mixing bowls and measuring cups: To keep all ingredients organized.
Having everything prepped and ready before you start (a technique called mise en place) is key to a smooth fudge-making experience. Once the sugar mixture starts boiling, you won’t have time to search for tools.
Optional Add-ons to Enhance Texture and Flavor
Want to give your fudge a personal twist? Try adding any of these ingredients right before pouring the fudge into the pan:
- Chopped nuts (pecans, walnuts, or almonds) for crunch.
- Mini marshmallows for a chewy contrast.
- Crushed peppermint for a festive touch.
- Peanut butter swirls for an irresistible combo.
- Sea salt flakes sprinkled on top for gourmet flair.
These additions not only elevate the flavor but also make your fudge uniquely yours.
Step-by-Step Guide to Making Old Fashioned Fudge
Step 1 – Preparing Your Pan and Ingredients
Before you start cooking, it’s important to set yourself up for success. Line your 8×8-inch pan with parchment paper or lightly butter it. This ensures your fudge will release easily once it’s set. Measure out all your ingredients — sugar, cocoa, milk, butter, vanilla, and salt — so you can move smoothly through each stage. Fudge requires attention and precise timing; preparation is everything.
Now, place your heavy saucepan on the stove and keep your thermometer handy. Once the cooking begins, things will move quickly, and precision will be your secret ingredient for perfection.
Step 2 – Combining Sugar, Cocoa, and Milk
Start by mixing your sugar and unsweetened cocoa powder together in the saucepan. This step is crucial to ensure the cocoa distributes evenly and doesn’t clump. Once it’s well blended, pour in the milk and give it a gentle stir until everything looks smooth and consistent.
Place the pan over medium heat and stir continuously until the sugar has fully dissolved. You’ll notice the mixture turning into a rich, dark chocolate syrup. At this point, make sure not to rush the process — patience is key. Avoid high heat, as it can cause the sugar to crystallize too quickly, resulting in grainy fudge later.
Once the mixture starts to boil, stop stirring. This may sound strange, but stirring at this stage can cause sugar crystals to form, ruining that creamy texture we’re aiming for. Allow the mixture to boil undisturbed until it reaches 234°F to 240°F (the soft-ball stage) on your candy thermometer. If you don’t have a thermometer, you can test by dropping a small bit of the mixture into a cup of cold water — if it forms a soft, flexible ball, it’s ready.
As the mixture cooks, your kitchen will fill with the comforting aroma of rich chocolate. Keep a close eye, as the fudge can go from perfect to overcooked very quickly. If it surpasses 240°F, it may turn dry or crumbly. The soft-ball stage is your sweet spot — literally!
Step 3 – Boiling the Mixture to the Right Temperature
This is the heart of making old-fashioned fudge. Once the sugar mixture begins to boil, you’ll see small bubbles forming at the edges before it turns into a full rolling boil. This stage determines the fudge’s final texture, so accuracy is everything.
The goal is to let it boil without stirring until it reaches that perfect temperature range. During this process, you might notice the mixture thickening slightly and the color deepening — that’s exactly what you want. It’s caramelizing ever so slightly, developing that signature fudge flavor.
When your thermometer reads between 234°F and 240°F, immediately remove the pan from the heat. Don’t stir yet! Instead, drop in the butter and let it sit on top of the hot mixture. This helps cool the surface and adds richness to the final product. Let the fudge cool undisturbed to about 110°F (lukewarm). This cooling phase is vital — it allows the sugar crystals to settle properly, ensuring a smooth, creamy texture rather than a gritty one.
Pro tip: Don’t rush this step. If you start beating the fudge while it’s too hot, it may seize up and become grainy. Let it rest naturally; patience pays off when it comes to fudge perfection.
Step 4 – Cooling and Beating the Fudge
Once your mixture has cooled to about 110°F, it’s time to bring that fudge to life. Add the vanilla extract and salt, then begin to beat the mixture using a wooden spoon or hand mixer on low speed. You’ll notice it slowly turning from glossy and liquidy to thick and creamy. This transformation is magical — it’s the fudge crystallizing just right.
Beating incorporates air and gives your fudge a smoother texture. It may take anywhere from 5 to 10 minutes of steady mixing before it reaches the ideal consistency. You’ll know it’s ready when it begins to lose its shine and starts to hold its shape when you stir.
If you plan to add extras like nuts, marshmallows, or flavorings, now’s the time. Gently fold them in so they distribute evenly. Once the fudge reaches that firm yet pourable texture, quickly pour it into your prepared pan. Smooth the top with a spatula to level it out.
Let it set at room temperature for several hours (or overnight). Avoid refrigerating immediately, as sudden cooling can affect the texture. When it’s firm to the touch, cut into neat squares using a sharp knife. You’ve now created a perfect batch of traditional old-fashioned fudge — rich, smooth, and utterly irresistible!
Step 5 – Cutting and Storing the Perfect Fudge
After your fudge has completely set, gently lift it from the pan using the parchment paper. Place it on a cutting board and, with a sharp knife, cut it into small squares — typically about 1-inch pieces. Clean the knife between cuts for cleaner edges.
Now, for storing: fudge keeps best in an airtight container at room temperature. If you’re in a humid environment, you can refrigerate it, but make sure it’s well sealed to prevent moisture from affecting the texture. Properly stored, your homemade fudge can last up to 2 weeks at room temperature or 3 to 4 weeks in the fridge.
You can also freeze fudge for longer storage — just wrap individual pieces in wax paper and store them in a freezer-safe bag. When you’re ready to enjoy them, let the pieces thaw at room temperature to bring back their creamy consistency.
Old-fashioned fudge also makes a perfect homemade gift! Wrap each square in parchment paper or decorative foil, place them in a pretty box, and you’ve got a heartfelt treat for birthdays, holidays, or any special occasion.
Tips for Perfect Old Fashioned Fudge Every Time
Avoiding Common Fudge Mistakes
Making fudge from scratch can feel intimidating, but once you understand the science behind it, success comes easily. Here are some golden rules to remember:
- Do not stir while boiling. This is the #1 cause of grainy fudge.
- Always use a candy thermometer. Guessing temperatures often leads to overcooking or undercooking.
- Cool before beating. Letting the fudge cool slightly before mixing ensures it sets properly.
- Use a heavy saucepan. Thin pans can cause hot spots, burning parts of your mixture.
- Measure ingredients precisely. Even small variations can throw off the sugar ratio and affect texture.
How to Fix Grainy or Runny Fudge
- Grainy fudge: Add a tablespoon of water and reheat gently until melted. Bring back to soft-ball stage, then cool and beat again.
- Runny fudge: It likely didn’t reach the correct temperature. Reheat and cook to 234°F–240°F, then let it cool and beat.
- Overcooked fudge: Add a little milk and stir on low heat to soften before resetting.
Consistency issues are common even for experienced cooks — but the good news is, fudge is forgiving. With a little adjustment, you can rescue almost any batch!
Flavor Variations and Creative Additions
Classic Add-Ins for Richer Taste
Once you’ve mastered the basic old-fashioned fudge recipe, you can get creative with endless variations. The classic version is divine on its own, but experimenting with flavors and textures can take your fudge to a whole new level.
Here are some timeless additions that pair beautifully with the rich chocolate base:
- Chopped Nuts: Pecans, walnuts, or almonds add a satisfying crunch and a toasty flavor. Stir them in right before pouring the fudge into the pan.
- Peanut Butter Swirls: Drop spoonfuls of creamy peanut butter into the fudge mixture just before setting, then use a knife to create marble-like swirls.
- Coconut Flakes: For a tropical twist, fold in sweetened shredded coconut for added texture.
- Mini Marshmallows: These melt slightly and give the fudge a chewy, gooey contrast that’s simply irresistible.
- Espresso Powder: For coffee lovers, a teaspoon of espresso powder intensifies the chocolate flavor and adds depth.
- Sea Salt: A sprinkle of flaky sea salt on top enhances the sweetness and creates that perfect sweet-salty balance.
The beauty of fudge lies in its versatility — it’s like a blank chocolate canvas ready to be personalized. Whether you like it nutty, creamy, or bold, there’s a version to suit every taste bud.
Holiday-Themed Fudge Ideas
Fudge isn’t just a treat; it’s a tradition — especially during the holidays. Here are a few festive variations to make your fudge stand out during special occasions:
- Peppermint Crunch Fudge: Add crushed candy canes or peppermint extract for a refreshing, minty flavor. Perfect for Christmas!
- Pumpkin Spice Fudge: Mix in pumpkin puree and a dash of cinnamon, nutmeg, and clove for a cozy autumn treat.
- Eggnog Fudge: Replace milk with eggnog and add a sprinkle of nutmeg for a creamy, holiday-inspired version.
- Valentine’s Day Fudge: Swirl in white chocolate and red food coloring to create beautiful pink marbled patterns.
- Easter Fudge: Top your fudge with pastel-colored mini chocolate eggs or sprinkles for a festive spring twist.
These themed fudges not only taste amazing but also make delightful gifts for family and friends. Wrap them in seasonal packaging for a homemade touch that spreads joy and sweetness.
Serving and Storing Old Fashioned Fudge
Best Ways to Serve for Freshness
Serving fudge may sound simple, but presentation matters, especially if you’re sharing it as a gift or dessert centerpiece. Here’s how to keep your fudge looking and tasting its best:
- Cut Uniformly: Use a sharp knife dipped in hot water, then wipe it dry before each cut. This keeps your fudge pieces smooth and professional-looking.
- Serve at Room Temperature: Cold fudge can feel too firm. Let it sit for 10–15 minutes before serving to restore its creamy texture.
- Add Garnishes: Dust lightly with cocoa powder, drizzle melted chocolate, or sprinkle crushed nuts or sea salt for extra flair.
- Pair with Drinks: Old-fashioned fudge pairs beautifully with coffee, tea, or even red wine. The rich chocolate contrasts perfectly with bitter or fruity flavors.
If you’re serving fudge at parties, consider arranging it on a tiered dessert tray or wrapping individual pieces in parchment paper for a charming touch. Presentation enhances the experience — after all, we eat with our eyes first!
How to Store for Long-Lasting Flavor
Proper storage ensures your fudge stays fresh and delicious long after it’s made. Here’s how to do it right:
- Room Temperature: Store fudge in an airtight container with parchment paper between layers. Keep it in a cool, dry place away from sunlight. It should stay good for up to 2 weeks.
- Refrigeration: If your home is warm or humid, store fudge in the fridge. Wrap it tightly to prevent moisture from affecting its texture. It’ll last about 3–4 weeks refrigerated.
- Freezing: Want to enjoy fudge later? Wrap individual pieces in wax paper, then seal in an airtight freezer bag. Fudge freezes beautifully for up to 3 months. To serve, thaw at room temperature before eating.
These methods preserve the flavor, texture, and freshness of your fudge so you can enjoy it whenever the craving hits. Homemade fudge also makes a thoughtful edible gift — just wrap it in decorative boxes or tins with ribbon for a personal touch that never fails to impress.
Nutritional Facts and Benefits
Calories and Serving Information
While fudge is undeniably indulgent, it’s all about enjoying it in moderation. Here’s an approximate nutritional breakdown for one small square (about 1 oz) of old-fashioned fudge:
| Nutrient | Amount |
|---|---|
| Calories | 130–150 kcal |
| Total Fat | 4–6 g |
| Saturated Fat | 3 g |
| Carbohydrates | 22–25 g |
| Sugar | 20 g |
| Protein | 1–2 g |
The richness of fudge comes mainly from sugar and butter, which contribute to its creamy, melt-in-the-mouth texture. Although it’s a sweet treat, enjoying a small piece can provide a satisfying chocolate fix without overindulgence.
Balancing Indulgence with Moderation
Like all desserts, the key to enjoying fudge is balance. You don’t need to eat a large portion to appreciate its flavor — even a small bite satisfies your sweet tooth. When enjoyed occasionally, old-fashioned fudge can be part of a balanced lifestyle.
If you want to make it a little lighter, here are some easy tweaks:
- Use dark cocoa powder for more antioxidants and richer flavor.
- Substitute part of the sugar with natural sweeteners like honey or coconut sugar.
- Reduce the butter slightly or use ghee for a more natural fat option.
Ultimately, fudge is about comfort and nostalgia. It’s the kind of treat meant to be shared — a small piece that brings big joy.
FAQs about Old Fashioned Fudge Recipe
1. Why is my fudge grainy?
Grainy fudge usually means the sugar crystallized too soon. Avoid stirring after the mixture starts boiling, and let it cool undisturbed before beating.
2. How long does homemade fudge last?
Stored properly in an airtight container, fudge can last up to 2 weeks at room temperature or 3–4 weeks in the refrigerator.
3. Can I make fudge without a candy thermometer?
Yes! You can use the soft-ball test — drop a bit of the mixture into cold water. If it forms a soft, flexible ball, it’s ready.
4. Can I use white chocolate instead of cocoa?
Absolutely! For white fudge, replace cocoa with melted white chocolate or vanilla baking chips for a creamy, sweet version.
5. How do I make fudge softer or firmer?
For softer fudge, cook to the lower end of the soft-ball range (234°F). For firmer fudge, aim closer to 240°F.
Conclusion
Old-fashioned fudge isn’t just a dessert — it’s a tradition that connects generations. With its velvety texture, deep chocolate flavor, and simple ingredients, it represents everything we love about homemade sweets. By following this step-by-step guide, you can master the art of making perfect fudge every time — smooth, rich, and irresistibly creamy.
Whether you’re preparing it for holidays, gifting it to loved ones, or simply indulging in a sweet craving, old-fashioned fudge will always bring smiles and sweet memories. Take your time, enjoy the process, and savor every bite of your homemade masterpiece.