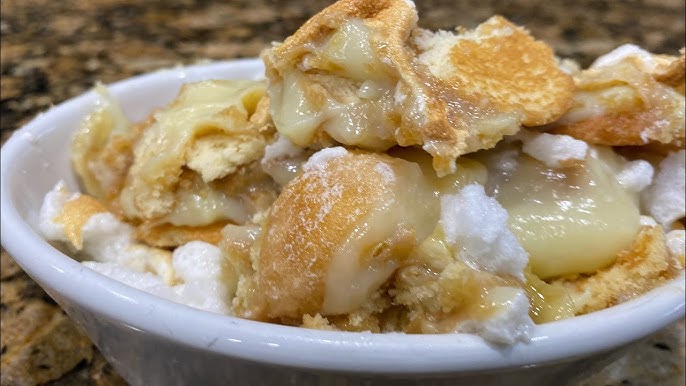
Old Fashioned Banana Pudding Recipe: Let’s take a stroll down memory lane with a dessert that’s more comforting than a warm hug—old-fashioned banana pudding. This creamy, dreamy Southern classic has been gracing family tables for generations. Whether you had it at Grandma’s house or at a Sunday potluck, the sweet nostalgia packed into each spoonful is unforgettable. The beauty of banana pudding is its simplicity—humble ingredients layered together to create a dessert that tastes like home.
What sets the old-fashioned version apart from shortcuts is the homemade vanilla custard. No instant pudding mixes here. It’s about taking the time to cook it slow and let the flavors develop. Real eggs, sugar, milk, and vanilla give it a richness that box mixes just can’t replicate. And don’t get us started on the vanilla wafers—softened by the custard but still holding their texture, nestled between slices of ripe banana.
This dessert is more than just a treat; it’s a tradition. It brings back memories of family gatherings, holidays, and carefree summers. You can serve it warm or cold, topped with meringue or whipped cream, but one thing is certain—it’ll always be a hit. Whether you’re making it for the first time or the hundredth, this recipe will guide you through creating a banana pudding that tastes just like the one you grew up with—maybe even better.
Ingredients You’ll Need
Before we start cooking, let’s round up everything you’ll need. One of the reasons banana pudding is such a beloved dessert is that it doesn’t require fancy or hard-to-find ingredients. Everything on this list is likely already in your kitchen or easy to pick up from the store.
Main Ingredients:
- 4 to 5 ripe bananas – not too soft, just perfectly ripe with a few brown specks
- 1 box (11 oz) of vanilla wafers – the classic Nilla brand works perfectly
- 4 large eggs – we’ll use the yolks for the custard and the whites for optional meringue
- ¾ cup granulated sugar
- ⅓ cup all-purpose flour
- 2 cups whole milk – you can substitute 2%, but whole milk gives the best creaminess
- ½ teaspoon salt
- 1 teaspoon vanilla extract
- 2 tablespoons butter
Optional Meringue Topping:
- 4 egg whites (from the same eggs used for custard)
- ¼ cup sugar
- ¼ teaspoon cream of tartar
- ½ teaspoon vanilla extract
Why These Ingredients Matter:
Each component plays a key role in the final flavor and texture of your pudding. The bananas should be sweet and aromatic. Vanilla wafers add that nostalgic texture, becoming slightly cake-like as they absorb the custard. The custard itself is the soul of the dessert—creamy, not too sweet, with just the right hint of vanilla.
You can experiment with homemade cookies or different types of bananas, but for that old-fashioned charm, simplicity wins.
Equipment Required
Great recipes don’t just depend on ingredients—your tools can make a difference too. Fortunately, banana pudding doesn’t require any special gadgets. Here’s what you’ll need to pull it all together:
Basic Tools:
- Medium saucepan – for cooking the custard
- Mixing bowls – for separating eggs and mixing ingredients
- Whisk and spatula – essential for smooth custard
- Electric mixer or hand whisk – helpful if making meringue
- 2-quart baking dish – glass or ceramic works well for presentation
- Measuring cups and spoons
Optional Equipment:
- Double boiler – if you’re nervous about scorching the custard, this adds control
- Blowtorch – if you want to get fancy with the meringue
Why the Right Equipment Matters:
Using a good-quality saucepan can prevent your custard from burning or sticking. A deep dish is ideal for layering, and a clear glass one lets you show off those beautiful banana and wafer layers. If you’re going all in with a meringue topping, an electric mixer will save your arms from a serious workout.
Setting up your station before you start cooking helps you move smoothly through each step without scrambling for tools in the middle of the process. Mise en place isn’t just for professional chefs—it’s your secret weapon for a stress-free baking session.
Preparing the Vanilla Custard (From Scratch)
This is the heart and soul of banana pudding—the rich, silky vanilla custard. Making it from scratch might sound intimidating, but it’s actually straightforward if you take your time and follow each step carefully. Trust us, once you taste the homemade version, there’s no going back to the boxed stuff.
Step-by-Step Instructions:
- Separate your eggs. In a small bowl, separate the yolks from the whites. Set the whites aside if you’re making meringue.
- Mix dry ingredients. In a medium saucepan, whisk together the sugar, flour, and salt.
- Add milk and egg yolks. Gradually whisk in the milk and then the egg yolks. Stir constantly to avoid lumps.
- Cook low and slow. Place the saucepan over medium heat. Cook the mixture, stirring constantly, until it thickens. This can take about 10–12 minutes. Don’t rush it—slow and steady wins the race.
- Remove from heat. Once thickened, take it off the heat. Stir in the butter and vanilla extract until smooth and glossy.
Tips for Perfect Custard:
- Keep stirring—don’t walk away while it cooks.
- If lumps form, strain the custard through a fine sieve before using.
- Use whole milk for maximum creaminess.
The result? A smooth, flavorful custard that clings to your spoon and makes every bite of pudding feel decadent.
Layering the Banana Pudding
Now comes the fun part—assembling everything together! This step is all about building those classic layers that make banana pudding so satisfying. There’s an art to layering, and once you master it, you’ll create the perfect ratio of cookie to banana to custard in every scoop.
How to Layer Like a Pro:
- Start with vanilla wafers. Line the bottom of your dish with a single layer of wafers.
- Add sliced bananas. Use evenly sliced bananas and arrange them over the wafers.
- Spoon over custard. Pour a layer of warm custard over the bananas, spreading it evenly.
- Repeat layers. Continue layering: wafers, bananas, custard—until the dish is full or you run out of ingredients.
- Top it off. End with a generous layer of custard or, if making meringue, leave room for that final flourish.
Layering Tips:
- Use bananas that are ripe but firm so they don’t turn mushy.
- Arrange layers tightly so every bite is balanced.
- Chill for at least 4 hours (overnight is best) to let the flavors meld.
This is the moment when all your hard work comes together in a gorgeous, golden, comforting dessert.
Baking with Meringue Topping (Optional but Traditional)
Meringue isn’t just a pretty topping—it’s part of what gives banana pudding that traditional old-school flair. Light, fluffy, and slightly toasted on top, it creates a contrast to the rich custard and tender wafers underneath. Not everyone includes meringue these days, but if you want that authentic Southern finish, it’s a must.
Making the Meringue:
If you saved your egg whites earlier, here’s where they come in. Let’s get whipping.
Ingredients:
- 4 egg whites
- ¼ cup granulated sugar
- ¼ teaspoon cream of tartar
- ½ teaspoon vanilla extract
Instructions:
- Whip it good. Place the egg whites in a clean mixing bowl (no yolk residue at all!). Using a stand mixer or hand mixer, begin to beat on medium speed.
- Add cream of tartar. Once the whites start to foam, add the cream of tartar and continue to beat.
- Sugar time. Slowly add the sugar, one tablespoon at a time, as the meringue thickens.
- Go stiff. Beat until stiff, glossy peaks form—this means the meringue holds its shape when the beaters are lifted.
- Spread on top. Spoon or pipe the meringue over the layered pudding, spreading it all the way to the edges to seal it.
- Bake to perfection. Place in a preheated oven at 350°F (175°C) for 12–15 minutes, or until the top is golden brown.
Tips for Flawless Meringue:
- Make sure the bowl and beaters are clean and dry.
- Don’t overbeat—the meringue should be firm, not crumbly.
- Sealing the edges helps prevent shrinkage while baking.
The meringue adds a light, cloud-like texture that contrasts beautifully with the dense, creamy pudding. Plus, those golden peaks are a feast for the eyes!
Chilling and Serving Tips
You might be tempted to dive right in—but patience pays off here. Old-fashioned banana pudding is best served chilled, after the flavors have had time to meld and the wafers have softened just enough to become cake-like.
Cooling Down:
Once your pudding is layered (and baked, if using meringue), allow it to cool on the counter for about 30 minutes. Then, transfer it to the fridge. Chill for at least 4 hours, but overnight is even better.
Serving Suggestions:
- Family-style: Bring the whole dish to the table and serve in generous scoops.
- Individual servings: Layer in mason jars or dessert cups for portion control and presentation.
- Toppings: A dollop of whipped cream, caramel drizzle, or a few extra wafer crumbles on top make it pop.
Bonus Tip: Banana pudding is one of those rare desserts that actually gets better with time. Day two? Even more amazing.
Variations to Try
While the classic recipe is perfection, there’s always room to get creative if you’re in the mood. Here are a few variations that put a fun spin on the traditional banana pudding:
1. Chocolate Banana Pudding:
Add a layer of chocolate ganache or chocolate chips between the banana layers for a richer twist.
2. Coconut Banana Pudding:
Stir shredded coconut into your custard, or sprinkle toasted coconut on top for tropical flair.
3. Peanut Butter Banana Pudding:
Add a thin layer of peanut butter or peanut butter chips to each layer—it’s like Elvis’ favorite sandwich in dessert form.
4. Banana Pudding Cheesecake:
Combine the custard with cream cheese to give it a denser, tangier taste reminiscent of cheesecake.
5. Gluten-Free Version:
Swap regular wafers for gluten-free cookies or ladyfingers to make it friendly for everyone.
Don’t be afraid to experiment—the foundation of this dessert is so strong that it welcomes new flavors while still staying true to its roots.
Storage and Shelf Life
You’ve made a big batch, and maybe (just maybe) you have leftovers. Here’s how to store them and keep that banana pudding tasting fresh:
In the Fridge:
- Store covered with plastic wrap or in an airtight container.
- Best eaten within 2 to 3 days.
- The wafers will continue to soften, and the bananas might brown a bit, but the flavor will still be amazing.
Can You Freeze Banana Pudding?
Short answer: not really. Custard tends to separate and bananas don’t freeze well—they’ll get mushy and watery. If you do freeze it, expect a texture change.
If you know you won’t eat it all, make a smaller batch or layer it into smaller containers to give away or save.
FAQs about Old Fashioned Banana Pudding Recipe
What are the essential ingredients for old-fashioned banana pudding?
The essential ingredients for an authentic old-fashioned banana pudding include vanilla wafers, ripe bananas, vanilla pudding (you can use a mix or make it from scratch), and whipped cream. For a richer flavor, some recipes also call for sweetened condensed milk and real vanilla extract.
How do I make the pudding from scratch?
To make vanilla pudding from scratch, you’ll need milk, sugar, cornstarch, salt, eggs, butter, and vanilla extract. Start by mixing sugar, cornstarch, and salt in a saucepan. Gradually stir in milk over medium heat until the mixture thickens and boils. Then, add some of this hot mixture into beaten eggs to temper them, return all to the pan, and bring to a gentle boil. Remove from heat, stir in butter and vanilla, and let it cool slightly before layering your pudding.
Can I use instant pudding instead of making it from scratch?
Absolutely! Instant vanilla pudding is a great shortcut for making banana pudding. Just follow the package instructions to prepare the pudding before layering it with bananas and vanilla wafers.
What’s the best way to layer the ingredients?
Start with a layer of vanilla wafers at the bottom of your serving dish, followed by a layer of sliced bananas, and then a layer of pudding. Repeat these layers until all ingredients are used up, finishing with a final layer of pudding. Top with whipped cream and a few more vanilla wafers or banana slices for decoration.
How long should banana pudding sit before serving?
Allowing the banana pudding to sit for at least 4 hours or overnight in the refrigerator lets the wafers absorb moisture from the pudding, resulting in a perfectly soft and creamy texture. However, if you prefer a crisper texture from the wafers, you can serve the pudding sooner.
Can banana pudding be made in advance?
Yes, banana pudding can be made up to 24 hours in advance. This not only helps the flavors to meld together but also gives the dessert a better texture. Be sure to cover it and keep it refrigerated until it’s time to serve.
What are some variations of this recipe?
There are several tasty variations to traditional banana pudding. Some popular options include adding a layer of caramel sauce, mixing in peanut butter with the pudding, or using coconut milk for a tropical twist. You can also experiment with different types of cookies instead of vanilla wafers, like shortbread or ginger snaps.
Conclusion
Old-fashioned banana pudding isn’t just a dessert—it’s an experience. From the creamy custard to the sweet bananas and nostalgic vanilla wafers, each spoonful tells a story of comfort, tradition, and love. It’s the kind of dish that brings people together, whether it’s at a family reunion, a church picnic, or just an ordinary weeknight craving something sweet.
Yes, it takes a little more time than opening a box of instant pudding—but the results? Absolutely worth it. You’ll taste the difference in every bite, and you’ll feel a little closer to the generations who passed this recipe down.
So go ahead, grab your saucepan, slice up those bananas, and get ready to make something truly special.