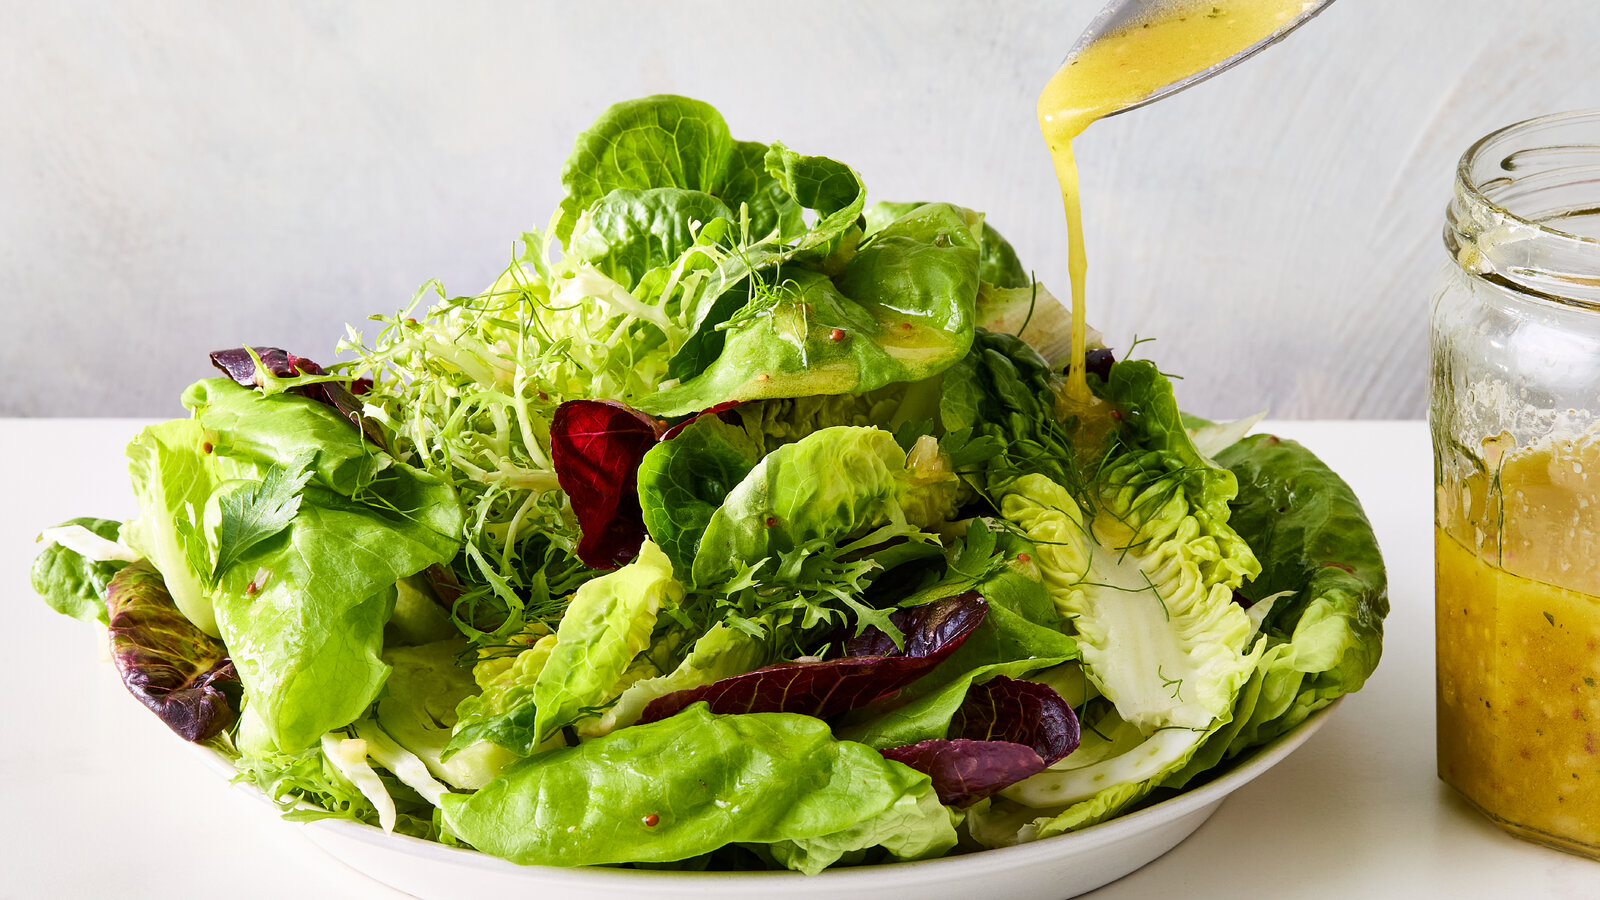
Oil and Vinegar Dressing Recipe: Oil and vinegar dressing is one of the simplest, healthiest, and most versatile condiments you can make at home. Unlike heavy, store-bought creamy dressings loaded with preservatives, sugar, and artificial flavors, this dressing relies on just a few fresh, wholesome ingredients. At its core, it is a beautiful balance of smooth, rich oil paired with the tangy bite of vinegar. This balance creates a refreshing dressing that can elevate even the most basic salad.
Why Oil and Vinegar Dressing is a Classic
This dressing has stood the test of time. For centuries, cultures around the world have combined oil and vinegar as a staple accompaniment to fresh vegetables. Italians drizzle it over crisp greens, the French whisk it into a vinaigrette, and even Mediterranean cuisines use variations of it in marinades. Its popularity comes from its simplicity and adaptability—it pairs well with everything from leafy greens to roasted vegetables, grains, and proteins.
Think of it as a canvas. Just like an artist starts with a blank canvas and adds layers, oil and vinegar dressing can start basic and evolve into endless variations. Add herbs, spices, or even a touch of mustard, and suddenly you have a unique flavor profile that matches your meal perfectly.
The Health Benefits of Homemade Dressings
Making your own dressing isn’t just about taste—it’s about health. Store-bought dressings often contain unhealthy trans fats, excess sodium, added sugars, and preservatives that your body doesn’t need. On the other hand, a homemade oil and vinegar dressing is naturally heart-healthy. Olive oil, in particular, is rich in monounsaturated fats that help lower bad cholesterol. Vinegar aids in digestion and may even help with stabilizing blood sugar levels.
When you control the ingredients, you’re not only improving the flavor but also ensuring you’re feeding your body something nutritious and natural. Plus, it’s cost-effective. A bottle of good olive oil and vinegar goes a long way and can save you money compared to repeatedly buying bottled dressings.
Common Uses Beyond Salads
While most people think of this dressing as “just for salads,” it’s actually so much more versatile. Use it as a marinade for chicken or fish, drizzle it over roasted vegetables, or toss it with pasta for a quick, refreshing flavor boost. It also works beautifully as a dip for fresh bread when paired with herbs. Once you start experimenting, you’ll find yourself reaching for your homemade oil and vinegar dressing for countless dishes.
Ingredients You’ll Need
The beauty of oil and vinegar dressing is its minimalism. You don’t need a complicated grocery list or hard-to-find ingredients. In fact, you probably already have everything in your pantry. Let’s break down the essentials and optional flavor boosters.
Choosing the Right Oil
Oil is the backbone of this dressing, and choosing the right one makes all the difference. Extra virgin olive oil is the most popular choice thanks to its rich, fruity flavor and heart-healthy benefits. However, depending on your taste preference, you can also experiment with:
- Avocado oil for a buttery, mild flavor
- Grapeseed oil for a light, neutral taste
- Walnut oil for a nutty twist
- Sunflower oil for a clean, versatile option
Each oil brings its own personality to the dressing. If you want something bold, stick with olive oil. If you prefer something lighter, grapeseed might be your best bet.
Picking the Best Vinegar
Just like oils, vinegars come in different styles, each lending its own character:
- Balsamic Vinegar – Sweet and tangy, ideal for Italian-style dressings.
- Red Wine Vinegar – Sharp and robust, perfect for Greek or Mediterranean salads.
- Apple Cider Vinegar – Mild and fruity, with added digestive benefits.
- White Wine Vinegar – Light and crisp, great for delicate greens.
- Rice Vinegar – Soft and slightly sweet, often used in Asian-inspired dressings.
The choice of vinegar determines the tanginess and depth of flavor in your dressing. Some even like to combine two different types for complexity.
Optional Add-ins for Extra Flavor
While the classic version uses only oil and vinegar, adding just a couple of extras can take your dressing to a whole new level. Consider adding:
- Minced garlic or shallots for sharpness
- Dijon mustard for creaminess and depth
- Honey or maple syrup for sweetness
- Fresh herbs like basil, oregano, or parsley
- Crushed red pepper flakes for a touch of heat
These additions allow you to customize the dressing to suit the dish you’re serving.
Tools and Equipment Required
You don’t need fancy gadgets to make this recipe, but having the right tools helps:
- A whisk or fork for mixing
- A measuring spoon or cup for ratios
- A clean glass jar with a lid for shaking and storage
- A small mixing bowl
That’s it! Simple tools, simple ingredients, yet the outcome is absolutely delicious.
Step-by-Step Guide to Making Oil and Vinegar Dressing
Now that you’ve got everything ready, let’s walk through the process step by step.
Step 1 – Gather All Your Ingredients
Lay out everything on your kitchen counter before you begin. This will make the process smoother and prevent you from scrambling mid-recipe. Place your chosen oil, vinegar, optional seasonings, and mixing tools in one spot. A little preparation goes a long way in making cooking more enjoyable.
Step 2 – Measure Proper Ratios
The golden rule of oil and vinegar dressing is the 3:1 ratio—three parts oil to one part vinegar. This ensures the dressing isn’t too acidic. For example:
- 3 tablespoons olive oil + 1 tablespoon vinegar
Of course, taste is subjective. Some prefer a sharper bite and may use a 2:1 ratio. The key is to experiment and find your personal sweet spot.
Step 3 – Mix or Whisk the Ingredients
Place your oil and vinegar in a mixing bowl or a jar with a lid. If you’re adding extras like mustard, garlic, or honey, add them now. Whisk the mixture vigorously or shake the jar until the ingredients emulsify—meaning they blend into a smooth, unified liquid.
Step 4 – Taste and Adjust
This is where personalization comes in. Taste your dressing with a spoon or a piece of lettuce. Too tangy? Add a little more oil. Too flat? Add a splash of vinegar or a pinch of salt. Adjusting at this stage ensures your dressing is perfectly balanced.
Step 5 – Storing the Dressing Properly
Pour your finished dressing into a glass jar with a tight lid. Store it in the refrigerator if it includes fresh herbs, garlic, or other perishables. If it’s just oil and vinegar, it can sit at room temperature for up to a week. Shake well before each use since oil and vinegar naturally separate.
Variations of Oil and Vinegar Dressing
One of the best things about oil and vinegar dressing is that it’s not a one-size-fits-all recipe. The basic formula gives you a blank canvas, but with just a few tweaks, you can create flavors that match different cuisines and meals. Here are some delicious variations to try at home.
Classic Italian Style
Italian-style oil and vinegar dressing is a household favorite. It often combines olive oil with red wine vinegar, garlic, oregano, and a touch of basil. Sometimes a pinch of sugar or honey is added to balance the acidity.
To make it, use:
- 3 tablespoons olive oil
- 1 tablespoon red wine vinegar
- 1 teaspoon dried oregano
- ½ teaspoon garlic powder
- Salt and pepper to taste
This dressing is perfect for green salads with romaine lettuce, cherry tomatoes, olives, and cucumbers. It’s also great for drizzling over pasta salads or as a marinade for grilled chicken.
Dijon Mustard Version
If you like creamier, more cohesive dressings, Dijon mustard is your best friend. Adding just a teaspoon of Dijon mustard helps emulsify the oil and vinegar, giving you a smooth, silky dressing that doesn’t separate as quickly.
Try this combo:
- 3 tablespoons olive oil
- 1 tablespoon white wine vinegar
- 1 teaspoon Dijon mustard
- ½ teaspoon honey (optional for sweetness)
- Salt and pepper to taste
This variation pairs beautifully with spinach or arugula salads. The mustard adds depth, making it ideal for heavier greens.
Garlic and Herb Infusion
Fresh garlic and herbs can transform your dressing into something restaurant-worthy. Crush or mince garlic and whisk it with your oil and vinegar, then toss in chopped parsley, thyme, or basil.
A basic version:
- 3 tablespoons olive oil
- 1 tablespoon apple cider vinegar
- 1 clove garlic, finely minced
- 1 tablespoon fresh herbs (parsley, basil, or dill)
- Pinch of red pepper flakes
This variation works wonderfully for grilled vegetables or as a dip for warm bread.
Balsamic Oil and Vinegar Dressing
Balsamic vinegar is naturally sweet and tangy, making it perfect for a more robust dressing. When combined with olive oil, it creates a dark, glossy vinaigrette that pairs well with fruit-topped salads.
For a simple version:
- 3 tablespoons extra virgin olive oil
- 1 tablespoon balsamic vinegar
- 1 teaspoon Dijon mustard
- 1 teaspoon honey (optional)
This is an excellent dressing for salads that include strawberries, goat cheese, or walnuts.
Tips for the Perfect Oil and Vinegar Dressing
Making oil and vinegar dressing is easy, but there are a few insider tricks to take it from “good” to “amazing.”
Balancing Acidity and Flavor
The most important rule is balance. Too much vinegar can overwhelm the palate, while too much oil can make the dressing feel greasy. Start with the classic 3:1 ratio but adjust slowly until you find what works for you. If you’re sensitive to acidity, consider adding a small spoonful of honey or maple syrup to mellow the sharpness.
Storage Tips for Longer Shelf Life
Plain oil and vinegar (without fresh add-ins) can last at room temperature for about a week. If you add garlic, fresh herbs, or shallots, store the dressing in the refrigerator to avoid spoilage. Shake well before each use since natural separation occurs.
For longer shelf life, consider making a concentrated version with only dried herbs and spices—no fresh ingredients. These can last up to two weeks in the fridge.
Common Mistakes to Avoid
- Using low-quality oil – The flavor of your dressing depends heavily on the oil, so don’t skimp here.
- Too much vinegar – Overpowering acidity can ruin the balance. Start small and adjust.
- Not whisking enough – Oil and vinegar naturally separate, so whisk or shake vigorously for the best consistency.
- Adding garlic too early – Raw garlic can overpower the dressing if it sits too long. Add it just before serving if you want a milder flavor.
Serving Suggestions
Oil and vinegar dressing isn’t just for salads—it’s incredibly versatile. Let’s look at some of the best ways to enjoy it.
Perfect Salad Pairings
The classic use is, of course, on fresh green salads. It pairs beautifully with mixed greens, arugula, romaine, or spinach. For a more substantial salad, drizzle it over a mix of quinoa, roasted vegetables, and chickpeas. The dressing adds brightness without overpowering the ingredients.
Using It as a Marinade
Because vinegar helps tenderize proteins, this dressing doubles as an excellent marinade. Combine it with extra herbs and use it for chicken, beef, or fish. Let the protein soak for at least 30 minutes before cooking for maximum flavor.
Drizzling Over Grilled Veggies
Grilled zucchini, eggplant, bell peppers, and asparagus come alive with a quick drizzle of oil and vinegar dressing. The smoky char from the grill combined with the tangy dressing creates a mouthwatering side dish. You can also toss roasted root vegetables like carrots and potatoes in the dressing for extra flavor.
Nutritional Value of Oil and Vinegar Dressing
Homemade dressing isn’t just tasty—it’s also much healthier than store-bought alternatives.
Calories and Fat Content
Most of the calories in oil and vinegar dressing come from the oil. Olive oil has about 120 calories per tablespoon, while vinegar adds virtually none. A typical serving (2 tablespoons of dressing) ranges from 100–150 calories, depending on the ratio of oil to vinegar.
Heart-Healthy Benefits
Olive oil is rich in monounsaturated fats, which support heart health by lowering LDL cholesterol and increasing HDL cholesterol. Vinegar, particularly apple cider vinegar, is linked to improved digestion and blood sugar regulation.
Why It’s Better Than Store-Bought
Store-bought dressings often contain soybean oil (a cheaper, less healthy oil), added sugars, stabilizers, and preservatives. Making it at home means you control what goes in—pure, natural ingredients without unnecessary additives.
FAQs about Oil and Vinegar Dressing Recipe
Q1: Can I use apple cider vinegar instead of red wine vinegar?
Yes, apple cider vinegar adds a fruity tang that’s slightly milder than red wine vinegar. It works especially well in salads with apples, pears, or nuts.
Q2: What’s the best oil-to-vinegar ratio for people who like less tang?
If you prefer a milder dressing, go with a 4:1 ratio—four parts oil to one part vinegar. This reduces sharpness while keeping the balance intact.
Q3: Can I make a large batch for the week?
Yes, but stick to simple oil and vinegar without fresh add-ins if you want longer storage. Then add fresh garlic or herbs just before serving.
Q4: How can I prevent the dressing from separating too quickly?
Add a teaspoon of Dijon mustard or honey to help emulsify the dressing. This keeps the oil and vinegar blended longer.
Q5: Can I use this dressing on warm dishes?
Absolutely! Try drizzling it over warm roasted potatoes, grilled chicken, or sautéed greens. The heat helps intensify the flavors.
Conclusion
The health benefits also make it a winner—olive oil supports heart health, while vinegar aids digestion and adds brightness without extra calories. Best of all, when you make it at home, you control the quality, ensuring every bite is fresh and free from unnecessary additives.
So next time you’re tempted to grab a bottle of store-bought dressing, think twice. With just five minutes and a few pantry staples, you can whip up a homemade oil and vinegar dressing that tastes better, costs less, and is far healthier.

