Oatmeal Scotchies Recipe: There’s nothing quite like the warm, chewy goodness of a fresh-baked oatmeal scotchie. These cookies are the perfect combination of hearty oats, rich brown sugar, and sweet butterscotch chips. Whether you’re baking for a holiday, a potluck, or just because—you’re going to fall in love with this easy, classic recipe.
Let’s dive right into the details of how you can create your own batch of mouthwatering oatmeal scotchies at home. From a complete list of ingredients to baking tips and tasty variations, this guide has everything you need.
Introduction to Oatmeal Scotchies
What Are Oatmeal Scotchies?
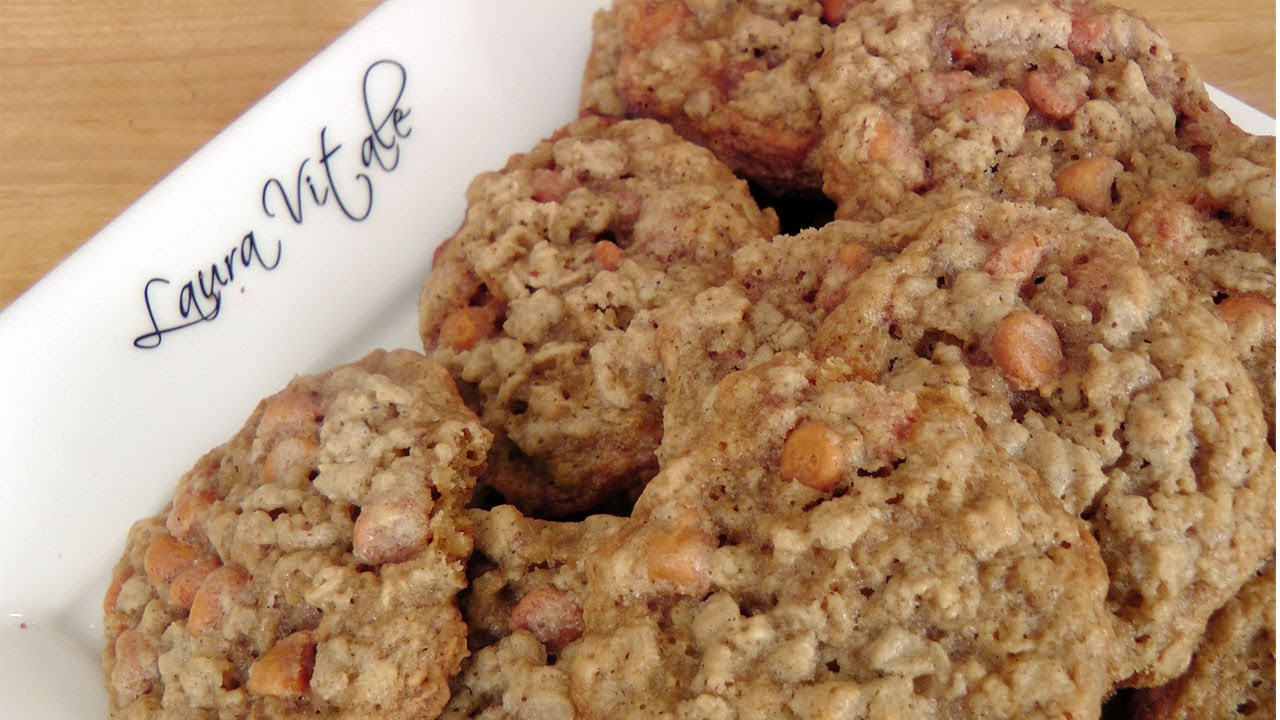
Oatmeal scotchies are a beloved cookie variety that combines the wholesome texture of rolled oats with the sweet caramel-like flavor of butterscotch chips. These cookies typically have a chewy texture with crisp edges and a warm, inviting aroma that fills the kitchen during baking. Unlike traditional oatmeal raisin cookies, oatmeal scotchies swap raisins for rich, melty butterscotch morsels—a move that many would argue is a serious upgrade.
The cookie’s origin ties back to classic American home baking, where pantry staples like oats and brown sugar were used creatively to whip up comforting desserts. The addition of butterscotch chips is what truly elevates these cookies into something special—an irresistible combo of chewy, sweet, and slightly salty.
Why You’ll Love This Recipe
- Super Easy to Make: No complicated steps or fancy techniques. Just mix, scoop, and bake.
- Family Favorite: These cookies are guaranteed to be a hit with both kids and adults.
- Perfect for Every Occasion: From bake sales to holiday parties, they fit in everywhere.
- Customizable: Add nuts, coconut, or switch up the chips for your own twist.
- Make-Ahead Friendly: You can freeze the dough or baked cookies for later!
If you’ve been looking for the perfect oatmeal cookie that hits that nostalgic sweet spot while still feeling indulgent and modern, this is the recipe to try.
Ingredients You’ll Need
Core Ingredients Breakdown
Here’s the essential list of ingredients that you’ll need to make a batch of classic oatmeal scotchies:
- 1 cup (2 sticks) unsalted butter, softened
- 3/4 cup granulated sugar
- 3/4 cup packed light brown sugar
- 2 large eggs
- 1 tsp vanilla extract
- 1 1/4 cups all-purpose flour
- 1/2 tsp baking soda
- 1/2 tsp salt
- 3 cups old-fashioned rolled oats
- 1 1/2 cups butterscotch chips
Each ingredient plays a specific role in creating the perfect texture and flavor:
- Butter gives richness and moisture.
- Brown sugar adds depth and chewiness.
- Eggs bind the dough and add structure.
- Oats give that hearty texture.
- Butterscotch chips melt slightly, adding sweet, creamy pockets throughout the cookie.
Optional Add-Ins and Substitutions
Want to make your cookies a little more exciting or adapt them to dietary needs? Here are some popular add-ins and swaps:
- Chopped walnuts or pecans for crunch
- Coconut flakes for a tropical twist
- White or dark chocolate chips instead of butterscotch
- Cinnamon or nutmeg for extra spice
- Raisins or dried cranberries for a chewy tang
Substitution ideas:
- Use gluten-free flour for a gluten-free version.
- Substitute plant-based butter and flax eggs for a vegan version.
- Replace half the butter with applesauce to cut back on fat (though the texture will change slightly).
Why Butterscotch Chips Make It Special
Butterscotch chips are really the star of this cookie. They melt into sweet, slightly gooey pools of caramel-flavored richness that perfectly complement the nutty oats and the brown sugar in the dough. Unlike chocolate chips, which can sometimes overpower the other flavors, butterscotch blends harmoniously—adding warmth and a hint of nostalgia to every bite.
Their smooth texture and rich flavor mean you don’t need any icing, frosting, or other toppings. Just one bite and you’ll know why oatmeal scotchies are a timeless favorite.
Kitchen Tools Required
Basic Baking Tools
No fancy kitchen gadgets needed! You likely have most of what’s required already in your kitchen:
- Large mixing bowls – one for wet and one for dry ingredients
- Measuring cups and spoons – accuracy matters!
- Wooden spoon or silicone spatula – for mixing
- Electric mixer – hand or stand, optional but helpful
- Cookie scoop – for evenly sized cookies
- Baking sheets – at least two, to rotate batches
- Parchment paper or silicone baking mats – prevents sticking and makes cleanup easier
Helpful Equipment for Better Results
If you want to level up your baking game, consider using these tools:
- Cooling racks – keeps cookies from overbaking once out of the oven
- Digital kitchen scale – for more precise measurements
- Oven thermometer – ensures your oven is baking at the right temp
Even though oatmeal scotchies are super forgiving, having the right tools makes the process smoother and your cookies more consistent.
Prepping for Baking
How to Prep Your Ingredients
Before you jump into mixing, do a little mise en place—French for “everything in its place.” Here’s how to prep like a pro:
- Bring butter and eggs to room temperature.
- Pre-measure all ingredients.
- Line baking sheets with parchment.
- Preheat your oven to 350°F (175°C).
Doing these steps beforehand saves time and ensures everything blends smoothly once you start mixing.
Tips for Room Temperature Butter and Eggs
Why does room temperature matter so much? Because it helps ingredients incorporate better, creating a smoother dough and fluffier cookies.
- Butter: Leave it out for about 1 hour. It should be soft but not melted.
- Eggs: Let sit in warm water for 5-10 minutes if you’re short on time.
Room temp ingredients trap air better during mixing, which means lighter cookies with just the right spread.
Step-by-Step Guide to Making Oatmeal Scotchies
This is where the magic happens. Follow this simple, step-by-step breakdown, and you’ll end up with perfectly chewy, buttery, golden oatmeal scotchies every single time. Let’s go!
Step 1: Cream the Butter and Sugars
Start by creaming the softened butter, granulated sugar, and brown sugar together in a large mixing bowl.
Why this step matters: Creaming incorporates air into the mixture, which gives your cookies lift and helps them bake up soft and chewy. The sugar also begins to dissolve into the butter, creating a smooth, rich base.
How to do it:
- Use a hand or stand mixer on medium speed.
- Beat for 2–3 minutes until the mixture becomes light and fluffy.
- Scrape down the sides of the bowl with a spatula to make sure it’s evenly mixed.
Pro tip: Don’t rush this step! Undermixing here can lead to dense, flat cookies.
Step 2: Add Eggs and Vanilla
Next, crack in the eggs one at a time, beating well after each addition. Then, pour in the vanilla extract and mix until fully combined.
Why it matters: Eggs add structure and richness to the dough, while vanilla enhances all the sweet flavors already in play. Together, they form the “glue” that holds your cookie dough together.
Technique tips:
- Beat until just combined—overmixing can toughen the cookies.
- If your eggs aren’t room temp, they might cause the butter to seize. Fix this by mixing a little longer or using warm water to warm the eggs beforehand.
At this point, your batter should look smooth and creamy. Now it’s time to work on the dry mix.
Step 3: Mix Dry Ingredients Separately
In a separate bowl, whisk together the flour, baking soda, and salt. This step is often skipped, but it’s essential for even distribution.
Why it matters: If you toss the dry ingredients straight into the wet mix, you risk clumps of baking soda or salt in your dough—not exactly the texture you’re aiming for.
How to do it:
- Use a whisk or fork to combine thoroughly.
- If you’re adding cinnamon or nutmeg for a spiced variation, mix them in here.
Once the dry ingredients are ready, it’s time to bring everything together.
Step 4: Combine Wet and Dry Mixtures
Gradually add the dry mixture into the wet ingredients. Don’t dump it all in at once—this can make your dough tough and overworked.
Best practice:
- Add in 2–3 increments, mixing gently between each.
- Stop once the flour is just incorporated. No need to beat it to death.
You’ll notice the dough starting to thicken up. Don’t worry if it looks a little stiff—this is where the oats and butterscotch chips come in to loosen and balance it out.
Step 5: Stir in Oats and Butterscotch Chips
Now the fun part—fold in your old-fashioned oats and butterscotch chips.
Why use old-fashioned oats? They give a better texture and chewiness than quick oats, which can turn mushy.
Mixing tips:
- Use a spatula or wooden spoon instead of a mixer.
- Mix until evenly distributed—don’t overwork the dough.
At this point, your dough should be thick, sticky, and speckled with golden butterscotch chips. It might be tempting to grab a spoonful (and hey, no judgment), but hold off—we’re almost there!
Step 6: Scoop and Arrange on Baking Sheet
Using a cookie scoop or tablespoon, scoop out even-sized balls of dough and place them on your prepared baking sheet.
Spacing: Leave at least 2 inches between cookies—they’ll spread slightly during baking.
Optional: For a prettier presentation, press a few extra butterscotch chips on top of each dough ball before baking.
Chill Option: If your kitchen is warm or your dough feels soft, pop the tray in the fridge for 15 minutes before baking. This prevents excessive spreading and leads to thicker cookies.
Step 7: Bake to Perfection
Slide the tray into your preheated oven at 350°F (175°C) and bake for 9–11 minutes, or until the edges are golden brown and the centers still look slightly underbaked.
Pro tip: Don’t wait for the entire cookie to look golden—by then, they’ll be overbaked. They’ll continue cooking on the sheet even after you pull them out.
If you like chewy cookies: Stick closer to 9 minutes.
If you like crispy edges: Let them go a bit longer, but watch closely.
Rotate the pan halfway through baking to ensure even browning, especially if your oven has hot spots.
Step 8: Cooling and Storing Tips
Once out of the oven, let the cookies sit on the baking sheet for 5 minutes. This helps them firm up before transferring.
Then, move them to a wire cooling rack to cool completely. This prevents soggy bottoms and keeps that delightful chew.
Storage Tips:
- Store in an airtight container at room temp for up to 1 week.
- Place a slice of bread in the container to keep cookies soft.
- Want to save some for later? Freeze the baked cookies or dough balls!
Baking Tips and Tricks
How to Get Chewy vs. Crispy Cookies
It all comes down to ratios, ingredients, and timing.
For chewy cookies:
- Use more brown sugar than white sugar.
- Don’t overbake—pull them out while the centers are still soft.
- Add a tablespoon of molasses or honey to boost moisture.
For crispier cookies:
- Use more granulated sugar than brown.
- Flatten the dough balls before baking.
- Bake a little longer for a golden crunch.
Experiment and find the texture you love best!
Common Mistakes to Avoid
Even a simple cookie like oatmeal scotchies can go wrong if you’re not careful. Here are some common missteps—and how to avoid them:
- Using margarine or cold butter – It won’t cream properly.
- Overmixing the dough – Leads to tough, dense cookies.
- Skipping the cooling time – The cookies need to set before moving.
- Using quick oats – They absorb too much liquid and change the texture.
- Adding chips too early – Fold them in at the end to prevent melting.
Remember: baking is a science, but it’s also an art. Pay attention to the little things, and your oatmeal scotchies will come out bakery-perfect every time.
Storage and Freezing Instructions
Best Practices for Freshness
You’ve just baked a batch of golden, chewy oatmeal scotchies—now how do you keep them fresh?
The secret lies in proper storage. To maintain that soft center and crisp edge, store your cookies in an airtight container as soon as they’ve cooled completely.
Here’s how to do it right:
- Use airtight containers or zip-top bags to lock in moisture.
- Separate layers with parchment paper to prevent sticking.
- Keep them at room temperature—no need to refrigerate.
Shelf life at room temp: 5 to 7 days.
Pro tip: Slip a slice of white bread or apple into the container. This keeps the cookies soft by transferring moisture to the baked goods rather than letting them dry out.
Avoid refrigerating unless necessary—cold air dries out cookies fast and can make butterscotch chips taste waxy.
How to Freeze Dough or Baked Cookies
Want to plan ahead or save some for later? Freezing is your best friend.
To freeze cookie dough:
- Scoop the dough into individual balls.
- Place on a baking sheet and freeze for 1–2 hours.
- Transfer the frozen balls into a zip-top freezer bag.
- Label with baking instructions and date.
When ready to bake:
- No need to thaw—just bake straight from frozen.
- Add 1–2 extra minutes to baking time.
To freeze baked cookies:
- Allow cookies to cool completely.
- Wrap each cookie in plastic wrap.
- Store in a freezer-safe bag or container for up to 3 months.
Thawing tips:
- Let cookies thaw at room temp for 15–30 minutes.
- Warm them up in the oven for 2–3 minutes for that fresh-baked taste.
Freezing not only saves time later, but it also gives you a stash of homemade goodness anytime the craving strikes.
Variations and Twists
Adding Nuts or Coconut
Want to elevate your oatmeal scotchies from great to gourmet? Add-ins like nuts or coconut flakes can add incredible texture and flavor.
Great nut choices include:
- Chopped pecans – sweet, buttery crunch.
- Walnuts – earthy and slightly bitter, balancing the butterscotch sweetness.
- Almonds – for a firmer crunch and nutty depth.
Coconut options:
- Use unsweetened shredded coconut for a subtle chew.
- Go with sweetened coconut flakes if you want extra indulgence.
Add about ½ to ¾ cup of add-ins per batch. Don’t go overboard, or the dough may not hold together well.
Why it works: Nuts and coconut add contrast to the chewy oats and melt-in-your-mouth butterscotch, creating a more complex bite that surprises and satisfies.
Using White Chocolate or Dark Chocolate Chips
Butterscotch chips are amazing, but what if you want to switch things up?
White chocolate chips offer a creamy, ultra-sweet flavor that pairs beautifully with oats. They also look striking against the golden cookie base.
Dark chocolate chips, on the other hand, provide a rich, bitter contrast to the sweet brown sugar and oats—perfect for those who like their sweets a little less sweet.
Other chip ideas:
- Peanut butter chips
- Cinnamon chips
- Caramel bits
Mix and match or do a 50/50 split with butterscotch for a truly customized cookie.
Tip: Reduce the total amount of chips slightly if combining multiple types—about 1 ½ cups total should still be the max.
Nutritional Information
Estimated Nutritional Breakdown per Cookie
If you’re tracking your daily intake or just curious about what you’re eating, here’s a rough nutritional estimate for one standard-sized oatmeal scotchie:
| Nutrient | Amount (per cookie) |
|---|---|
| Calories | 180–220 |
| Total Fat | 9–11g |
| Saturated Fat | 5g |
| Carbohydrates | 28–30g |
| Sugars | 15–18g |
| Protein | 2–3g |
| Fiber | 1–2g |
| Sodium | 120–150mg |
Note: Values can vary based on exact ingredients used (e.g., full-fat vs. light butter, different brands of chips, or added nuts).
Looking to lighten it up? Try these swaps:
- Use half whole wheat flour for added fiber.
- Swap some butter for mashed banana or applesauce.
- Use reduced-sugar butterscotch chips or cut down on the amount.
These cookies are a treat—but with the right tweaks, they can be part of a balanced indulgence.
Serving Suggestions
Best Pairings for Oatmeal Scotchies
So you’ve baked the perfect batch—now how should you serve them?
These cookies are incredibly versatile and go well with all kinds of beverages and accompaniments.
Pair with:
- A cold glass of milk (classic!)
- Coffee or latte for an afternoon pick-me-up
- A cup of hot tea—especially chai or cinnamon spice
- Ice cream – use cookies to make sandwiches with vanilla or caramel ice cream
- A glass of dessert wine or bourbon for a grown-up pairing
Hosting a party or holiday gathering? Stack oatmeal scotchies on a rustic plate with parchment layers or display in a glass cookie jar for that homemade bakery vibe.
Bonus idea: Crumble a cookie over yogurt, oatmeal, or a smoothie bowl for a sweet crunch!
Whether warm from the oven or days later, these cookies never disappoint. They’re comforting, flavorful, and versatile enough to fit any setting or craving.
Why This Recipe Works
Perfect Texture and Balance of Flavors
So, what makes this oatmeal scotchies recipe so dependable—and so delicious? It’s all about the balance of texture and flavor. You get chewy oats, melty butterscotch, crisp edges, and a soft center, all wrapped in a warm, slightly nutty cookie base. It’s the harmony of ingredients and the step-by-step precision that makes it a tried-and-true recipe.
Here’s a deeper breakdown of why this works so well:
- The Butter and Brown Sugar Base: Butter gives richness, while brown sugar offers moisture and a deep, caramel-like flavor. This combo is what gives the cookies their signature chewy centers.
- Eggs for Structure: Eggs help bind everything together and add fluffiness without making the cookie cakey.
- Oats = Texture Heaven: Old-fashioned oats are the real MVP here. They soak up the butter, lend chew, and give a rustic, homemade mouthfeel that sets oatmeal scotchies apart from your average cookie.
- Butterscotch Magic: Those golden morsels melt slightly as they bake, creating little puddles of sweet, toffee-like goodness that play perfectly against the nutty oats and brown sugar.
- The Mixing Method: Creaming the butter and sugar creates tiny air pockets, while folding in the dry ingredients and oats gently keeps the dough soft and tender. Not overmixing is key.
- Baking Technique: Removing the cookies while they still look slightly underdone ensures they finish cooking on the sheet. That’s how you get soft centers and golden edges every time.
All of these small techniques add up to one big result: a perfectly baked, crowd-pleasing cookie that’s as good on day one as it is on day three (if they last that long!).
FAQs about Oatmeal Scotchies Recipe
1. Can I make oatmeal scotchies without brown sugar?
Yes, but the flavor and texture will change. You can use all white sugar or substitute with coconut sugar or maple sugar for a similar rich flavor, though the cookies may be less chewy.
2. Why are my oatmeal scotchies spreading too much?
Likely causes include overly soft or melted butter, too little flour, or not chilling the dough before baking. Try chilling the dough for 30 minutes next time and measure your flour correctly.
3. Can I add spices like cinnamon or nutmeg?
Definitely! Add 1 teaspoon of cinnamon or 1/4 teaspoon of nutmeg to the dry ingredients for a warm, spiced variation that pairs beautifully with butterscotch.
4. Do I have to use parchment paper?
It’s highly recommended to prevent sticking and to help with even baking. If you don’t have parchment, lightly grease your baking sheet or use a silicone mat.
5. Can I make mini oatmeal scotchies?
Yes! Use a teaspoon-sized scoop and reduce baking time to 6–8 minutes. Mini cookies are great for parties, gifting, or portion control.
Conclusion
There you have it—your complete guide to baking the perfect oatmeal scotchies. These golden, chewy cookies are proof that simple ingredients, when combined just right, can produce something truly magical. Whether you’re baking for the holidays, filling a lunchbox, or just treating yourself, oatmeal scotchies deliver every single time.
With their comforting oats, sweet butterscotch chips, and easy-to-follow method, this recipe is destined to become a favorite in your kitchen. And the best part? You can customize it to your taste, make it ahead, or freeze for future cravings.
So fire up your oven, gather your ingredients, and get ready to enjoy the coziest cookie you’ve ever baked. You’ll be glad you did.


