Oatmeal Muffins Recipe: When you think of comfort food that’s both nourishing and satisfying, oatmeal muffins hit the mark. They’re like a hug in food form—warm, soft, slightly sweet, and packed with the goodness of whole grains. Whether you’re rushing out the door in the morning or looking for a wholesome snack, these muffins check all the boxes.
But what sets oatmeal muffins apart from other baked goods? It’s their simplicity, adaptability, and nutritional punch. Unlike sugar-laden pastries, oatmeal muffins give you the option to go healthy without sacrificing flavor. You can go classic, fruity, nutty, or even chocolatey depending on your mood or what you’ve got in the pantry.
So, if you’re looking to bake a batch that’s light, fluffy, and full of heart, keep reading. This step-by-step guide will walk you through everything you need to know to create your own homemade oatmeal muffins.
List of Ingredients You’ll Need
Here’s a quick rundown of all the ingredients that’ll make your oatmeal muffins the talk of the table. These ingredients are broken down into dry, wet, and optional add-ins.
Dry Ingredients
- 1 cup old-fashioned rolled oats
- 1 cup all-purpose flour (or whole wheat flour for a healthier twist)
- 1/2 cup brown sugar (or coconut sugar for a natural alternative)
- 1 tsp baking powder
- 1/2 tsp baking soda
- 1/4 tsp salt
- 1/2 tsp ground cinnamon (optional for extra flavor)
Wet Ingredients
- 1 cup milk (dairy or any plant-based alternative like almond, oat, or soy)
- 1/3 cup melted butter or coconut oil
- 1 large egg
- 1 tsp pure vanilla extract
Optional Add-ins for Flavor and Texture
- 1/2 cup chopped nuts (walnuts, pecans, or almonds)
- 1/2 cup dried fruit (raisins, cranberries, or chopped dates)
- 1/2 cup chocolate chips or cocoa nibs
- 1 mashed ripe banana or 1/2 cup unsweetened applesauce for moisture
These ingredients are easy to find and budget-friendly. Even better, they can be swapped or customized based on dietary needs or taste preferences.
Tools and Equipment Required
Before you dive into the baking process, make sure you have these tools ready:
- Large mixing bowl
- Medium mixing bowl
- Measuring cups and spoons
- Whisk or spoon for mixing
- Muffin tin
- Muffin liners or cooking spray
- Cooling rack
- Ice cream scoop or spoon for portioning
Getting your setup right ahead of time will make the process smoother and more enjoyable.
Step-by-Step Guide to Making Oatmeal Muffins
Alright, apron on and let’s get baking! Here’s how to make oatmeal muffins from scratch:
Step 1: Preheat Your Oven
Set your oven to 375°F (190°C). This ensures it’s at the perfect temperature by the time your muffins are ready to go in.
Pro tip: An oven thermometer is a baker’s best friend. Most home ovens run hotter or cooler than the setting, and this can make or break your muffins.
Step 2: Prepare the Muffin Tin
Line your muffin tin with paper liners or lightly grease each cup with cooking spray or butter. This makes sure your muffins don’t stick, and cleanup stays easy.
Step 3: Soak the Oats
Pour the milk over the rolled oats and let them soak for 10–15 minutes. This helps soften the oats and adds moisture, making your muffins soft and fluffy rather than dry and chewy.
This is a key step—don’t skip it!
Step 4: Mix the Dry Ingredients
In a large bowl, whisk together:
- Flour
- Baking powder
- Baking soda
- Salt
- Cinnamon (if using)
- Brown sugar
Combining dry ingredients separately prevents clumping and ensures your muffins rise evenly.
Step 5: Mix the Wet Ingredients
In a medium bowl, combine:
- Soaked oats and milk
- Egg
- Melted butter or oil
- Vanilla extract
Whisk until everything is well blended. The mixture should look creamy and smooth.
Step 6: Combine Wet and Dry Ingredients
Pour the wet mixture into the dry ingredients and gently stir until just combined. Do not overmix—this is a classic muffin mistake that leads to tough or rubbery texture. A few lumps are totally fine.
Step 7: Fold in Extras (Optional)
This is the fun part. Fold in your add-ins like nuts, fruit, or chocolate chips. Try not to go over 3/4 cup total mix-ins to maintain the right muffin consistency.
Feeling adventurous? Mix and match! Walnuts and banana? Cranberries and orange zest? Go wild.
Step 8: Fill the Muffin Cups
Use a spoon or scoop to divide the batter evenly among the muffin cups. Fill each about 2/3 to 3/4 full—this gives the muffins room to rise without spilling over.
Sprinkle extra oats or sugar on top for a bakery-style look.
Step 9: Bake the Muffins
Pop them in the oven for 18–22 minutes, or until a toothpick inserted in the center comes out clean.
Keep an eye on them after 18 minutes—every oven is different. When they’re golden brown on top and your kitchen smells amazing, you’re almost there.
Step 10: Cool and Serve
Let your muffins rest in the tin for 5 minutes, then transfer them to a cooling rack. This stops them from getting soggy bottoms.
Once they’ve cooled down a bit (if you can wait that long), dig in! Warm muffins with a pat of butter or a drizzle of honey? Heaven.
Pro Tips for Perfect Oatmeal Muffins
Now that you’ve got the basic recipe down, let’s talk about the little secrets that take your muffins from “pretty good” to “oh wow, did you bake these?!”
1. Don’t Skip the Oat Soaking Step
Soaking the oats in milk softens them and makes the texture of the muffin more cohesive and moist. It prevents those chewy oat bits that can mess with the overall bite.
2. Avoid Overmixing the Batter
Seriously, mix it just until everything is combined. Overmixing builds up the gluten in the flour, which makes the muffins tough. We’re going for light and fluffy here.
3. Sweetness Balance
Want a healthier muffin? Try reducing the sugar slightly, especially if you’re adding sweet mix-ins like banana or chocolate chips. You can also use maple syrup or honey instead of brown sugar—just reduce the milk slightly to compensate for the added liquid.
4. Add a Crunchy Top
Sprinkle a little raw sugar or extra oats on top before baking. It adds a satisfying crunch and makes them look like they came from a fancy café.
5. Don’t Skip the Cooling Time
Muffins continue cooking for a couple of minutes after being pulled from the oven. Letting them cool allows the crumb to set so they’re easier to peel and less crumbly.
Healthy Variations of Oatmeal Muffins
Want to switch things up while still keeping things wholesome? Here are some delicious oatmeal muffin variations that still keep nutrition in mind.
Banana Oatmeal Muffins
- Use 2 ripe mashed bananas in place of half the milk for a naturally sweet and moist muffin.
- Reduce the added sugar to 1/4 cup.
- Add walnuts or a sprinkle of cinnamon for extra warmth.
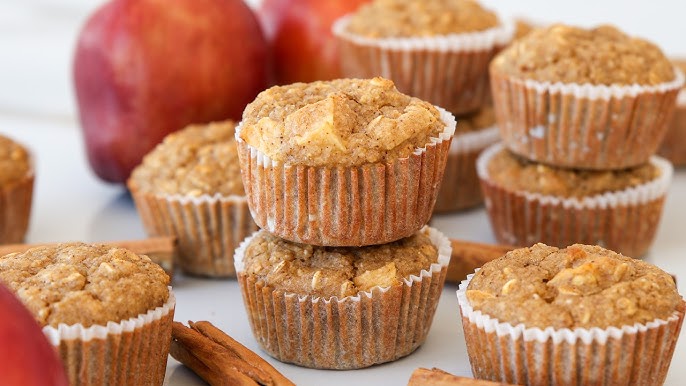
Apple Cinnamon Oatmeal Muffins
- Fold in 1/2 cup finely chopped apple and an extra 1/2 teaspoon of cinnamon.
- A dash of nutmeg adds autumn vibes.
- These pair beautifully with a drizzle of maple syrup.
Vegan Oatmeal Muffins
- Use plant-based milk like oat or almond.
- Swap the egg for a flax egg (1 tbsp flaxseed meal + 3 tbsp water).
- Coconut oil or vegan butter works great as the fat.
Gluten-Free Oatmeal Muffins
- Use gluten-free rolled oats and a 1:1 gluten-free flour blend.
- Let the batter rest for 10 extra minutes before baking—gluten-free flour absorbs moisture differently.
Each variation keeps the wholesome core of oatmeal muffins but adds its own twist.
Mistakes to Avoid While Baking Oatmeal Muffins
Let’s save you from a few baking blunders that can ruin even the best intentions:
1. Using Unsoaked Oats
They won’t blend well into the batter and can make your muffins dense or dry. Soak them!
2. Overfilling the Muffin Cups
This leads to muffins spilling over and baking into each other—awkward and messy. Stick to filling 2/3 to 3/4 of each cup.
3. Baking Too Long
Dry muffins? No thanks. Check doneness with a toothpick and don’t overbake. Pull them out once that tester comes out clean or with a few moist crumbs.
4. Skipping the Cooling Rack
Letting muffins cool in the pan too long can lead to soggy bottoms. Get them on a rack as soon as they’re safe to touch.
Serving Suggestions
Wondering how to enjoy your oatmeal muffins beyond just grabbing one and biting in? Here are some tasty ways to elevate the muffin experience:
- With coffee or tea: A classic breakfast or mid-morning pairing.
- Warm with a spread: Try peanut butter, almond butter, or cream cheese.
- Drizzled with honey or maple syrup: Great for dessert-like vibes.
- Crumbled over yogurt: Instant parfait!
- As a school snack or packed lunch: They’re mess-free and easy to transport.
Make a double batch and enjoy them in new ways all week long.
FAQs about Oatmeal Muffins Recipe
1. Can I use instant oats instead of rolled oats?
Yes, but rolled oats are preferred for texture. Instant oats break down more and can make the muffins overly soft or mushy. If that’s all you have, reduce the soaking time by half.
2. How do I make these muffins dairy-free?
Easy! Swap cow’s milk for any plant-based milk (almond, oat, soy, coconut) and use melted coconut oil or vegan butter instead of dairy butter.
3. What’s the best way to keep oatmeal muffins moist?
Store them in an airtight container at room temperature for up to 3 days. For longer storage, freeze and reheat as needed. Adding banana or applesauce to the batter also helps with moisture.
4. Can I freeze oatmeal muffins?
Absolutely! Let them cool completely, wrap them individually in plastic wrap or foil, and store in a freezer bag. They keep well for up to 3 months. To reheat, microwave for 20–30 seconds or warm in the oven.
5. Are oatmeal muffins good for breakfast?
Yes! They’re packed with whole grains and fiber, especially if you reduce the sugar and add fruits or nuts. Pair with Greek yogurt or a smoothie for a balanced meal.
Conclusion
There you have it—a complete, step-by-step guide to making the best oatmeal muffins you’ll ever try. Whether you stick to the basics or experiment with add-ins and healthy swaps, you’re guaranteed a warm, hearty treat every time.
Oatmeal muffins are simple to make, budget-friendly, and totally customizable. Plus, they’re a hit with both kids and adults. Bake a batch on Sunday, and you’ll have breakfast, snacks, or even a light dessert ready for the week.
So preheat that oven and get baking—your kitchen is about to smell amazing!