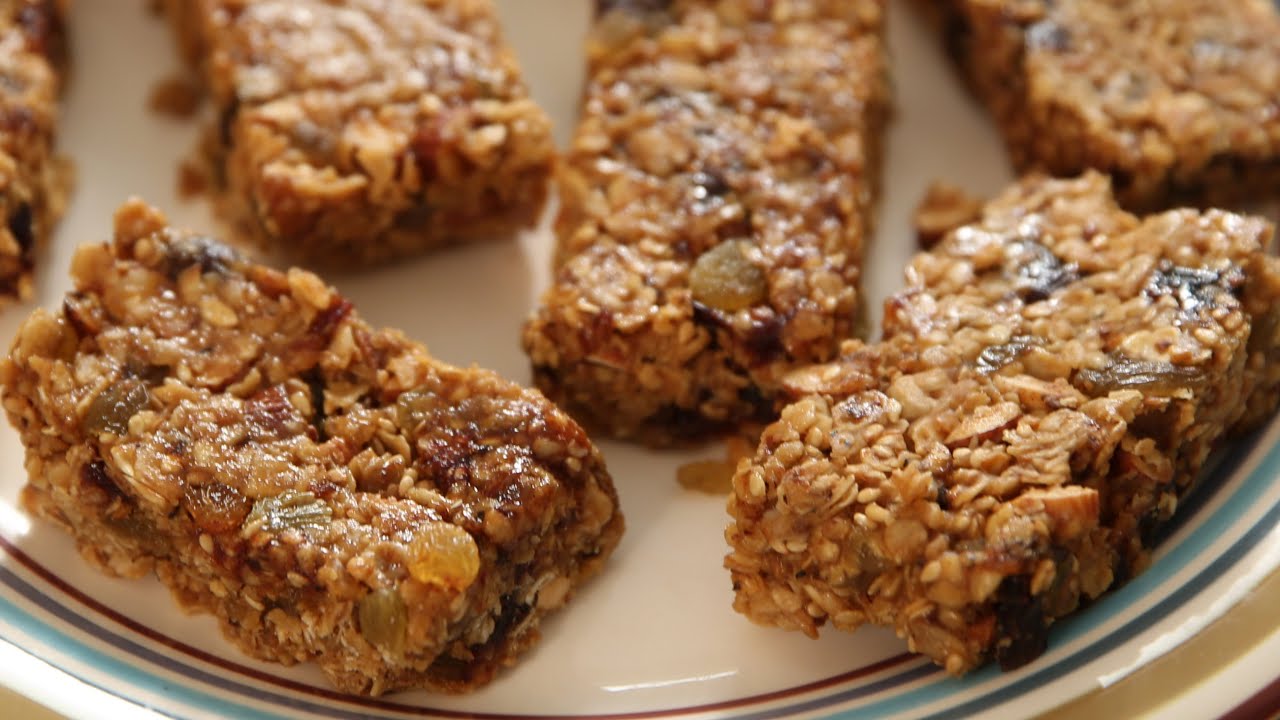
Oatmeal Bars Recipe: Oatmeal bars are the epitome of wholesome snacking. They strike a balance between indulgence and health, making them ideal for breakfast on-the-go, post-workout refueling, or even as a satisfying dessert. Whether you’re a seasoned baker or a kitchen newbie, this guide will walk you through everything you need to know to create the perfect oatmeal bars from scratch.
Why Oatmeal Bars are the Perfect Snack
What makes oatmeal bars such a great snack? First, they’re portable and mess-free—no spoons or bowls needed. You can pack them for a hike, toss them in your lunchbox, or enjoy them with your afternoon tea. Unlike overly processed snacks, oatmeal bars offer a mix of carbs, fiber, and proteins that actually sustain you.
Plus, they’re incredibly versatile. You can make them soft and chewy, dense and hearty, or even crisp and crunchy. Depending on what you mix in—chocolate chips, nuts, dried fruits, seeds—they can go from a simple breakfast item to a gourmet treat. And let’s be honest, who doesn’t love a snack that feels like a dessert but is actually packed with nutrients?
Nutritional Benefits of Oats
Oats are more than just a comfort food—they’re a nutritional powerhouse. Packed with fiber, particularly beta-glucan, oats help lower cholesterol levels and regulate blood sugar. They’re also rich in antioxidants and provide a good source of essential vitamins and minerals like manganese, phosphorus, magnesium, copper, and iron.
When you turn oats into oatmeal bars, you’re essentially baking nutrition into every bite. They’re especially good for heart health and digestion, and the slow-digesting carbs keep you full for longer. For those on a fitness journey or trying to eat cleaner, oatmeal bars are a brilliant way to stay on track without feeling deprived.
Ingredients You’ll Need
Creating oatmeal bars is refreshingly simple, and you likely already have many of the ingredients in your pantry. Here’s what you’ll need to get started.
Basic Ingredients for Classic Oatmeal Bars
To make a classic batch of oatmeal bars, gather the following:
- 2 cups rolled oats (old-fashioned)
- 1 cup all-purpose flour or whole wheat flour
- 1/2 cup brown sugar (light or dark)
- 1/2 cup unsalted butter (melted)
- 1/4 cup honey or maple syrup
- 1 large egg
- 1 teaspoon vanilla extract
- 1/2 teaspoon baking soda
- 1/2 teaspoon salt
These core ingredients create a balanced flavor profile—sweet, slightly salty, and buttery with that signature oaty texture. The brown sugar gives a rich molasses depth, while the honey or maple syrup adds a natural sweetness.
Optional Add-ins for Extra Flavor and Texture
Want to level up your oatmeal bars? Try these add-ins:
- Chocolate chips or chunks (semi-sweet, dark, or white)
- Dried fruits (raisins, cranberries, chopped dates, apricots)
- Nuts and seeds (walnuts, almonds, sunflower seeds, flaxseeds)
- Shredded coconut
- Spices (cinnamon, nutmeg, cardamom)
- Nut butters (peanut butter, almond butter)
You can mix and match these to suit your mood or whatever you have on hand. Just be sure not to overload the batter, or your bars may fall apart or not bake evenly.
Tools and Equipment Required
No fancy gadgets are required to whip up oatmeal bars, but having the right tools on hand can streamline the process and ensure success.
Must-Have Kitchen Tools
Here’s a quick checklist:
- Mixing bowls (one large, one medium)
- Measuring cups and spoons
- Whisk or hand mixer
- Wooden spoon or spatula
- Baking dish (8×8 inch or 9×9 inch for thicker bars)
- Parchment paper or non-stick spray
- Cooling rack
- Sharp knife for slicing
A hand mixer can help with creaming the butter and sugar, but it’s optional. Most of the mixing can be done by hand.
Preparing Your Baking Space
Before you start, make sure your kitchen is clean and organized. Preheat your oven to 350°F (175°C), and line your baking dish with parchment paper—this makes removal and cleanup a breeze. Measure out all your ingredients before you begin; it simplifies the workflow and prevents mid-recipe surprises.
Step-by-Step Guide to Making Oatmeal Bars
Let’s dive into the actual baking process. Follow these steps closely, and you’ll end up with golden, chewy, irresistible oatmeal bars.
Step 1: Preparing the Ingredients
Start by measuring out all your ingredients and chopping any add-ins like nuts or dried fruits. Melt the butter and let it cool slightly. If you’re using eggs straight from the fridge, let them sit out for a few minutes to come to room temperature.
This step might seem minor, but it makes a big difference in baking. Cold eggs or hot butter can mess with the batter’s texture, so it’s worth taking the time to prep properly.
Step 2: Mixing the Dry and Wet Ingredients
In a large bowl, combine oats, flour, baking soda, and salt. In another bowl, whisk together the melted butter, brown sugar, honey/maple syrup, egg, and vanilla until smooth.
Pour the wet mixture into the dry and stir until just combined. Don’t overmix—you want the ingredients to hold together without becoming dense.
Step 3: Layering and Shaping
Once your mixture is well combined, it’s time to get it into the baking dish. If you’re using parchment paper, line the dish so there’s extra hanging over the edges—this will make it easier to lift the bars out later. If you’re using non-stick spray, make sure to coat the pan thoroughly.
Pour the oatmeal mixture into the dish and spread it out evenly with a spatula or your hands. Press it down firmly, especially into the corners. A well-packed mixture ensures the bars won’t crumble after baking. If you’re adding toppings like extra chocolate chips or nuts, sprinkle them on top and press them in gently.
Want neat, café-style bars? Try using a second piece of parchment paper on top and flattening the surface with a glass or measuring cup. This trick gives your bars a uniform look and texture.
Step 4: Baking to Perfection
Now comes the crucial part: baking. Place the baking dish in the preheated oven (350°F or 175°C) and bake for 25–30 minutes, or until the edges are golden brown and the center is set. Avoid overbaking—they’ll continue to firm up as they cool.
Keep an eye on the last few minutes. If the top starts to darken too quickly, you can loosely cover it with aluminum foil to prevent burning. The perfect oatmeal bar has crispy edges and a soft, chewy center.
If you’re using a glass baking dish, be aware that it retains heat longer. In that case, lean toward the shorter end of the baking time to prevent overcooking.
Step 5: Cooling and Cutting
Once baked, remove the dish from the oven and let it cool on a wire rack for at least 30–40 minutes. This is the hardest part—waiting! But it’s essential. Cutting them too soon can result in a crumbly mess, no matter how perfect your mixture was.
When the bars are cool, use the parchment paper to lift them out of the pan. Transfer to a cutting board and use a sharp knife to slice into even rectangles or squares. If you want cleaner cuts, try chilling the bars in the fridge for 15 minutes before slicing.
Store the bars in an airtight container at room temperature for up to a week—or freeze them for up to three months.
Tips for Perfect Oatmeal Bars
Let’s be honest: even a simple recipe can go sideways. Here’s how to ensure your oatmeal bars turn out great every single time.
How to Prevent Crumbling
Crumbling usually happens when there’s not enough binding moisture or when the bars are sliced too early. To avoid this:
- Make sure your wet-to-dry ratio is balanced.
- Always let the bars cool completely before cutting.
- Press the mixture firmly into the pan before baking.
- Add a tablespoon of nut butter for extra stickiness if needed.
If you’re aiming for a chewy bar, use more honey or maple syrup. For crispier bars, bake a few minutes longer and don’t overload with wet ingredients.
Storage Tips for Freshness
To keep your bars tasting fresh:
- Store in an airtight container with parchment paper between layers to prevent sticking.
- Keep them at room temperature if you’ll eat them within a few days.
- For longer storage, refrigerate or freeze. In the fridge, they last up to 10 days; in the freezer, up to 3 months.
- Reheat slightly in the microwave for a soft, warm texture.
For grab-and-go snacks, wrap individual bars in wax paper or foil and toss them into lunchboxes, gym bags, or car consoles.
Variations to Try
The beauty of oatmeal bars is how endlessly customizable they are. Once you’ve nailed the basic recipe, you can start experimenting with flavors and dietary adaptations.
Peanut Butter Chocolate Chip Oatmeal Bars
This variation is a crowd-pleaser. It adds a rich, nutty taste and creamy texture thanks to peanut butter, while chocolate chips bring that indulgent touch.
Ingredients to swap or add:
- Replace half the butter with 1/2 cup creamy peanut butter.
- Add 1/2 to 3/4 cup semi-sweet or dark chocolate chips.
- Reduce the sugar slightly, as peanut butter adds natural sweetness.
The peanut butter acts as a binder, making the bars extra chewy and dense. They also store well in the freezer, so you can make a big batch ahead of time.
To make them even more decadent, drizzle melted chocolate over the top after baking and cooling. Pop them in the fridge for 15 minutes to set, and you’ve got dessert-worthy bars with minimal effort.
Vegan and Gluten-Free Oatmeal Bars
Dietary restrictions? No worries—oatmeal bars can easily be made both vegan and gluten-free with a few smart substitutions.
For vegan oatmeal bars:
- Use flax egg (1 tbsp ground flaxseed + 3 tbsp water) instead of a regular egg.
- Replace butter with coconut oil or vegan margarine.
- Opt for maple syrup or agave nectar over honey.
For gluten-free oatmeal bars:
- Use certified gluten-free oats.
- Replace regular flour with almond flour, oat flour, or a 1:1 gluten-free flour blend.
These alternatives don’t sacrifice taste or texture. In fact, many people prefer the nutty flavor that gluten-free flours bring to the mix. Just remember that gluten-free bars can be a bit more delicate, so cool them completely before slicing.
FAQs about Oatmeal Bars Recipe
1. Can I make oatmeal bars without eggs?
Yes! Use a flax egg (1 tbsp ground flaxseed + 3 tbsp water) as a plant-based alternative. It works great as a binder in vegan recipes.
2. Why are my oatmeal bars falling apart?
Crumbly bars usually mean not enough moisture or not letting them cool completely before cutting. Try adding a bit more honey or nut butter, and always cool before slicing.
3. How can I make my oatmeal bars less sweet?
Cut back on the sugar and use unsweetened add-ins like plain dried fruit or natural peanut butter. You can also reduce chocolate chips or swap for cocoa nibs.
4. What’s the best way to store oatmeal bars?
Store them in an airtight container at room temperature for 4–5 days. For longer freshness, refrigerate or freeze them individually wrapped.
5. Can I double the recipe?
Absolutely! Just use a larger baking dish (like 9×13) and keep an eye on the baking time—it might need a few extra minutes.
Conclusion
Remember to follow the basic recipe first and then feel free to get creative. Swap in your favorite ingredients, play with flavors, and don’t be afraid to make mistakes—that’s part of the fun! These bars are forgiving, reliable, and endlessly customizable.
Best of all, once you master the method, you’ll never need to buy overpriced snack bars again. Homemade always tastes better—and you get to control what goes in. So grab your mixing bowl, preheat your oven, and enjoy the process. Your perfect oatmeal bar awaits!


