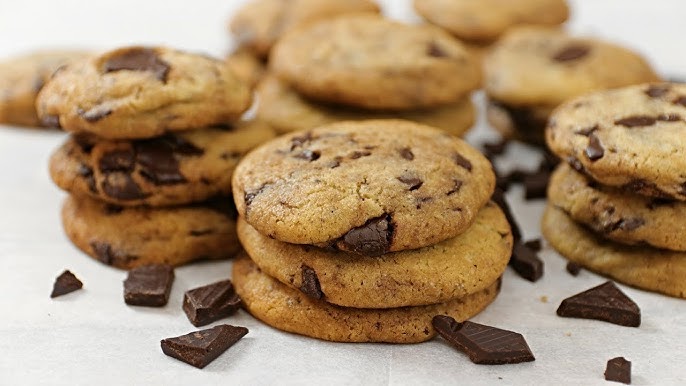
Nestle Chocolate Cookie Recipe: There’s nothing quite like biting into a warm, gooey Nestle chocolate chip cookie straight from the oven.
That rich aroma, the soft center, the slightly crispy edges—pure bliss! Whether you’re a seasoned baker or just starting out, this step-by-step guide will walk you through the perfect Nestle chocolate chip cookie recipe.
Ready to bring your kitchen to life with the sweet scent of homemade goodness? Let’s dive in!
Introduction to the Legendary Nestle Chocolate Cookie
Nestle’s chocolate chip cookie is a timeless classic that’s been cherished for decades. The original Toll House cookie recipe was actually created in the 1930s by Ruth Wakefield, who owned the Toll House Inn in Massachusetts. Nestle later bought the rights to the recipe, and it’s been printed on every bag of Nestle chocolate chips since.
What makes it so special? It’s the perfect balance of chewy, crispy, and sweet, with semi-sweet chocolate morsels that melt beautifully. This cookie has become a nostalgic treat for many and remains one of the most beloved recipes in American homes.
Ingredients You’ll Need
Essential Baking Ingredients
Before you start, gather all your ingredients. Accuracy is key when it comes to baking:
- 2 ¼ cups all-purpose flour
- 1 tsp baking soda
- 1 tsp salt
- 1 cup (2 sticks) unsalted butter, softened
- ¾ cup granulated sugar
- ¾ cup packed brown sugar
- 1 tsp vanilla extract
- 2 large eggs
Each ingredient plays a vital role—flour provides structure, sugars add sweetness and texture, eggs bind everything, and butter gives that rich, creamy taste.
Choosing the Right Chocolate Chips
Nestle’s signature is their semi-sweet chocolate chips. For this recipe, you’ll need:
- 2 cups (or a 12 oz bag) of Nestle Toll House Semi-Sweet Chocolate Chips
Want to go fancy? You can also try their dark chocolate or milk chocolate morsels for a twist. You can even mix them for a double-chocolate effect!
Tools and Equipment Required
Having the right tools makes baking much smoother. Here’s what you’ll need:
- Mixing bowls (one large, one medium)
- Electric mixer (stand or hand)
- Measuring cups and spoons
- Baking sheets
- Parchment paper or silicone baking mat
- Cookie scoop or tablespoon
- Cooling rack
These tools ensure consistent results, prevent sticking, and help maintain the ideal cookie shape and texture.
Preparation Tips Before You Start Baking
Before you jump in, here are some quick tips to set yourself up for cookie success:
- Room Temperature Ingredients: Let your butter and eggs sit out for about 30 minutes before using. It makes them easier to mix and helps the dough form better.
- Don’t Overmix: Overworking the dough can make your cookies tough instead of soft and chewy.
- Chill the Dough (Optional): If you want thicker cookies with more depth of flavor, chill the dough for at least 30 minutes before baking.
All set? Let’s get baking!
Step-by-Step Instructions
Step 1 – Preheat Your Oven
Set your oven to 375°F (190°C). A properly preheated oven ensures the cookies bake evenly, giving you that ideal texture: soft on the inside, slightly crispy on the edges.
Step 2 – Mix the Dry Ingredients
In a medium bowl, whisk together the flour, baking soda, and salt. This ensures even distribution of the leavening agents, which is key to a uniform rise and texture.
Step 3 – Cream Butter and Sugars
In a large mixing bowl, beat the softened butter with both sugars (granulated and brown) until the mixture is light and fluffy—about 2-3 minutes. This aerates the mixture, creating a soft, light texture.
Step 4 – Add Eggs and Vanilla Extract
Crack in the eggs one at a time, beating well after each addition. Then, add the vanilla extract. This step builds the base of flavor and structure.
Step 5 – Combine Wet and Dry Ingredients
Slowly add the dry mixture to the wet ingredients while mixing on low speed. Do this in batches to prevent flour from flying everywhere—and to ensure everything combines evenly.
Step 6 – Stir in Nestle Chocolate Chips
Use a spatula to fold in the chocolate chips. Be generous! Every bite should have that chocolatey goodness.
Step 7 – Scoop the Dough Onto the Baking Sheet
Line your baking sheet with parchment paper or a silicone mat. Use a cookie scoop or tablespoon to place even mounds of dough about 2 inches apart.
Step 8 – Bake to Perfection
Bake for 9 to 11 minutes, or until the edges are golden brown. The centers might look slightly underdone—that’s perfect! They’ll continue to cook as they cool.
Step 9 – Cool Down and Serve
Let the cookies sit on the baking sheet for 2 minutes before transferring them to a cooling rack. This helps them set and makes them easier to handle.
Expert Tips for Perfect Nestle Cookies
Getting your cookies just right can take a little practice, but these expert tips will help you nail it on your first try:
- Use Room Temperature Butter: This ensures even creaming with the sugar and contributes to a smoother dough.
- Don’t Skip Brown Sugar: It adds moisture and gives that soft, chewy texture. If you use only white sugar, your cookies may turn out crisper.
- Try a Chill Period: Chilling the dough for 30–60 minutes can make the flavors more intense and the texture more bakery-like. The colder the dough, the less the cookies spread.
- Rotate the Pan: Halfway through baking, rotate your cookie sheet 180 degrees to ensure even baking if your oven has hot spots.
- Add a Touch of Sea Salt on Top: A pinch of flaky sea salt sprinkled on top before baking brings out the chocolate flavor and adds a gourmet twist.
Want a café-style cookie? Make larger cookie dough balls and increase the baking time by a couple of minutes. You’ll get that iconic thick, soft-in-the-middle, golden cookie every time.
Storage and Shelf Life
Let’s face it—fresh-baked cookies rarely last long. But if you want to store them, here’s how to keep them tasting just as good:
- Room Temperature: Store cookies in an airtight container for up to 1 week. Put a slice of bread in the container to maintain moisture.
- Freezing Dough: Shape the dough into balls and freeze them on a tray. Once frozen, store in a zip-lock bag for up to 3 months. Bake straight from the freezer—just add 2-3 minutes to the baking time.
- Freezing Baked Cookies: Cool completely, then wrap in plastic wrap and store in an airtight container or freezer bag for up to 2 months. Thaw at room temperature or microwave for a few seconds for that just-baked feel.
These cookies are perfect for bake sales, lunchbox treats, or midnight cravings. With proper storage, you’ll always have that homemade goodness on hand.
Nestle Cookie Variations to Try
Once you’ve mastered the classic recipe, it’s time to get creative! Here are some mouthwatering variations to mix things up:
- Double Chocolate Delight: Replace ½ cup of flour with cocoa powder and use Nestle dark chocolate chips.
- Peanut Butter Paradise: Add ½ cup creamy peanut butter to the dough and reduce butter slightly. Toss in some chopped peanuts or peanut butter chips.
- Oatmeal Chocolate Chip: Replace 1 cup of flour with old-fashioned oats. Adds chewiness and a rustic feel.
- Salted Caramel Crunch: Add caramel bits and a dash of sea salt to your dough for a sweet-savory combo.
- M&M Explosion: Swap out half the chocolate chips for colorful M&M candies—perfect for parties and holidays.
Want a healthier twist? Use whole wheat flour, reduce sugar slightly, and mix in some chopped nuts or dried cranberries. There’s a version of this cookie for every taste bud!
FAQs about Nestle Chocolate Cookie Recipe
Q1: Can I use margarine instead of butter?
Yes, but it may alter the flavor and texture. Butter gives a richer taste and better texture.
Q2: What’s the best way to make my cookies chewy?
Use more brown sugar than white sugar and avoid overbaking. Chewy cookies often need slightly underbaked centers.
Q3: Can I freeze the cookie dough?
Absolutely! Freeze in dough balls, and bake straight from frozen. Just add a few more minutes to the baking time.
Q4: How do I make my cookies thicker?
Chill the dough before baking, and make taller dough mounds instead of flat ones.
Q5: Are these cookies safe for kids with allergies?
This recipe contains eggs, dairy, and gluten. Always check your ingredients and consider allergy-friendly alternatives as needed.
Conclusion
Baking Nestle chocolate chip cookies is more than just following a recipe—it’s about creating moments, indulging your senses, and sharing joy. Whether you stick to the traditional version or try one of the delicious twists, these cookies are guaranteed to satisfy every sweet tooth in the room.
From the warm aroma that fills your kitchen to that first bite of a gooey center, the Nestle chocolate chip cookie never disappoints. So gather your ingredients, preheat that oven, and start baking! Because life is simply better with cookies.


