Neapolitan Pizza Dough Recipe: Making pizza at home is a joy, but there’s something magical about mastering an authentic Neapolitan pizza dough.
It’s more than just flour and water—it’s tradition, technique, and a whole lot of love baked into every chewy, blistered bite.
Let’s dive into the step-by-step method to get that soft, airy crust with just the right crunch.
What Makes Neapolitan Pizza Special?
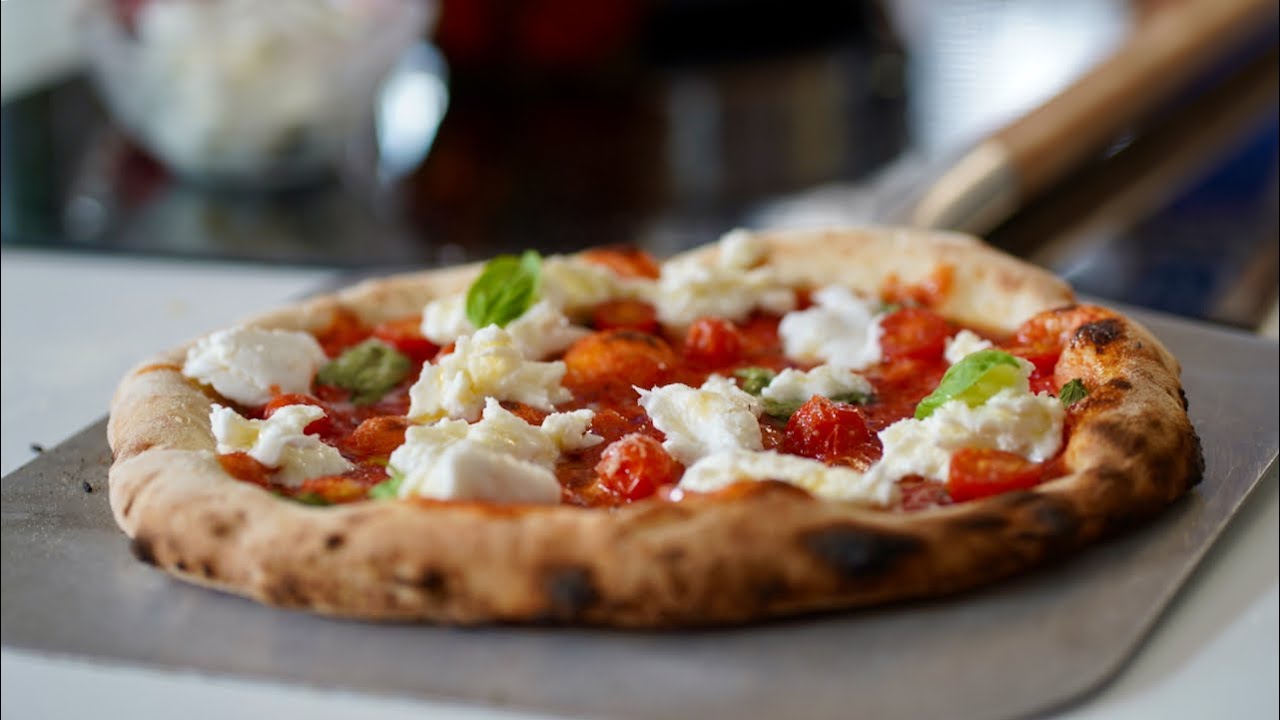
Neapolitan pizza hails from Naples, Italy—the birthplace of pizza. It’s world-renowned for its simplicity and emphasis on quality. With a thin center and puffed-up, slightly charred crust, it cooks fast at very high heat, resulting in a chewy yet crispy bite that’s completely different from American or deep-dish pizza.
What sets Neapolitan pizza apart is not just the look or taste, but the feel. That slight resistance as you tear a slice, the pillowy pockets in the crust, and the tang of slow-fermented dough all contribute to its signature character.
Another key factor? The rules. Yes, Neapolitan pizza follows a strict tradition: finely milled flour, fresh ingredients, hand-stretching, no rolling pins, and ideally, a blazing wood-fired oven. But even without a pizza oven, you can get impressively close at home with the right technique.
Why the Dough Matters Most
The dough is the foundation of any pizza, but in Neapolitan-style, it’s everything. There are no bells and whistles—no sugar, no oil—just the basics: flour, water, salt, and yeast. That’s why the method and timing are crucial.
The perfect Neapolitan dough should be:
- Elastic but soft, for easy stretching.
- Light and airy, thanks to long fermentation.
- Easy to digest, because of its natural leavening.
Get the dough right, and even a simple Margherita will taste like it came straight out of Naples.
Ingredients You’ll Need
Essential Ingredients List
Authentic Neapolitan dough only requires four ingredients, but don’t let the simplicity fool you. Quality matters.
Here’s what you’ll need:
- Flour – 00 flour is preferred (more on that soon).
- Water – Filtered, at room temperature.
- Salt – Fine sea salt or kosher salt.
- Yeast – Either fresh yeast or active dry yeast.
Optional but helpful:
- Olive oil – Not traditional, but some home bakers use a tiny bit for stretch and flavor.
- Sugar or honey – Not used in the authentic version, but a pinch can help with yeast activation in colder climates.
The beauty of this dough is that it’s incredibly minimalist. Because of that, every component counts. Use the best quality ingredients you can get.
Choosing the Right Flour
This might be the most crucial part of your pizza dough. Neapolitan pizza is traditionally made with Type 00 flour, which is a super fine Italian flour with low-to-moderate protein content (around 11-12.5%).
Why it matters:
- Finely milled: Gives the dough its signature silkiness.
- High hydration: Absorbs water well, making the dough smooth and easy to stretch.
- Moderate gluten: Enough for chewiness but still tender.
Brands like Caputo 00 or Antimo Caputo “Pizzeria” flour are industry standards. If you can’t find 00 flour, you can mix bread flour and all-purpose flour to simulate the protein content and texture, though it won’t be exactly the same.
Equipment Required
Basic Tools You’ll Need
You don’t need fancy tools to make great Neapolitan dough, but some basics will make the process smoother:
- Mixing Bowl – A large bowl for combining ingredients.
- Digital Scale – Accuracy is everything in baking; don’t eyeball it.
- Bench Scraper – Helps with kneading and dividing dough.
- Measuring Spoons/Cups – For precise salt and yeast measurement.
- Clean Surface or Dough Mat – For kneading and shaping.
You don’t need a stand mixer—though it helps if you’re making big batches—but many traditional pizzaiolos still knead by hand, and that’s part of the charm.
Optional but Helpful Gadgets
These tools can elevate your dough game but aren’t mandatory:
- Pizza Stone or Steel – Retains high heat for a crispy base.
- Infrared Thermometer – Helps you monitor oven and stone temperature.
- Proofing Box or Airtight Containers – Keeps dough from drying out during fermentation.
- Dough Fermentation Box – Great for keeping multiple dough balls separate and evenly proofed.
- Pizza Peel – For sliding pizza onto a stone or steel in the oven.
If you don’t have a pizza oven, crank your home oven to its max temp (usually 500°F/260°C) and preheat your stone or steel for at least 45 minutes. This simulates the high heat needed for Neapolitan style.
How to Make Neapolitan Pizza Dough – Step by Step Guide
Step 1 – Mixing the Dough
Start by measuring your ingredients accurately using a digital scale. Here’s a basic Neapolitan dough ratio:
- Flour – 1000g (Type 00)
- Water – 650g (65% hydration)
- Salt – 25g
- Yeast – 0.5g (if using fresh) or 0.2g (active dry)
In a large bowl, dissolve the salt in the water first. This may seem odd, but it prevents direct yeast-to-salt contact, which can kill yeast. Next, sprinkle in the yeast and stir until it dissolves. Now, gradually add the flour.
Mix by hand or with a spoon until a rough dough forms. It’ll be shaggy and sticky at this point. Let it rest for 10 minutes—this helps the flour absorb water. Then mix again until it becomes more cohesive.
Don’t overthink this part. The goal is to bring everything together before kneading.
Step 2 – Kneading Technique
Kneading is what develops the gluten—the stretchy protein that gives your dough its structure. For Neapolitan dough, kneading is best done by hand, though a stand mixer on low speed also works.
If kneading by hand:
- Turn the dough onto a clean surface.
- Fold it over itself, then press it down with the heel of your palm.
- Rotate 90°, fold, press again. Repeat for 10–15 minutes.
You’re aiming for a smooth, elastic dough that doesn’t tear when stretched. If it’s too sticky, resist adding too much flour. Lightly flour your hands instead.
Once it’s smooth and slightly tacky, form it into a tight ball. That’s your cue to move to the fermentation stage.
Step 3 – First Fermentation
Place your dough ball into a lightly floured or greased bowl. Cover it with a damp cloth, plastic wrap, or lid. Let it ferment at room temperature (68-72°F or 20-22°C) for 2 hours to kickstart the rise.
After 2 hours, the dough should be slightly puffy. Now comes the slow fermentation stage—key to deep flavor and digestibility.
Transfer the dough to the fridge for 18 to 24 hours. This cold proofing slows down yeast activity and allows the dough to develop complex flavors. It also makes the dough easier to stretch and less prone to tearing.
Some pros even ferment for up to 72 hours. But 24 is a sweet spot for most home cooks.
Step 4 – Balling the Dough
Once the cold fermentation is complete, remove the dough and let it rest at room temp for 30–45 minutes. This makes it easier to handle.
Next, divide the dough into individual balls. For standard 10–12 inch Neapolitan pizzas, you’ll want 250–280g per ball.
To shape:
- Cut dough with a bench scraper.
- Tuck edges under to create a tight ball.
- Pinch the bottom seam closed.
Place the dough balls in a lightly oiled container or tray. Leave space between them so they don’t stick together. Cover them gently with plastic wrap or a damp towel.
Step 5 – Final Fermentation
This is the last rise before baking. Let the dough balls rest at room temperature for 4 to 6 hours. You’ll notice they double in size and become super soft and airy.
They should jiggle when you nudge the tray and feel puffy to the touch. At this point, they’re ready to be stretched and topped.
Avoid over-proofing. If the dough gets too bubbly or slack, it can be hard to stretch and may tear. If you’re not baking right away, you can refrigerate them for a few more hours.
Now you’re ready to create pizza magic.
Tips for Perfect Neapolitan Pizza Dough
Common Mistakes to Avoid
Even with a simple recipe, there are a few pitfalls that can trip you up. Let’s break down the most common mistakes and how to avoid them:
Using the Wrong Flour
Not all flours are created equal. If you’re using all-purpose flour with low protein, your dough won’t develop the strength it needs to stretch thin without tearing. Always aim for 00 flour or a high-quality bread flour with around 12% protein.
Adding Too Much Yeast
Neapolitan dough is a slow-fermented dough, meaning you need very little yeast. Adding too much can lead to over-proofing, overly yeasty flavors, or a dough that collapses.
Skipping the Resting Periods
Each resting phase is crucial. Skipping or rushing them leads to tight, dense dough. Gluten needs time to relax to allow easy stretching.
Overloading the Dough with Toppings
Neapolitan pizza is all about balance. Too much sauce, cheese, or heavy toppings will cause a soggy center. Keep it light and let the dough shine.
Not Preheating the Stone or Steel
A cold pizza stone will never produce that beautiful charred crust. Always preheat for at least 45 minutes at the highest oven setting possible.
Using Cold Dough
Dough straight from the fridge is tight and hard to stretch. Always bring it to room temp before shaping.
Avoid these, and your dough will reward you with pizza that tastes like it came from a pizzeria in Naples.
How to Store and Freeze Dough
One of the great things about this dough is that it’s freezer-friendly. If you’re going through all this effort, why not make a double batch and store some for later?
Short-Term Storage (Up to 2 Days):
- Store dough balls in airtight containers or zip-top bags.
- Lightly oil them to prevent sticking.
- Keep them in the refrigerator.
- Bring to room temperature for 2 hours before use.
Freezing Dough:
- After balling the dough, let it rest for 1 hour at room temperature.
- Place balls on a tray lined with parchment and freeze for 1–2 hours until firm.
- Transfer to freezer bags and store for up to 3 months.
To Use Frozen Dough:
- Remove from freezer and place in the fridge overnight.
- On baking day, take it out 3–4 hours before and let it come to room temperature.
Frozen dough still develops excellent flavor and makes pizza night a breeze.
FAQs about Neapolitan Pizza Dough Recipe
1. What is Neapolitan pizza dough?
Neapolitan pizza dough is a type of dough originating from Naples, Italy, characterized by its simple ingredients: flour, water, salt, and yeast. This combination, along with a specific kneading and fermentation process, results in a soft, chewy crust with a distinctive puffiness along the edges.
2. What type of flour is best for Neapolitan pizza dough?
The best flour for Neapolitan pizza dough is Type 00 flour, which is a finely ground Italian flour with a high protein content ideal for achieving the classic light and airy crust.
3. How long should Neapolitan pizza dough ferment?
The fermentation time for Neapolitan pizza dough typically ranges from 8 to 24 hours. Allowing the dough to ferment at room temperature for a longer period helps develop flavors and improves the texture of the crust.
4. Do I need a pizza stone to bake Neapolitan pizza?
While a pizza stone is recommended to achieve the optimal crust texture, you can also use a heavy baking sheet or a cast-iron skillet. Preheating your baking surface is key to obtaining a crispy bottom.
5. Can Neapolitan pizza dough be frozen?
Yes, Neapolitan pizza dough can be frozen for later use. It’s best to portion the dough balls before freezing and thaw them in the refrigerator overnight before use.
6. Why is my Neapolitan pizza dough sticky?
Sticky dough is often a result of high hydration or insufficient flour. Ensure you measure your ingredients accurately, and adjust with a little more flour if needed during the kneading process.
7. How thin should I stretch the dough for Neapolitan pizza?
For authentic Neapolitan pizza, stretch the dough until it is about 1/8 to 1/4 inch thick. The center should be thin with a slightly thicker edge to create the characteristic puffy crust.
Conclusion
Making Neapolitan pizza dough is more than just cooking—it’s about connecting to a centuries-old tradition and bringing the soul of Naples into your kitchen. With just a few simple ingredients and some patience, you can create something truly special. The airy texture, the charred crust, the rich flavor—it’s all in your hands now.
And remember, practice makes perfect. The more you work with this dough, the better you’ll understand its quirks and charms. Once you master it, you’ll never look at pizza the same way again.


