Moist Banana Nut Bread Recipe: There’s something magical about the aroma of freshly baked banana nut bread wafting through the kitchen. It’s warm, comforting, and nostalgic all at once. Whether you’re baking it for breakfast, a snack, or dessert, this classic recipe never disappoints. Moist, fluffy, and loaded with crunchy nuts, banana nut bread is a timeless favorite that brings together the natural sweetness of ripe bananas with the earthy richness of nuts.
In this detailed step-by-step guide, we’ll walk you through everything you need to know—from the ingredients and tools you’ll need to baking tips that guarantee the perfect loaf every time. By the end, you’ll have a bakery-worthy banana nut bread recipe you can rely on whenever you have overripe bananas sitting on your counter.
Introduction to Banana Nut Bread
Banana nut bread has stood the test of time as one of the most beloved quick breads around the world. Unlike yeast-based breads, quick breads don’t require rising time, making them simple and fast to prepare. All you need are basic pantry staples, some ripe bananas, and a handful of nuts, and you’re well on your way to making this mouthwatering treat.
Why Banana Nut Bread is a Classic Favorite
Banana nut bread has been popular for decades because it’s versatile, delicious, and practical. Instead of throwing away overripe bananas, bakers realized they could mash them and transform them into a moist, flavorful loaf. The natural sugars in bananas caramelize beautifully when baked, giving the bread a rich sweetness without the need for excessive sugar.
The addition of nuts—whether walnuts, pecans, or almonds—takes it to another level. They add a crunchy texture that contrasts perfectly with the soft, moist crumb of the bread. Plus, nuts bring in healthy fats, proteins, and a nutty flavor that balances the sweetness of the bananas.
Banana nut bread is also loved because it can be enjoyed in so many ways. Serve it warm with butter for breakfast, with cream cheese for a quick snack, or drizzle with chocolate sauce for a decadent dessert. It’s the kind of recipe that feels like home, no matter how you serve it.
The Perfect Combination of Moisture, Sweetness, and Crunch
One of the biggest challenges in baking banana nut bread is striking the right balance between moistness and structure. Nobody likes dry, crumbly bread, and at the same time, you don’t want a soggy loaf that falls apart when sliced. The key lies in the bananas themselves. The riper they are, the more moisture and sweetness they bring to the batter.
Adding the right amount of butter or oil also ensures a soft texture, while eggs help bind everything together. Meanwhile, nuts not only enhance flavor but also create that delightful crunch in every bite. When baked properly, banana nut bread has a golden-brown crust on the outside and a soft, tender crumb on the inside—making it one of the most satisfying baked goods you can make at home.
Ingredients You’ll Need
Every great recipe starts with the right ingredients, and banana nut bread is no exception. The beauty of this recipe is that it doesn’t require anything fancy—just simple pantry staples and fresh bananas.
Essential Ingredients for Moist Banana Nut Bread
Here’s a list of what you’ll need to make the perfect loaf:
- 3 ripe bananas (the riper, the better—spotted or slightly blackened skins are ideal)
- 1/2 cup (1 stick) of unsalted butter (softened to room temperature)
- 3/4 cup granulated sugar (you can also use brown sugar for extra richness)
- 2 large eggs (at room temperature)
- 1 teaspoon vanilla extract
- 1 1/2 cups all-purpose flour
- 1 teaspoon baking soda
- 1/2 teaspoon salt
- 1/2 teaspoon cinnamon (optional but highly recommended for warmth and depth of flavor)
- 1/2 cup chopped nuts (walnuts or pecans are the most popular choice)
Optional add-ins: chocolate chips, shredded coconut, or dried fruit for extra variety.
Choosing the Right Bananas for the Recipe
The bananas you use will make or break your banana bread. Underripe bananas (yellow or slightly green) won’t have enough sweetness or moisture to produce that classic flavor. Instead, look for bananas with plenty of brown spots or even fully black skins. These bananas are softer, sweeter, and perfect for baking.
If your bananas aren’t ripe enough, you can speed up the process by placing them in a paper bag with an apple overnight or baking them in the oven at 300°F (150°C) for 15–20 minutes until soft and dark.
Types of Nuts You Can Use (Walnuts, Pecans, etc.)
While walnuts are the traditional choice for banana nut bread, you’re not limited to just one type. Pecans bring a slightly sweeter, buttery flavor, while almonds give a firmer crunch. Hazelnuts, macadamia nuts, or even cashews can be used for a unique twist.
If you prefer a nut-free version, you can simply omit them or replace them with seeds like pumpkin seeds or sunflower seeds for added texture.
Kitchen Tools and Equipment Required
To make banana nut bread successfully, you’ll need a few essential tools. Fortunately, most of these are items you probably already have in your kitchen.
Must-Have Baking Tools
- Mixing bowls – one for wet ingredients and one for dry ingredients.
- Measuring cups and spoons – accuracy is key in baking.
- Whisk or electric mixer – for creaming butter and sugar.
- Spatula – to fold ingredients together gently.
- Loaf pan (9×5 inch) – the standard size for this recipe.
- Oven thermometer – ensures your oven is at the correct temperature.
Helpful Add-Ons to Make Baking Easier
- Parchment paper – for easy removal of the bread.
- Cooling rack – prevents sogginess by allowing air circulation.
- Toothpick or cake tester – to check for doneness.
Using the right tools makes the process smoother and ensures your banana nut bread bakes evenly every time.
Step-by-Step Guide to Making Moist Banana Nut Bread
Now that you have your ingredients and tools ready, let’s dive into the process. Follow these steps carefully for the best results.
Step 1 – Preparing Your Ingredients
Preparation is everything in baking. Start by preheating your oven to 350°F (175°C). Grease your loaf pan lightly with butter or line it with parchment paper for easy cleanup.
Next, mash your ripe bananas in a bowl using a fork until smooth but still slightly chunky. This ensures the bananas mix evenly into the batter. Measure out your flour, baking soda, salt, and cinnamon into another bowl and whisk them together to avoid clumps.
At this point, chop your nuts into bite-sized pieces. Toasting them for a few minutes in a dry skillet can enhance their flavor and crunch, though this step is optional.
Getting everything ready before mixing ensures the process goes smoothly and prevents overmixing, which can make your bread dense instead of light and fluffy.
Step 2 – Mixing the Wet Ingredients
The foundation of any moist banana nut bread lies in the wet ingredients. In a large mixing bowl, start by creaming together the softened butter and sugar. If you’re using an electric mixer, beat on medium speed until the mixture becomes pale, fluffy, and creamy. This step is important because it incorporates air into the batter, which gives your bread a light texture.
Once your butter and sugar are creamed, add the eggs one at a time. Be sure to beat well after each addition so the eggs are fully incorporated. Eggs provide structure and stability to the bread, helping it rise properly. After that, stir in the vanilla extract, which adds warmth and depth to the overall flavor.
Finally, fold in the mashed bananas. The mixture may look slightly lumpy at this stage, and that’s completely normal. Those little chunks of banana will add bursts of sweetness throughout your loaf. By the time you finish mixing, your wet batter should be thick, creamy, and full of banana goodness.
Step 3 – Combining Dry Ingredients
While your wet ingredients are ready, it’s time to prepare the dry mix. In a separate bowl, whisk together the flour, baking soda, salt, and cinnamon. Each of these ingredients plays an important role in the final result.
- Flour gives structure to the bread.
- Baking soda acts as the leavening agent, helping the loaf rise and stay fluffy.
- Salt balances the sweetness and enhances the flavor.
- Cinnamon adds a cozy, warm note that pairs beautifully with bananas.
It’s important to sift or whisk these ingredients together before adding them to the wet mixture. This prevents clumps and ensures the leavening agents are distributed evenly, which makes your bread rise uniformly. Skipping this step could leave you with pockets of baking soda or uneven texture.
Step 4 – Blending Wet and Dry Mixtures
Now comes the crucial step—combining the wet and dry ingredients. Pour the dry mixture gradually into the wet batter. Using a spatula or wooden spoon, fold the ingredients together gently. Avoid using an electric mixer at this stage, as it can easily overmix the batter.
Here’s the golden rule: mix until you no longer see streaks of flour. Overmixing will develop too much gluten in the flour, making the bread dense and chewy instead of soft and tender. You want the batter to look slightly rustic, not perfectly smooth.
If you’re adding chocolate chips, shredded coconut, or dried fruits, now is the time to fold them in. These optional add-ins can elevate the flavor of your banana nut bread and give it a personalized touch.
Step 5 – Adding Nuts for Extra Crunch
The highlight of banana nut bread is, of course, the nuts. At this stage, fold in your chopped walnuts, pecans, or whichever nut you prefer. Be sure to distribute them evenly throughout the batter so every slice has that delightful crunch.
For an extra nutty touch, sprinkle some chopped nuts on top of the batter before baking. This not only makes the loaf look more appealing but also adds a crunchy topping that contrasts beautifully with the moist bread beneath.
Nuts do more than just add texture—they also bring healthy fats, protein, and nutrients to the bread. It’s a win-win: you get flavor, crunch, and nutrition all in one bite.
Step 6 – Baking the Banana Nut Bread
Once your batter is ready, pour it into your prepared loaf pan and smooth the top with a spatula. Place the pan in the preheated oven and bake for about 55–65 minutes, depending on your oven.
To check if your bread is done, insert a toothpick or cake tester into the center of the loaf. If it comes out clean or with just a few moist crumbs, your bread is ready. If the toothpick comes out with wet batter, bake for an additional 5–10 minutes, checking frequently.
During baking, your kitchen will fill with the irresistible aroma of bananas, cinnamon, and toasted nuts—a sure sign that something delicious is on the way. The bread should rise beautifully with a golden-brown crust on top.
Pro tip: If the top starts browning too quickly while the center is still baking, cover the loaf loosely with aluminum foil to prevent burning.
Step 7 – Cooling and Serving
Patience is key when it comes to banana nut bread. After baking, remove the loaf from the oven and let it cool in the pan for about 10–15 minutes. This resting time allows the bread to firm up slightly, making it easier to remove from the pan without falling apart.
After that, transfer the loaf to a wire cooling rack to cool completely. Cutting into the bread too soon can cause it to crumble because it’s still very soft inside.
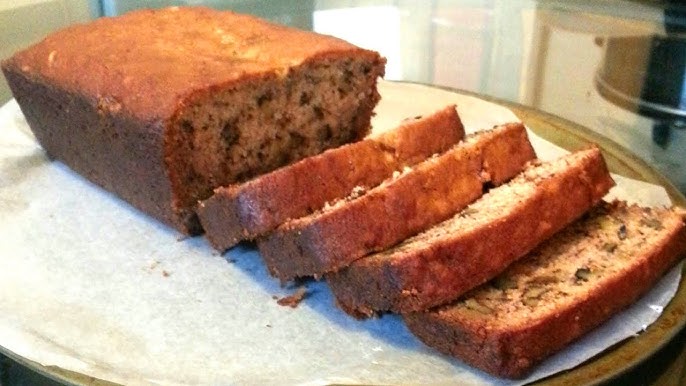
Once cooled, slice the banana nut bread into thick pieces and serve. You can enjoy it plain, spread with butter, drizzled with honey, or even paired with a cup of coffee or tea. The moist texture and nutty crunch make every bite irresistible.
Tips for Making the Perfect Moist Banana Nut Bread
Even though banana nut bread is relatively simple to make, a few expert tips can help ensure it comes out moist, flavorful, and perfect every single time.
How to Prevent Dry Banana Bread
One of the most common mistakes is ending up with dry banana bread. To avoid this:
- Use very ripe bananas for maximum moisture.
- Measure your flour accurately—too much flour can make the bread dense and dry. (Spoon flour into the measuring cup instead of scooping directly from the bag.)
- Don’t overbake. Remove the bread as soon as the toothpick test shows it’s done.
Substitutions for a Healthier Version
If you’d like to make your banana nut bread a little lighter, here are some healthy swaps:
- Replace half of the all-purpose flour with whole wheat flour for added fiber.
- Use coconut oil or olive oil instead of butter for a different kind of richness.
- Swap refined sugar with honey, maple syrup, or coconut sugar for natural sweetness.
- Add ground flaxseeds or chia seeds for an extra boost of nutrients.
Storage Tips to Keep Your Bread Fresh
Banana nut bread stores surprisingly well if kept properly:
- At room temperature: Store in an airtight container for up to 3 days.
- In the fridge: Wrap tightly in plastic wrap or foil and refrigerate for up to a week.
- In the freezer: Slice the loaf and freeze individual pieces in airtight bags for up to 3 months. Simply reheat slices in a toaster or microwave when you want a quick snack.
With the right storage, you can always have a slice of moist banana nut bread ready to enjoy.
Variations of Banana Nut Bread
One of the best things about banana nut bread is its versatility. While the classic recipe is always a winner, you can easily switch it up to suit your taste or dietary needs. Let’s explore some delicious variations that will keep your banana bread exciting every time you bake it.
Chocolate Chip Banana Nut Bread
For those with a sweet tooth, chocolate chip banana nut bread is pure heaven. Simply fold in a cup of chocolate chips along with your nuts before baking. The chocolate melts into little pockets of gooey goodness, balancing the nuttiness and sweetness of the bread. Dark chocolate chips add a rich, slightly bitter flavor, while milk chocolate gives a creamier sweetness.
If you want to take it a step further, drizzle melted chocolate over the top of the cooled loaf. Not only does it look bakery-perfect, but it also makes the bread taste like dessert.
Gluten-Free Banana Nut Bread
Gluten sensitivity or celiac disease doesn’t mean you have to miss out on this classic treat. Substitute the all-purpose flour with a gluten-free flour blend (look for one that contains xanthan gum for structure). Almond flour or oat flour can also be used for a wholesome, nutty twist.
When baking gluten-free, the texture may be slightly different, but the bread will still come out moist and flavorful if you use ripe bananas and the right balance of ingredients.
Vegan Banana Nut Bread
For a dairy-free and egg-free option, try vegan banana nut bread. Replace butter with coconut oil or vegan margarine, and swap eggs with flax eggs (1 tablespoon ground flaxseed + 3 tablespoons water per egg). Plant-based milk like almond or oat milk can replace dairy milk if needed.
The result? A moist, tender loaf with all the banana flavor you love, but entirely plant-based. It’s perfect for those who follow a vegan lifestyle or are lactose-intolerant.
Nutritional Value of Banana Nut Bread
Banana nut bread may be indulgent, but it’s also packed with nutrients, thanks to its wholesome ingredients. Knowing its nutritional profile can help you enjoy it in moderation while appreciating its health benefits.
Calories and Macronutrients
On average, one slice (1/10th of a loaf) of classic banana nut bread contains around:
- 200–250 calories
- 10–12g fat (from butter and nuts)
- 30–35g carbohydrates (from flour, sugar, and bananas)
- 3–4g protein
- 2–3g fiber
The exact numbers vary depending on substitutions and add-ins. While banana bread isn’t exactly low-calorie, it offers more nutrients than many other baked goods because of the bananas and nuts.
Health Benefits of Bananas and Nuts
Bananas are rich in potassium, vitamin B6, and dietary fiber. They help regulate blood pressure, improve digestion, and provide a natural energy boost. Nuts, on the other hand, are loaded with healthy fats, plant-based protein, and antioxidants. Walnuts, for instance, are high in omega-3 fatty acids, which support brain and heart health.
Together, bananas and nuts create a bread that’s not just delicious but also more nutritious than your average dessert. Enjoying a slice with breakfast or as a snack can be a satisfying and energizing choice.
Common Mistakes to Avoid When Baking Banana Nut Bread
Even experienced bakers can run into issues when making banana nut bread. To help you avoid disappointment, here are the most common mistakes and how to fix them.
Overmixing the Batter
Overmixing is the number one culprit behind dense, rubbery bread. Remember, once you add the flour, mix only until the ingredients are just combined. A few lumps are perfectly fine—the batter doesn’t need to be silky smooth.
Baking at the Wrong Temperature
If your oven runs too hot, the outside of the bread will brown too quickly while the inside stays raw. Too low, and the bread can come out undercooked or heavy. Always preheat your oven to 350°F (175°C) and use an oven thermometer if necessary to ensure accuracy.
Using Underripe or Overripe Bananas
Bananas that are too green won’t provide enough sweetness or moisture. On the other hand, bananas that are overly mushy and fermented can give your bread a sour, unpleasant taste. The best bananas are those with yellow skins heavily speckled with brown spots.
Serving Suggestions
Banana nut bread is incredibly versatile, and how you serve it can make all the difference. Here are some ideas to elevate your loaf from simple to spectacular.
Perfect Pairings with Banana Nut Bread
- Butter or margarine – A classic choice that melts into warm slices.
- Cream cheese – Adds tangy richness that balances the sweetness.
- Nut butter – Peanut butter or almond butter takes the nuttiness up a notch.
- Honey or maple syrup – A drizzle of natural sweetness makes it extra indulgent.
How to Serve for Breakfast, Dessert, or Snack
- Breakfast: Pair a thick slice with scrambled eggs or yogurt for a balanced meal.
- Snack: Enjoy with a cup of tea or coffee in the afternoon.
- Dessert: Warm up a slice and serve with vanilla ice cream or whipped cream for a quick, crowd-pleasing treat.
Banana nut bread truly shines because it can be enjoyed any time of day, in countless ways.
FAQs about Moist Banana Nut Bread Recipe
Q1: Can I freeze banana nut bread?
Yes! Wrap the loaf (or slices) tightly in plastic wrap and foil, then freeze for up to 3 months. Defrost at room temperature or toast slices directly from frozen.
Q2: Why did my banana bread sink in the middle?
This usually happens if the bread was underbaked or the batter was overmixed. Be sure to bake until a toothpick comes out clean.
Q3: Can I use frozen bananas?
Absolutely. Thaw frozen bananas and drain any excess liquid before mashing and adding them to the batter.
Q4: What nuts work best for banana bread?
Walnuts and pecans are the most popular choices, but almonds, hazelnuts, and macadamias work well too.
Q5: How long does banana nut bread last?
At room temperature, it lasts 3 days. In the fridge, up to a week. Frozen, it stays good for 3 months.
Conclusion
Banana nut bread is more than just a way to use up ripe bananas—it’s a cozy, delicious, and versatile treat that has earned its place as a baking classic. With its moist crumb, rich banana flavor, and crunchy nuts, it’s the perfect recipe for beginners and seasoned bakers alike.
By following this step-by-step guide, choosing the right ingredients, and avoiding common mistakes, you’ll have a loaf that turns out bakery-quality every single time. And with endless variations—whether chocolate chip, gluten-free, or vegan—you’ll never get bored of baking (and eating!) this timeless bread.
So next time you see those bananas on your counter turning brown, don’t toss them—turn them into the most comforting loaf of banana nut bread you’ve ever had.


