Mirror Cake Glaze Recipe: There’s nothing quite as mesmerizing as a beautifully glazed mirror cake. With its glossy, glass-like finish and vibrant colors, a mirror glaze cake is a true showstopper at any celebration.
But despite its elegant appearance, making a mirror glaze is totally achievable at home with a bit of patience and the right steps.
Let’s break it down together—step by step.
What Is a Mirror Glaze Cake?
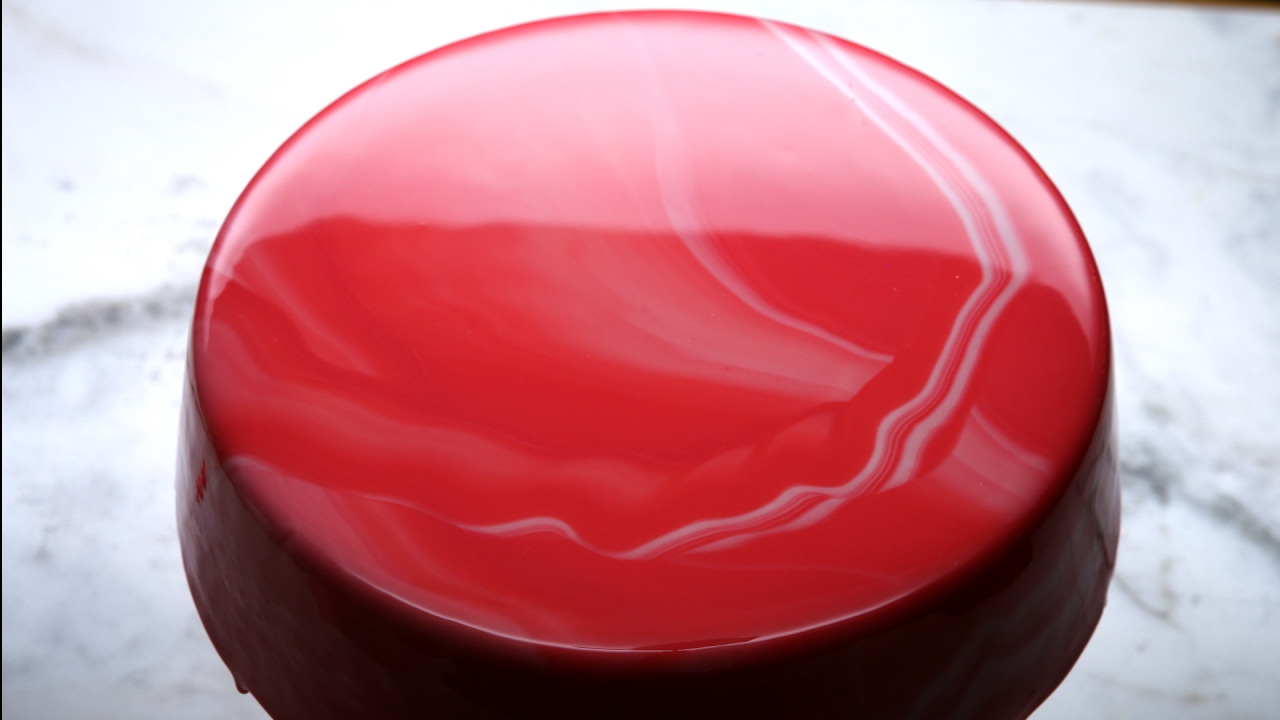
A mirror glaze cake is a dessert covered in a shiny glaze that reflects like a mirror—hence the name. It’s typically made with a base of white chocolate, sweetened condensed milk, and gelatin, which all work together to create that signature sheen. These glazes are often colored with food gel dyes to produce eye-catching designs like galaxies, marbles, or rainbows. You’ve probably seen them on social media, where every swirl looks like edible art.
The beauty of a mirror glaze is that it transforms a simple mousse or sponge cake into a piece of modern pastry art. The smooth finish is not just visually impressive, but it also adds a touch of sweetness and texture to the cake without overpowering it.
Why Mirror Glaze Is So Popular in Modern Baking
Mirror glaze cakes have exploded in popularity thanks to their viral presence on platforms like Instagram and Pinterest. But beyond their aesthetic appeal, there are several reasons why home bakers and pros alike love using mirror glaze:
- Customizable: You can play with colors, flavors, and effects endlessly.
- Professional look: It gives your homemade cake a patisserie-level finish.
- Textural contrast: The glaze pairs beautifully with creamy mousses or rich sponge cakes.
- Fun to make: Once you get the hang of it, making mirror glaze is incredibly satisfying.
Tools and Equipment You’ll Need
Essential Kitchen Tools
Before we dive into the recipe, gather these tools:
- Digital kitchen scale
- Medium saucepan
- Heatproof bowls
- Whisk or immersion blender
- Fine mesh sieve or strainer
- Measuring cups and spoons
- Offset spatula
- Baking sheet or tray
- Cooling rack
- Candy thermometer
Optional Tools for Professional Finish
- Silicone molds for mousse cakes
- Turntable for easy glazing
- Gloves (to avoid fingerprints on the glaze)
- Piping bags for creative designs
Having the right tools at hand makes a big difference when working with temperature-sensitive glazes. It also helps ensure smooth blending and application.
Ingredients You’ll Need for Mirror Glaze
Here’s a list of everything you’ll need to prepare the perfect mirror glaze.
| Ingredient | Quantity |
|---|---|
| White chocolate (chopped) | 300g |
| Sweetened condensed milk | 200g |
| Granulated sugar | 300g |
| Water (divided) | 150ml (75ml + 75ml) |
| Gelatin powder | 20g |
| Glucose or corn syrup | 300g |
| Food gel coloring | As needed |
Tips for Best Quality
- Use high-quality white chocolate. The better the chocolate, the shinier the finish.
- Gelatin strength matters. Use a good-quality gelatin (preferably 200 bloom).
- Gel food colors are better than liquid ones—they’re more concentrated and won’t affect consistency.
Understanding the Science Behind Mirror Glaze
Mirror glaze works because of the unique interaction between gelatin and sugar syrup. When heated and combined with chocolate and milk, these ingredients form a smooth, elastic mixture that sets with a glossy finish. The key is getting the temperature just right—too hot and the glaze runs off; too cold and it clumps.
Also, the emulsification of chocolate, gelatin, and condensed milk gives it that luxurious texture and reflective finish. When done right, the glaze not only looks stunning but also sets firmly while remaining soft enough to cut.
Preparation Before You Start
Prepping Your Cake
- Use a frozen mousse cake or well-chilled cake. It must be very cold for the glaze to set quickly and evenly.
- Smooth the surface with a knife or spatula—any imperfections will show through the glaze.
Organizing Your Workspace
- Set up your cooling rack over a baking tray to catch excess glaze.
- Prepare all ingredients and tools before you begin heating anything.
- Wear gloves to avoid fingerprints when moving the cake.
Preparation is half the success in baking, especially when timing and temperature are crucial.
Step-by-Step Guide to Making Mirror Glaze
Let’s break it down into simple, manageable steps so you get that smooth, glossy finish every time.
Step 1: Blooming the Gelatin
Pour 75 ml of cold water into a small bowl. Sprinkle 20 g gelatin evenly over the surface. Let it sit for 5–10 minutes until the gelatin absorbs the water, swells, and becomes spongy. This step ensures the glaze sets properly later.
Step 2: Preparing the Sugar Syrup
In a medium saucepan, combine 300 g sugar, 300 g glucose, and 75 ml water. Heat gently over medium heat, stirring until the sugar fully dissolves. Bring to a light boil, then remove from heat.
Step 3: Mixing in the Condensed Milk and Gelatin
Stir 200 g sweetened condensed milk into the hot syrup. Add the bloomed gelatin and mix until it completely dissolves. The mixture should be smooth and creamy.
Step 4: Melting the White Chocolate
Place 300 g white chocolate in a large heatproof bowl. Pour the hot syrup mixture over the chocolate. Let it sit undisturbed for 1–2 minutes, then stir gently until the chocolate is fully melted and smooth.
Step 5: Emulsifying Everything Together
Use an immersion blender to blend the mixture until glossy and uniform. Keep the blender fully submerged and angled slightly to avoid incorporating air bubbles, which can ruin the mirror finish.
Step 6: Coloring Your Glaze
If using multiple colors, divide the glaze into separate bowls. Add gel food coloring a few drops at a time and stir until you reach the desired shade. Gel colors work best for vibrant results.
Step 7: Straining and Cooling
Strain each glaze through a fine sieve to remove bubbles and any lumps. Let the glaze cool to 32–35°C (90–95°F) before pouring over a frozen cake for a flawless mirror effect.
How to Apply Mirror Glaze on a Cake
Now comes the most satisfying part—pouring your gorgeous mirror glaze over the cake! But don’t rush it—this part is all about timing and finesse.
Chilling the Cake
Your cake must be completely frozen or very well chilled before applying the glaze. Why? Because the cold surface helps the glaze set instantly, creating that signature smooth, glassy finish. If the cake is too warm, the glaze will just slide off or turn dull and patchy.
- Place the cake on a wire rack over a tray (to catch the drips).
- Make sure it’s smooth and even—imperfections will show through the glaze.
Pouring the Glaze
Once the glaze has cooled to around 90°F (32–35°C), it’s go time.
- Begin pouring from the center and work your way outward in a circular motion.
- Let the glaze naturally coat the sides and drip down—resist the urge to spread it with a spatula.
- You can alternate colors for swirls, marbles, or galaxy effects. Just pour them gently one after the other.
The glaze should flow like honey—thick, but smooth. If it runs too quickly, it might be too hot. If it plops or clumps, it’s too cold. Rewarm gently if needed.
Creating Stunning Effects
Want that swirled marble or galaxy finish?
- Use multiple bowls of colored glaze.
- Pour the main color first, then drizzle secondary colors on top.
- Use a skewer or toothpick to swirl them gently for a stunning visual.
- Add edible glitter or shimmer powder for a high-end look.
Let the excess glaze drip off for a few minutes, then transfer the cake to a clean serving board using two spatulas. Avoid touching the glaze surface—fingerprints show up easily.
Tips to Achieve a Perfect Mirror Finish
Achieving that flawless, reflective shine can take practice. Here are pro-level tips to make sure your glaze looks and performs like magic:
- Smooth Cake Surface: Any bumps or dents will reflect through the glaze.
- Use Quality Gelatin: Poor-quality gelatin won’t set properly or stay shiny.
- Right Temperature: This is critical—pour at 90°F for optimal results.
- Don’t Over-Blend: Avoid introducing air bubbles, which ruin the mirror effect.
- Strain Always: Even if it looks smooth, straining removes bits that can mar the surface.
- Level Pouring Surface: A tilted rack can cause uneven flow or pooling on one side.
- Minimal Handling After Glazing: Once it’s glazed, resist the urge to “fix” it—it sets quickly.
Practice makes perfect. Even if your first try isn’t flawless, keep going. You’ll be amazed at how much easier it gets with each attempt.
Common Mistakes and How to Avoid Them
Even experienced bakers can hit snags when working with mirror glaze. Here are some common issues and how to avoid them:
1. Glaze Is Too Runny
Cause: Glaze was too hot when poured.
Fix: Let it cool to the right temperature before pouring.
2. Dull Finish
Cause: Low-quality chocolate or improper temperature.
Fix: Use high-quality white chocolate and check with a thermometer before pouring.
3. Bubbles in the Glaze
Cause: Over-blending or using a whisk.
Fix: Use an immersion blender carefully and strain the glaze before pouring.
4. Glaze Doesn’t Stick
Cause: Cake not frozen or surface too warm.
Fix: Always freeze the cake before glazing.
5. Streaks or Uneven Color
Cause: Poor mixing or pouring too slowly.
Fix: Mix thoroughly but gently. Pour in a continuous motion.
By troubleshooting and staying attentive to these details, you’ll greatly improve your results.
Creative Variations of Mirror Glaze
Want to go beyond the classic clear-gloss look? Let’s explore some creative versions of mirror glaze that’ll take your cakes to the next level.
Galaxy Mirror Glaze
- Use deep blues, purples, and blacks as your base colors.
- Add white or silver specks with a toothbrush for stars.
- Swirl the colors before pouring to create cosmic effects.
Marbled Effect
- Choose two to three complementary colors.
- Pour in sections, then use a skewer to gently marble them.
- Avoid over-swiping to keep the marble elegant, not muddy.
Metallic Shimmer
- Mix edible gold or silver dust into a small amount of glaze.
- Pour as an accent or splatter with a brush.
- Use black or dark base for dramatic contrast.
You can also flavor the glaze using natural extracts (vanilla, mint, citrus) or add shimmer dust for extra glamour.
Storage and Shelf Life of Mirror Glaze
So, what do you do with leftover glaze—or a fully glazed cake?
Storing the Glaze
- Store unused glaze in an airtight container in the fridge for up to 1 week.
- Reheat gently to 90°F before using again.
- You can also freeze it for up to 1 month, but make sure to thaw it slowly in the fridge overnight before reheating.
Storing Glazed Cakes
- Glazed cakes should be kept in the fridge, uncovered if possible (to avoid smudging the glaze).
- Best served within 48 hours for the freshest taste and shine.
- Avoid freezing a glazed cake, as it can dull the surface and cause condensation issues.
Mirror glaze is sensitive to humidity and temperature changes, so handle with care during storage.
Cleaning Up – How to Deal with the Mess
Let’s be real—mirror glaze can get messy. Those drips? They go everywhere. But here’s how to keep things under control:
- Line your tray with parchment paper or plastic wrap before starting.
- Use warm water and dish soap to clean bowls and tools immediately before the glaze sets.
- Wipe your work surface with a warm, damp cloth—sugar syrup hardens fast!
If you clean as you go, the post-baking cleanup won’t feel like a battle.
FAQs about Mirror Cake Glaze Recipe
1. Can I use milk chocolate or dark chocolate instead of white chocolate?
White chocolate is preferred because it allows food coloring to show clearly. Milk or dark chocolate can be used but will affect the final color and opacity.
2. How long should I freeze the cake before glazing?
Freeze your cake for at least 4–6 hours, or preferably overnight, to ensure it’s firm enough for glazing.
3. Can I re-use the glaze that drips off the cake?
Yes! Collect it in the tray, strain it, and store it in the fridge. Reheat to the correct temperature before using again.
4. What type of food coloring works best?
Use gel or paste food coloring for vibrant, streak-free results. Avoid water-based colors as they can thin out the glaze.
5. Why is my glaze not shiny after setting?
This usually happens when the cake is too warm, or the glaze is poured at the wrong temperature. Also, make sure you use quality white chocolate and gelatin.
Conclusion
Creating a stunning mirror glaze cake is part science, part art, and all satisfaction. With the right ingredients, tools, and step-by-step guidance, you can pull off a bakery-quality masterpiece right in your own kitchen. Remember: it’s not just about following a recipe—it’s about enjoying the process, experimenting with colors, and having fun while making something beautiful (and delicious!).
Don’t be afraid to make mistakes or get creative. With every cake, you’ll learn more and gain confidence. Your next dessert might just be the most eye-catching creation on the table.

