Milkshake Recipe: There’s something magical about a cold, creamy milkshake sliding down your throat on a hot day—or even a chilly one when you need a comfort boost. Milkshakes have that nostalgic power to take you right back to childhood summers, late-night diner stops, or cozy movie nights at home. The best part? They’re ridiculously easy to make, and once you know how, there’s no going back to store-bought.
In this guide, I’ll walk you through everything from what ingredients you need to how to make the smoothest, richest milkshake possible. Whether you’re craving a classic vanilla blend or a chunky Oreo delight, this is your ultimate milkshake-making bible. So grab your blender, and let’s shake things up.
Benefits of Making Homemade Milkshakes
Let’s be real—store-bought milkshakes are convenient, but they’re often packed with artificial flavors, preservatives, and way more sugar than you need. Making your own gives you full control. You get to decide what goes in and what stays out. That means no mystery syrups or questionable “flavor enhancers.” Just real ingredients, real flavor.
Plus, homemade milkshakes can be tailored to your dietary needs. Want it dairy-free? No problem. Low sugar? Easy. Want to sneak in some extra protein after a workout? Done and dusted. And don’t even get me started on the cost savings. A gourmet milkshake at a café can run you $5 to $10. You could make four at home for that price—maybe more.
In short, it’s tastier, healthier, cheaper, and way more fun to make milkshakes in your own kitchen. Let’s dive into what you’ll need to get started.
List of Ingredients You’ll Need
You don’t need a massive shopping list to make a killer milkshake. In fact, the classic recipe calls for just three core ingredients:
- Ice Cream – Vanilla is the traditional base, but you can swap it with chocolate, strawberry, or even coffee.
- Milk – Whole milk makes it rich, but you can use any kind (2%, skim, almond, oat, etc.).
- Sweetener (Optional) – Sugar, honey, maple syrup, or flavored syrups for extra sweetness.
Now, here’s a breakdown for some of the most popular flavors:
| Flavor | Ingredients |
|---|---|
| Vanilla | 2 cups vanilla ice cream, ½ cup milk, 1 tsp vanilla extract |
| Chocolate | 2 cups chocolate ice cream, ½ cup milk, chocolate syrup |
| Strawberry | 2 cups strawberry ice cream, ½ cup milk, fresh or frozen strawberries |
| Banana | 2 cups vanilla ice cream, ½ banana, ½ cup milk |
| Oreo | 2 cups vanilla ice cream, ½ cup milk, 4 crushed Oreos |
Want to get creative? Add peanut butter, caramel, mint extract, or espresso powder. The sky’s the limit.
Tools and Equipment Required
Before you start scooping and pouring, make sure you’ve got the right gear. You don’t need anything fancy, but the right tools make all the difference.
- Blender – This is non-negotiable. A high-powered blender gives you that creamy consistency.
- Measuring Cups & Spoons – For accuracy. Eyeballing works, but precision ensures perfection.
- Ice Cream Scoop – Makes handling frozen ice cream much easier.
- Tall Glasses – Because milkshakes deserve to be served in style.
- Straws and Spoons – Wide straws are best for thick shakes.
Optional tools include whipped cream dispensers, piping bags for garnishing, and mason jars if you’re going for that Insta-worthy look.
Choosing the Right Ice Cream
Your ice cream is the soul of your milkshake. So don’t skimp here.
Best choices:
- Vanilla: Most versatile and works as a base for many combos.
- Chocolate: Rich and indulgent.
- Strawberry: Light and fruity.
- Coffee: Perfect for a morning treat or dessert-with-a-kick.
Looking for a healthier or plant-based option?
- Dairy-free options: Almond milk ice cream, coconut milk ice cream, oat milk varieties.
- Low sugar: Look for keto-friendly or “no sugar added” ice cream options.
Tip: Let the ice cream soften for a couple of minutes before blending. It’ll mix better and give you a smoother shake.
Step-by-Step Guide to Making a Classic Milkshake
Here’s the moment you’ve been waiting for. Let’s break it down:
Step 1: Measure Ingredients
Start by scooping 2 cups of your favorite ice cream into a blender. Then add ½ cup of milk. If you’re adding flavorings or syrups, toss those in now. Want a thicker shake? Use less milk. Thinner? Add a splash more.
Step 2: Add to Blender
Put everything in your blender. Make sure the lid is on tight—you don’t want a milkshake explosion. Trust me.
Step 3: Blend Until Smooth
Pulse the blender a few times to break down the ice cream, then blend on high until it’s completely smooth. This usually takes about 30–45 seconds.
Step 4: Check Consistency
Open the lid and check the thickness. Want it thicker? Add more ice cream. Too thick? Add a splash of milk and blend again.
Step 5: Pour and Serve
Pour into chilled glasses for the best experience. Top with whipped cream, a cherry, or even some sprinkles. Stick a straw in and enjoy!
Tips for the Creamiest Milkshake
Ever made a milkshake that came out too runny or icy? Don’t worry—we’ve all been there. The secret to that rich, creamy, milkshake-bar quality shake lies in a few simple techniques.
- Use full-fat dairy: Whole milk, heavy cream, or even half-and-half brings the luxurious texture you’re craving. Skim or low-fat milk just won’t cut it if you’re going for that thick and creamy result.
- Let your ice cream soften slightly: Give it 5 minutes on the counter before blending. This makes it easier to combine without adding too much milk and helps achieve that perfect consistency.
- Use a high-speed blender: It’s not essential, but a powerful blender ensures a smoother blend without over-mixing.
- Don’t over-blend: Blend just enough to combine the ingredients. Over-blending causes the milkshake to thin out and lose its rich texture.
- Chill your glasses: A cold glass keeps your milkshake thicker for longer and adds that pro touch.
You can also sneak in a scoop of vanilla protein powder, Greek yogurt, or even a frozen banana for an extra creamy vibe that also adds a nutritional boost.
Flavor Variations You Must Try
Sure, vanilla is a classic, but sometimes you want a milkshake that slaps with flavor and personality. Here are some next-level combos that will keep you coming back for more.
Chocolate Overload
- 2 cups chocolate ice cream
- 1/2 cup milk
- 2 tbsp chocolate syrup
- Optional: chocolate chips or fudge brownies blended in
Top with whipped cream and chocolate shavings for a full-on cocoa explosion.
Strawberry Dream
- 2 cups strawberry ice cream
- 1/2 cup milk
- Handful of fresh or frozen strawberries
Want it sweeter? Add a touch of honey or a drop of vanilla extract.
Banana Nut Boost
- 2 cups vanilla ice cream
- 1 ripe banana
- 1 tbsp peanut butter or almond butter
- 1/2 cup milk
This one’s perfect as a post-workout treat or healthy-ish dessert.
Cookies and Cream
- 2 cups vanilla ice cream
- 4 crushed Oreo cookies
- 1/2 cup milk
Don’t forget to add an extra cookie or two as a topping!
Mocha Madness
- 2 cups coffee ice cream
- 1/4 cup milk
- 1 tsp instant espresso or strong brewed coffee
- 1 tbsp chocolate syrup
Perfect for coffee lovers who want their caffeine and dessert fix all in one glass.
Healthy Milkshake Alternatives
Trying to cut down on sugar or dairy? You can still enjoy a delicious milkshake without sacrificing flavor. Here’s how:
- Use plant-based milk: Almond milk, oat milk, coconut milk, or soy milk are all great choices. They’re lighter and add subtle flavor notes.
- Frozen fruit as a base: Blend frozen bananas, strawberries, or mango with a bit of plant milk for a thick and fruity shake.
- Natural sweeteners: Skip the sugar and use dates, maple syrup, or honey instead.
- Add greens: Spinach or kale can be added to fruit-based shakes for a vitamin boost without ruining the taste.
- Try protein powders: Vanilla or chocolate protein powder adds thickness and keeps you full longer.
A go-to healthy combo? Frozen banana + almond milk + peanut butter + cocoa powder + a scoop of vanilla protein. Thick, creamy, chocolatey—and secretly good for you.
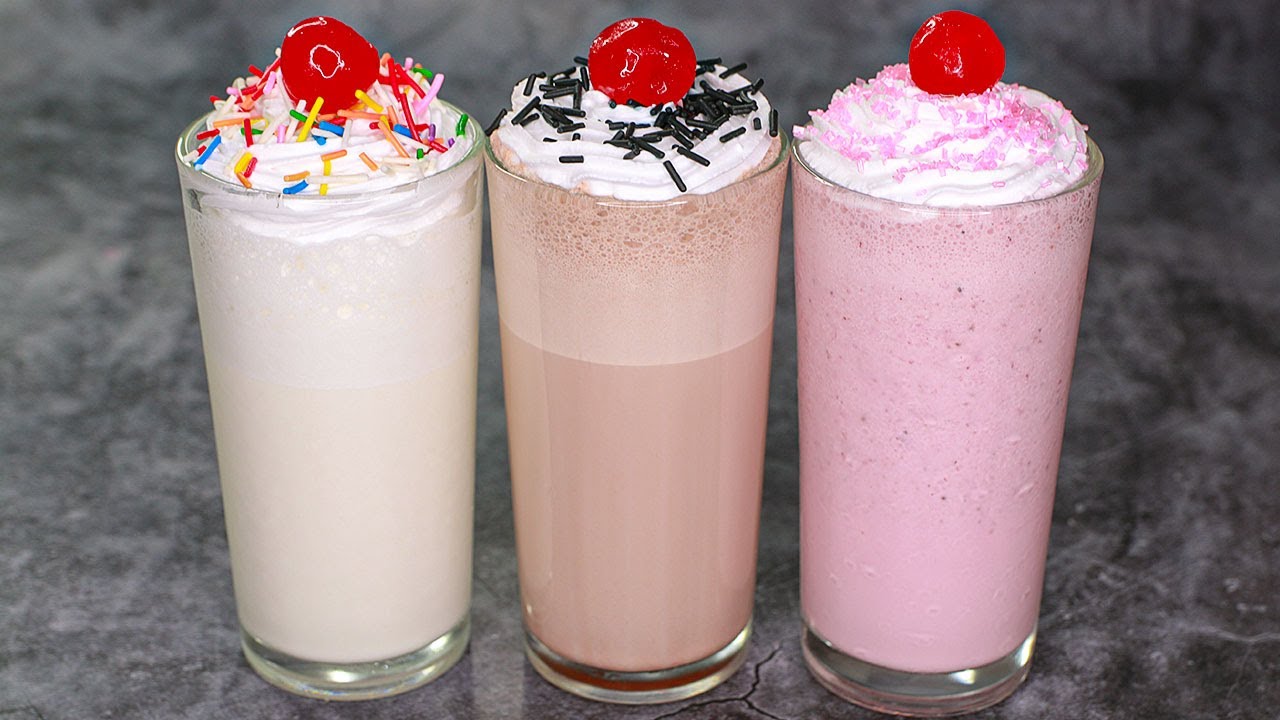
Toppings and Garnishing Ideas
The right toppings turn a basic milkshake into a showstopper. Think of your milkshake as a blank canvas—and toppings as the art.
- Whipped cream: A must-have. Light, fluffy, and indulgent.
- Maraschino cherry: The classic topper. Adds color and sweetness.
- Chocolate or caramel syrup: Drizzle inside the glass before pouring or over the top.
- Crushed cookies or candy: Oreos, Kit-Kats, Reese’s—go wild.
- Sprinkles: Because everything’s more fun with sprinkles.
- Nuts: Crushed peanuts, almonds, or pistachios add crunch.
- Mini marshmallows: Especially great with chocolate or s’mores shakes.
Want to go over the top? Add a mini donut, a brownie chunk, or even a slice of cake on a skewer. It’s all about creativity!
Best Milkshake Combinations
Mix and match flavors to come up with wild combos. Some just work better together—like peanut butter and jelly or cookies and cream.
- Peanut Butter + Chocolate: Rich and nutty. A flavor bomb.
- Mint + Chocolate Chips: Refreshing and indulgent.
- Mango + Coconut: Perfect tropical vibes.
- Banana + Nutella: Sweet and creamy with a hazelnut twist.
- Vanilla + Cinnamon Toast Crunch: A cereal lover’s dream.
Don’t be afraid to experiment. Try mixing flavors you love and discover your own signature shake.
Common Mistakes to Avoid
Even a simple recipe can go wrong without a few key precautions. Here’s what to avoid:
- Too much milk: This is the #1 mistake. It waters down your shake. Start with less and add more if needed.
- Using low-quality ice cream: Cheap ice cream usually means more ice than cream. That makes for a thin, flavorless shake.
- Over-blending: It warms up the shake and ruins texture. Blend just until smooth.
- Not tasting as you go: Always taste before serving. You might need more sweetener, a pinch of salt, or extra vanilla.
- Skimping on toppings: They don’t just look pretty—they add texture and flavor contrast.
Get these right, and every milkshake will be Instagram—and tastebud—worthy.
Serving Suggestions
Milkshakes are the kind of treat that can slide into just about any situation. Whether you’re throwing a party, chilling solo, or serving up dessert after dinner, there’s always a perfect way to serve them. Here are some winning ideas:
- Classic Diner Style: Serve your milkshake in a tall glass with a swirl of whipped cream and a cherry on top. Bonus points if you use a paper straw and metal malt cup for refills on the side.
- With Burgers and Fries: Ever dipped fries in a milkshake? If not, you’re missing out. The salty-sweet combo is an unexpected favorite for many.
- As a Dessert Centerpiece: Milkshakes can steal the show. Serve in mason jars with outrageous toppings—like mini donuts, brownies, or skewered candy—and you’ve got a milkshake freakshow that’s ready for the ’gram.
- With Cakes or Brownies: A creamy vanilla milkshake is the perfect match for a fudgy brownie or warm slice of cake. The textures balance out beautifully.
- Milkshake Bar at Parties: Set up a DIY station with different ice creams, milks, toppings, and syrups. Let guests build their own. It’s interactive, fun, and delicious.
Chill your glasses in the freezer for 15 minutes before serving for that extra touch of professionalism and cold-holding power.
Storage Tips
Let’s say you made too much (rare, but it happens!). Can you store a milkshake for later? Yes—but with a few tricks.
- Short-term storage: Pour any leftover milkshake into an airtight container or jar with a lid. Store it in the freezer for up to 1 day.
- Re-blending: When you’re ready to drink it, let it thaw for 10–15 minutes at room temperature, then give it a quick stir or re-blend for consistency.
- Avoid the fridge: It will just melt into flavored milk. Freezer is the way to go.
Want to meal-prep shakes for busy mornings? Blend all the ingredients except the milk and freeze them in individual bags. When you’re ready, just add milk and blend. Boom—instant milkshake.
FAQs about Milkshake Recipe
1. Can I make milkshakes without a blender?
Yes! Use a large jar or shaker bottle. Add soft ice cream and milk, then shake vigorously. You can also use a hand whisk, though the texture may not be as smooth.
2. What’s the best milk-to-ice-cream ratio?
Start with ½ cup milk for every 2 cups of ice cream. Add more milk in small amounts if needed for blending or if you prefer a thinner consistency.
3. How do I thicken a milkshake?
Use less milk, more ice cream, or add frozen fruit like bananas. You can also mix in a scoop of Greek yogurt or even a spoon of peanut butter for extra thickness.
4. Can I make a vegan milkshake?
Absolutely. Use non-dairy milk (almond, oat, soy) and plant-based ice cream. Add fruits, nuts, or vegan protein powder for flavor and texture.
5. How can I make a milkshake without ice cream?
Use frozen bananas or yogurt as a base. Blend with milk, sweetener, and your flavor of choice. It won’t be quite the same, but it’ll still be cold, creamy, and delicious.
Conclusion
There you have it—the ultimate guide to making milkshakes that are smooth, thick, and absolutely irresistible. Whether you’re a fan of the good old-fashioned vanilla or you want to go bold with double chocolate brownie chunks and caramel drizzle, making a milkshake at home opens the door to endless creativity.
It’s more than just a drink—it’s an experience. The cool creaminess, the endless flavor possibilities, the joy of sipping something homemade… it’s pure comfort in a glass.
Next time you’re craving a sweet treat, skip the drive-thru. With just a few ingredients, a blender, and a few minutes, you’ve got dessert sorted—and probably better than anything you could buy.

