Microwave Peanut Brittle Recipe: Ever had a sudden craving for a sweet, crunchy treat but didn’t want to spend hours in the kitchen? Enter microwave peanut brittle – your go-to, no-fuss candy fix that’s ready in minutes! It’s everything you love about classic peanut brittle: crunchy, nutty, buttery, with that beautiful caramelized flavor — minus the stress of a stovetop thermometer.
The microwave method cuts down prep time drastically without sacrificing taste. Whether it’s for holiday gifts, a quick dessert, or just something to munch on while watching Netflix, this microwave peanut brittle delivers.
In this guide, you’ll find a clear, foolproof step-by-step process. We’ll cover the ingredients, tools you’ll need, cooking time adjustments, and even some creative variations to try out. Ready to make the crunchiest, golden peanut brittle of your life? Let’s dive in.
What is Peanut Brittle?
Peanut brittle is a classic old-school candy that dates back centuries. It’s a hard, caramelized sugar candy filled with roasted peanuts, known for its sweet-and-salty flavor and glass-like snap when you break it. Traditionally, making peanut brittle required using a candy thermometer, boiling sugar on the stovetop, and lots of guesswork. But thanks to the microwave method, that long, intimidating process has become simpler, safer, and way faster.
Think of peanut brittle as the candy world’s version of peanut butter toast—simple, satisfying, and nostalgic. It’s made with just a few pantry staples, but the transformation is magical. The combination of sugar and corn syrup gives it that beautiful golden color and texture. Then you toss in roasted peanuts, add some butter and vanilla for richness, and finish off with baking soda to aerate the mixture, creating that signature light crunch.
Whether you’ve had it in holiday tins or at a country fair, peanut brittle remains a timeless treat that you can now whip up in less than 10 minutes!
Why Use the Microwave Method?
Let’s face it: not everyone has a candy thermometer lying around or wants to stand over a boiling pot of sugar, right? The microwave method is revolutionary because it gives you the same delicious results without the stress.
Here’s why the microwave version is a game-changer:
- Faster Cooking Time: The whole recipe takes about 10 minutes or less from start to finish.
- Fewer Tools Required: No need for a candy thermometer or heavy saucepan.
- Fewer Dishes: One microwave-safe bowl and a spatula are really all you need.
- Consistent Results: With proper timing and stirring, you get evenly cooked brittle every single time.
Plus, it’s a great way for beginners to get into candy-making without the usual intimidation. It’s perfect for families, students, or anyone craving a sweet treat without the hassle.
Tools and Equipment You’ll Need
Before diving into the recipe, make sure you’ve got everything you need on hand. Preparation is key when working with hot sugar—it moves fast!
Here’s what you’ll need:
- Large microwave-safe glass bowl (preferably 8-cup Pyrex)
- Microwave (1000 watts or adjust cook time accordingly)
- Silicone or wooden spatula
- Measuring cups and spoons
- Parchment paper or silicone baking mat
- Baking sheet
- Oven mitts (that sugar gets HOT!)
- Butter or nonstick spray (for lining)
Having these ready will make the process super smooth and prevent you from scrambling when it’s time to spread the hot candy.
List of Ingredients You’ll Need
You might be surprised at how few ingredients are needed to make microwave peanut brittle. It’s a pantry-friendly recipe that packs a punch in flavor.
Here’s what you’ll need:
| Ingredient | Amount |
|---|---|
| Granulated Sugar | 1 cup |
| Light Corn Syrup | ½ cup |
| Unsalted Peanuts (raw or roasted) | 1 cup |
| Unsalted Butter | 1 tbsp |
| Vanilla Extract | 1 tsp |
| Baking Soda | 1 tsp |
Let’s break down why each of these is important:
- Sugar: The base of any brittle. Granulated white sugar caramelizes beautifully in the microwave.
- Corn Syrup: Helps prevent crystallization and keeps the texture smooth.
- Peanuts: Raw or roasted both work; raw will roast during the cooking process.
- Butter & Vanilla: Add richness and depth of flavor.
- Baking Soda: Causes the mixture to foam slightly, creating tiny air bubbles that make the brittle crisp instead of tooth-breakingly hard.
Choosing the Right Peanuts
The peanut choice can make or break your brittle. Here’s how to pick the right one:
- Raw Peanuts: Ideal because they roast while cooking, giving a fresher flavor.
- Roasted Unsalted Peanuts: Work just as well and save time.
- Avoid Salted Peanuts: Unless you’re going for a salty-sweet twist, skip the pre-salted nuts—they can overpower the flavor.
Tip: If you’re using roasted peanuts, stir them in halfway through the microwave process to prevent burning.
Importance of Fresh Baking Soda
Baking soda may seem like a background player, but it plays a huge role in brittle. When added at the end, it reacts with the caramel mixture, creating little bubbles of carbon dioxide. These bubbles lighten the candy, giving it that delightful crunch rather than a rock-hard texture.
Pro Tip: Make sure your baking soda is fresh. Old baking soda can lose its effectiveness, leaving you with dense, overly hard candy.
Microwave Peanut Brittle: Step-by-Step Instructions
Now for the fun part—let’s make some brittle magic!
Step 1: Prepare Your Workspace
Line a baking sheet with parchment paper or lightly grease it. Measure all ingredients ahead of time—this recipe moves fast once heating begins. Use a large, microwave-safe glass bowl to prevent overflow.
Step 2: Combine Sugar and Corn Syrup
In the bowl, mix granulated sugar and corn syrup until evenly combined. Microwave on high for 3–4 minutes, or until the mixture is bubbling vigorously and begins to turn slightly golden. Watch closely to avoid burning.
Step 3: Add Peanuts and Continue Heating
Stir in the peanuts, coating them well with the hot syrup. Return the bowl to the microwave and heat for another 2–3 minutes, stirring once halfway through. The mixture should deepen in color and smell nutty.
Step 4: Stir in Butter and Vanilla
Carefully remove the bowl and add butter and vanilla extract. Stir quickly until the butter melts completely and the mixture looks smooth and glossy.
Step 5: Final Addition of Baking Soda
Immediately stir in the baking soda. The mixture will foam up and become lighter—this is what creates the brittle’s airy, crisp texture. Stir just until combined.
Step 6: Spread the Mixture Quickly
Pour the hot brittle onto the prepared baking sheet right away. Use a spatula to spread it into a thin, even layer. Work fast, as it begins to set almost immediately.
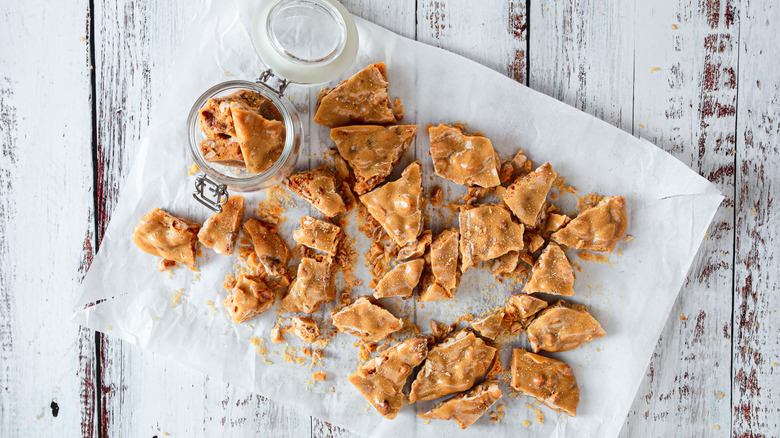
Step 7: Cool and Break into Pieces
Let the peanut brittle cool completely at room temperature. Once hardened, break it into pieces by hand. Store in an airtight container to keep it crisp and crunchy.
Microwave Cooking Time Adjustments Based on Wattage
Microwaves vary, and so will your cook time. A standard microwave is around 1000 watts. If your microwave is higher or lower wattage, you’ll need to adjust.
Here’s a general guide:
| Microwave Wattage | Initial Sugar/Corn Syrup Time | With Peanuts Time |
|---|---|---|
| 1200W | 3 minutes | 1.5–2 minutes |
| 1000W (standard) | 3.5–4 minutes | 2–3 minutes |
| 800W | 4.5 minutes | 3.5 minutes |
If you’re unsure, go slightly under and check the color. You’re aiming for a light golden brown. Too dark, and it’ll taste burnt; too light, and it won’t harden properly.
Pro Tips for the Perfect Peanut Brittle
- Use a large glass bowl: The mixture bubbles up, so give it space.
- Avoid metal bowls: Not microwave-safe and unsafe for sugar cooking.
- Grease your tools: A little butter or spray on your spatula helps prevent sticking.
- Have ingredients ready: Timing is everything. Measure your baking soda, vanilla, and butter in advance.
- Let it cool completely: Cutting or breaking too early results in a chewy mess.
Common Mistakes to Avoid
Making brittle in the microwave is easy, but here are a few things to avoid:
- Overcooking: This results in burnt sugar and bitter flavor. Watch the color.
- Undercooking: Leads to soft, chewy brittle that never sets right.
- Using old baking soda: No lift means no crunch.
- Adding nuts too late: Peanuts won’t roast properly and could be raw.
- Touching the mixture: Burn risk is high! Be cautious and keep kids away.
How to Store Microwave Peanut Brittle
To keep your peanut brittle fresh and crisp:
- Store in an airtight container at room temperature.
- Keep away from moisture—humidity will soften it.
- Don’t refrigerate! The fridge adds moisture and ruins the texture.
- Use parchment paper between layers to prevent sticking.
Stored properly, your brittle can last up to 3 weeks—but let’s be honest, it’ll be gone in a couple of days.
Variations of the Classic Recipe
Peanut brittle is a great base for getting creative. Here are a few delicious twists:
Almond or Cashew Brittle
Swap out peanuts for almonds, cashews, or even macadamias. Just make sure they’re raw or unsalted so they don’t overpower the candy.
Spicy Peanut Brittle
Love heat? Add a pinch of cayenne pepper or crushed red pepper flakes right before adding the baking soda. The sweet and spicy combo is a flavor bomb.
Chocolate-Dipped Brittle
After breaking the brittle into pieces, dip the ends in melted chocolate and let them cool on parchment. Fancy, fun, and irresistible!
You can even drizzle with white chocolate and sprinkle with sea salt for gourmet-style brittle that’s perfect for gifting.
Is Microwave Peanut Brittle Safe for Kids to Help With?
Yes—with supervision. Kids can:
- Measure ingredients
- Mix sugar and syrup
- Stir peanuts
But adults should handle microwaving, pouring, and spreading the hot sugar mixture. Always explain the risks of hot sugar—it’s hotter than boiling water and can cause serious burns.
For younger kids, consider letting them help decorate cooled brittle pieces with sprinkles or chocolate drizzle instead!
Health Considerations: How Much Sugar is Too Much?
Peanut brittle is definitely a treat—not a health food. A single serving contains a significant amount of sugar, corn syrup, and fat, so moderation is key.
For those watching their sugar intake, consider:
- Cutting portion sizes
- Using alternative sweeteners (though results may vary)
- Balancing with protein-rich snacks to avoid sugar spikes
It’s okay to indulge, especially during the holidays—but mindful snacking makes it more enjoyable.
FAQs about Microwave Peanut Brittle Recipe
Can I make peanut brittle without corn syrup?
Yes, but the texture may differ. Alternatives like honey or maple syrup can work, but they may crystallize or change the flavor.
How long does microwave peanut brittle last?
Stored in an airtight container at room temperature, it can last up to 3 weeks.
Why is my peanut brittle chewy instead of crispy?
It may have been undercooked or exposed to moisture. Make sure to cook to a golden color and store it properly.
Can I use raw peanuts?
Absolutely! In fact, raw peanuts roast during the cooking process, giving a fresher flavor.
Is peanut brittle gluten-free?
Yes! All the ingredients are naturally gluten-free, but always check labels for hidden additives.
Conclusion
Microwave peanut brittle is a perfect example of how a traditional favorite can be made easier and faster without sacrificing flavor. With just a handful of ingredients, a few minutes, and a microwave, you can create a batch of crunchy, golden perfection that tastes like it came from grandma’s kitchen.
From choosing the right peanuts to mastering cook times, now you have everything you need to nail it on the first try. Whether you’re gifting it, sharing it, or hoarding it (we won’t judge), microwave peanut brittle is bound to become your go-to treat.

