Mexican Flan Recipe: Flan is one of those desserts that makes everyone go “wow” from the first bite. It’s smooth, creamy, sweet, and covered in a delicious layer of caramel. Flan is a type of custard dessert that originated in Europe, but it took on a new life in Latin America. The Mexican version of flan is especially popular because of its ultra-creamy texture and rich vanilla flavor.
Traditionally, it’s made with eggs, sweetened condensed milk, evaporated milk, and sugar. The end result? A silky, melt-in-your-mouth dessert that feels fancy but is surprisingly easy to make at home. It’s perfect for birthdays, holidays, or just a cozy Sunday treat. And once you learn how to make it, you’ll find it’s one of those go-to desserts that everyone will request again and again.
Why Mexican Flan is Special
Mexican flan stands out because of its depth of flavor and texture. Unlike the firmer versions from some other countries, Mexican flan is incredibly creamy and often flavored with vanilla or cinnamon. It’s traditionally baked in a water bath, which helps keep it moist and prevents cracking.
But what really sets it apart is the caramel topping. It’s not just decorative—it adds a deep, rich sweetness that balances the flan’s custard base. When you flip the flan out of its mold, the caramel flows down the sides, giving it a glossy, mouthwatering finish.
Ingredients You’ll Need
Essential Ingredients
Let’s talk about what you need to bring this creamy dream to life. The ingredients are simple, and you may already have them in your pantry or fridge:
- 1 cup of granulated sugar (for the caramel)
- 1 can (14 oz) of sweetened condensed milk
- 1 can (12 oz) of evaporated milk
- 4 large eggs
- 1 tablespoon of pure vanilla extract
Each ingredient has a role: the sugar becomes caramel; the condensed and evaporated milk provide richness and sweetness; the eggs bind everything into a custard; and the vanilla adds that warm, familiar flavor.
Ingredient Substitutions and Tips
If you’re missing something, don’t worry—there are some workarounds:
- Milk alternatives: If you can’t find evaporated milk, use whole milk but simmer it down a little first to remove excess water.
- Flavors: Add a splash of orange zest or a sprinkle of cinnamon for a twist.
- Sweetener swap: You can substitute white sugar with brown sugar for a deeper caramel flavor, but it may alter the color and consistency.
The most important tip? Always use room-temperature eggs. Cold eggs can make the custard cook unevenly. And make sure not to over-mix the batter—gentle whisking is key.
Tools and Equipment Required
Kitchen Tools You Need
Before you get started, gather these basic kitchen tools:
- A medium saucepan (for making the caramel)
- A mixing bowl
- A whisk
- A blender (optional, for smoother custard)
- A round baking dish or flanera (flan mold)
- A larger baking pan (for the water bath)
- Aluminum foil
You don’t need fancy equipment, but having the right tools makes the process smooth and mess-free.
Preparing Your Workspace
Set everything up before you start cooking. It helps to prep your ingredients and tools in advance (that’s called “mise en place” in cooking terms). Make sure your oven is preheated to 350°F (175°C) and that you have hot water ready for the water bath.
A clean and organized kitchen makes baking flan feel like a breeze—and keeps you from scrambling while the caramel is bubbling.
Step-by-Step Instructions
Step 1: Making the Caramel
This is the foundation of your flan, so take your time. Pour the sugar into a dry saucepan and set it over medium heat. Stir gently with a wooden spoon or swirl the pan (don’t use metal utensils as they conduct too much heat).
Watch closely—sugar melts quickly. It will first clump, then melt into a golden liquid. Once it turns a deep amber color, immediately pour it into your flan mold and tilt the mold to coat the bottom evenly.
Be careful: caramel is extremely hot. Do not touch it or let it sit too long, or it’ll harden into candy.
Step 2: Mixing the Flan Custard
In a large bowl, combine the eggs, sweetened condensed milk, evaporated milk, and vanilla extract. Whisk until everything is well incorporated. If you want an extra-smooth texture, blend the mixture for 10-15 seconds.
Pour the mixture gently over the hardened caramel in the mold. Try to avoid creating bubbles, as they can affect the flan’s final texture.
Step 3: Preparing the Flan Mold
Once the caramel and custard mixture are ready, it’s time to prepare your flan mold for baking. If you’re using a traditional flanera (a lidded mold specifically for flan), simply pour the custard over the caramel. If you don’t have one, a round glass or metal baking dish works just as well.
Cover the top tightly with aluminum foil. This helps keep moisture in and prevents the top of your flan from drying out or forming a crust while baking. Make sure the foil is snug but not pressing down into the custard.
Next, place the flan mold into a larger baking dish—this is for the bain-marie, or water bath. The water bath is essential for even cooking. It keeps the temperature gentle and consistent, preventing the eggs from scrambling or curdling. It’s the secret to that silky-smooth texture we love.
Carefully pour hot water into the outer pan until it reaches about halfway up the sides of the flan mold. Don’t let any water get into the custard itself!
Step 4: Baking the Flan in a Water Bath
Preheat your oven to 350°F (175°C) if you haven’t already. Gently place your water bath setup in the middle rack of the oven.
Bake for 50 to 60 minutes. To check if it’s done, insert a toothpick or thin knife in the center—if it comes out mostly clean with just a bit of moisture, your flan is ready. The center should jiggle slightly like gelatin, but it should not be liquid.
Don’t overbake! If the flan is too firm in the oven, it can become rubbery when cooled. The key is a gentle wobble in the middle, which will firm up as it chills.
Once it’s done, remove the flan from the water bath carefully. Let it cool to room temperature before transferring it to the fridge.
Step 5: Cooling and Unmolding
Let your flan chill in the refrigerator for at least four hours—overnight is even better. This resting period helps the custard firm up completely and allows the flavors to meld together beautifully.
To unmold, run a thin knife around the edges of the flan. Then place a plate over the top of the mold and flip it upside down in one swift, confident motion. You might hear a soft “plop” as the flan releases and the caramel cascades over the top.
If it doesn’t release immediately, let the mold sit inverted for a few minutes. The caramel will slowly drip down, helping the flan slide out.
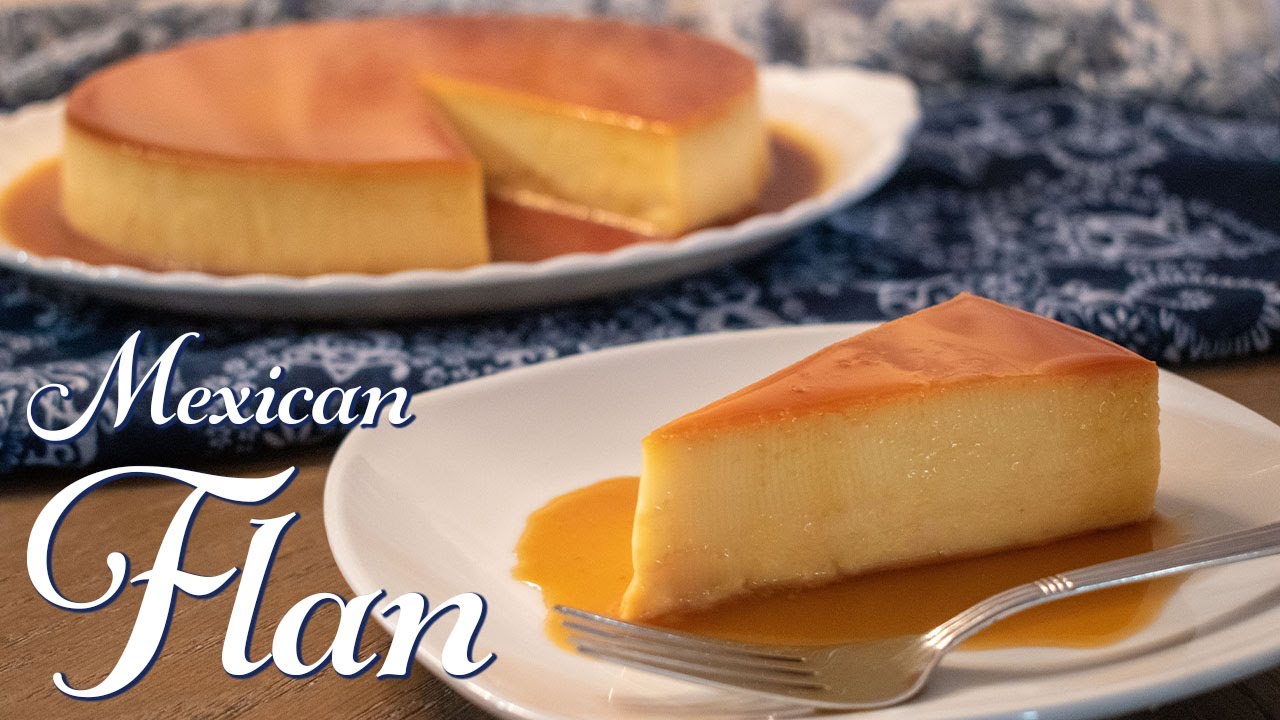
The moment the flan lands on the plate is pure magic—a glossy, golden dome covered in rich, glistening caramel.
Final Touches and Serving Tips
Garnishing Ideas
While flan is stunning on its own, a few thoughtful touches can take it to the next level:
- Fresh Berries: Strawberries or raspberries add a fresh, tart contrast.
- Mint Leaves: A sprig of mint adds color and a refreshing aroma.
- Whipped Cream: A small dollop on the side adds creaminess.
- Coconut Flakes or Cinnamon Dusting: Perfect for a tropical or spicy twist.
Flan is usually served cold, and it pairs beautifully with coffee or a glass of dessert wine.
Storage Tips
If you have leftovers (unlikely!), store them covered in the refrigerator. Flan will keep for up to 5 days.
Avoid freezing—it can ruin the custard’s texture. The caramel might also become gritty when thawed.
You can even prepare the flan a couple of days in advance for dinner parties or celebrations. It actually tastes better the next day as the flavors settle and deepen.
FAQs about Mexican Flan Recipe
1. Can I make flan without a water bath?
Technically yes, but you’ll risk overcooking or curdling the custard. A water bath ensures even heat and gives you that signature smooth texture.
2. Why did my caramel harden too fast?
Caramel hardens quickly once it’s off the heat. Work swiftly and pour it into the mold right away. If it hardens in the pan, gently reheat it to liquefy.
3. Can I make flan without condensed milk?
You can, but the texture and sweetness will change. Substitute with a mix of heavy cream and sugar, though results may vary.
4. How do I know when the flan is done baking?
Look for a slight jiggle in the center, and test with a knife. It should come out mostly clean. Remember, it continues to set as it cools.
5. Is flan gluten-free?
Yes! Mexican flan is naturally gluten-free since it contains no flour or gluten-containing ingredients. Just double-check your flavorings and toppings.
Conclusion
Mexican flan isn’t just a dessert—it’s an experience. It’s rich, sweet, creamy, and completely satisfying. Best of all, it’s easier to make than you think. With just a handful of ingredients and a few simple steps, you can create a show-stopping dessert that brings joy to any table.
Whether you’re new to cooking or a seasoned home chef, making flan is a rewarding journey. Once you master the basics, you can get creative with flavors, toppings, and presentation.
So grab your apron, heat up that sugar, and dive into the world of homemade flan. Your taste buds (and your friends) will thank you.