Marshmellow Recipe: There’s something magical about marshmallows. Those soft, fluffy, sugary pillows of joy are more than just toppings for hot chocolate or ingredients for s’mores—they’re nostalgic, comforting, and downright addictive. But here’s a secret: you don’t need a factory to make them. With the right ingredients and a little know-how, you can create fresh, cloud-like marshmallows right in your own kitchen.
Why settle for store-bought when you can customize your own with unique flavors, colors, and textures? Homemade marshmallows taste better, feel lighter, and can be made healthier by controlling the ingredients. Plus, it’s a super fun kitchen project. Whether you’re making them for a cozy night in or gifting them for the holidays, these homemade treats are guaranteed to wow.
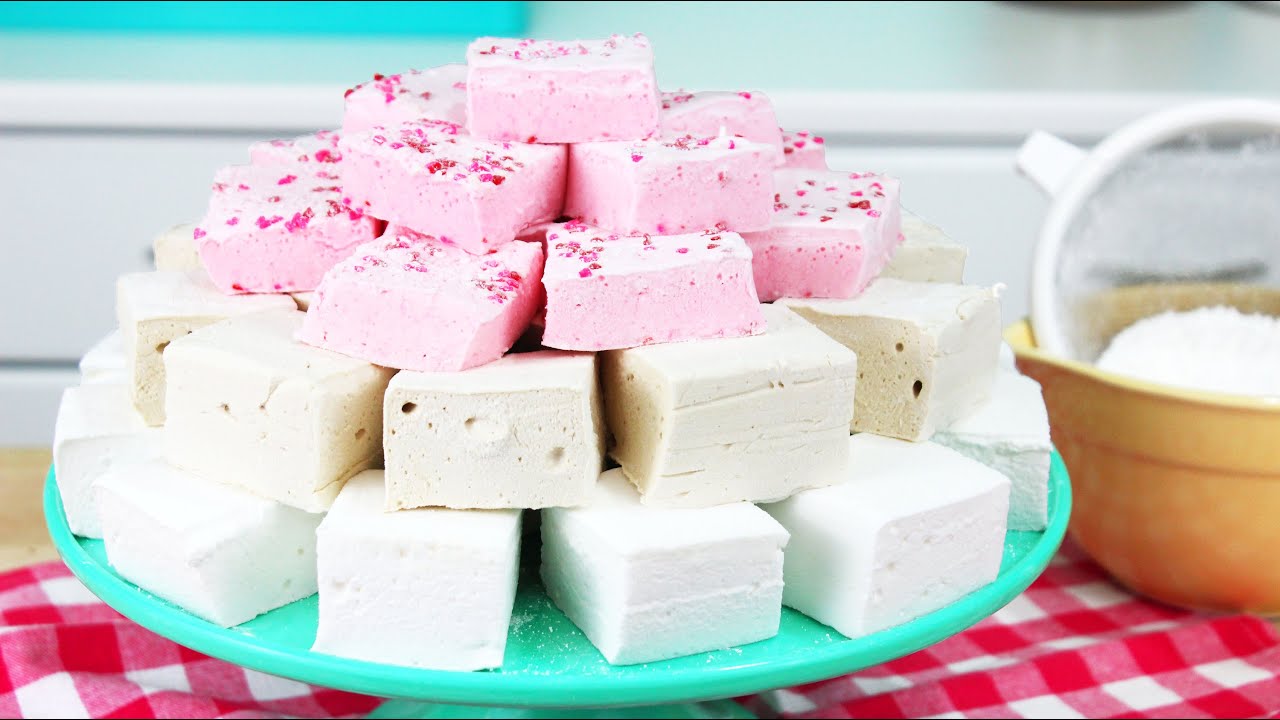
Let’s dive into the fluffy world of DIY marshmallows with this step-by-step guide!
List of Ingredients You’ll Need
Creating marshmallows from scratch is all about combining the right ingredients in the right way. Most of what you need might already be in your pantry!
Basic Ingredients
Here’s your base list:
- Unflavored gelatin (3 packets or about 21 grams)
- Cold water (1 cup, divided)
- Granulated sugar (2 cups)
- Light corn syrup (1 cup)
- Salt (½ teaspoon)
- Vanilla extract (1 tablespoon)
- Powdered sugar (for dusting)
- Cornstarch (optional, for dusting)
These ingredients work together to form the signature fluffy texture of marshmallows. The gelatin is what gives them structure, the sugar and syrup provide sweetness and stability, and the vanilla adds that classic flavor.
Optional Add-ins & Flavors
Want to level up your marshmallows? Try adding:
- Peppermint or almond extract
- Cocoa powder or melted chocolate
- Natural food coloring
- Freeze-dried fruit powder
- Coconut flakes or crushed candy for coating
Experimenting with flavors and coatings is half the fun. You can even layer two or three flavors for a beautiful swirl effect.
Essential Tools and Equipment
Don’t worry—you don’t need fancy gear to make marshmallows. Just a few basics from your kitchen will do.
What You Must Have
- Stand mixer with whisk attachment (or hand mixer)
- Candy thermometer
- Medium saucepan
- Spatula (silicone preferred)
- 9×13-inch baking pan
- Mixing bowls
- Measuring cups and spoons
The candy thermometer is crucial—marshmallows require the sugar syrup to reach a specific temperature (around 240°F, or 115°C) for that perfect texture.
Nice-to-Haves for Easier Prep
- Offset spatula for smoothing the top
- Kitchen scissors or sharp knife for cutting
- Sifter or fine mesh strainer (for coating)
Having these extras will make the process smoother and the final product look more polished.
How to Prepare for Making Marshmallows
Before diving into cooking, take a few minutes to prep your space. This isn’t just a baking project—it’s a bit of a sugar science experiment.
Cleaning and Organizing Your Space
Make sure your counters are clean and uncluttered. Have your tools laid out and ready to go. Sugar syrup waits for no one, so being organized ahead of time is key.
Prepping Ingredients and Equipment
- Grease your baking pan and dust it generously with a mix of powdered sugar and cornstarch. This keeps your marshmallows from sticking.
- Have your gelatin bloomed and ready (more on that in the next section).
- Pre-measure all ingredients. You’ll need to move quickly when working with hot syrup.
Once everything is set up, take a deep breath. You’re about to become a marshmallow master.
Step-by-Step Marshmallow Recipe
Now, the moment you’ve been waiting for—let’s make marshmallows!
Step 1: Bloom the Gelatin
Pour cold water into a mixing bowl and sprinkle gelatin evenly over the surface. Let it sit for 5–10 minutes. This allows the gelatin to absorb the water and soften, which is essential for fluffy marshmallows.
Step 2: Make the Sugar Syrup
In a saucepan, combine sugar, corn syrup, and water. Heat over medium heat until the sugar dissolves, then bring to a boil. Continue cooking until the mixture reaches 115°C (240°F) on a candy thermometer.
Step 3: Combine Syrup and Gelatin
With a mixer running on low speed, slowly pour the hot sugar syrup into the bloomed gelatin. Be careful and pour in a steady stream to avoid splashing.
Step 4: Whip to Fluffy Perfection
Increase the mixer speed to high and whip for 8–10 minutes until the mixture becomes thick, glossy, and fluffy. Add vanilla extract during the final minute of whipping.
Step 5: Pour and Set the Mixture
Transfer the marshmallow mixture into a greased and parchment-lined pan. Smooth the top with a spatula and let it set at room temperature for at least 4 hours, or until firm.
Step 6: Cut and Coat the Marshmallows
Dust a cutting surface with powdered sugar or cornstarch. Turn out the set marshmallow slab, cut into squares, and coat all sides to prevent sticking.
Tips for Perfect Marshmallows Every Time
Even though marshmallows seem simple, there are a few tricks to make sure yours come out fluffy and amazing every time.
Temperature Control Is Everything
- If the syrup is too cool, your marshmallows won’t set.
- If it’s too hot, the mixture may turn too stiff or grainy.
Use a candy thermometer and aim for that perfect 240°F (soft-ball stage).
Don’t Skimp on the Whipping Time
- If you don’t whip it long enough, the mixture will be too runny to set.
- Over-whipping can make the mixture too stiff to spread.
Aim for that glossy, billowy consistency—like thick marshmallow fluff.
Grease Your Tools
Everything gets sticky. Lightly grease your spatula, scissors, or knife with neutral oil to make handling easier.
Flavor Variations and Creative Twists
Once you’ve mastered the base recipe, it’s time to get creative!
Classic Vanilla Marshmallows
- Stick with high-quality pure vanilla extract.
- Or try vanilla bean paste for those lovely specks of flavor.
Peppermint Marshmallows
- Add ½ tsp peppermint extract during whipping.
- Swirl in red food coloring for a candy cane look.
Chocolate Marshmallows
- Mix ¼ cup of cocoa powder into the syrup while boiling.
- Add a drizzle of melted chocolate before setting.
Strawberry or Raspberry Marshmallows
- Add 2 tbsp of freeze-dried fruit powder during whipping.
- Use fruit extract for a stronger flavor punch.
These variations make amazing holiday gifts or party treats—and kids love experimenting with them.
How to Color Marshmallows
Want your marshmallows to match a holiday or theme?
- Use gel food coloring instead of liquid for brighter colors without ruining the texture.
- Add it during the last 1–2 minutes of whipping.
Marbling Techniques
For a beautiful swirl effect:
- Add a few drops of two different colors and just barely stir with a toothpick or spatula before pouring into the pan.
- Don’t overmix—let the colors stay streaky.
This technique is perfect for baby showers, birthday parties, or special events.
Decorating Marshmallows
Marshmallows can be beautiful as well as delicious!
Holiday-Themed Marshmallows
- Use cookie cutters to make hearts, stars, or trees.
- Add sprinkles or edible glitter before they dry.
Dipped and Drizzled Ideas
- Dip one end in melted chocolate, then roll in crushed nuts, coconut, or candy cane bits.
- Drizzle with dark or white chocolate for an artistic touch.
Decorated marshmallows make excellent wedding favors or holiday gifts.
How to Store Homemade Marshmallows
Homemade marshmallows are amazing when fresh, but they can last quite a while if stored properly. Let’s make sure all your hard work doesn’t go to waste.
Best Containers to Use
The key to marshmallow storage is air-tightness.
- Use airtight containers like plastic or glass with tight-fitting lids.
- Avoid storing in the fridge—it adds moisture and causes stickiness.
- Place wax paper or parchment between layers if stacking.
Keeping them dry is critical, or else they’ll get soggy or overly sticky.
How Long Do Homemade Marshmallows Last?
- At room temperature, marshmallows can last up to 2–3 weeks.
- In ideal conditions (cool, dry place), you might stretch that to a month.
After that, they may start to dry out, lose fluffiness, or harden slightly. You’ll still be able to use them in recipes like hot cocoa or baking, though!
For longer storage, you can freeze them (more on that in the FAQs section).
Marshmallow Troubleshooting
Let’s face it—not every batch is perfect. Here are quick solutions to common marshmallow mishaps.
Too Sticky?
- You probably didn’t coat them well enough after cutting.
- Try tossing them again in a mix of powdered sugar and cornstarch.
Also, humidity can cause stickiness. Store in a dryer area or with a food-safe moisture absorber in the container.
Too Hard or Chewy?
- Your sugar syrup might have been cooked too long, reaching above 245°F.
- Whipping time might have been too short, not incorporating enough air.
Next time, double-check your thermometer and watch for that sweet spot—240°F.
Not Setting Properly?
- Did you use enough gelatin? Skimping can cause floppy marshmallows.
- If it’s warm in your kitchen, the mix might not firm up correctly.
Be patient—letting them rest overnight at room temp in a cool, dry area is best.
Fun Ways to Use Homemade Marshmallows
Sure, you can eat them as-is (and probably will), but here are some fun ways to put your marshmallows to use.
S’mores
- Nothing beats a homemade marshmallow toasted over an open flame.
- Add to graham crackers and chocolate for a gourmet treat.
Pro tip: homemade ones toast faster and more evenly—get that golden crust without burning.
Hot Chocolate Toppers
- Drop a few cubes into hot cocoa and watch them melt into pillowy deliciousness.
- Try peppermint-flavored ones for a festive twist.
You can even make marshmallow stir sticks—dip them in chocolate and freeze onto wooden skewers.
Party Treats & Gifts
- Wrap in cellophane bags tied with ribbon.
- Include in gift baskets with cocoa, mugs, or gourmet cookies.
Homemade marshmallows say “I care” way more than store-bought ones ever could.
Making Vegan Marshmallows
Traditional marshmallows use gelatin (an animal product), but there are plant-based options too!
Substitutes for Gelatin
- Use agar-agar powder (derived from seaweed) in place of gelatin.
- The texture is slightly firmer, but still delicious and fluffy.
You’ll need to adjust your method slightly, since agar needs to boil briefly to activate.
Vegan Tips and Adjustments
- Use organic sugar (some refined sugars use bone char).
- Swap corn syrup for brown rice syrup or maple syrup if preferred.
Vegan marshmallows are a bit trickier to master but just as satisfying. And perfect for sharing with friends who have dietary restrictions.
Are Homemade Marshmallows Healthier?
Let’s break it down.
Store-Bought vs Homemade Comparison
| Feature | Store-Bought | Homemade |
|---|---|---|
| Additives | Often contains preservatives, artificial flavors, and dyes | No additives unless you add them |
| Sugar Type | High fructose corn syrup is common | You choose the sugar—organic, natural, etc. |
| Texture | More shelf-stable, but firmer | Fluffier, softer, and fresher |
| Flavor | One-note sweetness | Fully customizable |
When you make your own, you control everything—from sweetness to flavor to thickness. You can skip the chemicals and focus on taste and texture.
They’re still a treat, yes—but at least you know exactly what’s in them.
FAQs about Marshmellow Recipe
1. Can I use agar-agar instead of gelatin?
Yes! Agar-agar is a great plant-based alternative. Just remember it sets differently—you’ll need to boil it and adjust quantities based on the brand.
2. How long do marshmallows take to set?
They usually need at least 6 hours, but overnight is best for a firm and fluffy texture.
3. Why are my marshmallows sticky?
Most likely, they weren’t dusted enough with powdered sugar and cornstarch. Also, high humidity can make them sticky—store them in a cool, dry place.
4. Can I freeze homemade marshmallows?
Absolutely. Wrap them tightly and store in a freezer-safe bag for up to 3 months. Let them thaw at room temperature before using.
5. What’s the best way to cut marshmallows?
Use a greased knife or scissors. Dust the marshmallow block with powdered sugar before cutting to prevent sticking.
Conclusion
Marshmallows may seem like a mystery wrapped in fluff, but making them at home is surprisingly doable—and totally worth it. From prepping your kitchen and whipping the perfect sugar fluff to experimenting with colors, flavors, and decorations, every step brings you closer to the perfect batch of melt-in-your-mouth treats.
Not only do homemade marshmallows taste leagues better than store-bought ones, they also give you the freedom to get creative, make thoughtful gifts, or even customize them for different dietary needs. Plus, the satisfaction of watching sugar and gelatin turn into fluffy clouds? Pure kitchen magic.
So next time you’re craving something sweet or planning a party, skip the bagged marshmallows and whip up your own batch. Trust me, you’ll never go back.

