Marshmallow Food Recipe: Is there anything more nostalgic than the soft, gooey goodness of a marshmallow? Whether it’s roasting them over a fire, plopping them into a mug of hot cocoa, or munching on them right out of the bag, marshmallows are the ultimate treat. But here’s the twist — homemade marshmallows? Game-changer. If you’ve never tasted one made from scratch, you’re in for a fluffy, pillowy surprise that blows store-bought versions out of the water.
Making marshmallows at home may sound intimidating, but it’s surprisingly straightforward with the right guidance. The process is part science, part magic — transforming basic ingredients into sugary clouds of joy. And the best part? You can customize them however you like — from classic vanilla to peppermint, chocolate-dipped, or even cocktail-flavored.
In this comprehensive guide, you’ll learn how to make marshmallows step by step, with clear instructions, expert tips, and some fun variations you can try once you’ve mastered the basics. Ready to whip up a batch of marshmallow heaven? Let’s dive in.
Ingredients You’ll Need
Before you get started, it’s crucial to gather all the ingredients. Marshmallows don’t require a long shopping list, but precision matters.
Basic Ingredients:
- Unflavored gelatin: You’ll need about 3 packets (each usually 0.25 oz or 7g).
- Granulated sugar: Approximately 2 cups.
- Light corn syrup: 1 cup — helps prevent crystallization and adds that signature chew.
- Water: You’ll need it in two parts — one for the gelatin, one for the syrup.
- Salt: Just a pinch to balance the sweetness.
- Vanilla extract: 1 tablespoon for a classic flavor.
Optional Flavorings & Additions:
- Peppermint extract or almond extract for twists.
- Cocoa powder or melted chocolate for a chocolaty vibe.
- Food coloring for festive or themed batches.
- Toasted coconut, crushed nuts, or sprinkles for coatings.
- Powdered sugar and cornstarch mix (1:1 ratio): For dusting and storing.
When choosing ingredients, quality matters. Use pure vanilla extract, not imitation. If you’re going for flavoring oils or colorings, pick food-grade products specifically designed for candy making.
Tools and Equipment
Let’s talk about gear. Having the right tools makes this process smoother and safer.
Essential Tools:
- Stand mixer with whisk attachment: Absolutely key. A hand mixer can work, but it’s tough and takes much longer.
- Candy thermometer: You’ll need to reach precise temperatures for the sugar syrup.
- Saucepan: A medium-sized, heavy-bottomed one is best to avoid scorching.
- Rubber spatula: For scraping and folding — go for heat-resistant.
- 8×8 or 9×13 inch pan: Depending on how thick or thin you want the marshmallows.
- Parchment paper or silicone mat: Makes removing the marshmallows a breeze.
- Fine mesh sieve: For dusting the pan and marshmallows with powdered sugar/cornstarch.
Helpful Tips:
- Prep your workspace ahead of time. Marshmallow making moves fast once the sugar hits the right temp.
- Make sure your mixer bowl is dry and clean before you start.
- Lightly oil your spatulas and tools — marshmallow is sticky business!
Getting organized will prevent sticky disasters and ensure a smooth, stress-free candy-making experience.
Preparing the Gelatin Base
This is where the magic begins. The gelatin provides the structural base of your marshmallows and helps trap air for that perfect fluffy texture.
Step-by-Step Gelatin Prep:
- In the bowl of your stand mixer, pour ½ cup of cold water.
- Sprinkle the 3 packets of unflavored gelatin evenly over the water.
- Let it sit for 10–15 minutes. This is called “blooming” and it’s crucial — you’re hydrating the gelatin so it dissolves properly later.
Why Timing is Essential:
If you try to rush or skip blooming the gelatin, it won’t dissolve completely, and you’ll end up with gritty, unpleasant texture in your final marshmallows. On the flip side, letting it sit too long before adding the hot syrup can cause it to dry out or clump.
You can prep this step while your sugar syrup is heating. Once the syrup is ready, you’ll pour it directly into the bloomed gelatin and start whipping. Timing and readiness are key.
Making the Sugar Syrup
This is the part that scares most first-timers — but it’s also the most exciting. You’ll be cooking sugar to a specific temperature, then whipping it into a foamy, marshmallowy cloud.
Ingredients for Syrup:
- 2 cups granulated sugar
- 1 cup light corn syrup
- ½ cup water
- Pinch of salt
Cooking Process:
- Combine the sugar, corn syrup, water, and salt in your saucepan.
- Heat over medium-high, stirring until the sugar dissolves.
- Once dissolved, stop stirring and insert the candy thermometer.
- Let it bubble up until it reaches 240°F (soft-ball stage) — this usually takes 8–10 minutes.
- Remove from heat immediately.
Important Tips:
- Don’t stir once the sugar starts boiling — this causes crystallization.
- Be careful — molten sugar is extremely hot.
- Keep your mixer ready, because timing matters right after this step.
Once it hits the right temp, you’ll slowly pour the syrup into the gelatin base while whipping at low speed — then crank it up and watch the magic happen.
Whipping the Marshmallow Mixture
Here’s where it gets exciting — and a little noisy. Whipping the hot sugar syrup into the gelatin transforms the liquid into a thick, glossy, marshmallowy fluff.
Steps to Whipping:
- With the mixer on low speed, slowly pour the hot syrup into the bloomed gelatin.
- Once it’s all in, increase the speed to high.
- Beat for 10–12 minutes, or until the mixture becomes very thick and almost tripled in volume.
- When it starts to cool and look like thick marshmallow fluff, add your vanilla extract (or other flavoring) and beat for another minute.
Tips for the Perfect Fluff:
- Don’t under-whip — the longer you beat it (within reason), the fluffier and firmer your marshmallows will be.
- Add colorings or mix-ins during the last minute of whipping.
- Avoid over-mixing after it cools too much — it’ll start to set in the bowl.
Once it hits the right consistency — thick, glossy, and forming stiff peaks — it’s time to transfer it to your prepared pan. You’ll need to move quickly before it sets.
Pouring and Setting the Marshmallows
Pouring the marshmallow mixture into your pan isn’t like pouring cake batter — it’s sticky, stretchy, and sets up fast. Here’s how to do it without a mess.
Step-by-Step Guide:
- Lightly grease your baking dish and line it with parchment paper. Dust with a mix of powdered sugar and cornstarch.
- Using an oiled spatula, scrape the marshmallow mixture into the pan. Smooth it out as best as you can.
- Dust the top with more powdered sugar/cornstarch.
- Let it sit uncovered at room temperature for 6 to 8 hours, or preferably overnight.
Why This Step Matters:
This resting period allows the marshmallows to firm up. Don’t refrigerate them — the humidity can mess with the texture. Patience is key for the best results.
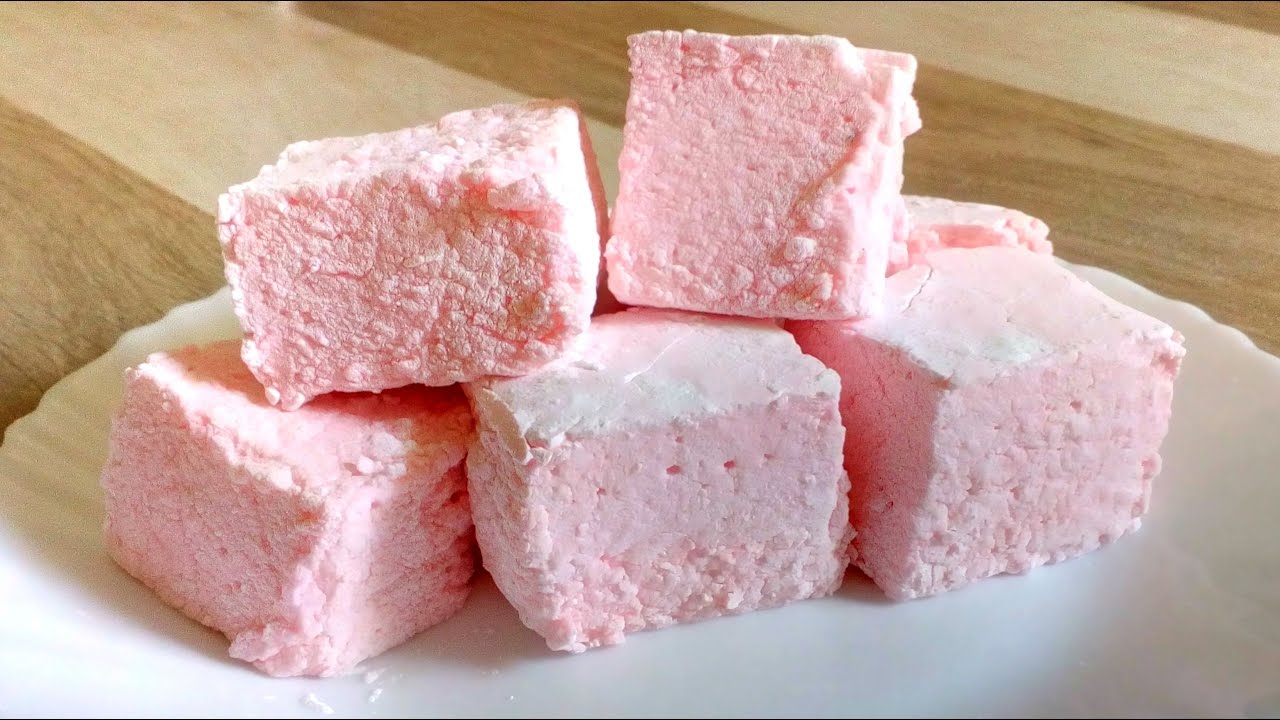
Cutting and Dusting
Once your marshmallows are fully set, it’s time for the fun part — cutting them into soft, bouncy squares of joy.
How to Cut:
- Dust a sharp knife or pizza cutter with powdered sugar/cornstarch.
- Lift the marshmallow slab out of the pan using the parchment paper.
- Cut into squares of your desired size. Dust the sticky sides as you go.
Storage Tips:
- Store marshmallows in an airtight container at room temperature.
- They’ll keep fresh for about 2 to 3 weeks — if they last that long!
If you want to get fancy, dip them in chocolate, sprinkle with crushed candy canes, or toast the edges with a kitchen torch for an artisanal touch.
Fun Variations to Try
One of the best parts about making your own marshmallows is how customizable they are. You’re not stuck with vanilla — go wild!
Flavor Variations:
- Peppermint swirl: Add a few drops of peppermint extract and swirl in red food coloring.
- Cocoa powder marshmallows: Mix in a tablespoon or two of unsweetened cocoa powder during whipping.
- Coconut marshmallows: Coat with toasted coconut flakes instead of cornstarch.
- Boozy bites: Use bourbon, Kahlúa, or flavored liqueurs as part of the liquid (in small amounts).
Holiday Themed:
- Pumpkin spice for fall
- Red and green swirl for Christmas
- Heart-shaped marshmallows with strawberry extract for Valentine’s Day
Let your imagination guide you — the possibilities are endless!
Using Marshmallows in Recipes
Homemade marshmallows are delicious on their own, but they also elevate other desserts. Their texture and flavor shine in baked goods, drinks, and snacks.
Recipe Ideas:
- S’mores: Level up the classic by sandwiching your marshmallows with gourmet chocolate between buttery graham crackers. Toasting homemade marshmallows gives them an even richer flavor.
- Hot Chocolate: Drop a few marshmallow cubes into a steaming mug for the ultimate winter treat. They melt beautifully and form a dreamy topping.
- Marshmallow Frosting: Melt marshmallows slightly and whip them into frosting or use as a soft topping on brownies, cookies, or cupcakes.
- Cereal Treats: Substitute store-bought marshmallows with homemade ones in your Rice Krispies Treats for a seriously upgraded snack.
- Baking Fillings: Use them inside muffins or cupcakes for a surprise gooey center. They puff up slightly during baking and add a melty, sweet bite.
Creative Desserts:
Try making marshmallow-stuffed cookies, dipping them in chocolate and crushed nuts, or even using them in homemade ice cream. The flexibility of homemade marshmallows opens the door to tons of unique creations.
Storing and Preserving Homemade Marshmallows
Proper storage helps keep your marshmallows fresh and fluffy for as long as possible. While they don’t have the shelf life of commercial varieties, with the right approach, you can still enjoy them for weeks.
Storage Tips:
- Use an airtight container. Exposure to air causes marshmallows to dry out and harden.
- Layer with parchment paper. Prevents them from sticking together.
- Keep at room temperature. Avoid the fridge or freezer — humidity can ruin the texture.
Shelf Life:
- When stored properly, homemade marshmallows last up to 3 weeks.
- If they start to feel stiff, a quick toast or gentle warm-up in a microwave can bring them back to life.
Avoid sealing them while they’re still even slightly warm or moist — that invites mold and stickiness.
Troubleshooting Common Issues
First time making marshmallows and ran into a problem? Don’t worry — here are some common issues and how to fix them.
Problem: Marshmallows are too sticky
- Cause: Not enough dusting with powdered sugar and cornstarch.
- Fix: Toss the cut pieces again in the sugar/cornstarch mix.
Problem: Marshmallows didn’t set
- Cause: Under-whipped mixture or syrup didn’t reach the correct temperature.
- Fix: Double-check your candy thermometer and always beat the mixture until thick and voluminous.
Problem: Marshmallows are grainy
- Cause: Sugar crystals forming in the syrup.
- Fix: Don’t stir once sugar dissolves; brush down sides of the pot with a wet brush while cooking.
Problem: Marshmallows too firm or rubbery
- Cause: Overcooked syrup or using too much gelatin.
- Fix: Stick closely to the temperature guidelines and measure ingredients accurately.
Making marshmallows can take a little practice, but once you get the feel for it, the results are always worth it.
FAQs About Marshmallow Food Recipe
1. Can I make marshmallows without a candy thermometer?
Yes, but it’s tricky. The sugar syrup must reach the “soft-ball stage” (around 240°F or 115°C). Without a thermometer, test by dropping a bit of syrup into cold water—it should form a soft, pliable ball.
2. How long do homemade marshmallows last?
Stored in an airtight container at room temperature, homemade marshmallows can last up to 2–3 weeks. Avoid refrigeration, as it can make them sticky.
3. Are homemade marshmallows gluten-free?
Most homemade marshmallow recipes are naturally gluten-free. Just be sure to use certified gluten-free ingredients if you have a gluten intolerance.
4. Can I flavor marshmallows with extracts or fruit?
Absolutely! You can add vanilla, peppermint, strawberry, or other flavor extracts. For fruity flavors, use concentrated fruit purée or zest for best results.
5. Why are my marshmallows not fluffy?
The most common reasons are under-whipping the mixture or not heating the sugar syrup enough. Make sure to beat until stiff peaks form and the mixture holds shape.
6. What’s the best way to cut homemade marshmallows?
Dust a sharp knife and the marshmallow surface with powdered sugar or cornstarch to prevent sticking. You can also use cookie cutters for fun shapes.
7. Can I use agar-agar instead of gelatin?
Yes, for a vegetarian option, agar-agar can substitute gelatin. However, the texture will be firmer and slightly less bouncy.
8. Can I toast homemade marshmallows?
Yes! Homemade marshmallows toast beautifully over a fire or under a broiler. They melt slightly faster than store-bought ones, so watch them closely.
9. Is corn syrup necessary in marshmallow recipes?
Corn syrup helps prevent crystallization and keeps the texture smooth. You can substitute it with honey or golden syrup, but it may slightly alter the taste and texture.
10. Can I freeze homemade marshmallows?
Technically yes, but it’s not ideal. Freezing can cause condensation when thawing, leading to sticky or mushy marshmallows. It’s best to store them at room temperature.
Conclusion
There’s something incredibly satisfying about making marshmallows from scratch. From watching sugar syrup transform into fluffy white clouds to slicing perfect cubes and savoring the first bite — it’s part science, part art, and all delicious.
Homemade marshmallows are not only tastier than store-bought, but they’re also customizable and make fantastic gifts. Whether you keep them classic or experiment with colors, flavors, and textures, you’ll find they add a touch of homemade magic to everything from s’mores to cocoa.
So roll up your sleeves, break out the mixer, and create a batch of marshmallow joy today. Once you taste your own, you’ll never go back.