Marble Cake Recipe: Isn’t there something just so magical about marble cake? It’s like the best of both worlds — the rich flavor of chocolate and the lightness of vanilla, all swirled together into a stunning, edible piece of art. Whether you’re a baking newbie or a seasoned pro, marble cake is a must-have in your baking arsenal.
What Makes Marble Cake So Special?
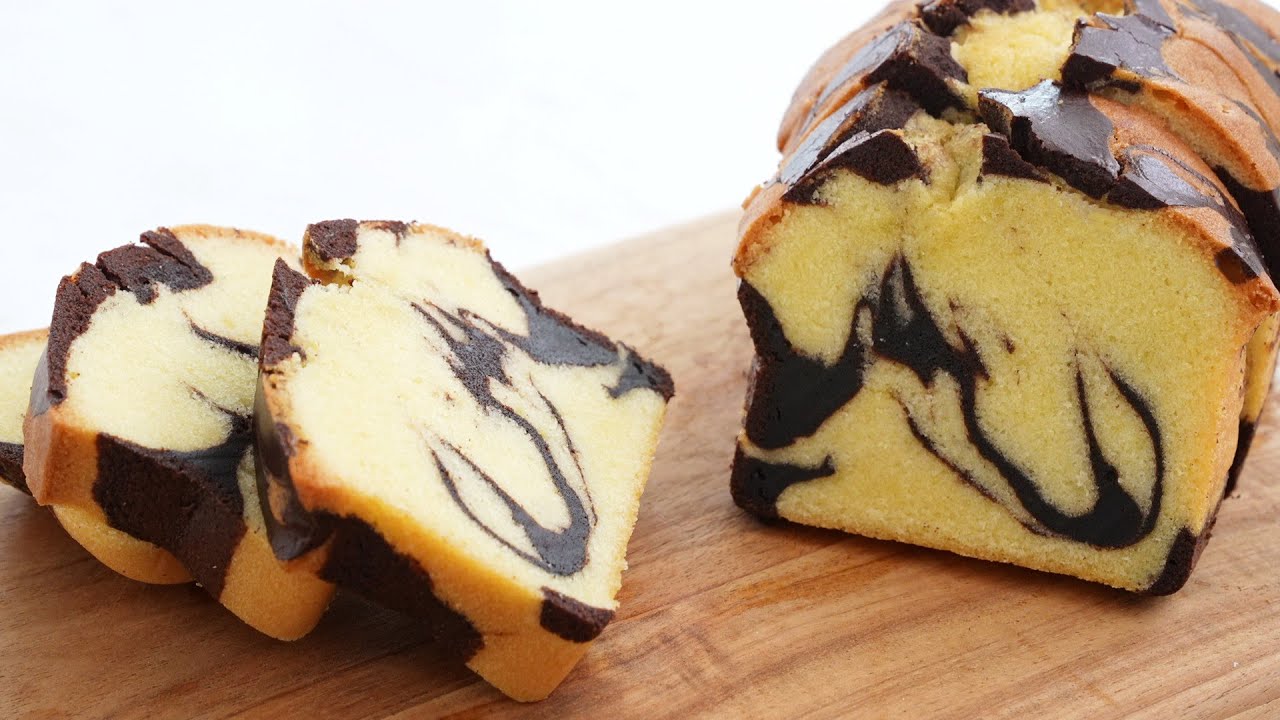
The beauty of marble cake lies in its delicious contrast. One bite gives you a rich taste of chocolate, while the next teases your taste buds with buttery vanilla goodness. Plus, that stunning swirl? Total showstopper! It’s perfect for birthdays, brunches, or just because you need a little sweet pick-me-up.
Origin of Marble Cake
Marble cake has a pretty rich history (pun totally intended). It originated in 19th-century Germany and made its way to America with German immigrants. Traditionally, it was made with molasses and spices, but over time, the chocolate-vanilla combination became the most loved version.
Ingredients You Will Need
Before you dive in, let’s gather everything you need. Spoiler: You probably have most of it already!
Basic Ingredients for Marble Cake
Here’s your grocery list:
- 2 ½ cups all-purpose flour
- 2 ½ teaspoons baking powder
- ½ teaspoon salt
- 1 cup unsalted butter (room temperature)
- 1 ¾ cups granulated sugar
- 4 large eggs
- 1 tablespoon vanilla extract
- 1 cup whole milk
- ¼ cup cocoa powder
- 2 tablespoons hot water
Optional Add-ons and Variations
Want to jazz it up? Here are a few ideas:
- Chocolate chips for extra bursts of chocolate
- Almond extract for a nutty twist
- Coffee in the chocolate batter for a mocha flavor
Essential Tools for Baking Marble Cake
You don’t need a fancy bakery setup — just a few kitchen basics:
- Mixing bowls
- Electric mixer or a good old whisk
- Measuring cups and spoons
- Rubber spatula
- 9×5 inch loaf pan or a bundt pan
- Toothpick (for doneness testing)
- Cooling rack
Step-by-Step Guide to Making Marble Cake
Ready? Let’s get baking! Follow these simple steps, and you’ll have a gorgeous marble cake in no time.
Step 1: Preparing the Ingredients
Start by preheating your oven to 350°F (175°C). Grease and flour your baking pan so nothing sticks. Then, in a medium bowl, whisk together the flour, baking powder, and salt. Set it aside — you’ll come back to it soon!
Step 2: Mixing the Batter
In a large bowl, cream the butter and sugar together until it’s light and fluffy. This step is key for a soft, airy cake! Beat in the eggs one at a time, making sure each egg is fully incorporated before adding the next. Stir in the vanilla extract.
Next, gradually add the dry ingredients alternately with the milk. Start and end with the flour mixture. Mix just until combined — don’t overmix, or you’ll end up with a tough cake!
Step 3: Dividing and Coloring the Batter
Now, here comes the fun part. Divide the batter into two bowls. In one bowl, mix the cocoa powder with the hot water until smooth, and then stir it into the batter. Now you have one chocolate batter and one vanilla batter!
Step 4: Creating the Marble Effect
Spoon dollops of each batter alternately into the prepared pan. Once all the batter is in, take a knife or a skewer and swirl it gently through the batter to create that beautiful marbled effect. Don’t overdo it — a few good swirls are all you need!
Step 5: Baking the Cake
Pop the pan into your preheated oven and bake for about 50-60 minutes. Keep an eye on it towards the end — when a toothpick inserted in the center comes out clean, it’s done!
Step 6: Cooling and Serving
Let the cake cool in the pan for about 15 minutes before transferring it to a wire rack to cool completely. Slice it up and serve with a cup of tea, coffee, or even a dollop of whipped cream!
Tips for a Perfect Marble Cake
Want a cake that looks like it came straight out of a bakery? Here’s how.
Common Mistakes to Avoid
- Overmixing the batter: It can ruin the texture.
- Swirling too much: You’ll lose the marble effect.
- Wrong pan size: Could cause uneven baking.
- Not preheating the oven: Leads to uneven rise.
How to Keep Your Cake Moist and Fluffy
- Always use room temperature ingredients.
- Don’t overbake — start checking early!
- Store the cake properly to retain moisture.
Serving Suggestions and Pairings
- A scoop of vanilla ice cream alongside? Heaven!
- Drizzle some chocolate ganache over it for extra indulgence.
- Fresh berries like raspberries or strawberries add a nice tartness.
FAQs about Marble Cake Recipe
What is a marble cake made of?
Marble cake is typically made from a classic vanilla cake batter, with a portion of it mixed with cocoa powder to create the chocolate swirl effect. The two batters are lightly combined to form a beautiful marble pattern.
How do you create the marble effect in a cake?
To achieve the marble effect, pour alternating spoonfuls of vanilla and chocolate batter into your pan. Then, gently swirl a knife or skewer through the batters. Be careful not to overmix, or you’ll lose the distinct marbled look.
Can I use a cake mix for marble cake?
Yes! You can easily make marble cake using a store-bought cake mix. Simply prepare a vanilla cake mix, separate a portion, and add cocoa powder to it before swirling them together.
Why is my marble cake dry?
A dry marble cake usually results from overbaking or using too much flour. Make sure to measure ingredients accurately and check the cake a few minutes before the recommended baking time is up.
How do I store marble cake?
Store marble cake in an airtight container at room temperature for up to 3 days. For longer storage, you can refrigerate it for up to a week or freeze it for up to 2 months.
Can I make marble cake without cocoa powder?
If you don’t have cocoa powder, you can substitute it with melted chocolate. Just mix the melted chocolate into a portion of the batter to create a rich, marbled effect.
Conclusion
There you have it — a stunning, moist, and incredibly delicious marble cake that looks fancy but is actually super simple to make. With this step-by-step guide, you’ll be swirling like a pro and impressing your friends and family in no time. Happy baking!


