Lemon Tart Recipe: There’s something about a lemon tart that instantly captures attention. Maybe it’s the bright, cheerful yellow that suggests sunshine on a plate, or the balance of tangy and sweet flavors that feels like a gentle wake-up call to your taste buds. Lemon tarts are the perfect dessert for any occasion, offering both elegance and a punch of citrusy refreshment. They strike the ideal balance between sophistication and simplicity, making them suitable for everything from afternoon tea parties to formal dinners.
Whether you’re a seasoned baker or a complete beginner, a lemon tart is one of those recipes that offer a high reward for a relatively low effort. The best part? It looks like you’ve slaved away for hours, but in reality, it’s quite a straightforward process when broken down into steps.
Why You’ll Love This Recipe
This lemon tart recipe is made for those who appreciate desserts that aren’t cloyingly sweet. The crust is buttery and slightly crisp, while the filling is smooth, zesty, and refreshing. We’ve broken it down into a step-by-step guide, so even if you’ve never baked a tart before, you’ll be able to pull this off like a pro. With just a few basic ingredients and tools, you’ll end up with a dessert that’s bakery-worthy in both taste and appearance.
Ingredients You’ll Need
For the Tart Crust
- 1 1/4 cups all-purpose flour
- 1/2 cup unsalted butter, cold and cubed
- 1/4 cup powdered sugar
- 1/4 tsp salt
- 1 egg yolk
- 1-2 tbsp ice water
This crust is similar to a shortbread crust: crumbly, rich, and holds up well to wet fillings like lemon curd. Using cold butter is key—it ensures that the crust turns out flaky rather than tough. The powdered sugar helps provide a smooth texture and delicate sweetness.
For the Lemon Filling
- 1 cup granulated sugar
- 3 large eggs
- 1/2 cup freshly squeezed lemon juice (about 3-4 lemons)
- 1 tbsp lemon zest
- 1/2 cup heavy cream
The filling is the heart of the tart. Fresh lemon juice and zest are non-negotiable here—they’re what give the tart its vibrant flavor. The eggs help set the filling into a soft, custardy texture, while the heavy cream adds richness and smoothness.
Equipment You’ll Need
- 9-inch tart pan with removable bottom
- Mixing bowls
- Whisk
- Food processor (optional for the crust)
- Rolling pin
- Fine grater or zester
- Saucepan
- Oven
Having the right tools makes the process smoother and more enjoyable. A tart pan with a removable bottom is especially useful for a clean presentation when serving.
Step-by-Step Guide to Making Lemon Tart
Step 1: Preparing the Tart Crust
Start by making the tart crust, which forms the buttery, crumbly foundation for your filling. If you’re using a food processor, combine the flour, powdered sugar, and salt, then add the cold, cubed butter. Pulse until the mixture resembles coarse breadcrumbs. If doing this by hand, use a pastry cutter or your fingertips to rub the butter into the flour mixture.
Next, add the egg yolk and pulse or mix until the dough just begins to come together. Add ice water, one tablespoon at a time, if needed. The goal is to have a dough that holds its shape when pressed but isn’t sticky.
Form the dough into a disc, wrap it in plastic wrap, and chill it in the refrigerator for at least 30 minutes. This step is essential to prevent shrinking when baking and helps the butter firm up, ensuring a flaky texture.
After chilling, roll out the dough on a lightly floured surface into a 12-inch circle. Carefully lift it into your tart pan, pressing it gently into the bottom and sides. Trim the excess and use a fork to prick the base—this helps prevent bubbling.
Step 2: Blind Baking the Crust
Blind baking is a must for lemon tarts. It ensures that the crust holds its shape and doesn’t get soggy once the lemon filling is added. Preheat your oven to 375°F (190°C). Line the crust with parchment paper or foil and fill it with pie weights, dried beans, or even rice.
Bake for 15 minutes, then remove the weights and parchment and bake for another 10 minutes, or until the crust is lightly golden. Remove from the oven and let it cool while you prepare the filling.
This two-step baking ensures a crisp crust that’s golden and sturdy—ideal for holding that luscious lemon filling.
Step 3: Making the Lemon Filling
While the crust cools, it’s time to whip up the lemon filling. In a medium bowl, whisk together the sugar and eggs until pale and slightly thickened. This aeration helps create a light, silky filling. Stir in the lemon juice, zest, and heavy cream until well combined.
Pour the mixture into a saucepan and heat it gently over medium-low heat, whisking constantly. You’re not cooking it fully—just warming it enough to begin thickening slightly. This pre-cooking helps the tart set better in the oven.
Once it’s slightly thickened (it should coat the back of a spoon), remove from heat and strain it through a fine mesh sieve. This removes any zest clumps or cooked egg bits, ensuring a smooth, glossy finish.
Step 4: Filling and Baking
Pour the warm lemon filling into the cooled tart crust. Tap the tart pan gently on the counter to release any air bubbles. Place it back in the oven at 325°F (163°C) and bake for 20-25 minutes, or until the edges are set and the center slightly jiggles like gelatin.
Do not overbake! The tart will continue to set as it cools, and overbaking can lead to cracks or a rubbery texture. Let it cool at room temperature, then refrigerate for at least 2 hours to fully set.
Step 5: Cooling and Serving
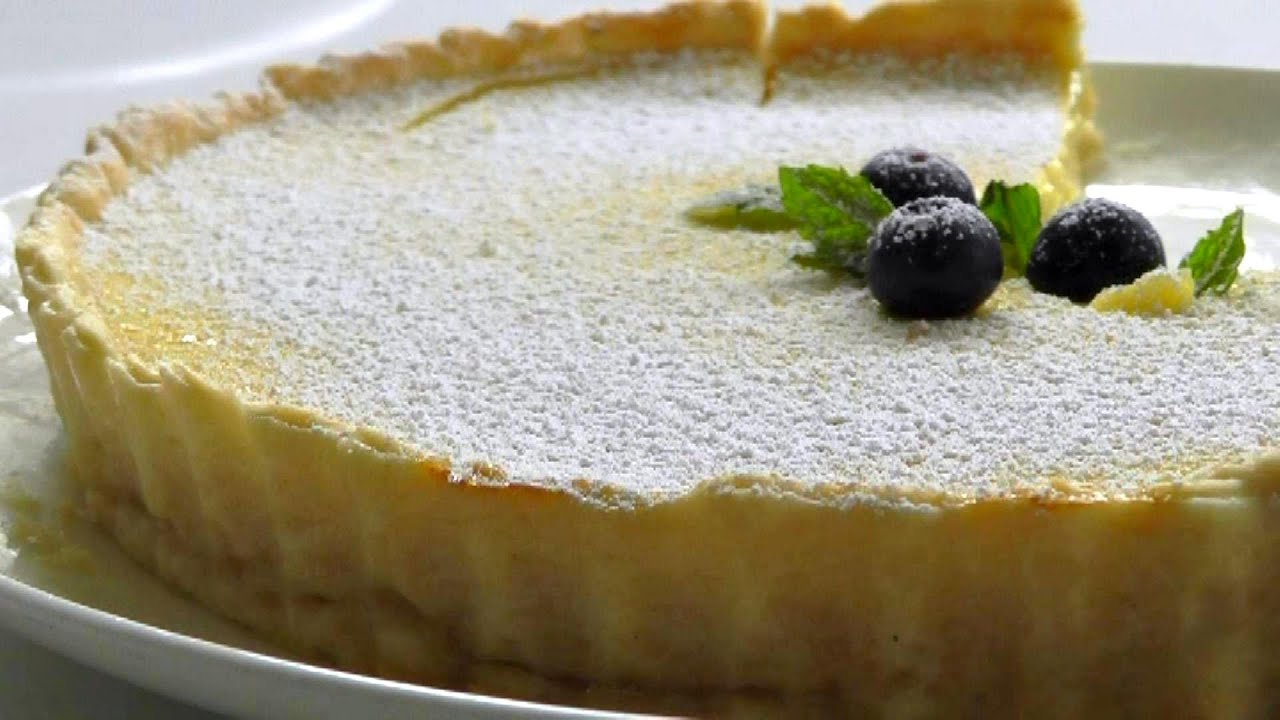
Once chilled, remove the tart from the pan and transfer it to a serving plate. You can garnish it with a dusting of powdered sugar, a few lemon slices, or fresh berries for a pop of color and flavor.
When sliced, the lemon filling should hold its shape but still be soft and creamy. Serve it cold or at room temperature with a dollop of whipped cream or a scoop of vanilla ice cream if you want to go the extra mile.
Tips for the Perfect Lemon Tart
Achieving the Right Consistency
The key to a standout lemon tart lies in the consistency of the filling. It should be velvety, smooth, and just firm enough to hold its shape when sliced. Achieving this balance requires a bit of technique and patience. First, always strain your lemon filling before pouring it into the crust—this step might seem minor, but it makes a world of difference. It removes zest bits, curdled egg, and ensures that the final result is silky and glossy.
Use fresh lemon juice rather than bottled, as the natural acidity and vibrant aroma of fresh lemons are irreplaceable. While heating the filling, go low and slow. High heat can scramble the eggs, giving you a lumpy texture. Stir constantly with a whisk to avoid hot spots and overcooking.
Also, don’t skip the chilling process. Cooling the tart thoroughly allows the filling to set into that perfect custardy consistency. It’s tempting to cut into it right away, but letting it chill ensures clean slices and the best flavor experience.
Avoiding a Soggy Bottom
No one wants a lemon tart with a soggy crust. That crisp bite is part of what makes this dessert so delightful. The best way to prevent a soggy bottom is through proper blind baking. Make sure you bake the tart crust long enough—until it’s a light golden brown before adding your lemon filling.
You can also brush the inside of the baked tart shell with a lightly beaten egg white and return it to the oven for 2-3 minutes. This step creates a seal between the crust and the filling, adding an extra layer of protection against moisture.
Another tip: make sure your filling isn’t too runny before adding it to the crust. If you’ve followed the steps correctly and pre-thickened it slightly on the stove, this shouldn’t be an issue. And finally, let your tart cool completely before transferring it to the fridge. Placing a hot tart in the fridge can cause condensation, leading to a soggy base.
Variations to Try
Lemon Meringue Tart
Love a little drama on your desserts? Add a meringue topping! After the lemon tart has baked and cooled slightly, whip up a meringue using egg whites and sugar. Spoon or pipe it on top of the tart, then use a kitchen torch or broiler to give it that signature golden-brown finish. The fluffy, sweet meringue adds a cloud-like contrast to the tart lemon base.
Mini Lemon Tarts
Want to serve individual portions at a party? Make mini lemon tarts using a muffin tin or small tart pans. The process is the same, but you’ll portion out the dough into smaller cups and adjust the baking time accordingly. They’re cute, convenient, and great for serving at gatherings.
Mini tarts also offer a fun opportunity to get creative with garnishes. Think tiny mint sprigs, candied lemon peel, or even edible flowers. Plus, since they’re bite-sized, you can go ahead and have two (or three) without guilt.
Storage and Shelf Life
A lemon tart is one of those desserts that stores beautifully. Once cooled and set, you can keep it in the refrigerator for up to 4 days. Just make sure it’s covered with plastic wrap or stored in an airtight container to prevent it from absorbing any fridge odors.
If you want to make it in advance, you can prepare the tart crust a day or two before and store it at room temperature, wrapped tightly. You can even freeze the baked crust for up to a month. The lemon filling is best made fresh, but the assembled tart can be made a day in advance and chilled until ready to serve.
Freezing a fully assembled tart is possible, but it’s not ideal. The texture may suffer slightly upon thawing. If you must freeze it, wrap it well in plastic wrap and foil, then thaw it in the refrigerator overnight before serving.
FAQs about Lemon Tart Recipe
Can I make lemon tart ahead of time?
Absolutely. You can make the crust a day or two in advance and store it in an airtight container at room temperature. The entire tart can be assembled and baked a day before serving—just keep it refrigerated. It actually tastes even better the next day once all the flavors have had time to meld.
What type of lemons should I use?
Fresh lemons are best for this recipe. Meyer lemons offer a slightly sweeter, less acidic flavor, while regular Eureka or Lisbon lemons provide that classic tart punch. Avoid bottled lemon juice—it lacks the vibrant flavor and aroma needed for a standout tart.
Can I freeze lemon tart?
Yes, you can freeze a fully baked and cooled lemon tart. Wrap it tightly in plastic wrap and aluminum foil. When ready to serve, thaw it in the refrigerator overnight. However, note that the texture may be slightly different from a fresh tart.
How do I prevent my crust from shrinking?
Chilling the dough thoroughly before rolling it out and again before baking helps prevent shrinkage. Also, don’t stretch the dough to fit the pan—press it gently into place. Using pie weights during blind baking is another effective trick.
Is lemon tart supposed to be served cold or warm?
Lemon tart is traditionally served cold or at room temperature. This allows the filling to set properly and develop its full flavor. Chilling also helps the tart slice cleanly and hold its shape.
Conclusion
The beauty of a lemon tart is its versatility. You can dress it up with a glossy meringue topping, fresh berries, or a simple dusting of powdered sugar. It’s as at home on a fancy dessert table as it is on a casual picnic blanket. The balance of tart and sweet, creamy and crisp, makes it a crowd-pleaser that’s hard to resist.
So, gather your ingredients, preheat your oven, and get ready to bring a little sunshine to your table. And once you’ve mastered this version, don’t hesitate to put your own spin on it. After all, the best recipes are the ones that evolve with your personal touch.