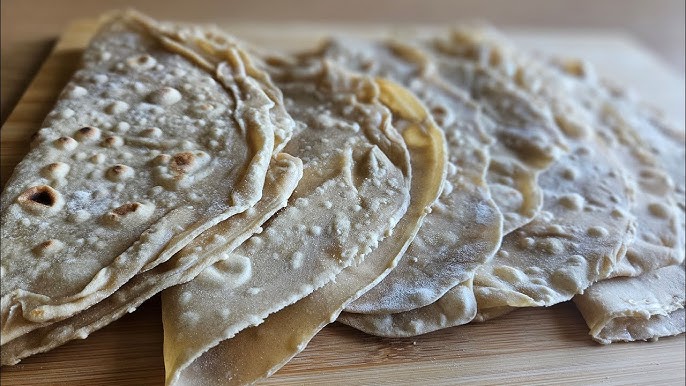
Lavash Bread Recipe: Lavash bread is a traditional thin flatbread, often soft and pliable but sometimes crisp, depending on how it’s prepared. It’s a staple in Armenian, Middle Eastern, and Central Asian cuisine, enjoyed with a wide range of dishes. Think of it as the ancestor of tortillas, pitas, and other flatbreads, but with its own unique texture and charm. Whether you want a wrap for kebabs or a crunchy base for dips, lavash fits the bill beautifully.
History and Origin of Lavash
Lavash has a rich history that dates back centuries, believed to have originated in Armenia and spread across the Middle East. It’s traditionally baked in a clay oven called a “tonir” or “tandoor.” In many cultures, lavash is more than food—it’s a symbol of heritage and hospitality. UNESCO even recognized Armenian lavash as an element of cultural heritage. Making lavash at home not only connects you to this deep history but also brings a touch of authenticity to your table.
Why You’ll Love Making Lavash at Home
Why settle for store-bought when you can make fresh lavash at home? Homemade lavash tastes fresher, smells amazing, and gives you complete control over ingredients. You can decide whether you want it soft and bendable for wraps or crisp and crunchy like crackers. Plus, making bread from scratch is therapeutic—it connects you with tradition and fills your home with irresistible aromas.
Ingredients You’ll Need
Essential Ingredients for Traditional Lavash
To make lavash, you need just a handful of basic ingredients:
- Flour (all-purpose or bread flour)
- Water (lukewarm)
- Yeast (active dry yeast or instant yeast)
- Salt (for flavor)
- Olive oil (optional, for added softness)
That’s it! Simple, pantry-friendly, and budget-friendly.
Substitutions and Variations
- Use whole wheat flour for a nuttier flavor and healthier version.
- Skip the yeast for an unleavened lavash (closer to crackers).
- Add herbs or spices (like sesame seeds, cumin, or nigella seeds) to boost flavor.
- Use yogurt or milk instead of water for a richer texture.
These variations let you customize lavash to suit your taste and dietary needs.
Tools and Equipment You’ll Need
To make lavash successfully, you’ll need:
- A mixing bowl
- A rolling pin (essential for thinness)
- A cast-iron skillet, baking stone, or oven tray
- A clean towel (to keep the bread soft)
If you want to stay traditional, a clay oven or tandoor is best, but a hot skillet does the trick beautifully at home.
Step-by-Step Guide to Making Lavash Bread
Step 1 – Preparing the Dough
Start by mixing lukewarm water, yeast, and a pinch of sugar in a bowl. Let it sit until it bubbles—this means the yeast is alive and ready. Then, add flour and salt, mixing until it comes together into a rough dough. The dough should be soft but not sticky. If it’s too wet, add a little more flour. If too dry, splash in some water. Getting the right consistency here is key for perfect lavash later.
Step 2 – Kneading the Dough Properly
Turn the dough out onto a floured surface and knead for about 8–10 minutes. Kneading develops gluten, which gives lavash its structure and chewiness. You’ll know the dough is ready when it’s smooth, elastic, and springs back when pressed lightly. If kneading feels tiring, think of it as a mini arm workout that pays off with delicious bread.
Step 3 – First Rise and Resting Period
Place the kneaded dough in a lightly oiled bowl, cover with a damp cloth, and let it rise in a warm spot. It should double in size within 1 to 1.5 hours. This resting period allows the yeast to do its magic, making the dough airy and easy to roll out thinly. If you want lavash without yeast, just skip this step and rest the dough for 20 minutes instead.
Step 4 – Rolling Out the Dough
Once your dough has risen, punch it down gently to release the air. Divide it into small portions—each portion will be one lavash bread. Lightly flour your work surface and rolling pin, then roll out each portion as thin as possible. The thinner, the better, because authentic lavash is known for its paper-thin texture. If you want it pliable (like a wrap), keep it slightly thicker; if you prefer it crispy (like a cracker), roll it ultra-thin. Take your time here—this step makes or breaks the texture.
A useful trick is to rotate the dough as you roll, ensuring it stays even and doesn’t stick. Don’t worry if your lavash isn’t a perfect circle or rectangle—its rustic shape is part of the charm.
Step 5 – Cooking the Lavash Bread (Oven, Skillet, or Tandoor Method)
There are a few different ways to cook lavash, and each gives a slightly different result:
- Skillet Method (most convenient): Heat a heavy skillet or cast-iron pan over medium-high heat. Place the rolled-out dough onto the hot surface. Cook for 30–60 seconds until bubbles form, then flip and cook the other side.
- Oven Method: Preheat your oven to 475°F (245°C). Place rolled-out dough on a hot baking stone or tray. Bake for about 2–3 minutes until puffed and lightly browned.
- Traditional Tandoor Method: If you’re lucky enough to have a clay oven, slap the dough against the hot wall. It cooks in seconds, developing smoky flavors and charred spots.
Cooking is quick—so keep an eye on it. You want nice golden spots without burning.
Step 6 – Cooling and Storing Lavash
As soon as your lavash comes off the heat, decide whether you want it soft or crisp:
- To keep it soft, stack the breads and cover them with a clean towel. The steam will keep them pliable, perfect for wraps.
- To make them crispy, let them cool uncovered. They’ll harden into cracker-like bread, ideal for snacking with dips.
Store cooled lavash in an airtight container or wrap in foil. It stays fresh for 2–3 days at room temperature, a week in the fridge, or up to a month in the freezer. To reheat, simply warm it on a skillet for 30 seconds, and it’s as good as new.
Tips and Tricks for Perfect Lavash Every Time
How to Get That Signature Thinness
The hallmark of lavash is its thinness. To achieve this, always roll on a floured surface and use a rolling pin with steady pressure. If the dough resists stretching, let it rest for 5 minutes, then continue rolling. Gluten relaxes with time, making it easier to achieve thin sheets.
Avoiding Common Mistakes
- Don’t use cold water—it prevents yeast from activating.
- Avoid over-flouring, which makes the bread dense.
- Don’t roll unevenly; thick spots will stay doughy, while thin spots might burn.
- If using the oven, make sure it’s fully preheated. A lukewarm oven won’t give that puff and golden spots.
Making Lavash Crispy vs. Soft
- For crispy lavash, roll super-thin and cook until fully golden.
- For soft lavash, roll slightly thicker and cover with a towel right after cooking.
This way, you can adjust the recipe based on whether you’re making wraps, chips, or a pizza base.
Serving Ideas for Lavash Bread
As a Wrap or Sandwich Base
Lavash makes an excellent wrap for meats, vegetables, or even breakfast fillings. Try stuffing it with grilled chicken, fresh veggies, and a drizzle of yogurt sauce. Roll it tightly, and you’ve got a portable, healthy meal.
With Dips and Spreads
Cut lavash into triangles, bake until crispy, and serve as chips with hummus, baba ganoush, or tzatziki. It’s healthier than store-bought chips and much more flavorful.
As a Pizza or Flatbread Base
Lavash doubles as a quick pizza base. Just top with sauce, cheese, and toppings of your choice, then bake for 5–7 minutes. It’s perfect for a weeknight dinner when you crave pizza without the long dough process.
Health Benefits of Lavash Bread
Nutritional Profile
Lavash is one of the simplest breads you can make, and that means its nutritional profile depends heavily on the ingredients you use. A classic recipe made with all-purpose flour provides carbohydrates for energy, small amounts of protein, and a little fiber. If you swap in whole wheat flour, you’ll add more vitamins, minerals, and dietary fiber, making it even healthier. Since it doesn’t require much fat or sugar, lavash is naturally lighter than many other breads.
Comparing Lavash to Other Breads
Compared to pita or naan, lavash is thinner and lower in calories per piece. Tortillas are similar, but lavash has a slightly more elastic texture when soft and a distinct crispiness when baked hard. Because it’s so versatile, you can replace many store-bought breads with lavash and reduce overall calorie intake without sacrificing satisfaction.
How to Make a Healthier Version
For a healthier twist, try these modifications:
- Use whole wheat flour for more fiber.
- Add chia seeds, flaxseeds, or sesame seeds for extra nutrients.
- Replace some water with plain yogurt for protein and probiotics.
- Use minimal oil or butter to keep it light.
These small changes transform lavash into a nutrient-packed bread that works with almost any diet.
Variations of Lavash Bread Around the World
Armenian Style Lavash
In Armenia, lavash is considered a cultural treasure. Traditionally baked in a clay tonir, the sheets are rolled paper-thin and cooked until lightly browned. Often, several women gather to prepare large batches, stacking them in tall piles that last for weeks. This style is usually softer and bendable, perfect for wrapping kebabs or cheeses.
Middle Eastern Flatbread Versions
In Iran and Turkey, lavash has cousins like sangak or yufka, which are also thin flatbreads but differ slightly in thickness and texture. Some versions are more rustic, baked on pebbles or hot stones, while others are designed to be crisp crackers. Across the Middle East, lavash is paired with stews, dips, or eaten with grilled meats.
Modern Twists and Creative Recipes
Today, lavash is making its way into modern kitchens worldwide. Some creative spins include:
- Using it as a wrap for sushi rolls instead of seaweed.
- Turning it into lavash chips seasoned with paprika or za’atar.
- Making lavash dessert wraps with honey, nuts, and cinnamon.
Its flexibility makes it one of the most adaptable breads for both traditional and contemporary recipes.
Storage and Reheating Tips
How to Store Fresh Lavash
Once your lavash cools, store it in an airtight container or wrap it tightly in foil. Keeping it covered prevents it from drying out too quickly. If you prefer it crisp, store it uncovered in a dry container.
Freezing and Defrosting Instructions
Lavash freezes exceptionally well. Stack pieces between parchment paper, wrap tightly in plastic or foil, and freeze for up to a month. To defrost, simply leave it at room temperature for 15 minutes, or heat it directly on a skillet.
Reheating Without Losing Texture
The best way to reheat lavash is in a hot skillet for 30–60 seconds. This revives both soft and crispy textures without making the bread soggy. Avoid microwaving—it makes lavash chewy and less appetizing.
FAQs about Lavash Bread Recipe
Q1: Can I make Lavash without yeast?
Yes! You can prepare unleavened lavash by skipping the yeast. It will be flatter, crispier, and more cracker-like, but still delicious.
Q2: How thin should Lavash be rolled out?
As thin as possible—almost see-through. The thinner it is, the closer you’ll get to authentic lavash.
Q3: Can I cook Lavash on a gas stove?
Absolutely. If you have a flat skillet or griddle, place it directly over a gas flame for that slightly charred effect.
Q4: Is Lavash bread vegan-friendly?
Yes. Traditional lavash contains only flour, water, salt, and yeast, which makes it naturally vegan.
Q5: What dishes pair best with Lavash?
Lavash pairs beautifully with grilled meats, hummus, cheese platters, and even as a base for quick homemade pizzas.
Conclusion
Lavash bread is more than just food—it’s history, tradition, and versatility all rolled into one. With just a few ingredients and simple steps, you can create soft wraps or crispy crackers right in your kitchen. Whether you enjoy it with dips, as a pizza base, or in its most traditional form, lavash proves that sometimes the simplest recipes are the most rewarding. So grab your flour, roll out some dough, and bring this timeless bread into your home.