Kitchen Sink Cookie Recipe: Everyone needs that one cookie recipe that becomes their secret weapon—and trust me, this kitchen sink cookie recipe is it. Why? Because you can literally throw in everything but the kitchen sink! These cookies are chewy, crispy-edged, sweet-salty masterpieces loaded with chocolate chips, pretzels, potato chips, nuts, and so much more. Whether you’re using leftovers from your pantry or crafting the ultimate snack-packed cookie, this step-by-step guide has you covered from start to finish.
What Are Kitchen Sink Cookies?
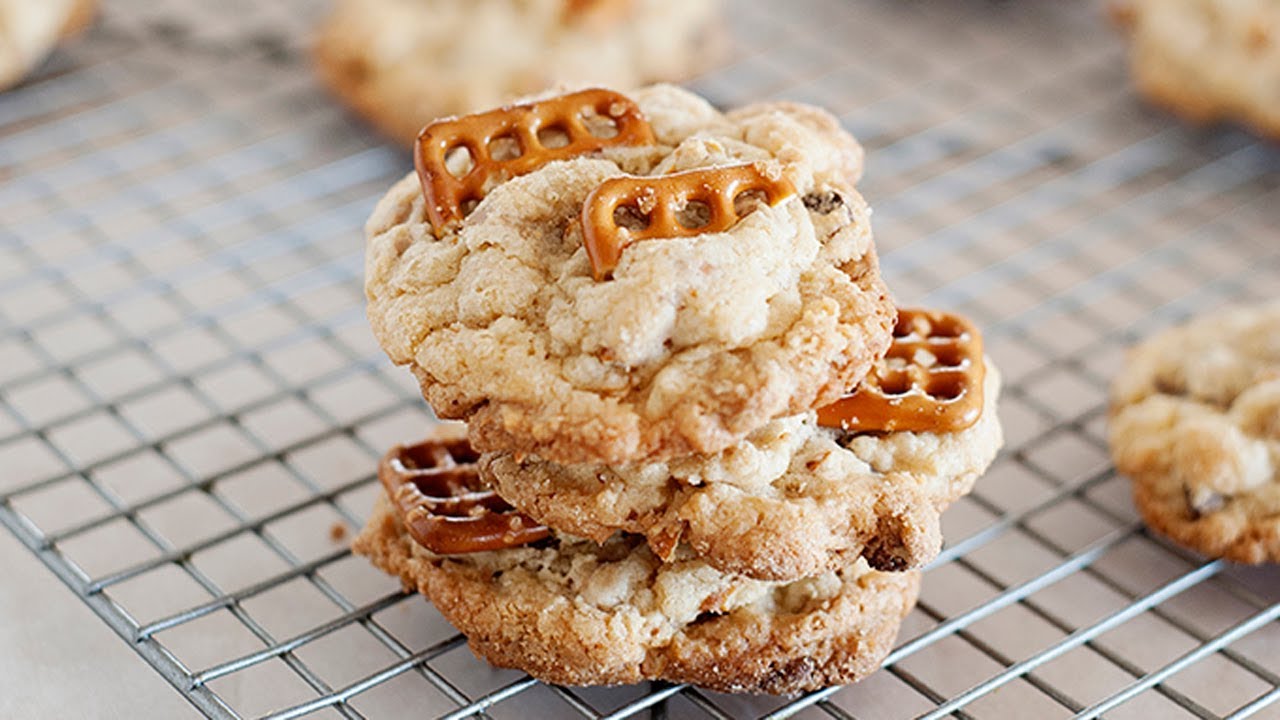
Kitchen sink cookies are the deliciously chaotic cousin of your typical chocolate chip cookies. They get their name from the phrase “everything but the kitchen sink” because these cookies are loaded with a wild combination of ingredients. Think chocolate chips, pretzels, potato chips, shredded coconut, toffee bits, nuts, and even candies. It’s like the Frankenstein of cookies—in the best way possible.
The beauty of kitchen sink cookies is their flexibility. You don’t need to follow a rigid set of ingredients. If you’ve got half a bag of peanut butter chips and a handful of marshmallows lying around? Toss them in. Leftover cereal? That works too. These cookies are all about creativity and clearing out your pantry.
The result? A cookie that’s crunchy, chewy, salty, and sweet all in one glorious bite. Each cookie is unique, and that’s the fun of it. No two batches are ever the same. That’s why they’re the ultimate crowd-pleaser.
Why Are They Called Kitchen Sink Cookies?
Ever heard the phrase “everything but the kitchen sink”? That’s where these cookies get their quirky name. The idea is that you can throw just about anything into the dough—everything but the kitchen sink. It’s all about using odds and ends from your pantry or baking stash.
But beyond the funny name, these cookies are a celebration of contrast. They mix sweet and salty, chewy and crunchy, smooth and chunky. You get melty chocolate chips in one bite and a salty pretzel crunch in the next. It’s the most delicious kind of chaos.
This recipe encourages improvisation. Instead of stressing about having the “perfect” ingredients, it lets you be creative. That’s what makes it not just a recipe, but a mood.
Why You’ll Love This Recipe
- Pantry Clean-Out Friendly: Got a handful of leftover M&Ms or crushed pretzels? Use them up!
- Soft & Chewy Texture: With just the right amount of butter and brown sugar.
- Salty-Sweet Heaven: The combination of sweet dough and salty mix-ins is addicting.
- No Chill Time Required: Just mix, scoop, and bake.
- Customizable: Make it your own every time you bake it.
- Perfect for Sharing: These cookies are big, bold, and always a hit.
Whether you’re baking for a party, a potluck, or just because your snack stash needs a makeover, this recipe delivers in taste, texture, and creativity.
List of Ingredients You’ll Need
Let’s break this down into manageable categories so you can prep your ingredients like a pro.
Dry Ingredients
- 2 ¼ cups all-purpose flour
- 1 tsp baking soda
- ½ tsp baking powder
- ½ tsp sea salt
These are your base dry ingredients. Baking soda and baking powder help the cookies rise, and a little salt balances all that sweetness (especially important with the salty mix-ins).
Wet Ingredients
- 1 cup (2 sticks) unsalted butter, softened
- ¾ cup brown sugar (light or dark works)
- ½ cup granulated sugar
- 2 large eggs
- 2 tsp vanilla extract
The combo of white and brown sugar helps get that chewy-crispy edge. Don’t skip the vanilla—it rounds out the flavor.
Mix-ins (The Fun Part!)
Here’s where you get to be creative. You’ll want about 2 to 2½ cups of mix-ins total.
Try combining any of the following:
- 1 cup semisweet chocolate chips
- ½ cup crushed pretzels
- ½ cup crushed potato chips
- ½ cup butterscotch chips
- ½ cup chopped nuts (walnuts, pecans, etc.)
- ½ cup toffee bits
- ¼ cup shredded coconut
- ½ cup M&Ms or Reese’s Pieces
- ½ cup mini marshmallows
Mix and match! Just avoid overly wet ingredients or anything that might melt too much in the oven (like whole caramels).
Essential Kitchen Tools
Before we get messy, make sure you have these essentials:
- Large mixing bowl
- Hand or stand mixer
- Measuring cups and spoons
- Rubber spatula or wooden spoon
- Baking sheet(s)
- Parchment paper or silicone baking mat
- Cookie scoop (optional but helpful)
- Wire rack (for cooling)
Tips for Customizing Your Cookies
Swap Your Add-ins
Feel free to substitute based on what you have or what you’re craving:
- Instead of chocolate chips: Use white chocolate, dark chocolate, or peanut butter chips.
- Not a fan of pretzels? Try cornflakes or rice cereal.
- No potato chips? Kettle chips, cheese crackers, or crushed tortilla chips can work!
Make It Gluten-Free or Vegan
- Gluten-Free: Use a 1:1 gluten-free flour blend and gluten-free snacks.
- Vegan: Swap butter for vegan margarine, eggs for flax eggs, and use vegan mix-ins.
Step-by-Step Guide to Making Kitchen Sink Cookies
Now, let’s get baking!
Step 1: Preheat Your Oven
Set your oven to 350°F (175°C). Line your baking sheets with parchment paper or silicone mats. This keeps the cookies from sticking and helps them bake evenly.
Step 2: Mix the Dry Ingredients
In a medium bowl, whisk together:
- Flour
- Baking soda
- Baking powder
- Salt
Set it aside—you’ll come back to it in a bit.
Step 3: Cream Butter and Sugars
In a large bowl, use a mixer to cream the softened butter with brown sugar and granulated sugar. Mix on medium-high for about 2–3 minutes, until the mixture is light and fluffy.
This step is key for texture—don’t rush it. Creaming adds air, which helps make the cookies soft and chewy.
Step 4: Add Eggs and Vanilla
Crack in the eggs one at a time, beating well after each addition. Then stir in the vanilla extract. The dough should look smooth and slightly glossy.
Step 5: Combine Wet and Dry Ingredients
Add the dry mix to the wet mix gradually—about ⅓ at a time. Mix on low speed until just combined. Don’t overmix or the cookies could turn out tough.
Step 6: Fold in the Add-ins
Here’s the fun part. Gently fold in your chosen mix-ins using a spatula. Make sure they’re evenly distributed throughout the dough, but don’t overwork it.
Step 7: Scoop and Space the Dough
Use a cookie scoop or tablespoon to portion out the dough. Roll into balls and place on the prepared baking sheets, leaving about 2 inches between each cookie. These spread a bit!
Step 8: Bake to Perfection
Bake for 10–12 minutes or until the edges are golden brown and the centers look slightly underdone. That’s the trick to a soft and chewy cookie.
Step 9: Cool Before You Devour
Let the cookies rest on the baking sheet for 5 minutes, then transfer to a wire rack to cool completely. This helps them set up without falling apart.
How to Store Your Cookies
One of the best things about kitchen sink cookies—besides how ridiculously good they taste—is how well they keep. If you bake a big batch, don’t worry about them going stale too quickly. Here’s how to store them properly so they stay fresh, soft, and flavorful:
- Room Temperature: Store your cookies in an airtight container for up to 1 week. Place a slice of bread in the container to help retain moisture (a bakery hack that actually works!).
- Refrigerator: Not necessary, but if your kitchen runs hot or you like your cookies a bit firmer, you can refrigerate them for up to 10 days. Just let them sit at room temp before serving.
- Layering Tip: If stacking cookies in a container, place parchment or wax paper between layers to prevent sticking or smudging of chocolate and toppings.
Proper storage not only maintains the texture but also keeps the flavor balanced. Cookies exposed to air too long can lose that crispy edge and soft interior. Keep them sealed and you’ll have snack-ready treats all week long.
Can You Freeze Kitchen Sink Cookies?
Absolutely—and you should! Freezing these cookies makes them a lifesaver for last-minute guests or when a sugar craving strikes.
To Freeze Baked Cookies:
- Let them cool completely.
- Place in a single layer on a baking sheet and freeze for 1 hour.
- Transfer to a freezer-safe bag or container. Use parchment paper to separate layers.
Shelf Life in Freezer: Up to 3 months
To Freeze Cookie Dough:
- Scoop dough into individual balls.
- Freeze on a tray until solid.
- Transfer to a zip-top freezer bag, label with date, and store.
When you’re ready to bake, pop them straight from the freezer to a preheated oven. Add an extra 1–2 minutes to the bake time. No need to thaw!
Freezing is the ultimate time-saver for future-you. Imagine pulling warm, gooey, fresh-baked cookies out of the oven in minutes—all the reward, none of the mess.
Mistakes to Avoid When Baking Kitchen Sink Cookies
Even a recipe this flexible has some traps. Here are a few things you don’t want to do:
1. Overmixing the Dough
Once you add the flour, mix just until everything is combined. Overmixing = tough cookies. And nobody wants that.
2. Too Many Add-ins
Yes, it’s tempting to go wild with all your favorite snacks. But more than 2½ cups total can weigh down the dough and make the cookies spread too much or bake unevenly.
3. Using Cold Butter
Softened butter is key for that perfect creamed texture. If it’s too cold, it won’t mix properly. If it’s melted, your cookies will be greasy and flat.
4. Skipping the Salt
Salt enhances the sweetness and balances out the flavors—especially important in a cookie that combines salty and sweet elements.
5. Not Watching the Oven
Since every oven runs slightly differently, keep an eye on your cookies around the 10-minute mark. The edges should be set and golden, but the centers should still look a little soft.
Baking is a science and an art, and like any masterpiece, even a little tweak can throw things off. Avoid these common pitfalls and your kitchen sink cookies will turn out like bakery-level treats every single time.
Nutrition Facts
Let’s break it down for one standard-sized cookie (assuming a batch makes about 24 cookies):
| Nutrient | Amount per Cookie |
|---|---|
| Calories | ~220 |
| Total Fat | 11g |
| Saturated Fat | 6g |
| Carbohydrates | 28g |
| Sugar | 18g |
| Protein | 2g |
| Fiber | 1g |
| Sodium | 150mg |
Note: These values vary depending on your add-ins (especially if you’re going heavy on candies or nuts). If you want a healthier version, consider using dark chocolate, oats, or whole wheat flour.
Kitchen Sink Cookies vs. Traditional Cookies
Let’s settle the debate. What really makes a kitchen sink cookie stand out from your everyday chocolate chip cookie?
| Feature | Traditional Cookies | Kitchen Sink Cookies |
|---|---|---|
| Add-ins | Basic (chocolate) | Wide variety (sweet & salty) |
| Texture | Usually soft | Chewy + crunchy |
| Flavor profile | Sweet | Sweet, salty, and complex |
| Customization | Minimal | High |
| Presentation | Uniform | Rustic and chunky |
Kitchen sink cookies are like the extroverted cousin of traditional cookies—louder, bolder, and definitely more fun at parties.
Fun Variations to Try Next
Want to remix your next batch? Here are some creative spins to try:
- S’mores Style: Add mini marshmallows, crushed graham crackers, and chocolate chunks.
- Peanut Butter Overload: Toss in peanut butter chips, chopped Reese’s, and salted peanuts.
- Breakfast Cookie: Add oats, dried cranberries, white chocolate chips, and cereal (like cornflakes or granola).
- Holiday Theme: Crushed candy canes, red & green M&Ms, and a sprinkle of cinnamon.
- Tropical Vibes: Shredded coconut, dried pineapple, white chocolate, and macadamia nuts.
There’s no wrong way to kitchen sink it—just follow your taste buds.
FAQs about Kitchen Sink Cookie Recipe
1. What are the best add-ins for kitchen sink cookies?
The best add-ins include chocolate chips, pretzels, potato chips, toffee bits, shredded coconut, and candy-coated chocolates. It’s all about contrast—aim for a mix of salty, sweet, chewy, and crunchy.
2. Can I make these cookies without eggs?
Yes! Use a flax egg (1 tbsp ground flaxseed + 3 tbsp water = 1 egg) or a commercial egg replacer. The texture will still be deliciously chewy.
3. How do I make them chewy and not cakey?
Stick with brown sugar, use softened (not melted) butter, and don’t overbake. Pull them out when the centers look slightly underdone—they’ll finish setting as they cool.
4. Can I reduce the sugar?
You can cut back a bit, but don’t go too low or the texture will suffer. Reducing by up to ¼ cup usually works without major changes in consistency.
5. How long do these cookies last?
Stored in an airtight container, they last up to 1 week at room temperature or 3 months in the freezer. That’s if they even last that long—these cookies tend to disappear fast!
Conclusion
Kitchen sink cookies are everything a cookie should be—bold, messy, indulgent, and packed with personality. Whether you’re using up leftover snacks or creating the most epic cookie combo of your dreams, this recipe gives you the freedom to have fun and make something truly memorable. It’s more than just a cookie—it’s a canvas for flavor, texture, and creativity.
So, next time you’re craving a treat or just staring into your pantry unsure what to do with all those half-empty bags of snacks… you know what to bake.
Kitchen sink cookies: where chaos tastes like heaven.

