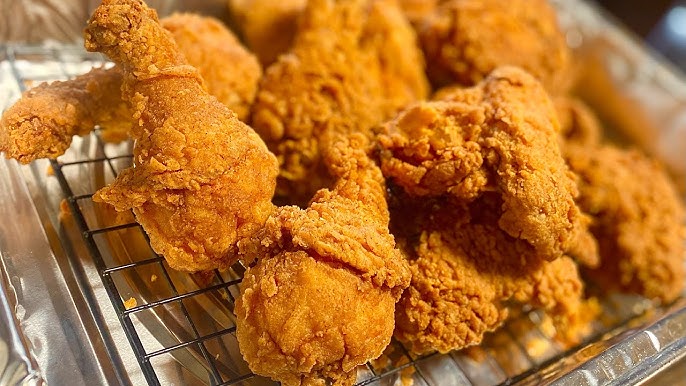
KFC Fried Chicken Recipe: There’s something irresistibly delicious about KFC’s fried chicken. It’s more than just a fast-food item—it’s an iconic, globally recognized dish with a flavor so unique that people have spent decades trying to crack the code. The crispy, golden-brown exterior with that unmistakable crunch, the blend of 11 herbs and spices, and the juicy, tender meat inside—it’s a combination that triggers cravings the moment you think of it.
Whether it’s the nostalgia of childhood meals or the comforting taste of a guilty pleasure, KFC’s original recipe chicken has carved a permanent place in the hearts (and stomachs) of fried chicken lovers around the world. But here’s the deal: while the actual recipe is locked in a vault, countless attempts have gotten pretty close. And guess what? With the right ingredients and process, you can recreate a copycat version at home that hits all the right notes.
Making it at home not only saves money but also lets you tweak it to your preference—extra crispy, a bit spicier, or even baked if you’re trying to be a little healthier. You get full control over quality and portions, and you’ll gain serious kitchen cred too.
The Inspiration Behind Making It at Home
So why bother recreating it at home when you could just hit the drive-thru? First, homemade fried chicken is deeply satisfying. The process—from seasoning the chicken to watching it turn golden in the fryer—makes you appreciate the art of cooking. Plus, it’s fun!
More importantly, this recipe brings family and friends together. Whether it’s a weekend treat, a game night snack, or part of a holiday feast, homemade KFC-style chicken makes any meal memorable. And once you master it, it’ll be a regular star in your recipe book.
List of Ingredients You’ll Need
Let’s dive into the heart of this recipe—ingredients. KFC’s famous flavor comes from a carefully blended mix of spices, a well-marinated chicken, and a perfectly executed fry. Here’s what you’ll need.
Key Spices and Seasonings (The “Secret” Blend)
This spice blend is as close to the original as it gets. These are pantry staples, but when combined, they work magic:
- 2 teaspoons paprika
- 1 teaspoon white pepper
- 1 teaspoon garlic salt
- 1 teaspoon onion powder
- 1 teaspoon dried oregano
- 1 teaspoon dried basil
- 1 teaspoon celery salt
- 1 teaspoon ground thyme
- 1 teaspoon mustard powder
- ½ teaspoon black pepper
- ½ teaspoon ginger powder
These 11 herbs and spices give your chicken that bold, savory flavor. You’ll mix them into your flour coating, which is the real secret weapon in this recipe.
Chicken Cuts – What Works Best?
KFC traditionally uses a mix of:
- Drumsticks
- Thighs
- Wings
- Breasts (bone-in)
For the best homemade experience, go with bone-in, skin-on chicken pieces. They stay juicy during frying and give that traditional look and feel. If you’re short on time or prefer faster cooking, boneless thighs are a great alternative.
Pro Tip: Buy a whole chicken and cut it yourself. It’s cheaper, and you can control the size of the pieces.
Buttermilk Marinade – Why It’s Essential
Buttermilk isn’t just a buzzword—it’s a game-changer. It:
- Tenderizes the meat
- Adds tangy flavor
- Helps the flour coating stick better
To make a basic buttermilk marinade, mix:
- 2 cups buttermilk
- 1 teaspoon salt
- ½ teaspoon cayenne pepper (optional for heat)
- 1 tablespoon hot sauce (like Tabasco, for an extra kick)
Let the chicken soak in this mixture overnight or for at least 6 hours. Trust me, the longer, the better.
Optional Add-Ins to Customize the Flavor
Want to put your twist on it? Try these:
- Smoked paprika for a smoky edge
- Chili flakes for extra spice
- Maple syrup in the marinade for a sweet heat balance
- Cornstarch mixed with flour for extra crunch
This recipe is flexible, so feel free to get creative once you’ve nailed the basics.
Kitchen Tools & Prep Essentials
Before you fire up the stove, make sure your kitchen is prepped and ready.
Tools You’ll Need for the Recipe
Here’s what should be on your countertop:
- Large mixing bowls
- Measuring spoons and cups
- Tongs
- Wire rack (for draining)
- Deep fryer or large heavy pot (cast iron works great)
- Thermometer (to monitor oil temperature)
- Tray with parchment paper (for coating process)
These tools will keep your process smooth and efficient.
Safety and Cleanliness Tips
Frying at home can get messy—here are some quick tips to stay safe and clean:
- Keep a lid nearby when frying to smother oil fires.
- Use a thermometer to keep oil around 350°F (175°C)—too hot and you’ll burn the coating before cooking the meat.
- Don’t overcrowd the pot—this drops oil temperature.
- Always wash hands and surfaces after handling raw chicken.
Also, lay out paper towels under a wire rack to drain excess oil while keeping the chicken crispy.
Step-by-Step Guide to Making KFC Fried Chicken
Time to roll up those sleeves and bring the kitchen to life! Follow these steps closely and you’ll have a batch of crispy, juicy, finger-lickin’ good chicken on your plate in no time.
Step 1: Preparing the Chicken (Cleaning & Cutting)
Start by selecting your chicken cuts—drumsticks, thighs, wings, and breasts. Rinse them under cold water and pat them completely dry with paper towels. Removing excess moisture is key because it helps the marinade and coating stick better. If you’re cutting a whole chicken yourself, aim for even-sized pieces so they cook at the same rate.
Here’s a pro trick: score the thickest parts of the chicken with a knife. This not only helps the marinade penetrate deeper but also ensures the meat cooks more evenly. Don’t go too deep—just enough to make shallow cuts on the surface.
Next, lightly salt your chicken before marinating. A small sprinkle of salt helps draw in flavor before the buttermilk bath begins.
Step 2: Marinating in Buttermilk (Overnight Tip)
In a large bowl, mix your buttermilk marinade (buttermilk, salt, cayenne pepper, and hot sauce). Submerge the chicken pieces fully—each piece should be well coated. Cover the bowl with plastic wrap and refrigerate it overnight or at least 6 hours.
Why the wait? This long soak is the secret to tender, flavorful chicken. The buttermilk gently breaks down the protein in the meat, resulting in juicy bites that stay moist even after frying. It also helps the flour coating stick better and crisp up perfectly.
If you’re short on time, try marinating for a minimum of 2 hours, but for best results, plan ahead and let it sit overnight.
Step 3: Creating the Secret Spice Blend
Now comes the fun part—crafting the flavorful flour coating. In a large shallow bowl, mix:
- 2 cups all-purpose flour
- All 11 herbs and spices listed earlier
- Optional: 2 tablespoons cornstarch (for an even crispier crust)
Stir thoroughly to make sure the seasoning is evenly distributed. If you’re going for extra crispy, consider doing a double flouring process: coat once, dip in buttermilk, and coat again.
Want to take it even further? Add a teaspoon of baking powder—it introduces air into the coating, making it lighter and crispier.
Step 4: Dredging and Double-Coating the Chicken
Remove the chicken from the marinade and let any excess drip off. Working one piece at a time, dredge it in your seasoned flour mix. Press down and make sure each piece is thoroughly coated—no bare spots!
For that signature KFC-style craggy texture, gently press the flour mix into the chicken and shake it lightly. Then, place the coated chicken on a tray and let it rest for 10–15 minutes. This rest time allows the coating to stick better and prevents it from falling off during frying.
Want an extra crispy result? After resting, dip the chicken back into the buttermilk, then dredge it a second time in the flour mix. Boom—double crunch!
Step 5: Frying to Golden Perfection
Pour oil into a deep fryer or heavy-bottomed pot until it’s about 3 inches deep. Heat it to 350°F (175°C)—use a thermometer to maintain steady temperature. Too hot and the crust burns before the inside cooks. Too cold and your chicken absorbs excess oil and turns greasy.
Once the oil reaches temperature, carefully lower 2–3 pieces of chicken in at a time. Don’t overcrowd the pot—this drops the oil temp and results in soggy chicken.
Fry each piece for 12–15 minutes, turning occasionally for even browning. Use a meat thermometer to check internal temp—it should hit 165°F (74°C) at the thickest part.
Once cooked, remove the chicken and place it on a wire rack over paper towels. This helps drain the oil while keeping the crust intact and crispy.
Step 6: Draining and Serving Properly
Let the chicken rest on the rack for 5–10 minutes before serving. This not only cools it down to edible temperature but also helps the juices settle inside.
Avoid stacking the chicken while it’s still hot—it traps steam and softens the crust. Instead, spread the pieces out so air can circulate freely around each one.
Now comes the best part: serving! Pair it with classic sides like mashed potatoes, coleslaw, cornbread, or biscuits. Or go all out and set up a Southern-style platter with gravy, corn on the cob, and sweet iced tea.
Pro Tips to Make It Taste Like the Real Deal
Temperature Control Secrets
One of the most crucial elements in making restaurant-quality fried chicken is consistent oil temperature. Invest in a reliable deep-fry or candy thermometer. Keeping your oil between 325°F and 350°F ensures that the outside crisps up without burning while the inside cooks evenly.
If the oil drops below 300°F, your chicken will absorb more oil, becoming greasy. If it rises above 375°F, you risk burning the crust before the meat is fully cooked. Monitor the temperature continuously and adjust your stove as needed.
Also, let the oil return to temperature between batches—this keeps every piece evenly golden and crispy.
How to Keep the Chicken Juicy Inside and Crispy Outside
- Use bone-in chicken: It cooks more slowly, allowing the outside to crisp up without overcooking the inside.
- Don’t skip the marinade: The acidity in buttermilk keeps the meat tender and flavorful.
- Rest your chicken after coating: Letting it sit before frying creates a better crust.
- Fry in small batches: This keeps oil temp consistent and prevents sogginess.
- Drain on a wire rack: Paper towels alone can cause the underside to steam and lose crunch.
Want a restaurant-level experience? After frying, place your chicken in a low oven (200°F) while you finish other batches. It keeps them warm without drying them out.
Common Mistakes to Avoid
Even seasoned home cooks can make a few missteps when frying chicken. Here’s how to dodge the most common pitfalls and ensure your homemade KFC-style fried chicken turns out perfectly every time.
Overcrowding the Pan
One of the biggest errors is adding too many chicken pieces to the pan at once. It might seem like a time-saver, but it actually causes more harm than good. Overcrowding:
- Lowers the oil temperature drastically
- Causes uneven cooking
- Makes the coating soggy instead of crispy
The fix? Fry in small batches. Give each piece plenty of space so that oil circulates evenly. If your pan feels too full, remove a piece or two. It’s better to take your time and cook multiple batches than end up with greasy, undercooked chicken.
Also, be patient between batches. Let the oil return to the ideal frying temperature before dropping in the next round.
Incorrect Oil Temperature
This is the silent killer of crispy chicken dreams. If the oil isn’t hot enough, the chicken absorbs it like a sponge, leaving you with an oily mess. If it’s too hot, the outside burns while the inside remains raw.
Always preheat your oil to 350°F (175°C) and adjust the heat as needed to maintain this temp. A good thermometer is your best friend here. Avoid guessing—this is one of those details that separates average fried chicken from legendary fried chicken.
Tip: If you don’t have a thermometer, drop a small piece of bread or flour into the oil. If it sizzles and browns in about 60 seconds, your oil is ready.
Skipping the Marinade Step
We get it—you’re hungry and tempted to cut corners. But trust me, skipping the marinade is like skipping the love in a love story. It’s what gives the chicken that deep, Southern flavor that you crave in every bite.
Without the buttermilk soak, the meat lacks depth and tenderness. You might still get a crispy outside, but the inside will fall flat. Worse yet, the flour coating may not adhere properly and flake off during frying.
So, plan ahead. Marinate for at least 6 hours, but preferably overnight. It makes all the difference between “pretty good” and “holy smokes, this tastes like KFC!”
Healthier Alternatives & Air Fryer Method
Fried chicken doesn’t always have to be a guilty pleasure. With a few tweaks, you can enjoy a lighter version that still packs that crave-worthy crunch and flavor.
Using an Oven or Air Fryer Instead of Deep Frying
Air Fryer Method:
The air fryer is your best friend if you’re looking to cut back on oil without sacrificing crunch.
- Preheat the air fryer to 375°F (190°C)
- Spray the chicken with a light coating of oil or cooking spray
- Cook for 25–30 minutes, flipping halfway through
You still want to follow all the same preparation steps: marinate, coat with seasoned flour, and let it rest. The air fryer handles the crisping part beautifully with way less oil.
Oven Method:
You can also bake the chicken in the oven:
- Preheat to 400°F (200°C)
- Line a baking sheet with parchment paper and place a wire rack on top
- Arrange coated chicken on the rack and spray lightly with oil
- Bake for 40–45 minutes, turning halfway
Though it may not be as crispy as deep-fried, the oven method still gives you flavorful, juicy results—perfect for meal prepping or a guilt-free family dinner.
Reducing Oil Without Losing Flavor
Here are some extra tricks to make your fried chicken healthier:
- Use skinless chicken to cut down on fat
- Trim visible fat before marinating
- Use avocado or grapeseed oil—they’re more stable at high temps and contain healthy fats
- Drain thoroughly: Don’t let your chicken sit in excess oil. A wire rack over paper towels works best
You can also try mixing in panko breadcrumbs or crushed cornflakes with your flour for a lighter crust that crisps well in the oven or air fryer.
Serving Suggestions
Fried chicken on its own is amazing—but pair it with the right sides and dips, and you’ve got a full-on feast.
Best Sides to Pair with Fried Chicken
Here are some classic and creative side dishes that complement KFC-style chicken perfectly:
- Mashed potatoes & gravy – creamy, savory comfort
- Coleslaw – crisp and tangy to balance the richness
- Biscuits – fluffy, buttery goodness
- Mac and cheese – rich, cheesy, and irresistible
- Corn on the cob – sweet and crunchy
- Green beans or collard greens – a touch of healthy balance
- French fries or potato wedges – for that fast-food authenticity
Want a more global twist? Serve it with spicy rice, garlic noodles, or a fresh garden salad with vinaigrette.
Dipping Sauces That Work Wonders
Let’s talk sauce—because even perfection can use a partner. These dips take your chicken to the next level:
- Classic gravy – thick and peppery
- Honey mustard – sweet and tangy
- Spicy mayo – creamy with a kick
- Barbecue sauce – smoky and bold
- Buffalo sauce – for heat lovers
- Garlic aioli – rich and fancy
Create a mini dipping station at your next dinner party or game night and watch everyone go wild.
Storing & Reheating Leftovers
So, you’ve got leftovers (or maybe you made a double batch—smart move). Here’s how to store and revive that fried chicken without losing its crisp.
Keeping the Crunch When Reheating
Refrigerate leftovers in an airtight container. When it’s time to reheat:
- Preheat your oven to 375°F (190°C)
- Place chicken on a wire rack over a baking sheet
- Reheat for 15–20 minutes, or until the internal temp reaches 165°F
Avoid microwaving—unless you’re into soggy, rubbery crust (no thanks).
Air fryer tip: For smaller portions, reheat in the air fryer at 375°F for 5–7 minutes. It brings back that crispy bite like magic.
How Long Can It Be Stored?
- In the fridge: Up to 3–4 days
- In the freezer: Up to 2 months
To freeze, wrap each piece in foil or parchment paper, then place in a freezer-safe container or ziplock bag. When you’re ready to eat, thaw overnight in the fridge and reheat as described above.
FAQs about KFC Fried Chicken Recipe
1. Can I Make It Spicy Like Nashville Hot Chicken?
Absolutely! If you’re into heat, you can turn up the spice factor by adding:
- 1-2 teaspoons of cayenne pepper to the flour mix
- A few drops of hot sauce to your buttermilk marinade
- A spicy glaze after frying: Mix cayenne, brown sugar, garlic powder, and hot oil for a fiery drizzle
This brings the heat without sacrificing that crispy texture or signature flavor.
2. What Oil Is Best for Frying Chicken?
The best oils for frying chicken are neutral in flavor and have high smoke points, such as:
- Peanut oil – rich and slightly nutty, perfect for frying
- Canola oil – budget-friendly and widely available
- Sunflower oil – clean-tasting and stable at high temps
- Vegetable oil – reliable and commonly used
Avoid olive oil or butter—they have low smoke points and can burn quickly.
3. Is It Okay to Use Boneless Chicken?
Yes! Boneless thighs or breasts work great, especially if you want faster cook times or easier eating (no bones to deal with). Just keep in mind:
- Boneless pieces cook faster—adjust frying time to about 8–10 minutes
- They may be slightly less juicy than bone-in cuts, so don’t skip the marinade
- Perfect for chicken sandwiches or tenders
For maximum juiciness, boneless thighs are the way to go.
4. Can I Freeze the Chicken After Frying?
Yes, fried chicken freezes well if stored properly:
- Let it cool completely
- Wrap each piece in foil or parchment
- Place in a freezer-safe ziplock or container
To reheat, thaw overnight in the fridge and bake at 375°F (190°C) for 15–20 minutes. This helps restore the crisp without overcooking the inside.
5. How Long Does the Marinade Need?
For best results, marinate the chicken in buttermilk for:
- Minimum: 2 hours (if you’re short on time)
- Ideal: 6–12 hours
- Maximum: 24 hours
Marinating longer helps break down muscle fibers, resulting in juicy, tender chicken with deeper flavor. Avoid marinating for more than 24 hours—it can make the meat too soft or mushy.
Conclusion
What makes this recipe stand out is the careful balance between technique and ingredients. The spice blend? Carefully curated. The buttermilk marinade? Essential for tenderness and flavor. The frying process? A science that transforms raw chicken into golden, crunchy, juicy bliss.
But what really takes your fried chicken to the next level is attention to detail—maintaining oil temperature, giving the flour coating time to rest, and letting the chicken drain properly. These steps might seem small, but they make a world of difference in texture and taste.
Whether you’re hosting a backyard BBQ, preparing a comfort meal for the family, or simply testing your kitchen skills, this recipe delivers. It’s tried, tested, and guaranteed to impress. And the best part? You can tweak it to make it yours. Want more spice? Add cayenne. Prefer a lighter version? Use the air fryer.
Now that you’ve got the recipe, it’s time to roll up your sleeves and create your own finger-lickin’ masterpiece.